
Ever wanted a totally unique stamp? Meet Undefined.
 You can make any image you want. You carve it yourself.
NOW STOP. I know what you are saying. “I’m not artistic”, you say. “I can’t draw”, you say. “It looks hard”, you say.
It’s just like when you began stamping and you weren’t sure if you were holding the stamp right, or if you had enough ink, or whether you had stamped with enough pressure. You do it. You learn. Crystal and I did!
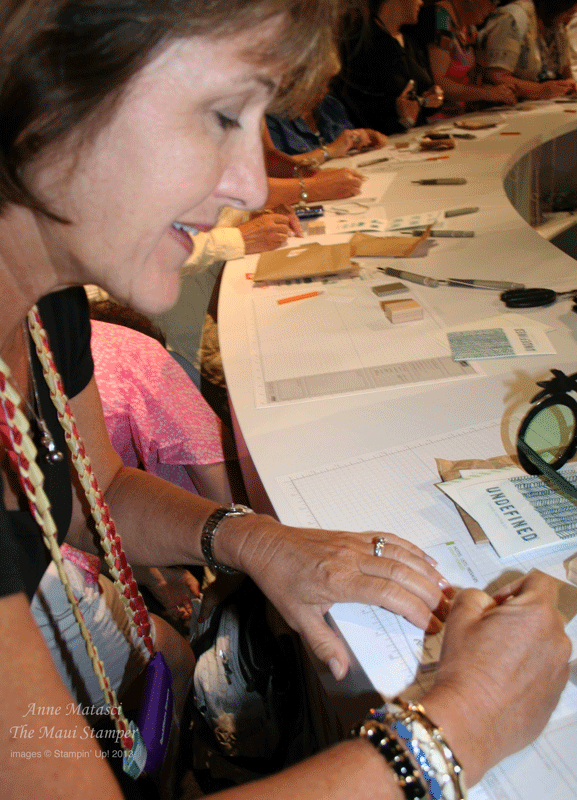 See! I’m smiling! I’m calm! This was taken BEFORE I
 threw firmly placed the cutting tool on the counter and said “THIS SUCKS.” The wonderful SU staff member behind the counter did for me what I have done for countless customers. She immediately came over and reassured me that I could do it and showed me how to hold the cutting tool. Turns out I was holding it sideways. Cutting with the cutting tool held sideways does suck. Cutting with the cutting tool held correctly is awesome! Here’s how it works:
 Step One: Sketch your design true to size in pencil, and go over the design so that there is plenty of graphite on your paper.
 Step Two: Transfer your image from the paper to the rubber by placing one against the other and rubbing firmly with your finger.
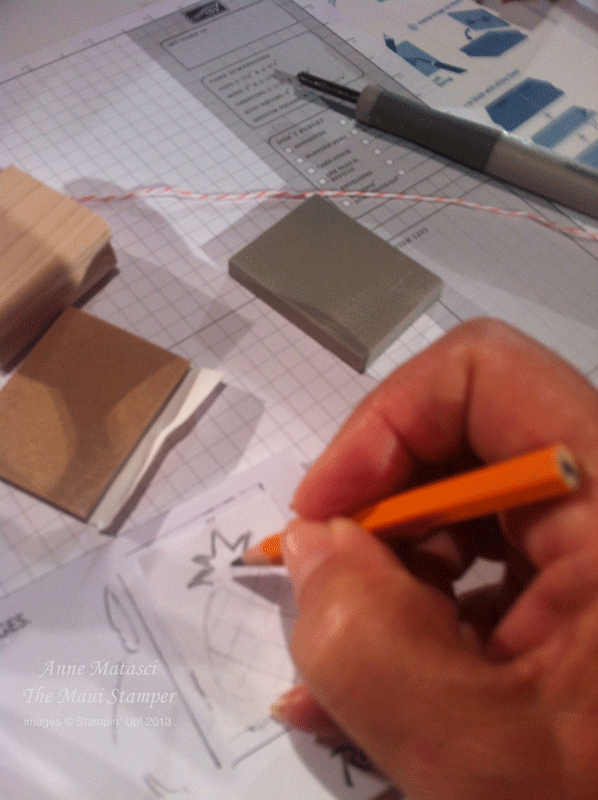
 Step Three: Cut out your design with the cutting tool. It’s kinda hard to do this AND take a photo 🙂
Step Four: Apply the self-adhesive foam to the back of the rubber and cut out the your shape.
 Step Five: When it’s all trimmed out, and before you adhere the rubber to the back of the wood block, ink up your image with Staz-On and stamp it on the front of the block.
Step Six: Adhere the rubber to the back of the wood block.
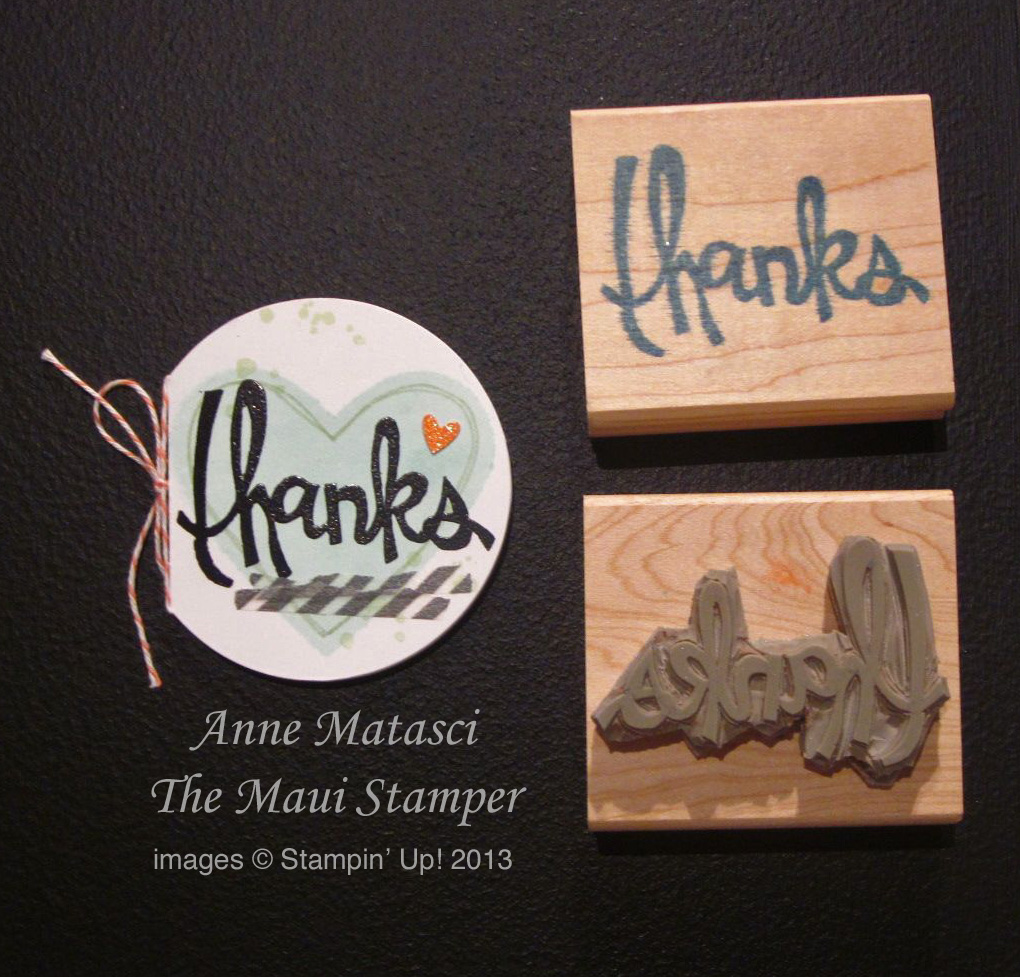
 Step Seven: Stamp and ADMIRE!!
Don’t think you can come up with an original idea? Each kit comes with multiple templates for you to begin with – just trace and carve. Or you can use one of these ideas from The Home Office:
 Notice that the letters are carved out, but the stamp doesn’t have to be too closely trimmed out around the outside.
 I am SO going to make my own word bubble. The kit is already ordered.
 This is a BIG @ sign! There are a variety of block sizes in the kit for you to play with.
Included in the Stamp Carving Kit #133402:
- 2 carving tools
- 3″ x 4″ rubber
- 3″ x 4″ foam
- 4 wood blocks (various sizes)
- 1 Island Indigo Stampin’ Write Marker
- 3 postcards
- Instruction sheet
- Stamp image templates
You can do this! And you will be thrilled, I promise, with your very own custom-made stamp. Visit my Online Store today!

Pingback: Two Pineapples | The Maui Stamper