
Do you have a Designer Series Paper stash? Mine is threatening a semi-hostile take over, but that doesn’t stop me from adding to my collection. I loved Kintsugi Inspirations the moment I set eyes on it at OnStage 2025 in Brisbane, and I couldn’t wait to cut into it and make something!

- Stamps: Inspiring Imperfections
- Color Palette: Basic White, Petal Pink, Misty Moonlight
- Accessories: Stamp Cut & Emboss Machine, Textured Notes dies, Inspiring Imperfections dies, Kintsugi Inspirations DSP, Stampin’ Dimensionals

This is an easy gate-fold card that uses narrow strips of DSP. I find I have a lot of those when I cut larger pieces for card fronts. I love using up those scraps!
Here are the measurements you’ll need to make this card:
- Cut a piece of card stock to 5 1/2″ x 11″ for your card base.
- Score the long side at 2″, 3 3/4″, 7 1/4″ and 9“.
- Fold the 2″ and 9” outer panels towards the back and the 3 3/4″ and 7 1/4″ scores towards the center of the card. This creates the gate fold shape.
- Cut 2 each of DSP, choosing coordinating papers: 1 3/4″ x 5 1/4″ and 1 1/2″ x 5 1/4″
- Cut 2 each of coordinating card stock: 1 7/8″ x 5 3/8″ and 1 5/8″ x 5 3/8″
- Layer the DSP on the card stock panels. Adhere the narrower panels to the inside folds and the wider panels to the front. Add a focal point, embellish, and admire your beautiful work!
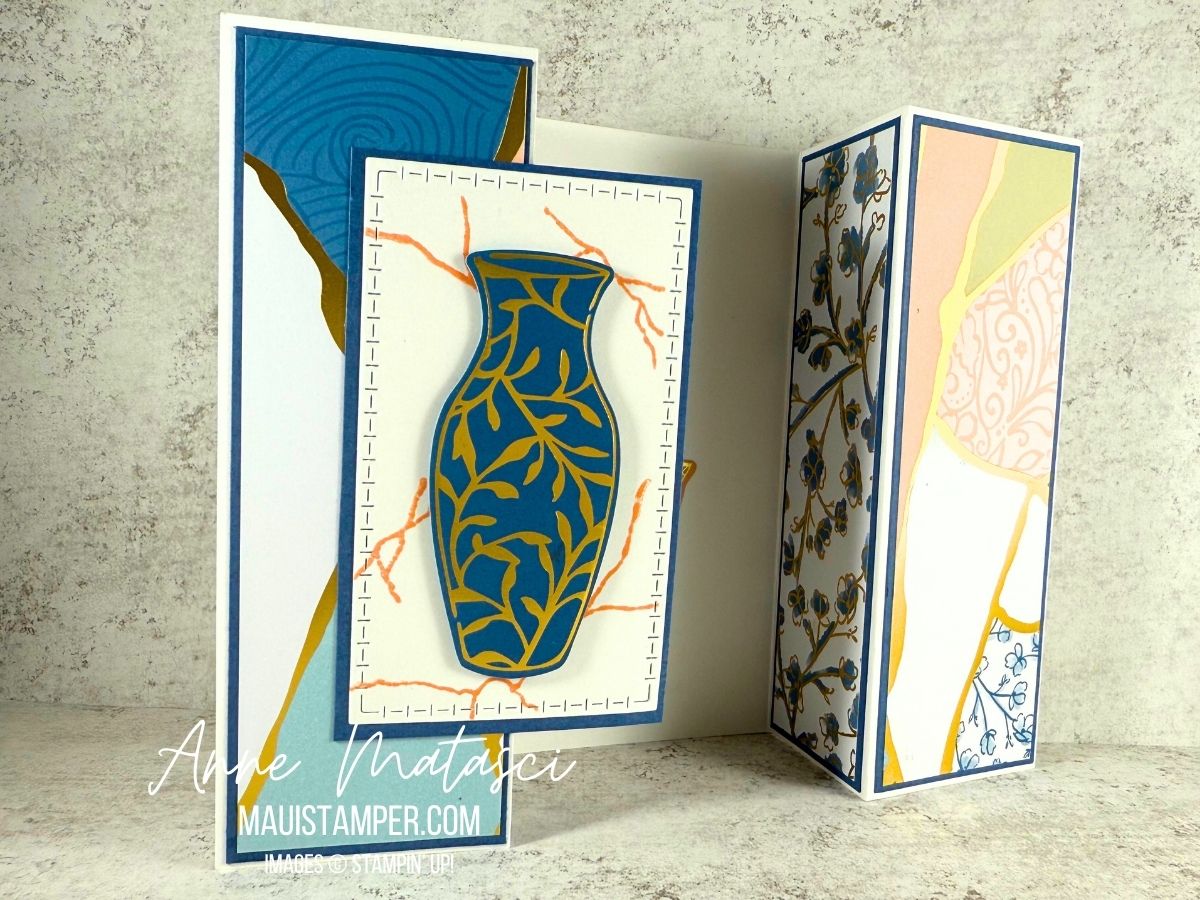
Gate folds often have some kind of closure, but I prefer the simplicity of this card as it is. Ready to give it a try? Your choice of Designer Series Paper will determine the mood of your card. Have some fun with it, and enjoy using up those scraps!
Suites and suite products are BOGO this month in the Online Store. Learn more about Stampin’ Up! Designer Series Paper HERE.

Beautiful!! My favorite DSP right now!
LikeLike
Mine too! I love the gold running through it 💕
LikeLike