Welcome to the latest edition of the RemARKable Blog tour. We’re certainly going places this month and we hope you’ll come along! This is a long post with a lot of photos – if you want to move along, click on the graphic below to see what the talented Heather Mathiesen has done:
 Mr. Maui Stamper and I love to travel. Sometimes we’re asked why we would ever want to leave our beautiful island. As much as we love our home, we also love seeing new places. More importantly, our three wonderful, independent, confident children are flung across 12 time zones in the world. We love them, so we travel!
I’ve learned to take an envelope with me every trip to collect the receipts, ephemera, and mementos that accumulate when you travel. At first it was a plain #10 envelope, then a 6×8 envelope, and finally, I’ve graduated to a travel wallet.
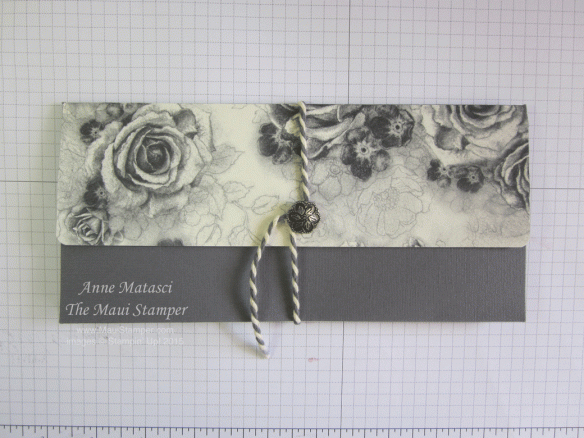 With a little tinkering, I found a size that worked well and was quick to put together, and now I make one for each trip. It gives me something pretty and new to use, and allows me to quickly locate the correct envelope for any given trip should I need to find a receipt or memento.
You’ll need:
- a 12″ square piece of card stock
- a 2 3/4″ x 9″ piece of DSP
- a 2 3/4″ x 9″ piece of either card stock or DSP
- The Simply Scored tool
- a button or brad
- a length of twine (about 14″)
- a 1/8″ hole punch
- adhesive – I use Tear and Tape and Tombo (the Wonder Adhesive)
- Corner rounder punch
Let’s get started!
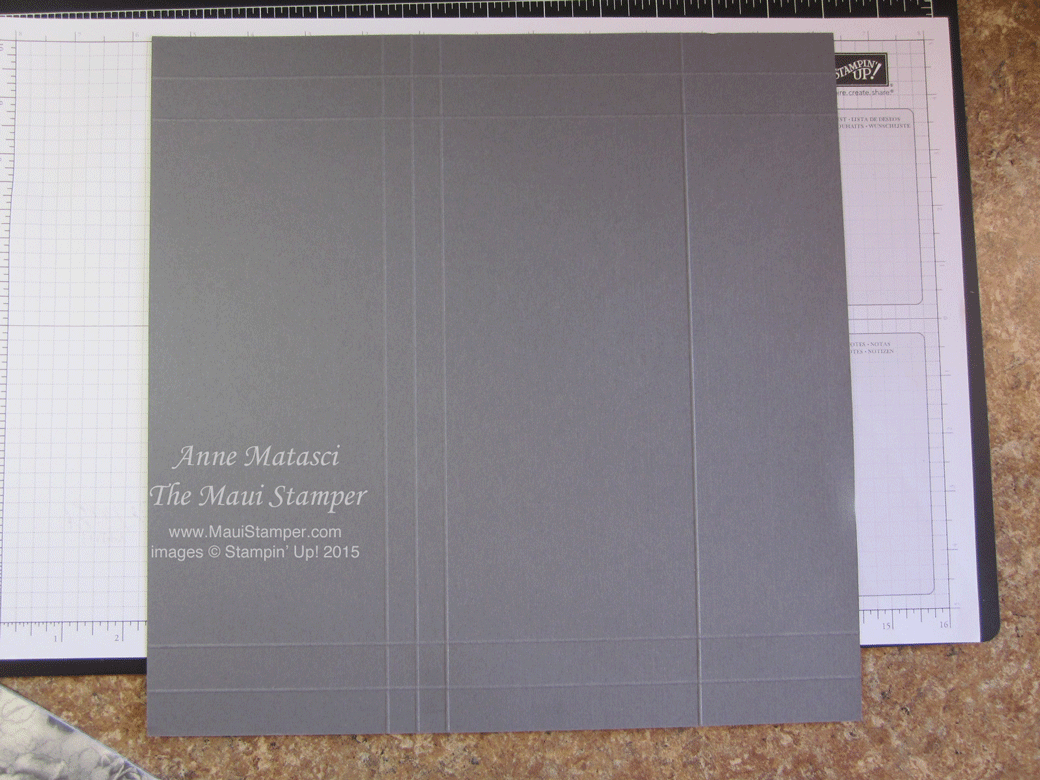
 Place the card stock on the Simply Scored tool and score at 4″, 4 1/2″, 5″ and 9 1/4″.
Turn the card stock a quarter turn so that you are scoring perpendicularly to the first set of score marks. Score at 3/4″, 1 1/2″, 10 1/2″ and 11 1/4″.
If you don’t have the Simply Scored tool, you can measure and score the old fashioned way.
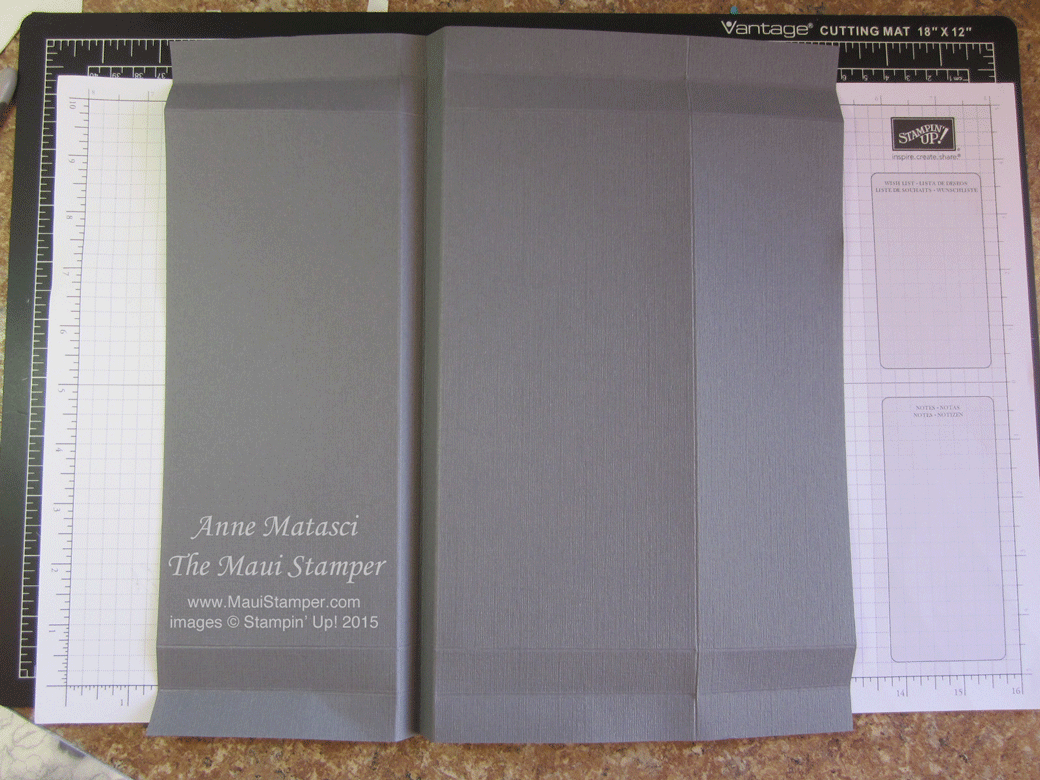
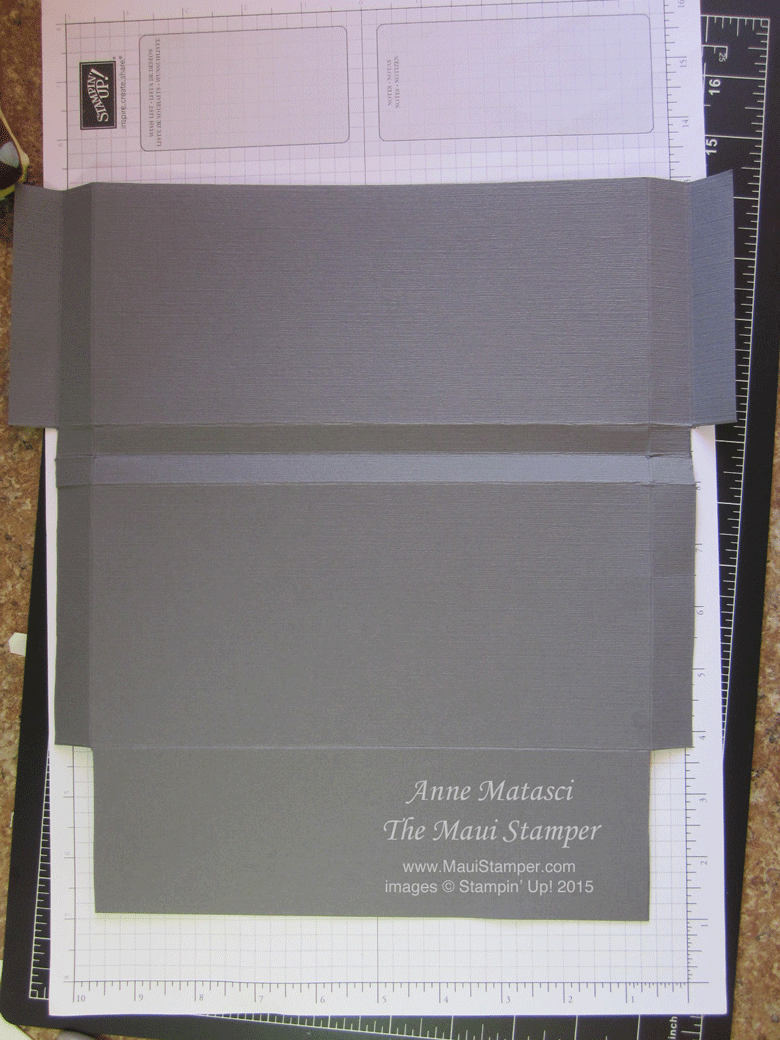
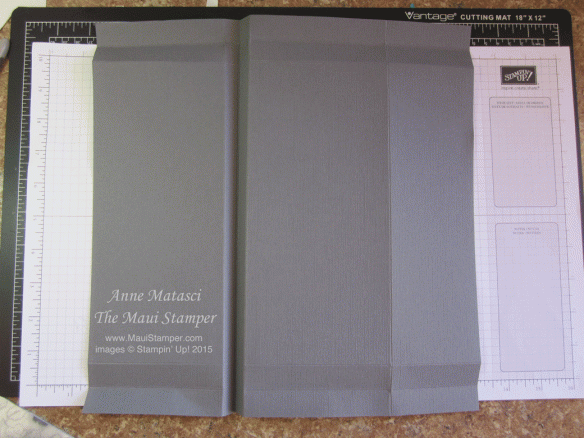 Fold gussets across the middle and on either side as indicated by the score marks. Your envelope will have a gusset along the bottom and on the sides.
 Trim off the sides as shown. The narrow panel at the bottom of the photo will be your flap and will be 9 inches wide. The second panel will be adhered to the third (top) panel to create the envelope. Clear as mud?
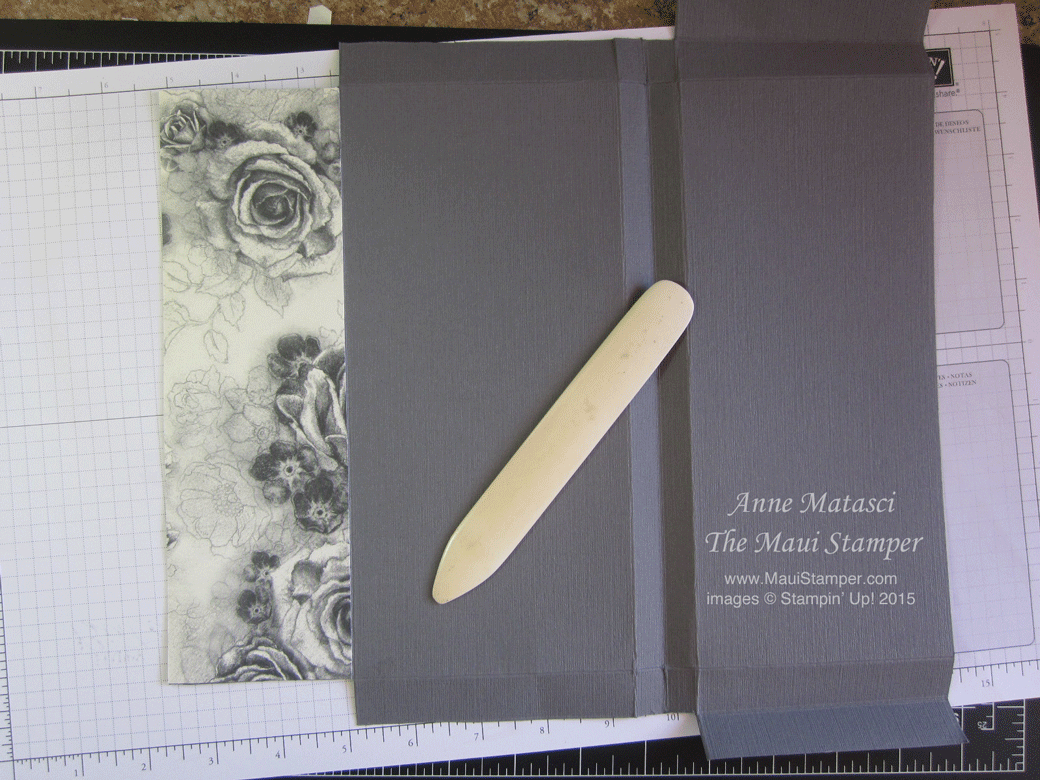
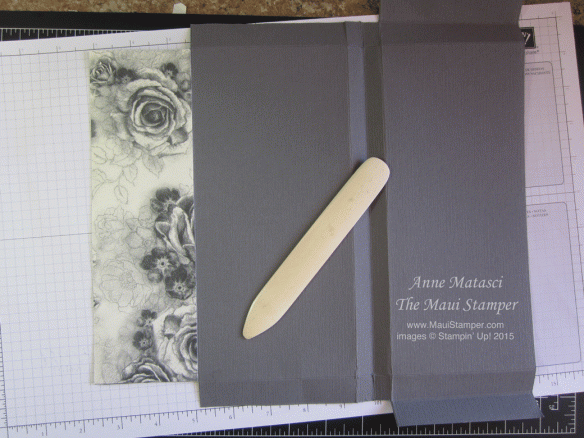 Adhere your DSP to the 9 inch wide flap. I use Tombo (the Wonder Adhesive) so that I can get as close as possible to the edge. (I use a bone folder to smooth out any bubbles and assure a smooth fit.) This is the fabulous new Timeless Elegance DSP, and I think it is gorgeous with Basic Grey card stock. Use the Corner Rounder punch to (wait for it) ROUND THE CORNERS. Lol. I know. I crack myself up.
 Fold in the gusset that will be at the bottom of the envelope, and then fold in the sides. Apply our new Tear and Tape to the flap as shown.
 Snip a bit into the flap, because there’s some magic to be done. That little snip will create a space for the flap to leap over the gusset. When you adhere the sides this way, you won’t have a gap at the bottom for little things to slide through. Practice once or twice before you remove the tape from the adhesive to get the feel of it. It’s not hard!
 Once the sides are together, trim the ends that stick out at the top to a pleasing angle.
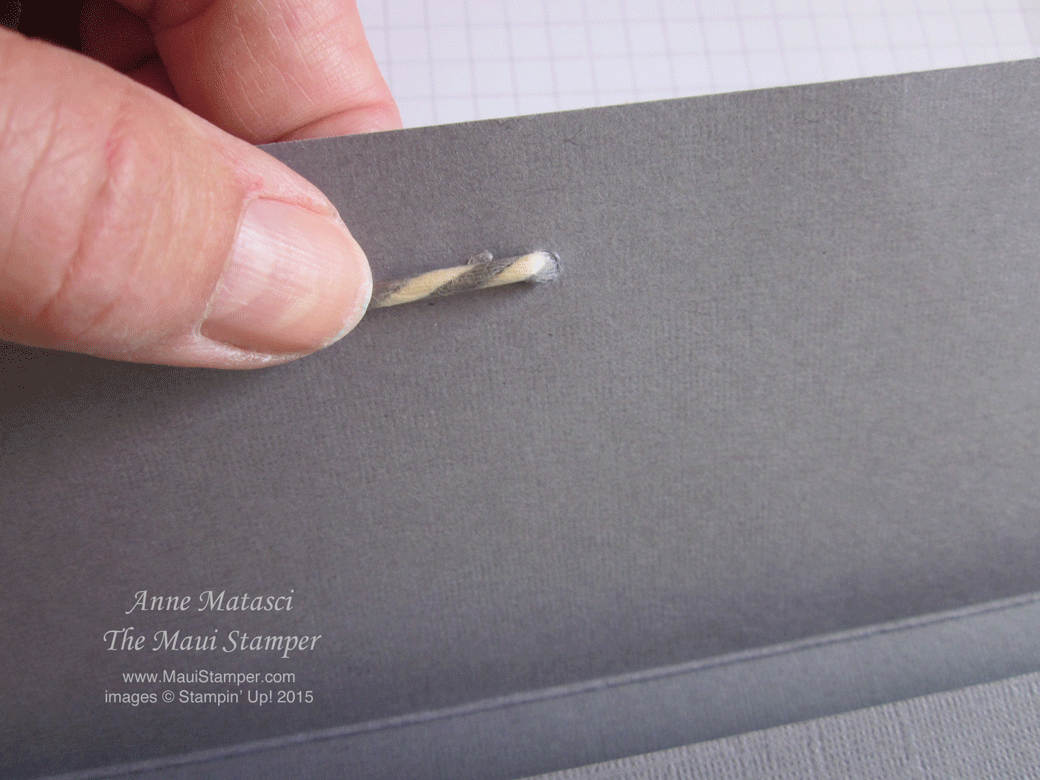
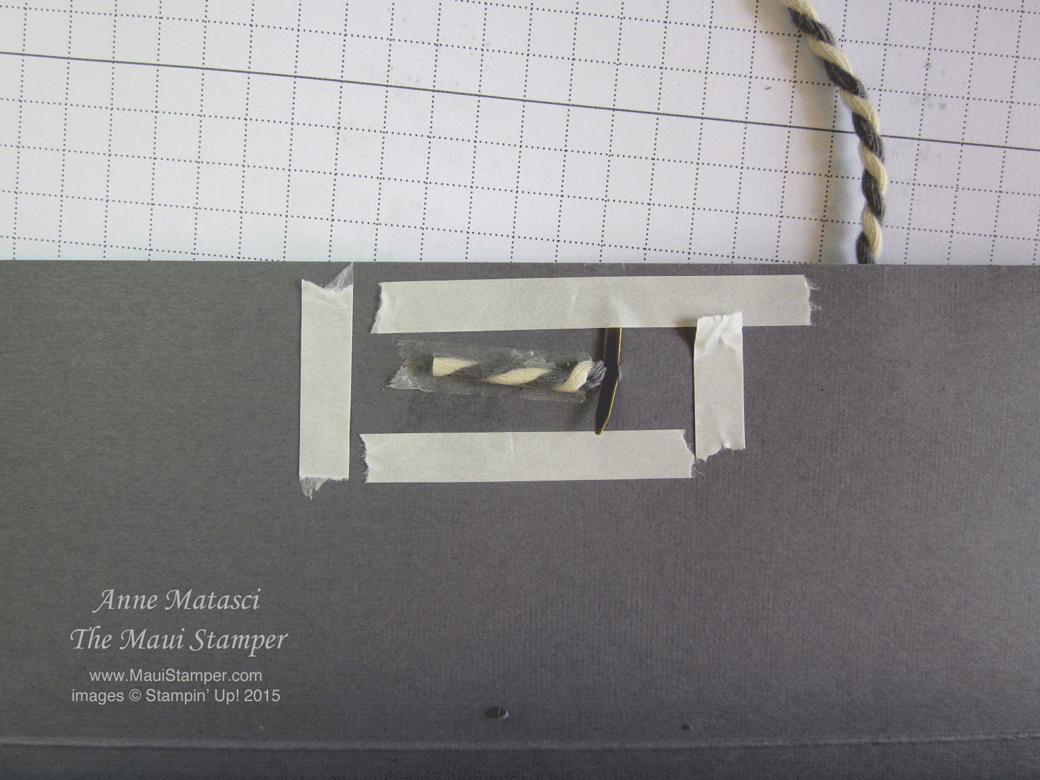
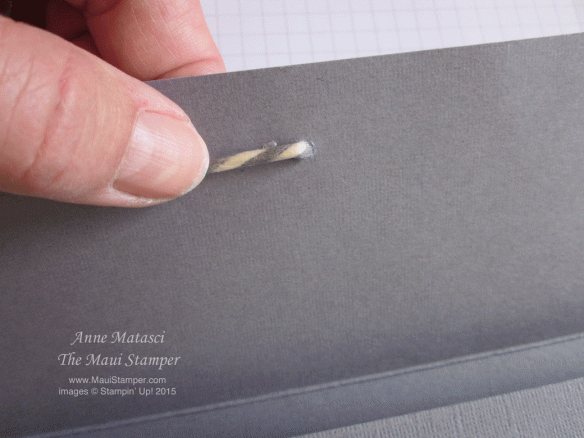 Almost done! Punch a 1/8″ hole in the center of the top flap and thread through your twine. Tape into place – I use the Tear and Tape because I can. (This beautiful Basic Grey and Vanilla twine is from the Gratitude for Days Simply Created kit on the Clearance Rack. It’s a steal at $8.79!)
 Loop the twine around the brad before you open the prongs to be sure there is enough clearance. Secure the brad.
 Apply Tear and Tape around the bumpy parts where the brad and the twine appear on the bottom. (We’re going to cover those up!) Apply Tombo (the Wonder Adhesive) to that second piece of card stock (2 3/4′ x 9″) and cover that mess!
 Yeah, I’m fussy like that. Your travel wallet is ready for your next trip – where are you going? I’m Salt Lake City bound next month for Inspire.Create.Share 2015!
The tour continues with Heather Mathieson, if you’ve been hardy enough to make it this far! The rest of the team is listed below – enjoy the creative projects!
Nancy Amato – http://stampinallnight.blogspot.com/2015/06/remarkable-stampers-blog-tour-going.html
Melissa Bolinger – http://creativeblessingsbymissy.blogspot.com/2015/06/remarkable-blog-tour-going-places.html
Tamra Davis http://www.theCardLadies.com/remarkable-blog-tour-going-places/
Anne Matasci – http://wp.me/pCcBw-1RL YOU’RE HERE!!!
Heather Mathieson – http://wp.me/p2wIuv-2f
Audra Monk – http://thecraftyyogi.blogspot.com/2015/06/going-places-remarkable-blog-hop.html
Maria Pane – http://stampinandscrappinwithriri.blogspot.com/2015/06/remarkable-stampers-blog-tour-moving-on.html
Michele Reynolds – http://inspirationink.typepad.com/inspiration-ink/2015/06/going-places-blog-tour.html
Pam Staples – http://wp.me/p3p2VA-12t
Janet Wakeland – http://wp.me/pHIQD-7ij