Using Designer Series Paper with Garden Wishes

I love our Designer Series Paper (DSP). My favorite thing is the way it coordinates with our products, both colors and images. But wait, there’s more! I love the range of styles, the images themselves, and the perfect weight: not too heavy, not too light, jussst right. The fact that it’s two-sided (and often a multi-colored design on one side and a monochromatic design on the other) expands your crafting options even further.

DSP is an easy way to add interest or complexity to a simple design. With a couple of well-measured cuts, you have a quick addition to your project that often just makes it sing. Our Dandy Garden 6×6 DSP has been a star in the January-June Mini Catalog, and it’s going to retire at the end of June. It coordinates with both the Garden Wishes and Dragonfly Garden stamp sets, so it’s a real hero.

Maui Stamper Stampin Up Dandy Garden DSP Garden Wishes
  • Stamps: Garden Wishes, Many Messages
  • Color Palette: Basic White, Mossy Meadow, BumbleBee, Basic Black
  • Accessories: Stitched Rectangle dies, Messages die, Stampin’ Blends, Mossy Meadow Braided Linen Trim*, Stampin Dimensionals, Wink of Stella, Dandy Garden DSP*
  • *Retiring June 30 and available while supplies last

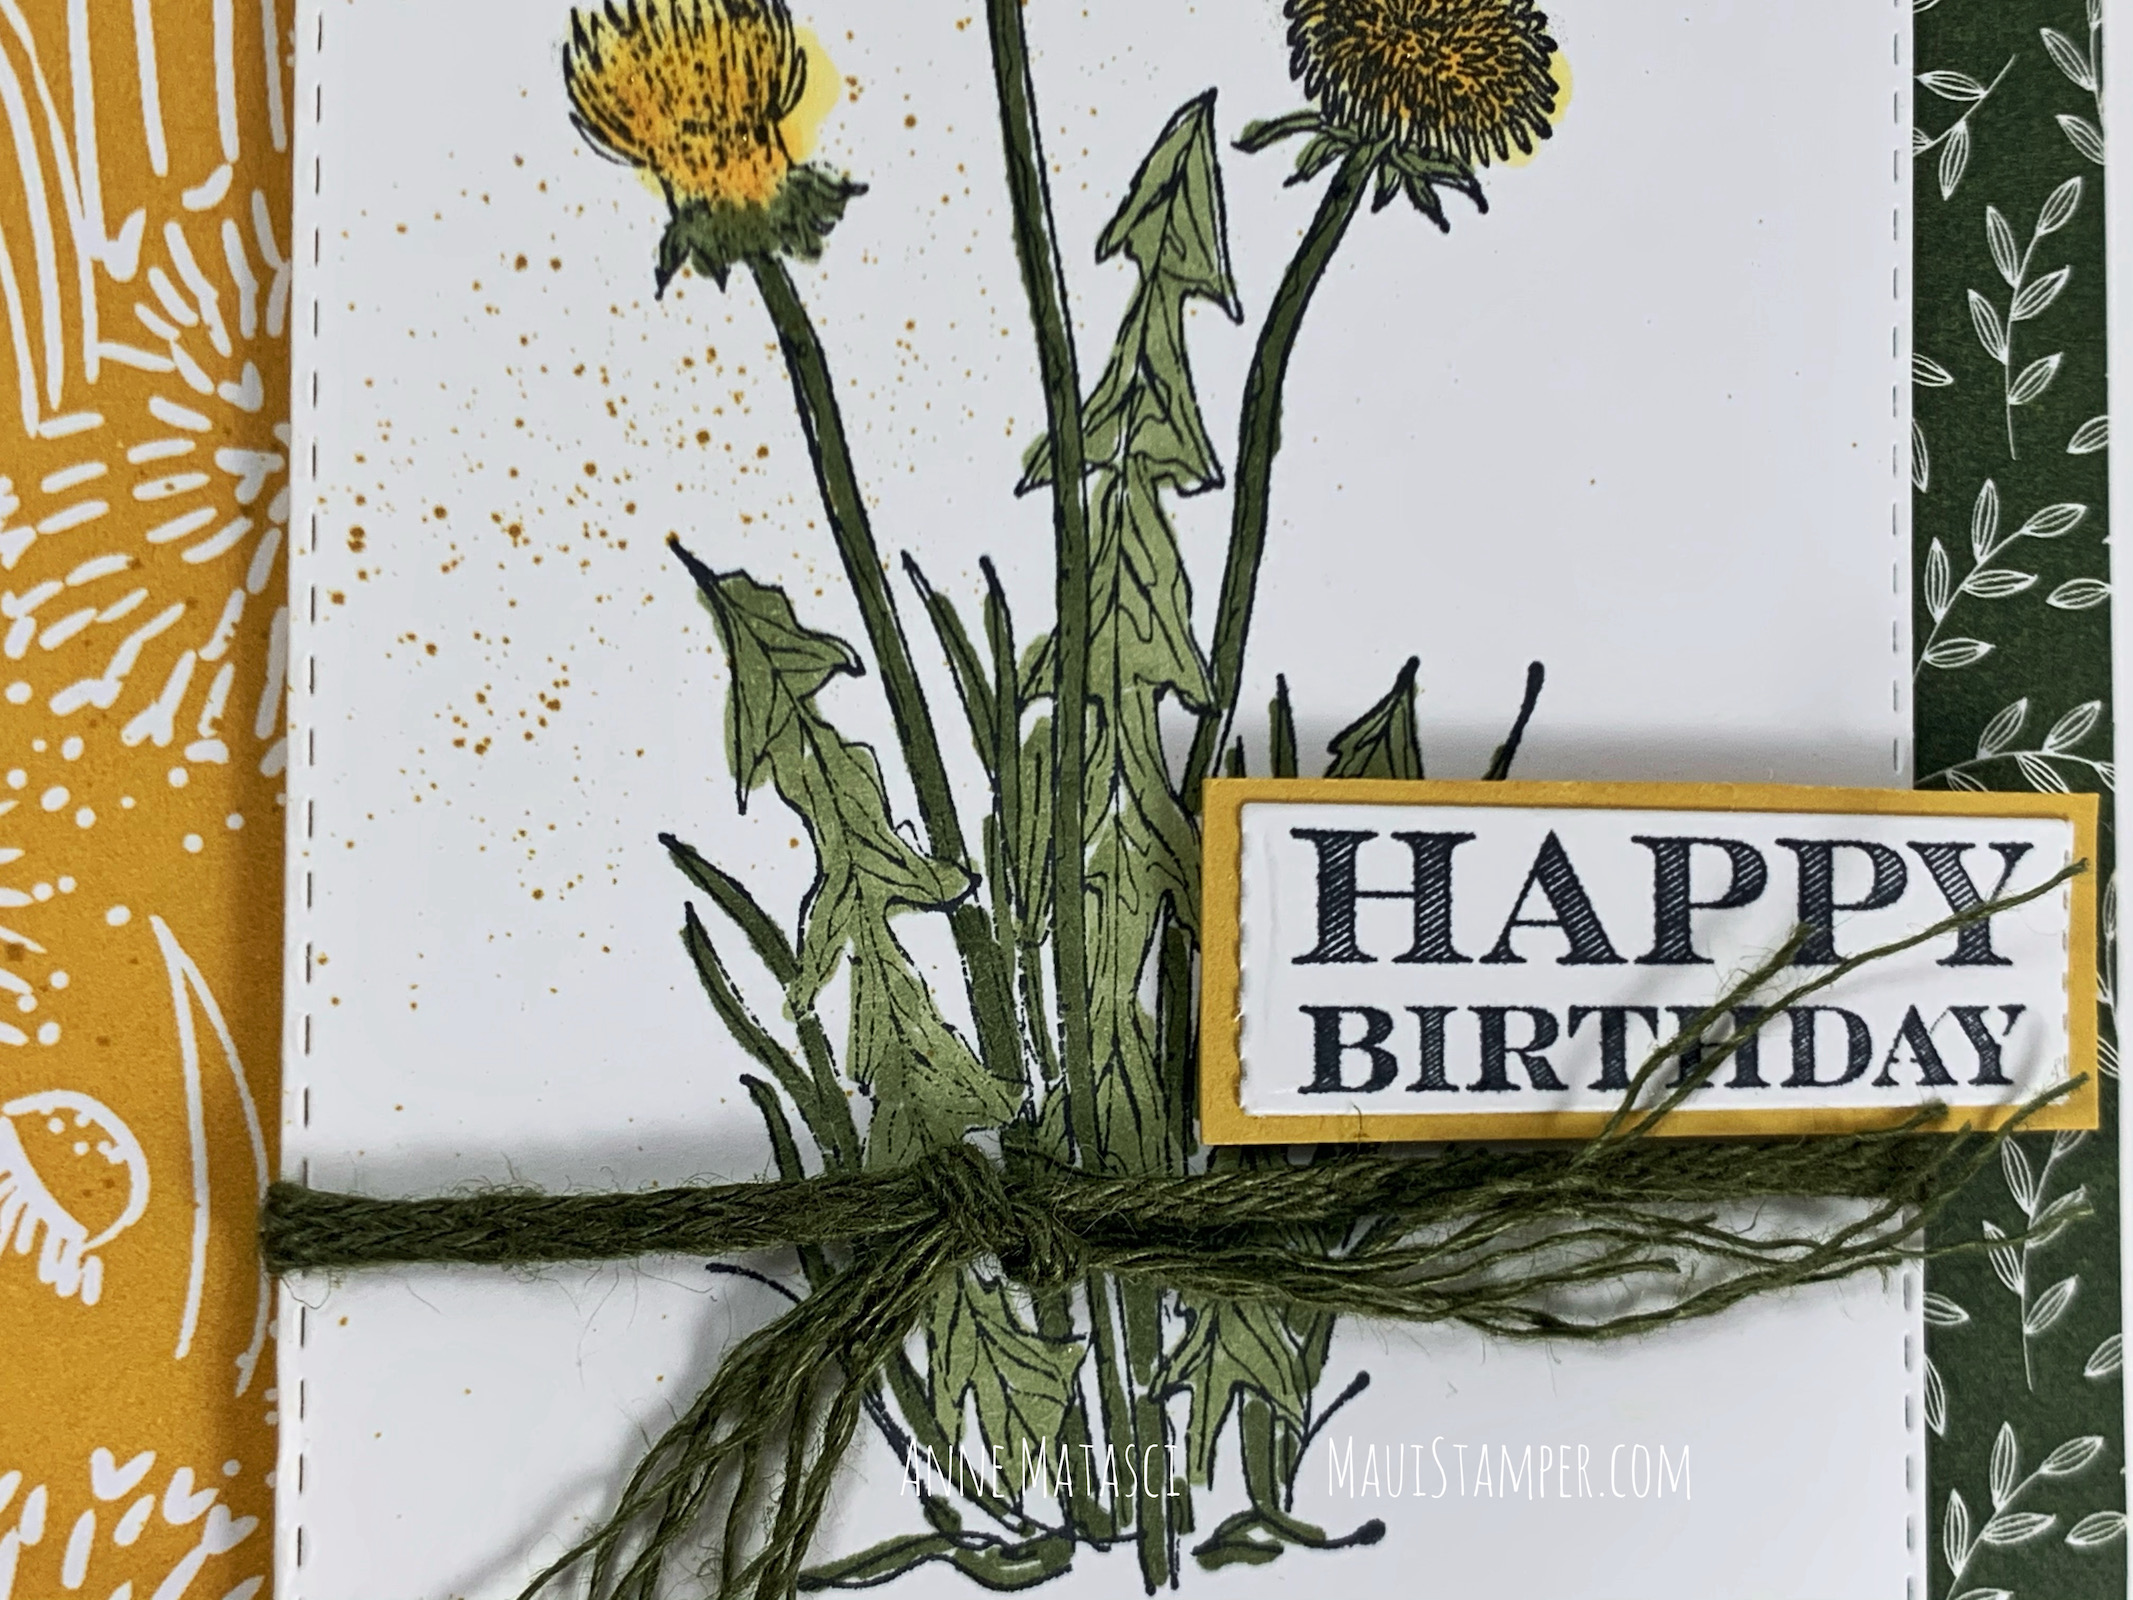
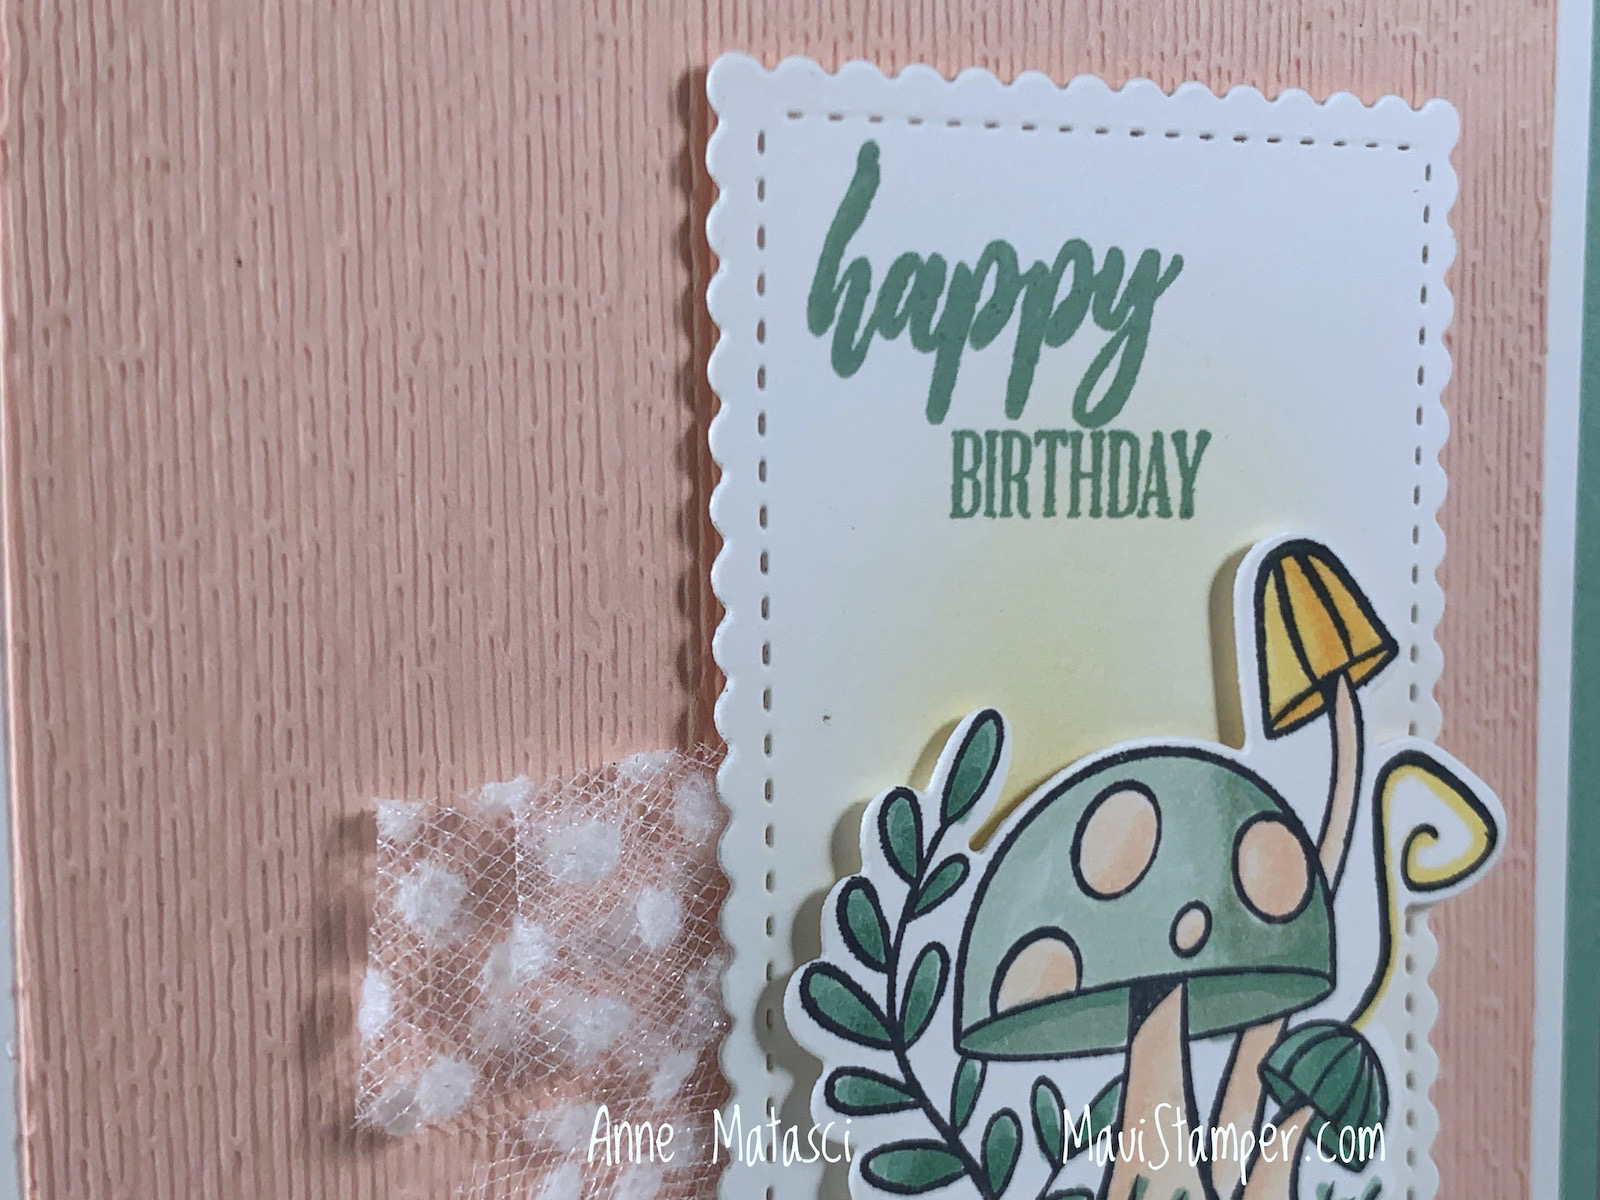
I used the Daffodil Delight and Mossy Meadow Stampin’ Blends to color this image, and treated the light and dark toned Blends as separate shades. The Dandelion leaves need a light color and a soft touch to retain the detail in the images. I’ve also used a very old, long-retired tool to get that color spritz. I just can’t seem to pull off the paint-brush-flick with any reliable results!

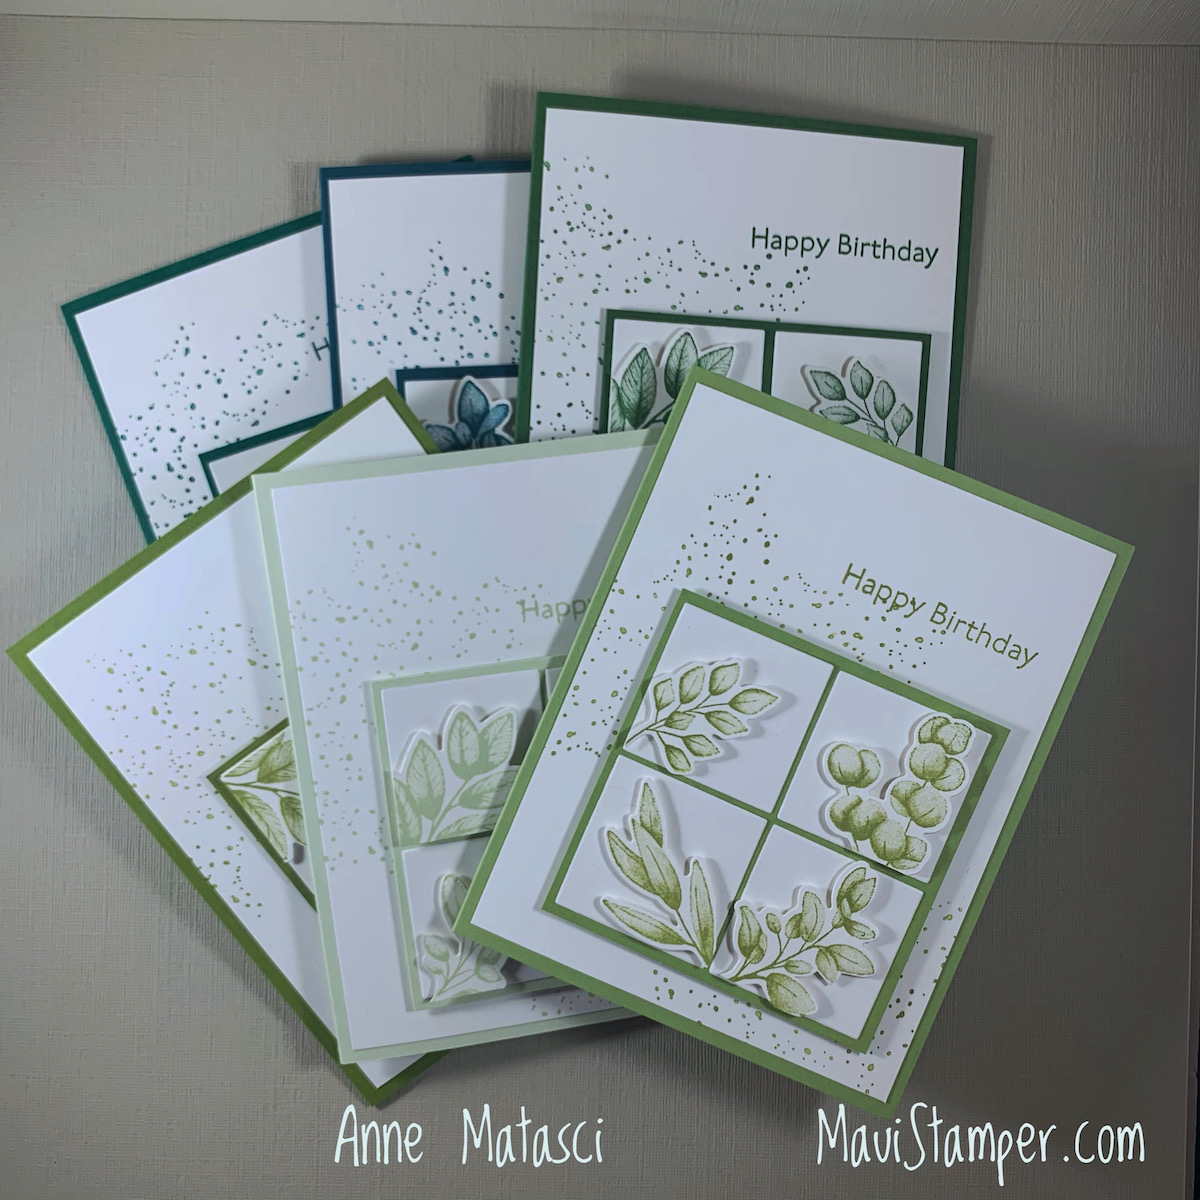
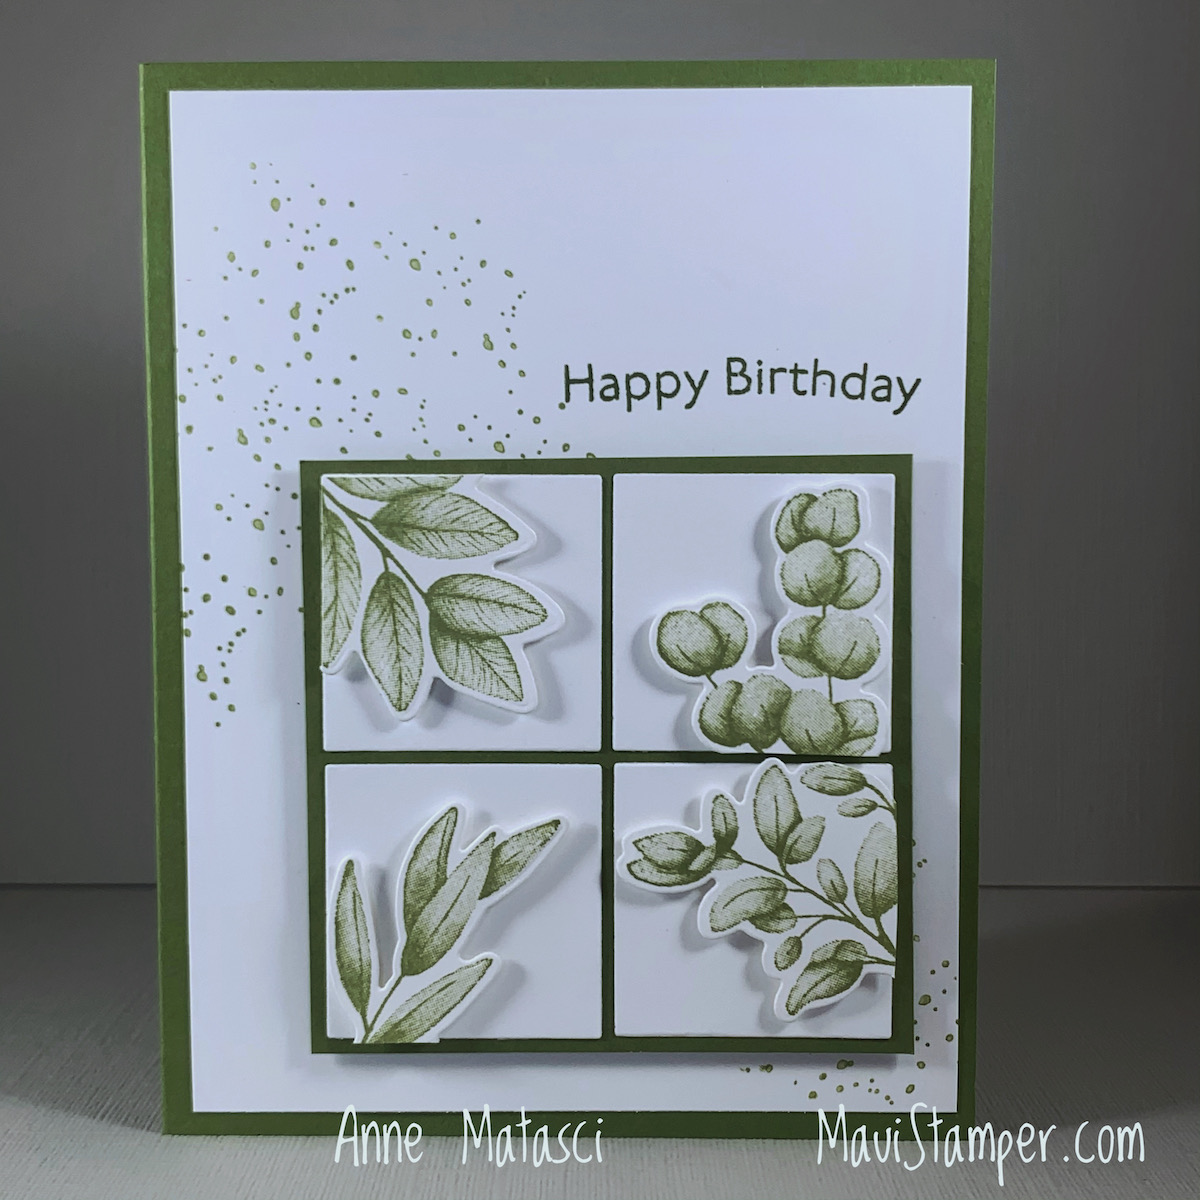
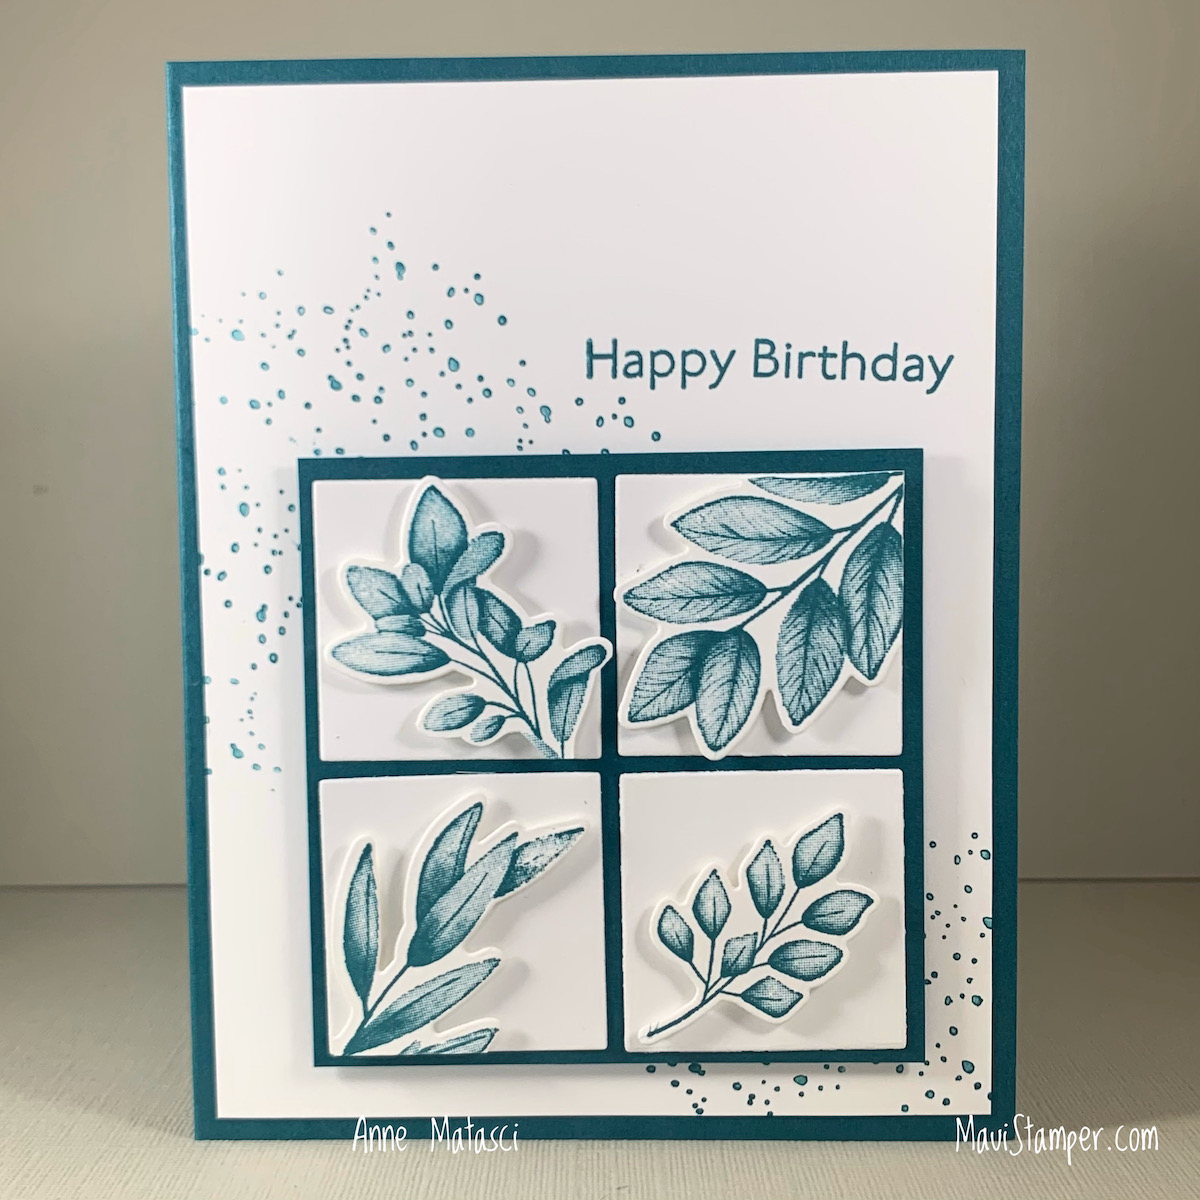
I did a series of these cards with my clubs using the monochromatic papers from the Dandy Garden DSP pack, and I had a narrow strip of the Bumblebee Dandelion design left over. I really wanted to use it, and came up with the idea of adding the Mossy Meadow strip to the side in order to fill out the front of the card.

Maui Stamper Stampin Up Dandy Garden DSP Garden Wishes

I used the same layout with a multi-hued DSP option from the same pack. It’s definitely colorful! This card includes one of the little ladybug embellishments that will retire the end of June. They’re the perfect size to secure with a Glue Dot.

Ready to shop? The Connect, Craft, and Collect offer adds $25 in Host Rewards to your qualifying order through June 14th! Maybe you’re ready to take the leap and earn a discount on Every. Single. Purchase. you make – Join+ increases the value of your No Obligation kit when you join the team by May 31st!

Or just pop on over to the Online Store to see what catches your eye. There’s ALWAYS something!

Sweet Strawberry Birthday

Sometimes you see a card that begs to be made! I saw THIS card by the Alaska Stamper and knew I could put it together with the Sweet Strawberry stamp set (carrying over to 2021-2022!). It’s a great feeling to be able to sit down and create something happy in a hot minute!

Maui Stamper Stampin Up Sweet Strawberry birthday card
  • Stamps: Sweet Strawberry, The Right Triangle (retiring May 3)
  • Color Palette: Basic White, Poppy Parade, Soft Succulent (21-23 In Color)
  • Accessories: Strawberry punch, Stampin’ Blends, Big Boss, Subtle Embossing Folder (retiring May 3), Stampin’ Dimensionals, Glue Dots, sequins from the craft archive

Teri made her card with leftovers from the So Cool Paper Pumpkin kit, but I was able to use what I had on hand to CASE her project. I loved the parallel lines she created down the side of the card, but I’m not as precise as she is, so I guesstimated the spacing and used a thin ruler and the light Soft Succulent Stampin’ Blend.

PRO TIP: If you plan on dry embossing your panel, be certain to doing all the stamping BEFORE you run it through the Big Boss. If you try to stamp once it’s embossed, it’s difficult, perhaps impossible, to get a clean image.

Maui Stamper Stampin Up Sweet Strawberry birthday card

I used the Stamping Off technique with the strawberry stems and leaves when I added the “fill” stamps. I kept the outline stamped images strong, but wanted a lighter touch for the foliage. I stamped the strawberries full strength. I had an extra leaf – but not really extra at all- it was perfect for inside the card.

Maui Stamper Stampin Up Sweet Strawberry birthday card

Find a card you love and make it your own! Just be sure to give credit to the original artist. It’s the right thing to do.

Need supplies? Shop HERE. Just a few more days to shop from the Retiring List and then that beautiful Subtle Embossing Folder will be gone.

NB: The Strawberry punch is currently unavailable to order. I will shout from the rooftops when it comes in!

Pretty Perennial Petals

The four-petal flower in Pretty Perennials makes me think of dogwood, a flower I loved when I lived in Northern California. There are others that are only four petals, but that shape isn’t typical for a flower. I wanted to explore this simple stamped image:

Maui Stamper Stampin Up Pretty Perennial Petals
  • Stamps: Pretty Perennials, Painted Poppies
  • Color Palette: Basic White, Basic Black, Pear Pizazz, Pale Papaya, Mango Melody, Pumpkin Pie
  • Accessories: Big Boss, Perennial Petals dies, Painted Blooms dies, Sunflowers dies, Vellum card stock, Stampin’ Dimensionals, Champagne Rhinestones, Crinkled White Ribbon

I like to stamp and die cut multiple colors of the same image as a source of inspiration. I think it’s pretty funny that these three tones are so complimentary and so edible – and so is Pear Pizazz! It’s practically fruit salad.

When you look at these flowers on the card, they have a lovely, flowing color. Look a little closer and you’ll see they’re screened, and that’s what softens the intensity of the color and allows it to have so much depth.

Maui Stamper Stampin Up Pretty Perennial Petals

This version uses Daffodil Delight, Gorgeous Grape, and Highland Heathy, with a little Soft Sea Foam as an accent. I really like yellow and purple together, and this combination really pops.

Maui Stamper Stampin Up Pretty Perennial Petals

The white centers are from the last mini catalog in the All the Trimmings suite. I gave them a little swipe of Wink of Stella for some sparkle. I love that we offer more flat style embellishments so that they don’t get held up in the USPS letter sorting equipment!

Maui Stamper Stampin Up Pretty Perennial Petals

This is a bright and happy card for someone who loves color! That’s our new In Colors Fresh Freesia and Polished Pink with Melon Mambo. I used the Greenery Embossing folders on the main panel – they fit perfectly in the Baby Boss! And while they’re not as flat as other embellishments, I do love the class of our Matte Black Dots.

Maui Stamper Stampin Up Pretty Perennial Petals

I’ve fussy cut enough of these “happy” sentiments that I’m starting to get pretty fast with the task, but it’s still a bit of a labor of love. Good thing I love the way it looks when it’s done, don’t you think?

Does the four petal flower deserve a place in your craft room? Which color combination do you like the best? I’ve got a stack of a dozen or so more petals, and I hope to turn them all into HAPPY mail this weekend. If you’re ready for a little happy of your own, please shop at my Online Store.

Pretty Perennials and True Love

There is such fabulous inspiration in the January-June mini catalog! Pretty Perennials was the first stamp set that caught my eye, and I’m an absolute pushover for black-and-white, so pairing those stamps with the True Love Designer Series paper was inevitable.

Maui Stamper Stampin Up Pretty Perennials True Love DSP Scripty birthday card
  • Stamps: Pretty Perennials
  • Color Palette: Basic White, Basic Black, Coastal Cabana, Bermuda Bay
  • Accessories: Big Boss, Perennial Petals dies, Stitched Shapes dies (retiring May 3), Scripty Embossing Folder (retiring May 3), Matte Black Dots, Stampin Dimensionals, Paper Snips

I based this card very closely on one I saw somewhere in the interwebs, but despite spending a good thirty minutes searching, I cannot find my source. If you created and shared something that looks a lot like this, please message me and I’ll gladly update the post to give you credit! (Pandemic Brain. That’s my story and I’m standing by it.)

The Stitched Shapes dies are still available in the Online store, although they are on the Retiring Products list. I recently heard them described as indispensable to a craft room the way salt and pepper are to a kitchen, and I don’t think that’s an exaggeration. If you don’t have these dies in your craft stash, I highly recommend you add them to your collection ASAP. I bought a second set for myself.

Maui Stamper Stampin Up Pretty Perennials True Love DSP Scripty birthday card

The Pretty Perennial flowers are whimsical and fresh. Stampin’ Up! has loads of realistic flowers, and flowers that are great for coloring, but these are gloriously happy What-You-See-Is-What-You-Get flowers. They stamp quickly and can be made a little more fancy with the addition of a few die cuts, but WUSIWUG with these babies.

Maui Stamper Stampin Up Pretty Perennials True Love DSP Scripty birthday card

I’ll be honest: fussy cutting the word happy is the very definition of FUSSY cutting. I love the effect, and I really love this font, but it takes some time to cut it out. Do it while you’re waiting for someone, or watching TV, or doing anything possible to avoid finishing your taxes. It works well in all of those circumstances. Or design your card around happy stamped directly onto the card! It’s your project, do it the way you want to do it. And if you don’t like the way it turned out, remember that it’s pennies worth of paper and just THROW IT OUT. Don’t hang onto it hoping to change it like you did your first boyfriend. We know how that went. Throw it out.

Oops. Guess I took a wild turn there, didn’t I?

Turn yourself to shopping and pick up Pretty Perennials. You don’t have to change them – they’re perfect, just as they are. Shop HERE. (nb: It says they’re low inventory as of right now. Don’t wait.)

Snailed It: Magical Mushrooms

The Stampin’ Up! January – June mini catalog is filled with delights, and these sweet mushrooms are Exhibit A. They remind me of the Alice in Wonderland sort of mushroom, and I find coloring them to be endlessly appealing. Because they’re magical, they lend themselves to whimsical colors.

Maui Stamper Stampin Up Snailed It Magical Mushrooms birthday card
  • Stamps: Snailed It, A Wish for Everything
  • Color Palette: Basic White, Petal Pink, So Saffron, Mango Melody, Mint Macaron, Basic Black
  • Accessories: Big Boss, Snail dies, Subtle Embossing Folder (retiring May 3), Stitched So Sweetly dies, Polka Dotted Tulle Ribbon (retiring May 3), Blending Brush, Stampin Dimensionals

The Subtle Embossing folder is such a go-to texture on my craft desk that I’ve actually ordered a second one in the dire event that something happens to mine. It creates a dobby, fabric-like impression on our card stock that doesn’t distract from anything else: it’s SUBTLE.

Speaking of subtle, be still my heart but I do love our Blending Brushes! No more blobs or streaks, just lovely subtle washes of color. You can build color, you can blend colors, you can spend all day playing with your Blending Brushes! (Not that I would do that, of course.)

Maui Stamper Stampin Up Snailed It Magical Mushrooms birthday card

I have a my own technique for adding the ribbon to the back of a focal point. I’ve watched a lot of YouTube videos where crafters just seem to wave their fingers in the air and viola! they have a beautiful, casual ribbon bundle for their project. When I wave my fingers in the air, well, it’s just messy, let’s leave it at that.

My technique is to put some Stampin’ Seal on the back of the panel and then place the ribbon, layer by layer, on that adhesive. I flip it back and forth to see how it looks, and if I’m not happy with it, it’s simple to pull it off the adhesive and reposition it. Once I have the look I want, I add a small piece of tape (the ordinary desktop kind) to secure everything in place.

The Clearance Rack has been updated – snap up Designer Series Papers, ribbons, embellishments, punches and more at great prices – while supplies last. Or if you prefer, snap up the Snailed It bundle and go color some mushrooms of your own. I promise it will be magical.

An afternoon with Forever Fern

I’m a keeper. I keep stuff – bits and bobs, odds and ends – because I just know I’ll need it. Sometimes I do, sometimes I don’t. But I’ve had an assortment of die cut Forever Fern pieces in multiple shades of greens in my collection for months, and Today Was Their Day.

Maui Stamper Stampin Up Forever Fern Monochromatic card
  • Stamps: Forever Fern, Itty Bitty Greetings (retiring May 3)
  • Color Palette: Basic White, Garden Green
  • Accessories: Big Boss, Forever Flourishing Dies, Layering Squares dies, Stampin Dimensionals

This card layout is a CASE (Copy And Share with Everyone) of a card I spotted in the new 2021-2022 Annual Catalog. Yes, I’m sure you’ve heard – demonstrators get an advanced copy of the catalog, and this one is going to rock your world!

The retiring Layering Squares dies aren’t absolutely essential, since it’s pretty easy to cut a square. That said, how easy is it to cut 4 squares EXACTLY the same size?? I’ll be keeping this set of dies for certain.

I made a BUNCH of these in a relatively short period of time because I had all of these bits!! Each card turned out a little differently because I was having such a good time orienting the branches. Tell me what you think:

Big Boss, Forever Flourishing Dies, Layering Squares dies

This one is in Old Olive. I think this one was the first one I did.

Big Boss, Forever Flourishing Dies, Layering Squares dies

Next I used the retiring Pretty Peacock In Color from 2019-2021. I’m really going to miss this shade, as it’s one of my favorites, not just for crafting but in Real Life.

This is Pear Pizazz. I had some fun with these branches as I worked them into a bit of a wreath arrangement. I thought about putting something in the center, but I wanted these cards to lean a bit masculine.

Maui Stamper Stampin Up Forever Fern Monochromatic birthday card

With this Shaded Spruce version I did the opposite – I worked from the center outward. I’m still a little undecided about this one!

Maui Stamper Stampin Up Forever Fern Monochromaticbirthday card

This is Soft Seafoam, one of my favorite greens. It’s really a versatile tone and definitely lends a more feminine touch to this card layout.

Maui Stamper Stampin Up Forever Fern Monochromaticbirthday card

Forever Fern has a great variety of botanical images, but as my friend Heather pointed out, none of them actually appears to be a fern. Go figure.

If you suddenly need the Layering Squares dies, or anything else for that matter, pop on over to the Online Store lickety split! And thanks for stopping by today.

2020-2021 Annual Catalog RETIRING LIST

It’s the moment we find out who will stay and who will go – and it always makes me nervous! The list has been published and there are plenty of great deals, but don’t hesitate! When these products are gone, they are GONE.

Great deals – be sure to notice that some bundles are NOT retiring, just being split. That means the individual items will be available in the new catalog but the bundle price will not.

You’ll also see Tear n Tape on this list but DO NOT FEAR!!! It will return, slightly repackaged – just this item number is retiring. 

My tech skills have their limitations, but I can give you a link! Click HERE to see a pdf – or just head over to the Online Store to see images and details!

Sand and Sea Suite: Unconstructed

When you combine the Seashells Embossing Folder from the Sand and Sea suite with the all-in-one die, you get a stunning panel that works all by itself. But when you cut apart all the elements, the combinations are endless:

Maui Stamper Stampin Up Sand and Sea Suite Friends Are Like Seashells
  • Stamps: Friends Are Like Seashells, Itty Bitty Greetings
  • Color Palette: Whisper White, Sahara Sand, Petal Pink
  • Accessories: Stamp Cut and Emboss (Big Boss), Seashell Embossing Folder, Subtle Embossing Folder, Seaside Seashells dies, Ornate Frames dies, Shimmery White paper, Linen Thread, Opal Rounds, Stampin Dimensionals, Blending Brush, Paper Snips

You really need Paper Snips for this task, because they are super sharp and their pointy little tips get right into the littlest spots! The other indispensable tool I used is the Blending Brush, which layers color consistently and smoothly. I KNOW they’re not available to order right now 😟 but they are due in the warehouse the week of April 5!

Maui Stamper Stampin Up Sand and Sea Suite Friends Are Like Seashells handmade card

Did you notice the Opal Rounds in the January-June Mini Catalog? I completely missed them until just a few weeks ago, but I’m doing my best to make up for that now! They’re perfect with the Shimmery White card stock (or any other project you might be working on.) And I think it is a universal truth that there is no substitute for Linen Thread.

Maui Stamper Stampin Up Sand and Sea Suite Friends Are Like Seashells handmade card

The Friends Are Like Seashells stamps include the images on the Embossing Folder, but also include a great assortment of other images that really round out the suite. I used a little bit of ocean flora on the inside of my card – because it’s there, just waiting for some ink!


156205 Friends Are Like Seashells Bundle

The Retiring List for the 2020-2021 Annual Catalog comes out today (March 24) at 1pm MST. Every year, there’s a lot of excitement swirling around what will stay and what will go, and I confess that I get a little nervous when I think about some of my favorites! This year the calendar is a little different, so pay close attention: The 2020-2021 Annual Catalog is available (while supplies last once the list has been published) until May 3, 2020. The new 2021-2022 Annual Catalog will debut on May 4th!

The January-June Mini Catalog remains current until June 30 (again, there’s that pesky “while supplies last” clause). If you’re making a plan, be sure to make note of those two dates!

And if you’re ready to shop, please visit the Online Store.

Maui Stamper Stampin Up Sand and Sea Suite Friends Are Like Seashells handmade card

Back to that Darling Donkey

Stampin’ Up! has set me up! What is with snails and donkeys? I didn’t anticipate falling for such off-my-radar critters, but here I am. After I finished the January DIY calendar, I was on a Donkey Bender – but I didn’t really want to cut him out. I mean, I’ll fussy cut with the best of them, but enough is enough.

Maui Stamper Stampin Up Darling Donkey Oh So Ombre DSP
  • Stamps: Darling Donkeys
  • Color Palette: Whisper White, Bermuda Bay, Gray Granite, Daffodil Delight, Petal Pink
  • Accessories: Stampin Cut and Emboss (BIG BOSS), Layering Ovals dies, Ornate Frames dies, Stampin Blends, Blending Brushes, Stampin Dimensionals, Oh So Ombré Designer Series Paper (SAB 2021.1)

I’ve based this card on a design by Mary Knabe of Stampin’ Peace. I loved her concept and color palette, and reinterpreted them for this card. One of the delights of this design is that by using an opening on the front of the card, the image can be expanded when you open it:

Maui Stamper Stampin Up Darling Donkey Oh So Ombre DSP

The Blending Brushes are VERY easy to use, and in this case I didn’t even bother to mask off the donkey before I created that Daffodil Delight aura. (You know donkeys have auras, right??) I also added an additional message in the corner that isn’t visible from the front of the card. (I am quite proud of myself, as I normally struggle to use images AND sentiments from the same set, and on this one I have used 3 of the 4 sentiments!)

But wait, there’s more!

Maui Stamper Stampin Up Darling Donkey Oh So Ombre DSP

You could call this technique a card within a card. The card base is 11″ x 8 1/2″, scored at 5 1/2″. The white card inside is 10″ x 3 3/4″, scored at 5″, so it fits well within the first card. The bottom panel is completed adhered to the card base, much as a layer would be. That leaves a front for artwork to peep through the window, and an interior page for your message – or more artwork!

As you can see, I accidentally inked up this kick-up-your-heels donkey in Bermuda Bay instead of Memento Black, and had to be extra careful to avoid pulling in the Bermuda Bay ink when I colored with my Blends.

Maui Stamper Stampin Up Darling Donkey Oh So Ombre DSP

I prepared quite a few of these for a virtual stamping event, and I wanted to be sure I had the ovals in the center every time. To simplify that task, I made templates to use with the BIG BOSS:

Maui Stamper Stampin Up Darling Donkey Oh So Ombre DSP

There’s a little math involved, so bear with me. I began by measuring the height and width of each die, then subtracting that number from the height and width of the card panel. For example, the plain oval is 2 1/4″ wide, and the card front is 4 1/4″ wide, so the difference is 2 inches. I divided that number by 2 and measured in that amount from each edge, drawing a line at 1 inch. That gives me the left-to-right guideline for placing my die.

I went through the same process with the height of each die, creating two panels that had a rectangle in the center of each one. I centered the appropriate die in each panel (note that I wrote which panel was which on the template, I am famous for mixing up things like this!) When I ran the centered die through my BIG BOSS I created a template that I could use repeatedly without having to mark each piece of paper.

Maui Stamper Stampin Up Darling Donkey Oh So Ombre DSP

Just place the template squarely on top of your card or panel, drop the die into the pre-cut opening, and crank ‘er through! When you have a bunch of cutting to do, this is a real time saver.

Have some fun with your own Darling Donkeys, or any other spotlight image for that matter! Darling Donkeys and the Oh So Ombré are only available in January and February 2021 as Sale-a-bration selections. Don’t miss out! Shop HERE.

Painted Poppies Split Card

I playing with the Split Card technique again. Sometimes I like my results, and sometimes I don’t. Therein lies the beauty of paper-craft: paper, in general, is cheap. Don’t like it? Throw it away! The Split Cards I made with Painted Poppies were keepers:

Maui Stamper Stampin Up Painted Poppies Split Card technique

Working with Stampin’ Blends allows you to get deep, intense images while still allowing you highlights and shadows. The bold colors of this card pop right off the page! I stamped the flowers with Poppy Parade ink, then used my Poppy Parade Blends to color them in. I did the same with the leaves in Mossy Meadow. Since I used the same color to stamp the image as to color it in, I didn’t have to worry if the outline ran a little.

Maui Stamper Stampin Up Painted Poppies Split Card technique

This card front was a split card project so I had another side to color. I chose to go the opposite direction and use colored pencils. They are much more nuanced, and allowed me to create a much softer look:

Maui Stamper Stampin Up Painted Poppies Split Card technique

The color palette is the same, but I used our Watercolor Pencils and a Blender pen to create this more subdued look. The sentiment is from Beautiful Friendship, and the trim is our new Braided Red Linen. I also slipped in a few splooshes (that is the technical term, btw) from the Forever Fern stamp set.

Maui Stamper Stampin Up Painted Poppies Split Card technique

You can fluff and stretch and unravel that red trim to get a BUNCH of different looks. The natural linen is still my favorite, but this is going to be a great addition to my embellishment stash.

So tell me, what do you think? Do you like the bold, intense poppies, or do you prefer the gentler version? I want to try this again using watercolor paper and our new Water Painters. The possibilities are endless! It’s amazing I ever get anything done.

Need supplies for your next project? Shop HERE.