Sizzix Edgelits Sneak Peak

How about another little look at some new Occasions Mini goodies?

Sizzix Edgelits

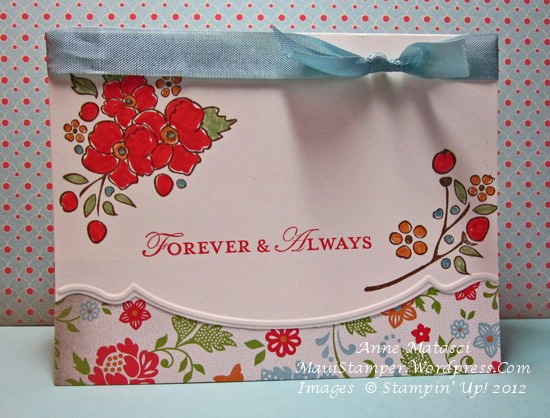
Actually, this card uses both an Edgelit and an Embosslit – do  you see how perfectly they mirror each other?  The Edgelit cuts a perfect edge every time – I cut both the Garden Green and Whisper White cardstock and offset them.  The Embosslit created that raised line on the Garden Green cardstock, and a new stamp set provided the little dots – they match perfectly too!

Crafting in January is going to be a LOT of fun!

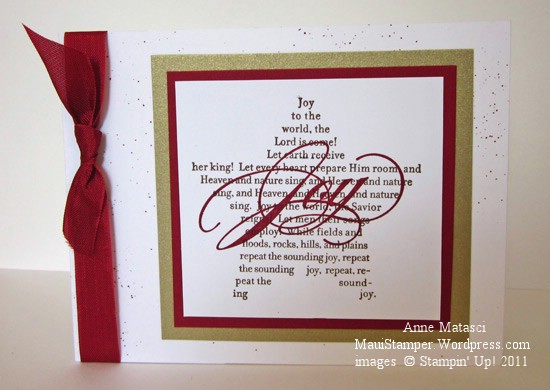
Cheery holiday trees

This is a case – maybe it was Robin Merriman, maybe not – but honestly, the past week I’ve been goin’ 178 miles an hour in a convertible with my hair on fire (please say that with your bestest deepest Southern accent, because that’s how I first heard it).  Here in the Stamper Household we are T minus 4 days from departure for the land down under.  I haven’t seen my oldest daughter for over a year, and I CAN’T WAIT.  I didn’t think we were ever going to get to this point!

Ah, but I do have a card to share:

Three Holiday Trees

Imagine how many different cards you could make with all of the fabulous holiday Designer Series Paper scraps you have in that scrap box of yours.  Yeah, you know the one.  It’s full of pieces that were too big to throw away, or that you just loved so much you couldn’t bring yourself to use, or that you can’t remember the name of any more and coordinating colors will be a wild guess.  It’s all okay – this is the perfect project!

I used the Perfect Pennants Bigz L die (# 123126 for $32.95, and you know you’ve been so good this year and worked so hard making everything Just Right for everyone else in the family – you deserve it, don’t you??) but you could cut triangles if you really wanted to.  I am terrible at cutting triangles.  Didn’t like geometry all that much anyway.  My triangles always come out catty-wompus (and of course that’s a word, if you read it right here on the World Wide Web, well, you KNOW that makes it a word!!).   Anyway, before I went on that little rant I meant to say that the Perfect Pennants die gives me – yep, you guessed it – perfect pennant shaped triangles every time.  No compass and slide rule required.  Hallelujah for that.

The other product you don’t want to miss on this card is Teeny Tiny Wishes.  (#115370 $36.95).  I’m feelin’ the Mom-thing here…if I’ve said it once, I’ve said it a thousand times:  You need this stamp set.  Seriously.  And that’s all I have to say about that.

There’s some Smooch and some Glimmer Paper and some ribbon and bling here, too.  This card goes together faster than the reindeer a minute before sunrise and that is some fast my friends!  If you have procrastinated on putting together some cards to send to friends near and far, stack up some DSP on this die and get crankin’.    Just stay out of the convertible when your hair catches on fire.

Just a little bit of country

I’m not a big fan of country – music, decor or otherwise – but a little bit never hurt anyone:

Country Pines and Poinettias

  • Pines and Poinsettias and Delightful Dozen stamp sets
  • Whisper White, Garden Green and Real Red card stock
  • Holly Berry Bouquet Designer Series paper
  • Real Red Classic ink pad
  • Early Espresso, Garden Green and Real Red Stampin’ Write Markers
  • Big Shot and Perfect Pennants Bigz L die
  • Stampin’ Dimensionals
  • Dazzling Details

This card reminds me of my mother-in-law.  She loved things with a country feeling – her house was full of bunnies wearing glasses, big dried flower arrangements, and figurines of little girls carrying baskets.  I can just see her smile as she would show me her latest little girl, pointing out a charming detail and telling me something about the artist.

She REALLY loved Christmas, and her home was decorated from top to bottom.  She had two big trees, and a vignette in her kitchen window that lit and moved.  My father-in-law would put an enormous tree of lights on the roof of their house, and people would stop by just to say thanks for the lights.   And the food – I can’t begin to tell you about the food!  Oh, I miss the two of them.  I was richly blessed with wonderful in-laws.

And isn’t that what the holidays are all about?  To me, December means sharing our blessings and spending time with those we love…even if it’s just in our memories.   Let’s all make time for the important things!


Presenting…the 2011 Maui Stamper Snow Globe

It’s become something of an annual tradition to create a snow globe card.  I enjoy the shift from linear to circular, the concept of vignette and the focus on Christmas.  This card was born from an “AHA!!” moment as I played with a new stamp set from the Holiday Mini Catalog:

  • Christ Child in the Woods Snow Globe
  • 25 and Counting, Pennant Parade and Pines and Poinsettias stamp sets
  • Whisper White, Brushed Gold and Always Artichoke card stock
  • Always Artichoke, Pear Pizazz and Daffodil Delight Classic ink pads
  • Daffodil Delight, Real Red, Always Artichoke and Early Espresso Stampin’ Write markers
  • Crumb Cake and Marina Mist Classic ink refills
  • Aquapainter
  • Petite Pennants Builder Punch
  • Big Shot and Clear Circle Bigz die
  • Real Red 1/8 inch taffeta ribbon
  • Tombo the Wonder Adhesive
  • Stampin’ Dimensionals
  • Fine Galaxy (gold) Stampin’ Glitter

If you happen to run into me out and about with Mr. Maui Stamper, please do not mention the glitter.  It was applied VERY VERY carefully while he was off-island.  The less said, the better!

If you would like to see previous Snow Globe cards  I’ve made it easy –

the card that started it all in 2009

Shimmery Pines also 2009

Frosty the Snow Globe Man from 2010

And if you would like the paper template to hand-cut your card, here you go!  The REALLY cool thing about this card is that it fits in our standard envelope and is designed to be 100% mail-worthy with no extra postage.

Ah, now it’s beginning to feel as though Christmas is on its way.


Giving thanks

A pretty autumn-colored card for you today on this beautiful Thanksgiving morning:


Mom's birthday

  • Simply Soft Stamp set
  • Naturals White, Old Olive, More Mustard and Cajun Craze card stock
  • Old Olive and More Mustard Classic ink pads
  • Aquapainter
  • Champagne Mist shimmer paint
  • Dimensionals
  • Rhinestone Jewels

I made this card for my mom’s birthday.  She’s a gardener and a good one, and I wanted her card to be full of flowers, so I put the message on the inside.  I cut out a few of the blossoms and stuck them on little pieces of dimensionals – it wasn’t hard – I can hear some “no cutting” stampers groaning!

One of my favorite things to do is make a card FOR someone.  Creating a design that suits the recipient and the occasion is part of the pleasure, but for me the best part is enjoying thinking of that “someone” while I’m making the card.   I live apart from many people whom I love, so making something especially for them allows me to draw them near if only in my mind.

Today, as every day, I am grateful.  My life is abundantly rich in beauty, comfort and the love of family and friends, and I make an effort to live with thanksgiving.  I am very blessed, and I wish the same for you.  Happy Thanksgiving Day.

The first cut is the tricky part

What’s it gonna be today?

You're in my heart

  • Word Play, Creative Elements and Simply Soft stamp sets
  • River Rock, Cherry Cobbler and Whisper White card stock
  • Paisley Petals Designer Series paper
  • River Rock, Cherry Cobbler and Marina Mist Classic ink pads
  • Cherry Cobbler Quilted Satin ribbon
  • Big Shot, Scallop Circles 2 and 3 inch Circle Bigz dies
  • Scallop Border punch
  • Stampin’ Sponge

I love this specialty cut, but I have a confession to make.  Every time I run this through the Big Shot, I make a mistake (or two) and ruin two or three pieces of paper.  The placement of the cutting pads on the Big Shot is a little tricky and I always goof it up.  I got that Sheryl Crow song stuck in my head – you know – “The first cut is the deepest, Baby I know!”

THIS video tutorial does a great job of demonstrating how to make this cut, and I’ve bookmarked it so I can review it every time!  I used a card with the fold on the narrow side instead of the wide side, but it’s the same principle.

Those little smudgy bits around the edge of the circle are one of the two-step “filler” stamps from the Simply Soft stamp set.  Just the right amount of texture!  You could do a lot of different things with those smudgy bits.

A few words of sympathy

It’s hard to know what to say when someone experiences loss.  Finding the right words is a struggle, and often the words that come to mind don’t express what we’re really feeling.  I’ve found that simple is best:

I'm so sorry

  • Thoughts and Prayers, Teeny Tiny Wishes, and French Script stamp sets
  • Whisper White and Wisteria Wonder card stock
  • Pear Pizazz and Wisteria Wonder classic ink pads
  • Pretty in Pink and Wisteria Wonder Stampin’ Write markers
  • Blender pen
  • Big Shot, Originals 3 inch Circle,  and Framed Tulips Textured Impressions Embossing Folder

I tried to add more embellishment to this card and it just wouldn’t work.  This is about as close as I get to Clean and Simple.  For this sympathy card, in this situation, it was just right.

Stacy, I’m so sorry.

Mejiro

There’s a flock of delightful little songbirds that are frequent visitors in my garden.  They especially love the jatropha tree outside my kitchen window, so I often have the opportunity to watch them dart about looking for treats.   They’re small, about 4 inches or so, and they look quite a bit like the Young Vermillion a la carte stamp (#124092, $7.95).

Mejiro

  • Young Vermillion stamp
  • Whisper White, So Saffron and Old Olive card stock
  • Pocket Full of Posies and Patterns Designer Paper Stack Designer Series Paper
  • Early Espresso, Old Olive and So Saffron Classic ink pads
  • Aquapainter
  • Basic Black Stampin’ Write Marker
  • Uniball Signo White gel pen
  • Piercing tool, mat and template
  • Early Espresso 1 1/4 inch striped grosgrain ribbon

These little birds are known as Japanese White Eye or Mejiro, and they were introduced to the islands in the 1920’s and 1930’s.  Back then, it was common to bring in non-native plants and animals, but we now know that this practice creates an imbalance in our delicate island eco-system.  It’s not the little Mejiro’s fault, though, and the busy crowd in my jatropha don’t seem the least worried about their impact.  They’re much too intent on something to eat, and they chatter and sing cheerfully with one another as they flit through the branches.


Out on a Limb

The Maui Stampers team got together last week and Crystal brought a project for all of us:

Out on a Limb Telescoping card

You can find instructions for a telescoping card HERE.  This one uses the new Halloween set Out on a Limb from the Holiday mini. Of course, the tool that makes this card possible is the Big Shot – beautiful, perfect, consistent circles of card stock every time!

We got a little silly putting these together, but then again, we always get kind of silly at team meetings.  My husband was off island and my son retreated upstairs to the farthest corner of the house, but he said he could still hear us laughing.  I should think so!!

Sunset sail

I’m sorry that this single sailboat stamp retired.  I love the image, and it lends itself to a lot of fun techniques.  There must be a few of you who bought it and are still looking for ways to use it, right?

Sunset sail

  • A Note of Thanks, Wonderfully Worn, Woodgrain (ret) and Sail Away (ret) stamp sets
  • Whisper White, Sahara Sand, Pear Pizazz and Not Quite Navy card stock
  • Pear Pizazz, Soft Suede and Not Quite Navy Classic ink pads
  • Not Quite Navy, Rich Razzleberry, Calypso Coral, More Mustard and So Saffron Classic ink pads (sunset)
  • Stampin’ Sponges
  • Big Shot and 3 inch circle Originals die

The sunset is just Stampin’ Sponges tapped on the Classic ink pad and dragged across the cardstock circle.  I stamped the sailboat image first, created my background, and then stamped the sailboat again on a scrap of Whisper White and cut out the sails.  It was easier to piece them than to try to mask them and keep them in place with all of that dragging!