
Did you stamp some Flower Shop images and try to punch them out? Did you discover what I learned – the images aren’t symmetrical! Took me a while, but I have a system to make it easier.
Grab your stamps, your punch and a Sharpie and let’s get started! I HIGHLY recommend you follow this procedure for ONE image and your punch. Make sure you’ve got everything lined up, and THEN add the marks to the rest of the images. Saves a lot of “erasing”.
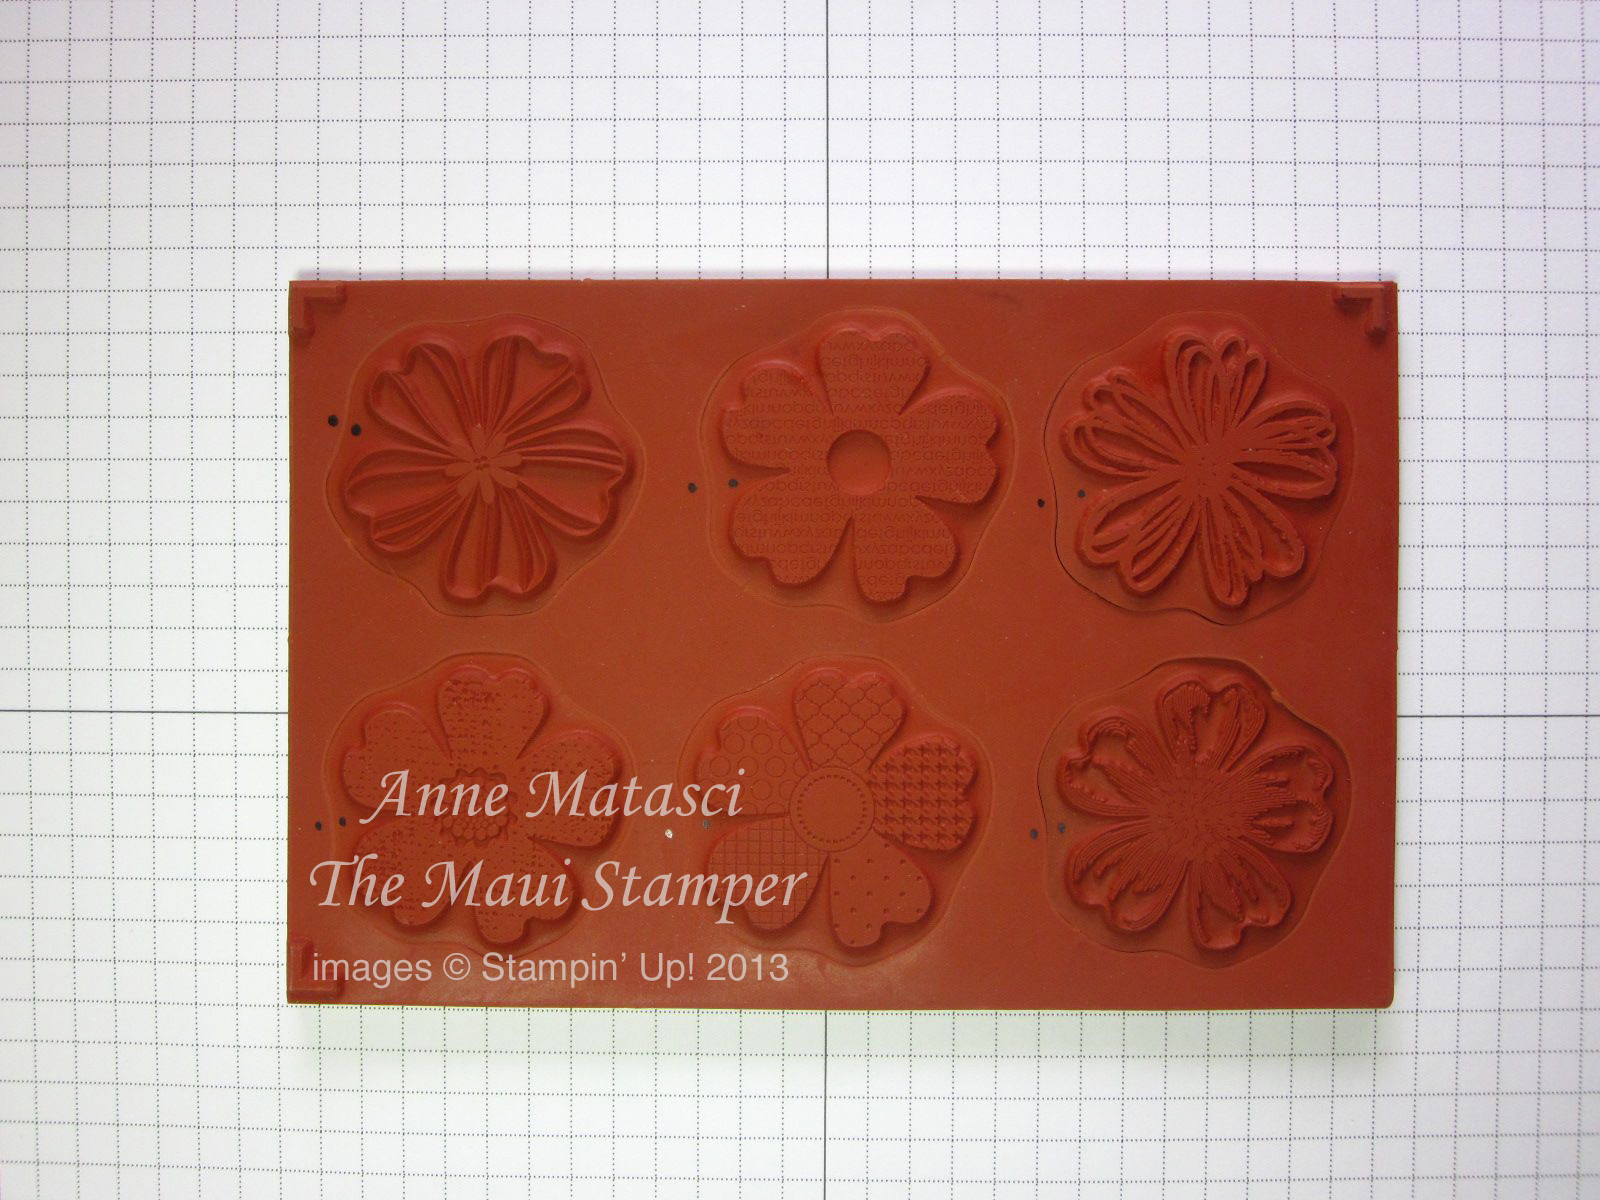 See those little black dots? We’re going to mark each image with a Sharpie. You’ll notice I’m storing my stamps inside the die cut negative rubber. I started doing that a while ago and find it keeps them from slipping unnoticed out of the case, especially when the stamps are small.
I began the process by putting dots on the stamps and the negative image just so I could line them up easily to put them back! Later on I realized the dots could help me line up the punch.
 If you happen to put the dot in the wrong place, never fear – it wipes off quite easily with Staz-on ink cleaner and a cotton swab. You can put the dots wherever you like, but this whole process will be much easier and go much more quickly if you put them in the same place on the flower that I did. (The easiest flowers to work with for that purpose is the one on the top left in the first photo or the one with the different patterns for each petal – you can see it peeking on the left side of the photo directly above.)
If you’ve already taken your stamps out of the negative rubber and discarded it, you can still make your dots. Just be sure they are in the same place on each stamp. Here’s a little tool to help you:
 Not very high tech, but it works! I keep this little “tool” in the box with my stamps for Senior Moments when I forget my system 🙂 Using the punched out image will allow you to quickly align all your Flower Shop images in the same position. Use it on the rubber side, not the sticker side. It will slip right over the rubber when it’s aligned correctly.
 I went ahead and marked the dot on the “sticker side” of my stamps as well so that I could see it through the clear block. That allows me to be sure a row of pansies are stamped in the same orientation each time if I want to punch out a whole bunch (oh, say 60 or so!) Be careful here – when you flip the stamp over, be sure you don’t reverse it and put the dot on the opposite side! Check the rubbah!
 Next step is to mark the punch. I’ve marked both the top and the bottom of the punch (go ahead, call me OCD or whatever other name you want. I’m used to it.) Again, use your paper template to line up the image, and keep in mind that top-side and bottom-side aren’t the same.
At this point you’ll want to check your work. Stamp a few flowers in a row, keeping the mark in the same position each time. My stamps are set up so that it’s easiest if I have the dot on the left side of the image as I stamp along the bottom edge of a strip of cardstock. There’s a little trial and error involved in how you orient the image, but it’s only a big deal if you’re punch a whole bunch of pansies.
One more little hint…I store my punches on their side in a pull-out drawer, so having the name of the punch on the side makes it much easier for me to choose the right one the first time! (Go ahead, say it – I’m a little label crazy.)
 Hope this helps! As I read through it, it seems about as clear as mud. Once you get started, it falls into place. Enjoy your Flower Shop!

Good to know. Just ordered this set!! Thank!!
LikeLike
You’re welcome – I hope my instructions make sense 🙂
LikeLike
Pingback: Best of…Greeting! | Card-ED
Pingback: Burlap texture | The Maui Stamper
I just found this post on Pinterest, and I wanted to pop in to let you know how much I appreciate this information. When you mentioned how you store your punches, a lightbulb went off in my head. I’ve been considering the purchase of a wall-mount unit, as I’ve maxed out my drawer space, but this may be the better (and free) solution! I’m heading upstairs now to see if the drawers in my current storage unit have the depth required for your approach. Fingers crossed!
LikeLike
Pingback: Fall Colors in the Flower Shop | The Maui Stamper