
The Greenery Lane bundle is so versatile, and today I’m experimenting with the gorgeous washi tape that compliments the Greenery Lane dies. Have a look!

- Stamps: Greenery Lane
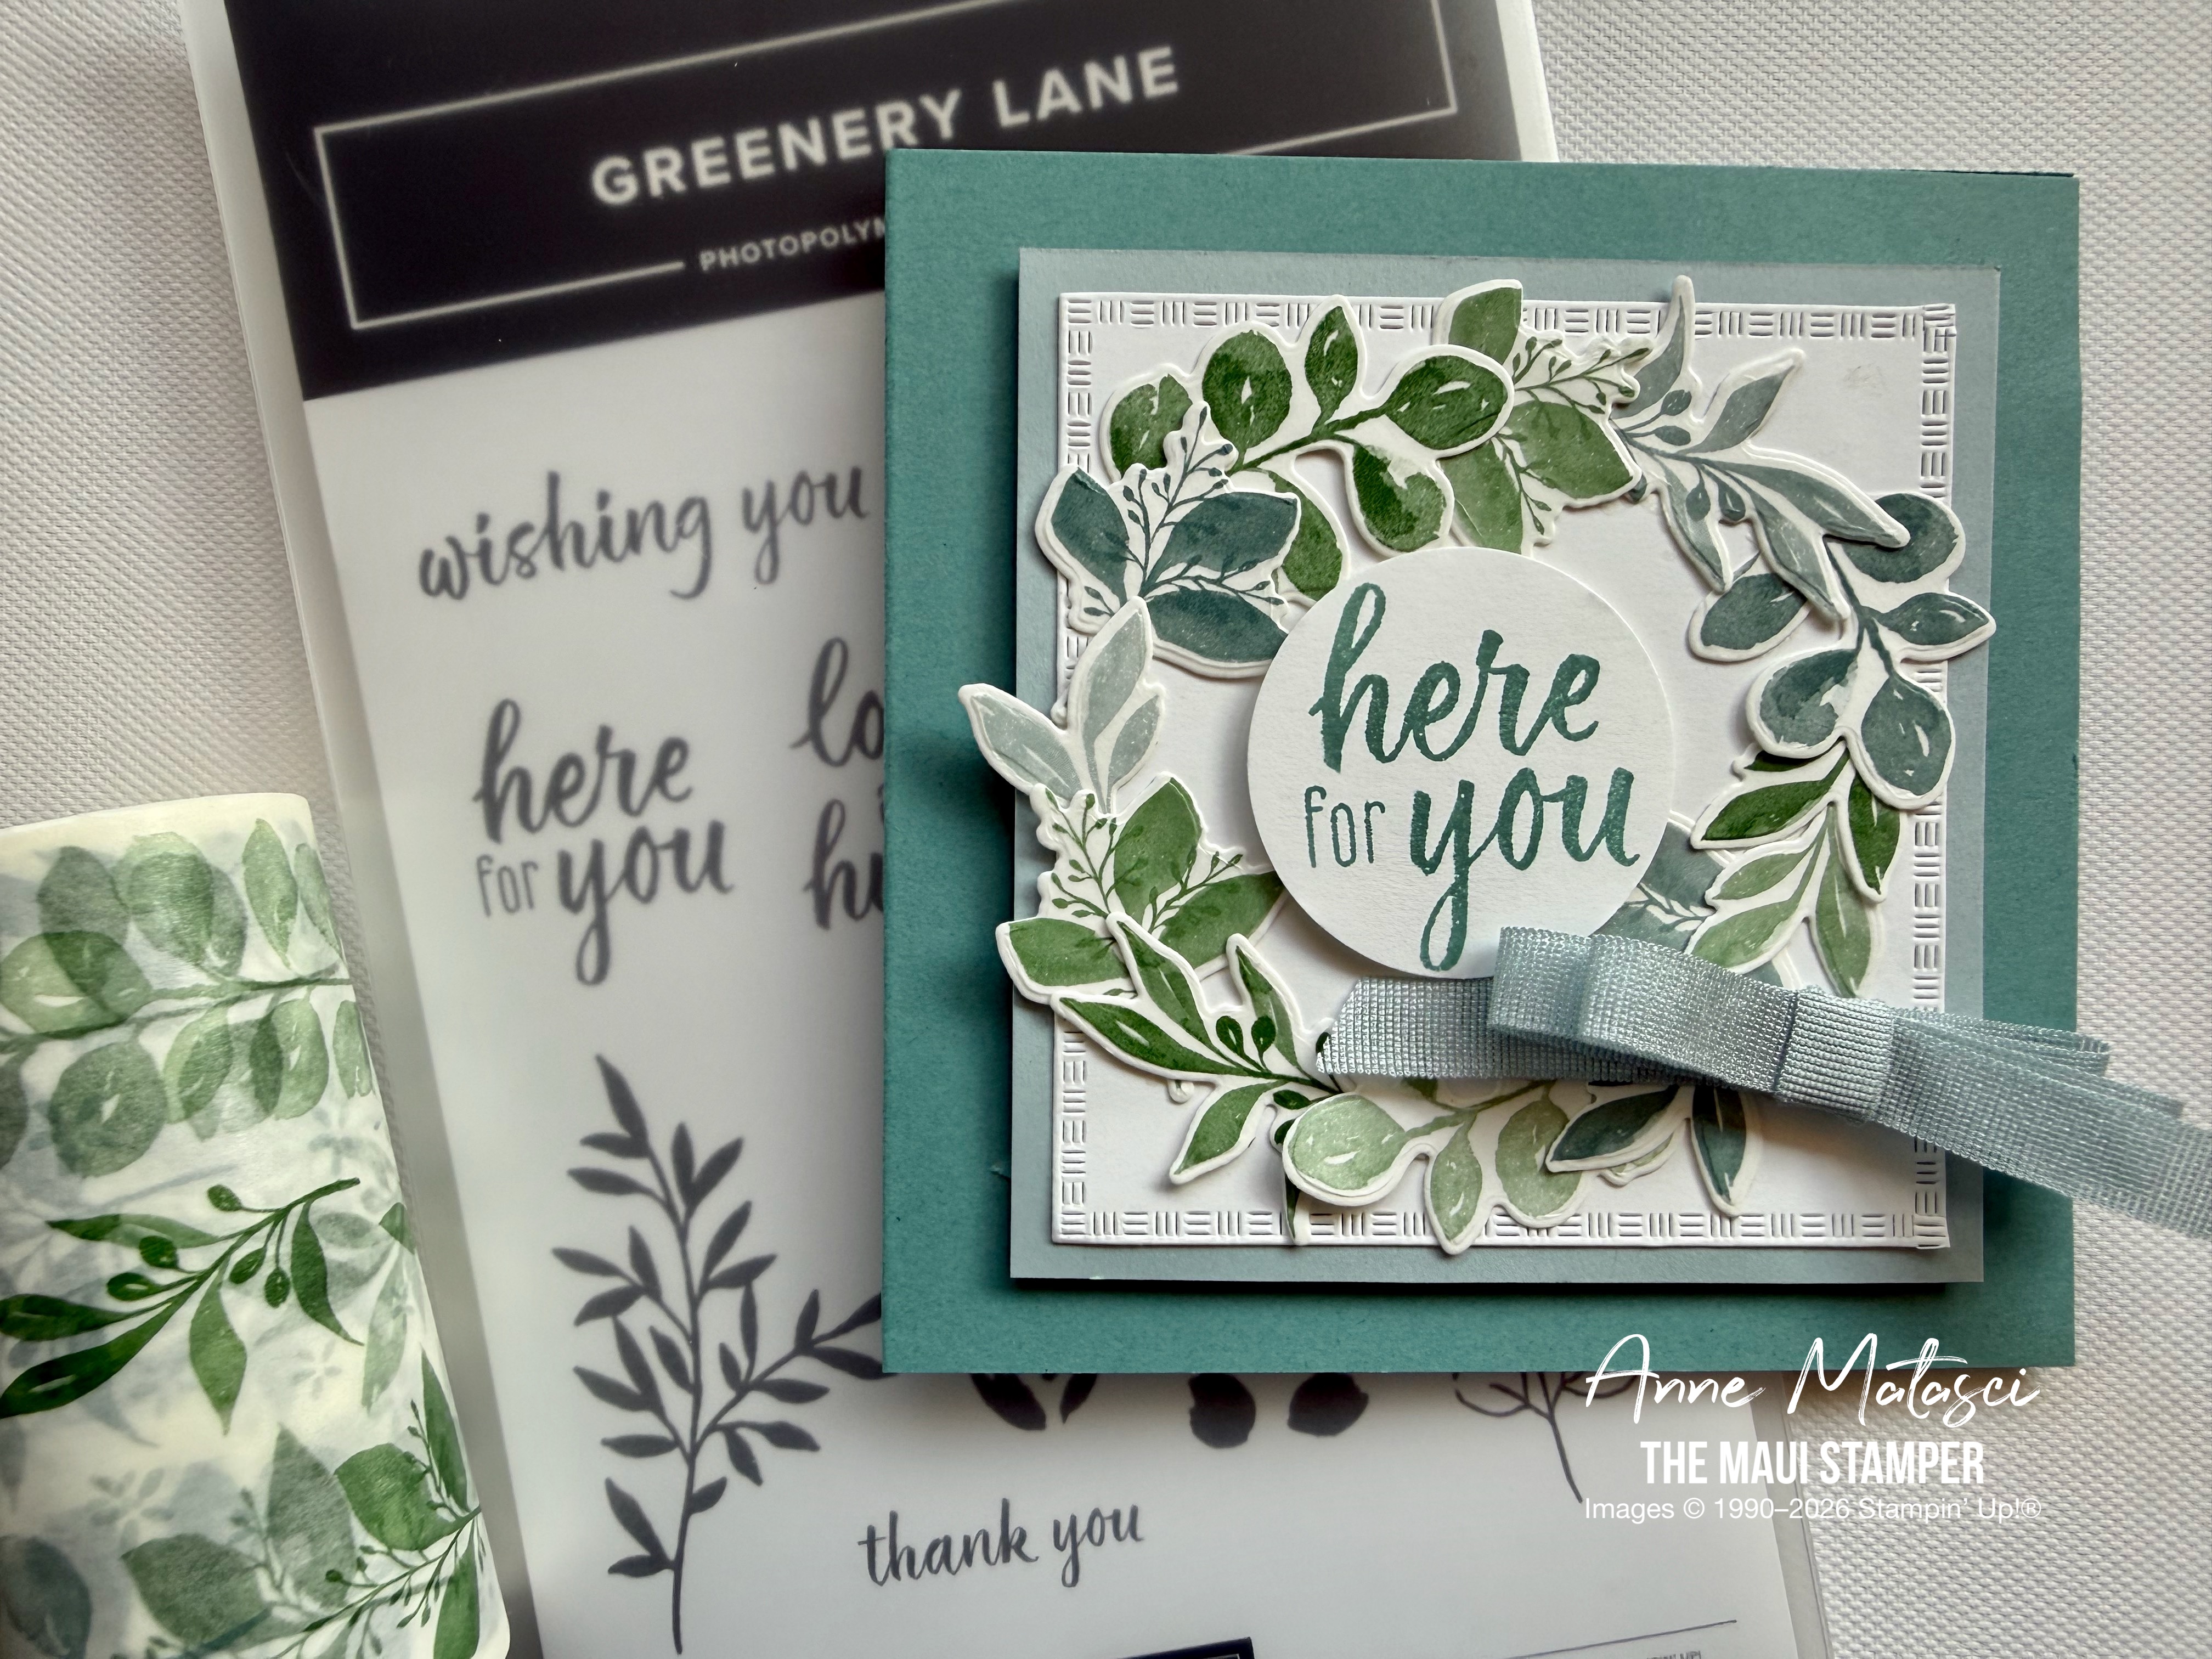
- Color Palette: Basic White, Lost Lagoon, Pretty Peacock, Cloud Cover
- Accessories: Stamp Cut & Emboss Machine, Textured Notes dies, Greenery Lane stamps and dies, Greenery Lane Washi Tape, Cloud Cover Faux Linen Ribbon, Circle Punch, Stampin’ Dimensionals

I adhered the Greenery Lane washi to Basic White card stock for stability and cutting ease. I like the softened look it gives, almost as if it were vellum. I cut a number of leaves somewhat randomly and played with them on the card base.
I’m currently in Australia visiting my daughter, her husband, and my brand new GORGEOUS grandson, Jarrah. As a result, I don’t have all the details on this project, but I’ll give it a go and if you have questions you can leave them in the comments. When I’m home at the end of the month I’ll sort it out.
This washi is gorgeous! I’ve set aside an extra roll just for putting on envelopes. It’s available now, as the January-April mini has been released in the US. Don’t forget the Product of the Month! It’s a super stamp set you’ll reach for again and again.
Have a look at what’s new in the Online Store – and don’t forget, Product of the Month is limited availability – don’t wait to get yours!


I’ve been asked to provide more details. I cut a 4″ wide strip of Basic White Card Stock and rolled the washi onto it. I used the 3 smaller leaf dies to cut out individual leaves, trimming the card stock (with washi attached) into smaller sections to make it easier.
The sentiment in the center is punched with the 1 1/2″ circle punch. The Cloud Cover Faux Linen ribbon is folded into a bow and secured with glue dots. An additional bit of ribbon is wrapped around the center to finish the bow, and the entire thing is adhered to the card front with more glue dots.
I used the largest Textured Note die (now retired) and double cut it to make a square. It’s 4″ wide. Begin by cutting the rectangle, then measure 4″ down the long side and place the top of the die across the 4″ point, leaving the rest of the die along the unnecessary part of the original die cut . When you put it through the die cut machine, it will cut off the bottom portion and leave the edge impression along the new square you’ve created.
The white panel is 4″ x 4″; the Cloud Cover panel is 4 1/2″ x 4 1/2″; the Lost Lagoon Card Base is 5″ x 5″.
Hope that helps!
Anne
LikeLike