February is upon us and January is in the rear view. I’m glad there will be an extra day in February this year, because I need it! (See previous post, lol.) Here’s to the turn of the calendar:
I wanted to use the embossed image technique for the Lilypad, but I wasn’t happy with what I was coming up with using the Blender pens, the Aqua painter, or the Stampin’ Blends, so I pulled out the actual, bona fide, genuine article – the paintbrush.
I’m not trained by any stretch of the imagination, so this was absolutely trial and error, but I had a great time and I’m happy with the results so I count it for a win! A little Wink of Stella gives it a little shine.
Do you make your own DIY Calendar? It’s quick and easy, and so gratifying to see on your craft desk every month. Click on “Contact the Maui Stamper” above if you’d like to purchase your own calendar – I sell the pdf for just $5 so you can make as many as you like.
Stop by to see what Crystal and Cheryl are doing for February. And if you’re ready to shop, visit the Online Store!
I’ve neglected the Maui Stamper all month, and sorry, but I’m not sorry. Our family celebrated a wedding last weekend and the past few weeks have been abundant with love and joy. The last of the family is headed back to the mainland today, and I am trying my best to re-enter my version of the real world.
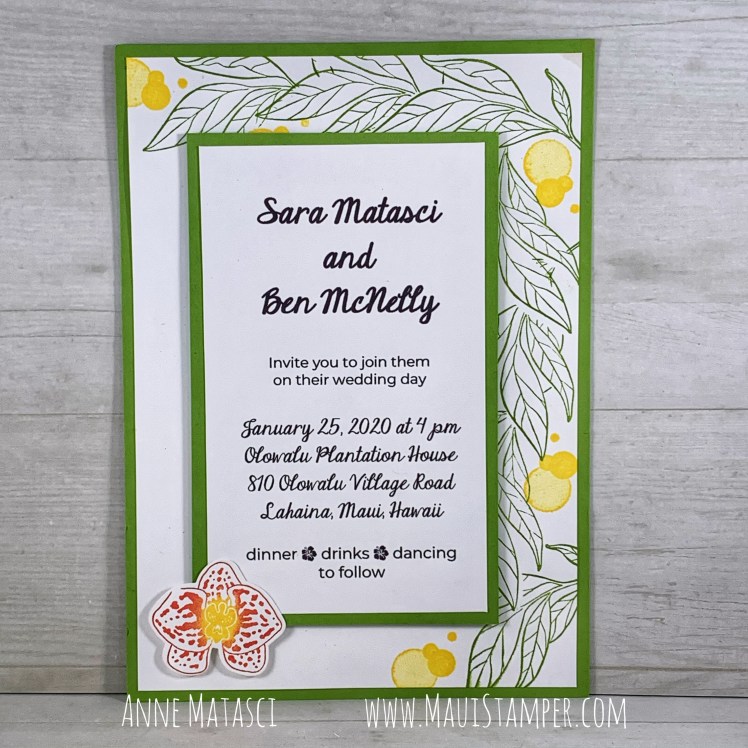
Let’s go back to the beginning – at least the Maui Stamper beginning! Here’s the Save-the-Date I collaboratively created for my daughter Sara and her fiancé Ben:
I’m not going to tell you how many of these I made, but I will tell you that my die cutting machine and my dies may never be the same and my fingers were WORN OUT. But it was worth it – I loved how they turned out, and so did Sara and Ben.
In both cases I printed the text onto Whisper White card stock, formatting with Microsoft Publisher. There was an additional card included with the invitation with a few more details, and it was cut to to the size of the interior panel. The Save-the-Date measures 4 1/4″ x 5 1/2″ and the Invitation is 5″ x 7″. We ordered yellow envelopes that coordinated well, since Stampin’ Up! doesn’t sell that size.
I sent Sara and Ben a sample of EVERY color of Stampin’ Up! card stock, as well as some samples of embellishments and embossing folders. Most of our design work was done via text and photo, with a couple of FaceTime sessions as we narrowed things down. It was such an enjoyable process, and an honor for me to make the invitations.
Fast forward to last weekend:
The ceremony was at Olowalu Plantation House, and despite some iffy weather earlier in January, the day was spectacularly gorgeous. Everything went smoothly, and the whales provided a nice touch as they spouted, breached, and showed their tales all afternoon. The flowers were amazing, done by Dellables and of exceptional quality. Look at the bride’s bouquet three days AFTER the ceremony:
There are advantages to being Mother of the Bride at a destination wedding – Mr. Maui Stamper and I brought home a lot of beautiful flowers!
Speaking of The Mister, he’s a craftsman in his own right. He created an extraordinary marker for the event: a redwood sign with the home town and distance of every wedding guest on arrows:
That’s the beautiful Maid of Honor, our oldest daughter Carol, with her wonderful partner, Shanti. There are more home towns and distances on the other side of the sign, and as an engineer, Mr. Maui Stamper made sure that each arrow pointed correctly towards its destination (within 22°). He also made quite precise measurements, and used the appropriate unit of measurement for the country. This sign was a big attraction!
A late addition to the décor was a set of table numbers and escort cards to help the guests find their seats. There wasn’t a set seating chart, but guests were grouped at their tables so that family and friends would be able to sit together.
I can’t say enough about White Orchid Weddings and my dear friend, Jackie Ishikawa. I’ve known her since our kids were in grade school together, and when it came time to find a wedding coordinator there was no question about who to ask. Jackie did a fabulous job of guiding Sara and Ben through the process, and made sure that on the day of the celebration we were all guests at the party!
The bride and groom kicked off the festivities and the celebration was one to remember. My family is spread across the globe, and having an occasion like this to gather made my heart sing.
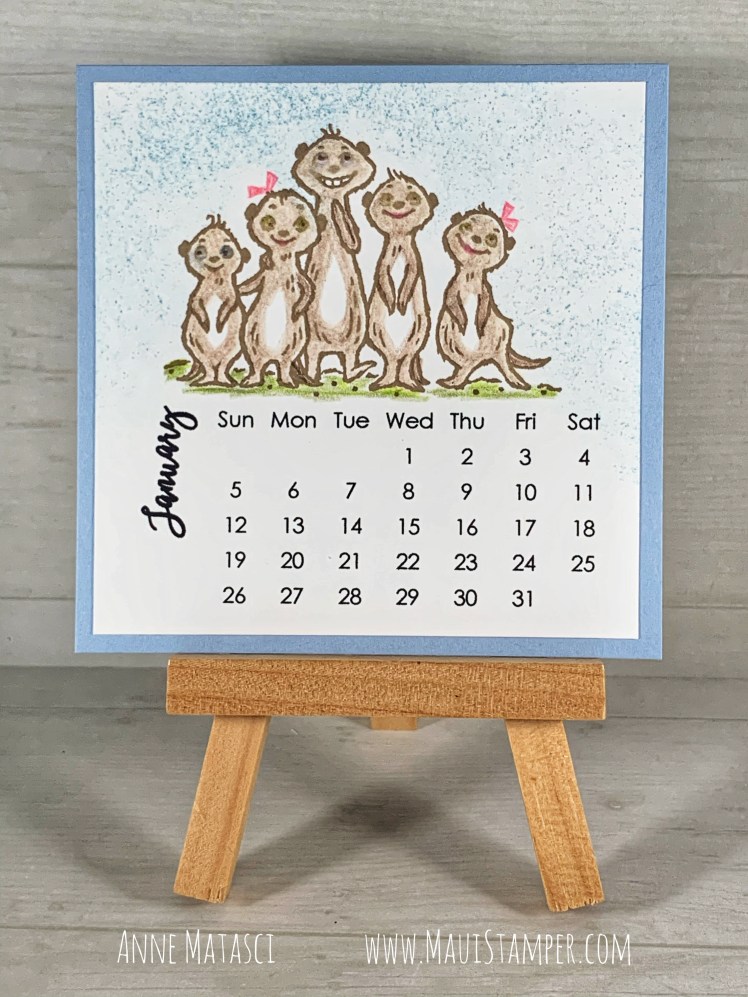
Happy New Year! January First is the original fresh start, new leaf turned over, time to renew…you’ve heard them all. It’s also 2 days before Sale-a-bration 2020, and I think it’s safe to say that The Gang’s All Meer will be a huge favorite.
Stamps: The Gang’s All Meer (SAB 2020)
Color Palette: Whisper White, Crumb Cake, Seaside Spray, Flirty Flamingo, Early Espresso, Granny Apple Green, Garden Green
I used our Watercolor Pencils to color the image and softened the lines with the Blender Pen. I took the liberty of adding hair-bows to a couple of the ‘cats and even added a little color on lips and eyes.
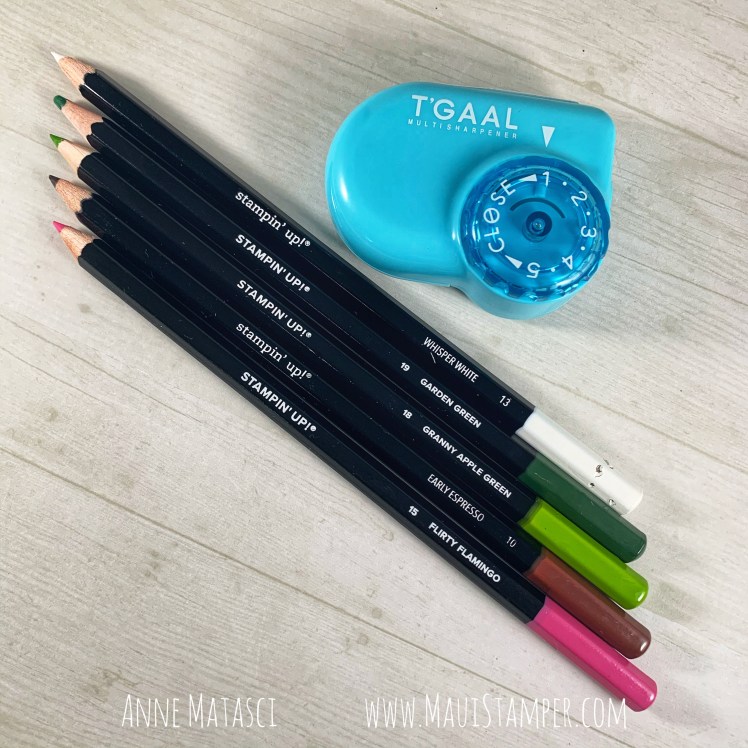
I was able to add those fine details because I found a LIFE CHANGING pencil sharpener. Really. This tool has a little dial on the front, and you can have it make your pencil super-dee-duper sharp or wider and softer for coloring. Life changing, I tell you!
It comes in turquoise or pink or black (ho hum) and you can even get a two-pack. I got mine on Amazon.
The 2020 DIY Calendar PDF is still available and it’s just $5. Please click Contact the Maui Stamper above and message me your email (we’re all a lot less likely to be spammed if I do it this way).
Crystal and Cheryl are sharing their calendars again this year – stop by to see how they’re kicking off 2020.
And of course, if you need supplies, check out the Online Store. The Holiday Catalog will be finished, kaput, complete at close of business Mountain TIme on January 2nd.
Tomorrow – NEWS FLASH – is January 1st and there will be a new DIY Calendar to begin the year. As I planned that project, I took some time to reflect on 2019 and I thought you might enjoy seeing all 12 months. Click on the month and it will take you to the page with all the details.
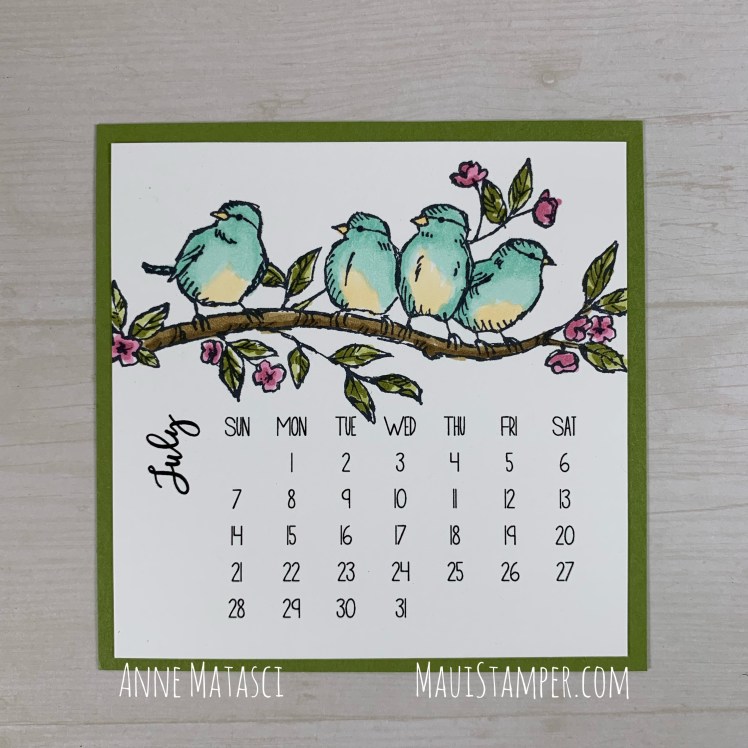
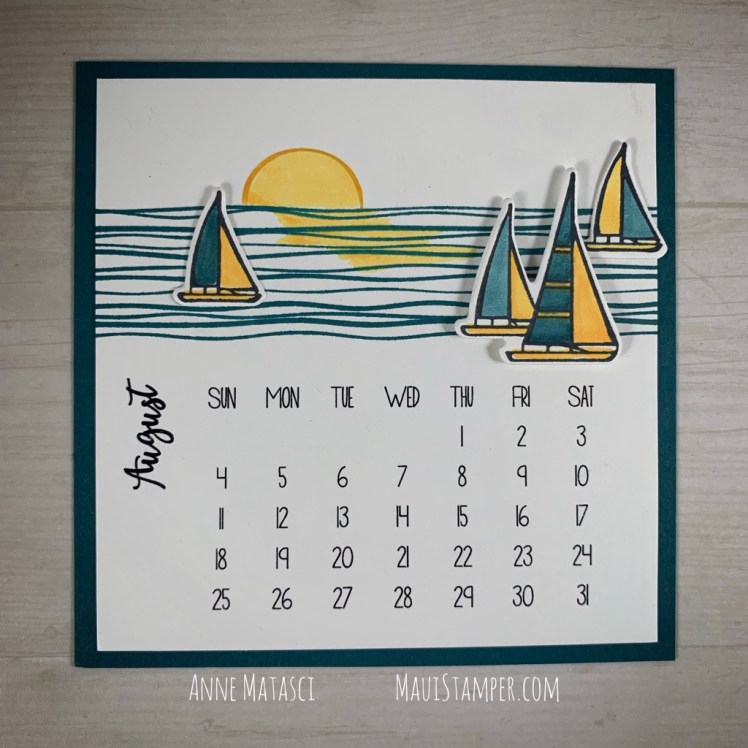
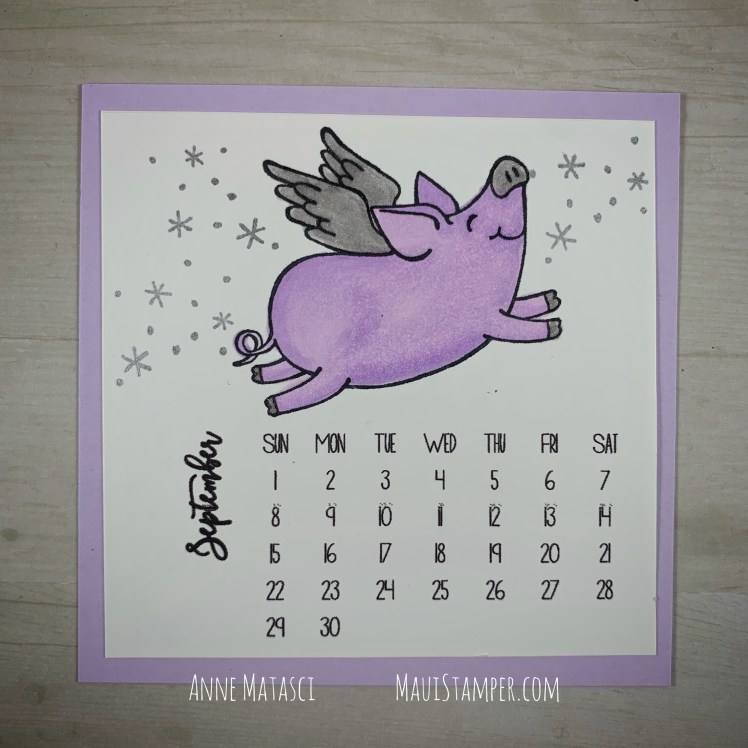
Kind of fun to look back, isn’t it? I have such a great time with these little pages, precisely because they’re small. I couldn’t pick a favorite if I tried, but it’s clear I like birds and flowers!
You can make your own DIY Calendar for 2020! The PDF is just $5 and if you click on Contact the Maui Stamper above and send me your email, we’ll get you set up in a jiffy.
Be safe tonight! I’ll be back tomorrow with – you guessed it – the first 2020 DIY Easel Calendar!
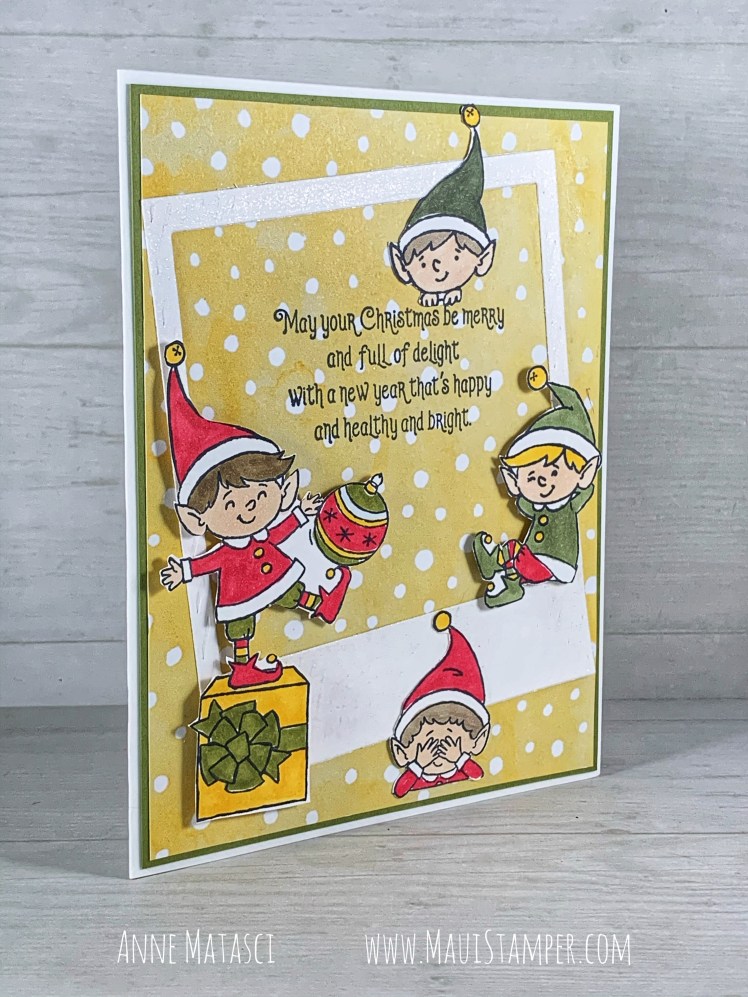
I may have finally crossed the line into Crafty Craziness. I was inspired by a card in a private demonstrator group, which was fine, but then I decided to make multiples. You’ll see:
There’s a LOT of coloring and an absolutely RIDICULOUS amount of fussy cutting in this card. I don’t think I would make this many again (I made more than 10, less than 20).
But it sure is cute! I’m smitten with these elves, and I know their time is almost up. Stampin’ Up! has had versions of elves for the last 3 or 4 holiday catalogs, and they never carry over so I’m not expecting to see #Elfie after Thursday.
That said, if you want an #Elfie of your own, you’d better skedaddle on over to the Online Store and order one ASAP. You’ve got until close of business Mountain Time on January 2, 2020.
Hear me out now, before you start shouting at me! I love cookies as much as the next girl but this time of year they seem to be lurking around every corner, and it gets dangerous. One of my host clubs exchanged tags every year instead, and it’s such fun!
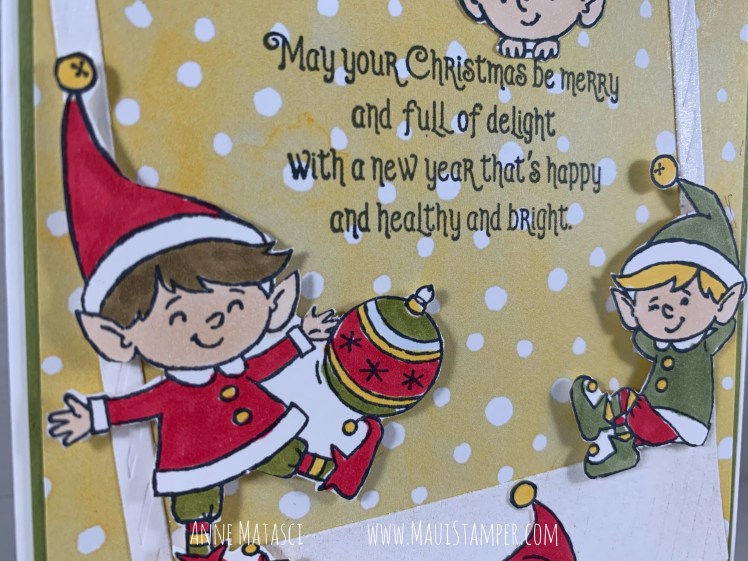
Stamps: #Elfie
Color Palette, Whisper White, Basic Black, Real Red, Shaded Spruce, Daffodil Delight, soft Suede, Ivory Seaside Spray, Rococco Rose
The puff paint is amazing! It’s a quick way to add some fun texture. Be sure to let it puff up all the way, and then I find it’s more durable if you let it sit for half an hour or so before touching or stacking it. I make it the last step and then set the tags aside to “cure”. Watch this video for more: https://s.tamp.in/yo-AGL
A dozen of these went together really quickly – but you need to enjoy coloring. I didn’t do any shadowing because it’s such a small image.
To create a little blush in #Elfie’s cheeks, I dabbed a dot of Rococco Rose Blends and then blurred it with the color lifter. Do this BEFORE you add the skin tone (I used ivory) or you’ll see a funny circle.
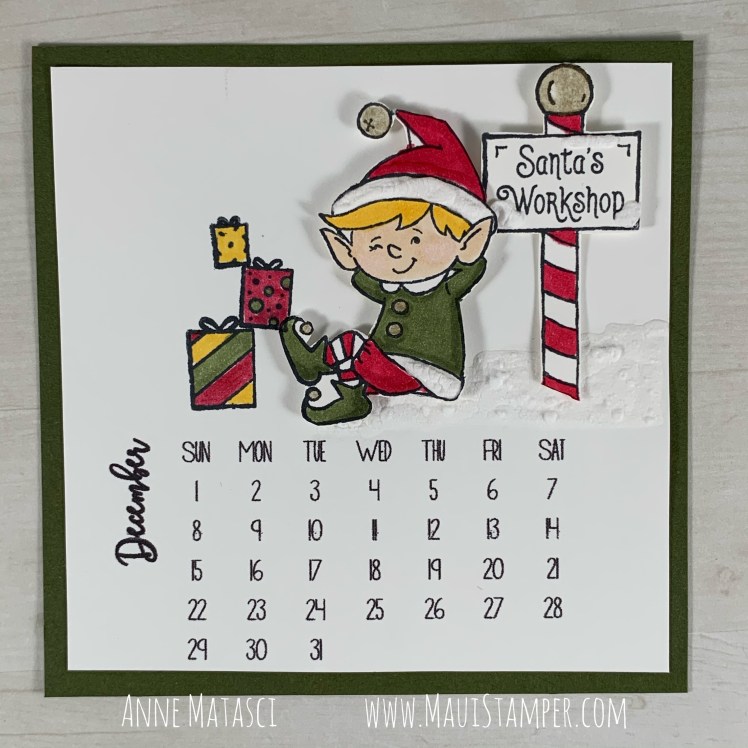
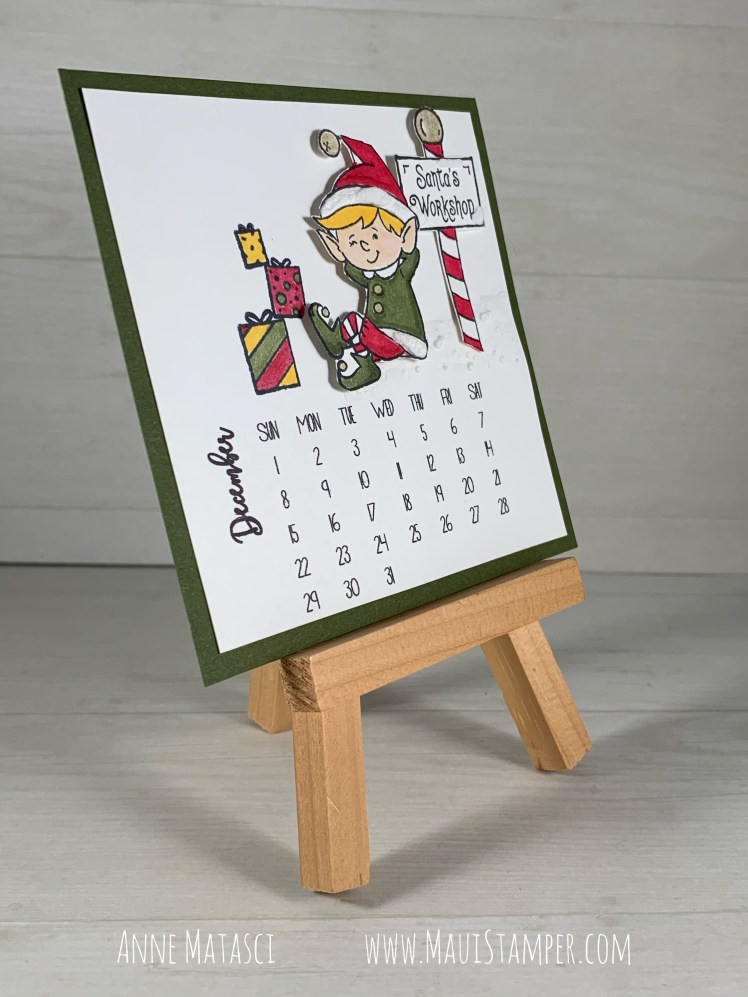
I went a little over-the-top with the Snowfall Accents Puff Paint. Well, actually, I went over-the-top with the Paper Snips, too. In the stamped image, #Elfie is leaning against the bottom of the signpost, but that makes the image too tall for a little calendar! I REALLY wanted to use this image, so out came the snips and I disassembled the whole business.
When I figured out how to settle him into a snowbank with the post popping out I was pretty pleased with myself. But…it looked a little empty. Maybe it was just lop-sided, but it needed something. That’s when I dug into my retired stash for the set from last year. It’s just the packages, and I could have probably hand-drawn them…HA. Imagine how successful that would have been!
This turned out just the way I imagined it, which is quite a feat. If you’re imagining your own set of DIY Easel Calendars for 2020, there’s still time to purchase the PDF! It’s just $5 and you can print your own set of months to play with all year long. Click Contact the Maui Stamper above and give me your email, and I’ll send you an invoice.
Be sure and stop by to see what Cheryl and Crystal have crafted for your inspiration this month! Happy December!
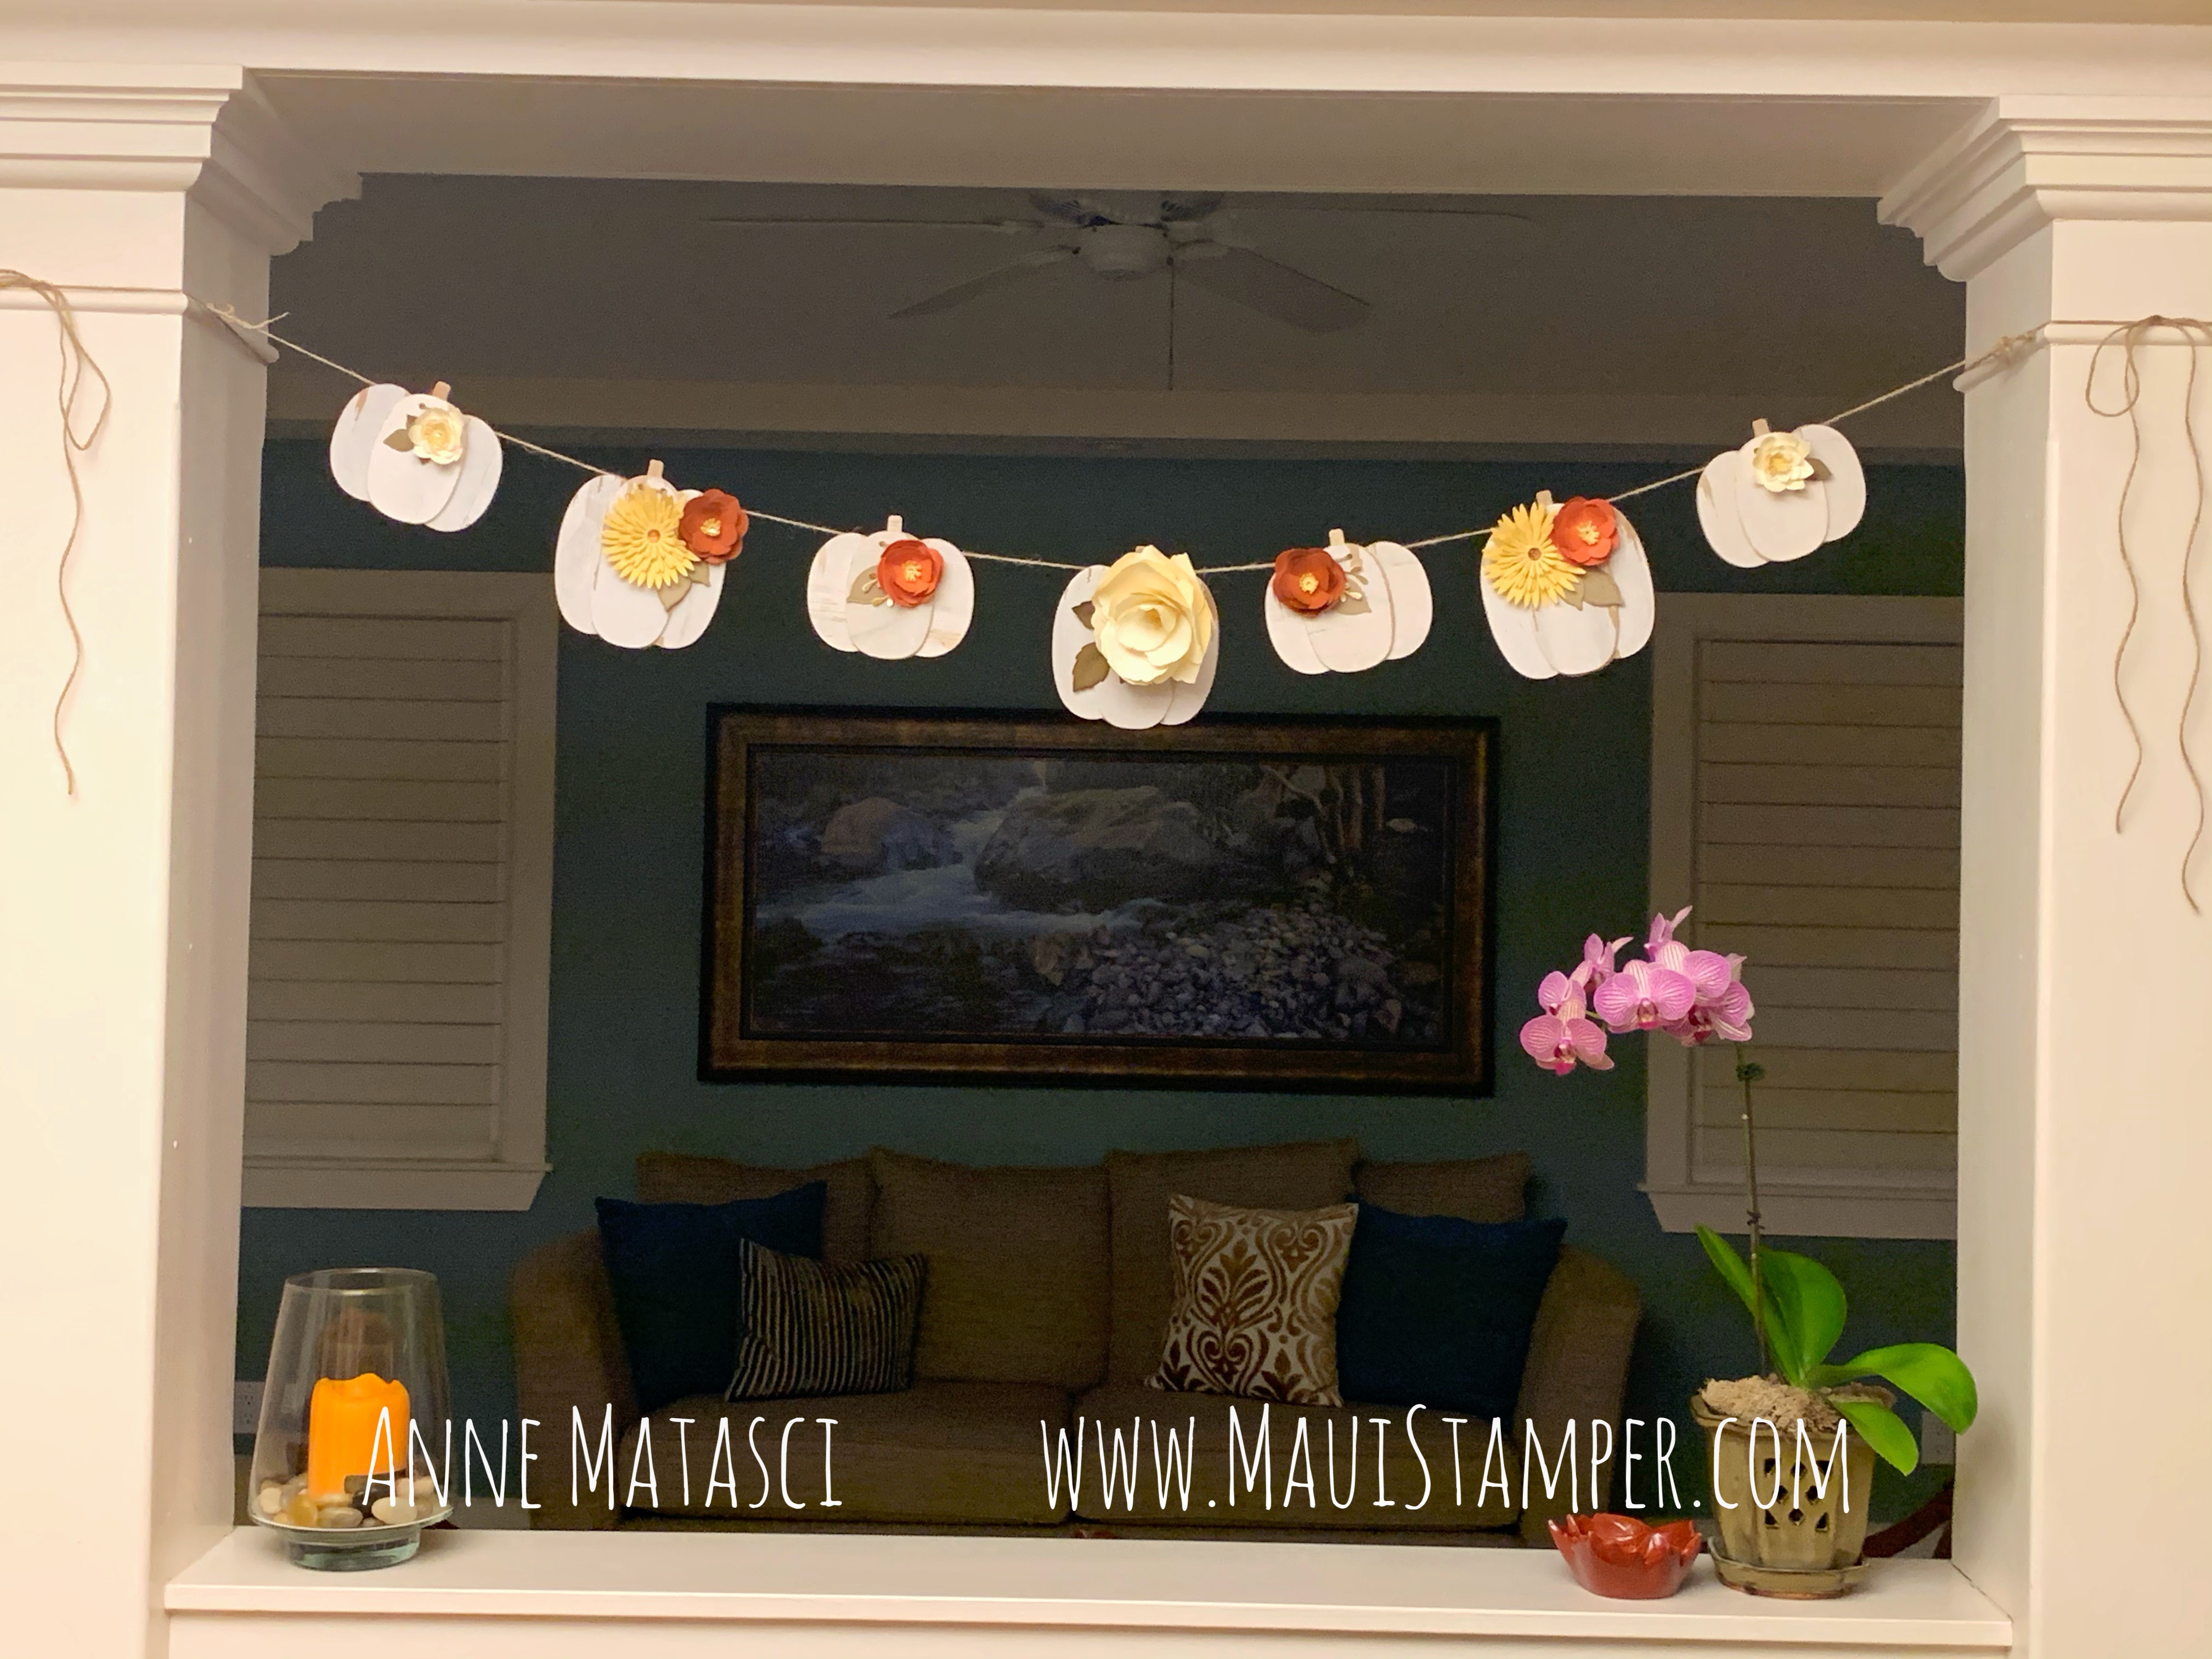
I don’t do a lot of fall decorating since fall in Hawaii doesn’t match up well with traditional decor, but I couldn’t resist this little pumpkin banner from the Dollar Spot at Target.
I know. It looks a little funny with that orchid there. I think that just serves to emphasize my point!
These little wooden pumpkins are perfect for embellishing with paper flowers. I pulled out a variety of retired and even not-Stampin’-Up! dies to do the job.
This is a Sizzix did but it wasn’t in our catalog. It’s actually kind of oversized for this project, but shoot, go big or go home, right? I did use the flower from the Magnolia die and was very happy with that result.
Sometimes it’s just fun to work outside the box, and that’s what I did with this project. I hope you enjoy!
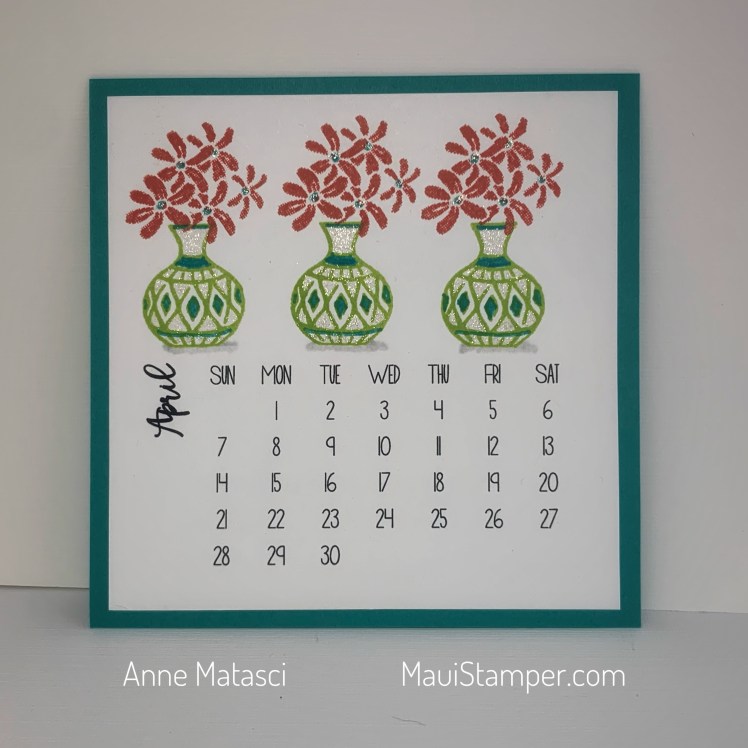
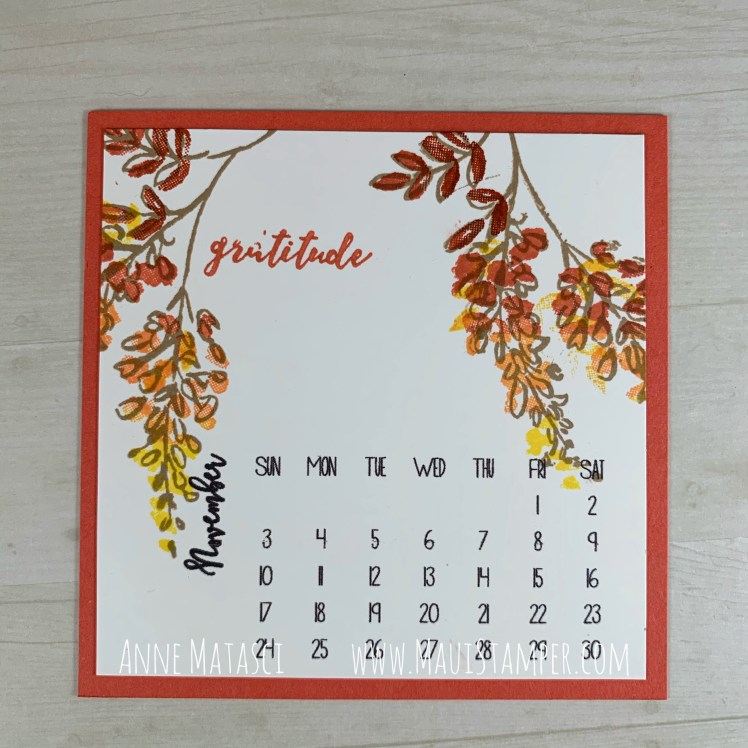
My thoughts are increasingly focused on being grateful, and this time of year the focus intensifies. It’s not just the Thanksgiving holiday in the United States, but the approaching holiday season that causes me to dive into thankfulness. My November 2019 calendar is born out of this focus and will maintain it as well:
I like to play with words, and using the Soft Spring Host set for an Autumn themed calendar page makes me smile. First of all, I think it works quite well! It doesn’t represent any particular flower (at least not one I know) but it represents the feeling of Fall because of the colors I chose. Secondly, it’s Spring now in the Southern Hemisphere, and since my daughter lives there I’m more aware of that juxtaposition.
My technique was super simple. I inked the outline image in Crumb Cake and stamped it on the calendar. I inked the floral fill image completely in Pineapple Punch, then about 75% in Grapefruit Grove, about 50% in Terracotta Tile, and finally added Cajun Craze to the top 25%. I didn’t wipe off previous colors – they’re all piled on top of each other!
If you’d like to make your own 2020 DIY Easel calendar, I’m selling the PDF for $5. Just click on Contact the Maui Stamper above and message me your email address. I’ll get an invoice out to you, and as soon as it’s paid, I’ll email the file including the cover page and a set of cutting instructions. You’ll be on your way!
I also have a Pinterest Board with literally years of these pages for your inspirational enjoyment. Crystal and Cheryl have created their own version of the November 2019 calendar, so be sure to visit them too.
Host stamp sets are a bit of an under-appreciated category in the catalog. They’re a great value, because they’re priced below market. The catch is that you have to use Host Rewards to purchase them, but those begin to accrue when your order or workshop reaches $150. You can start shopping the Online Store, or contact me about hosting an event of your own, either in person or online. Crafting is a lot more fun with a friend!