Quick and easy tags – and a Reunion Story

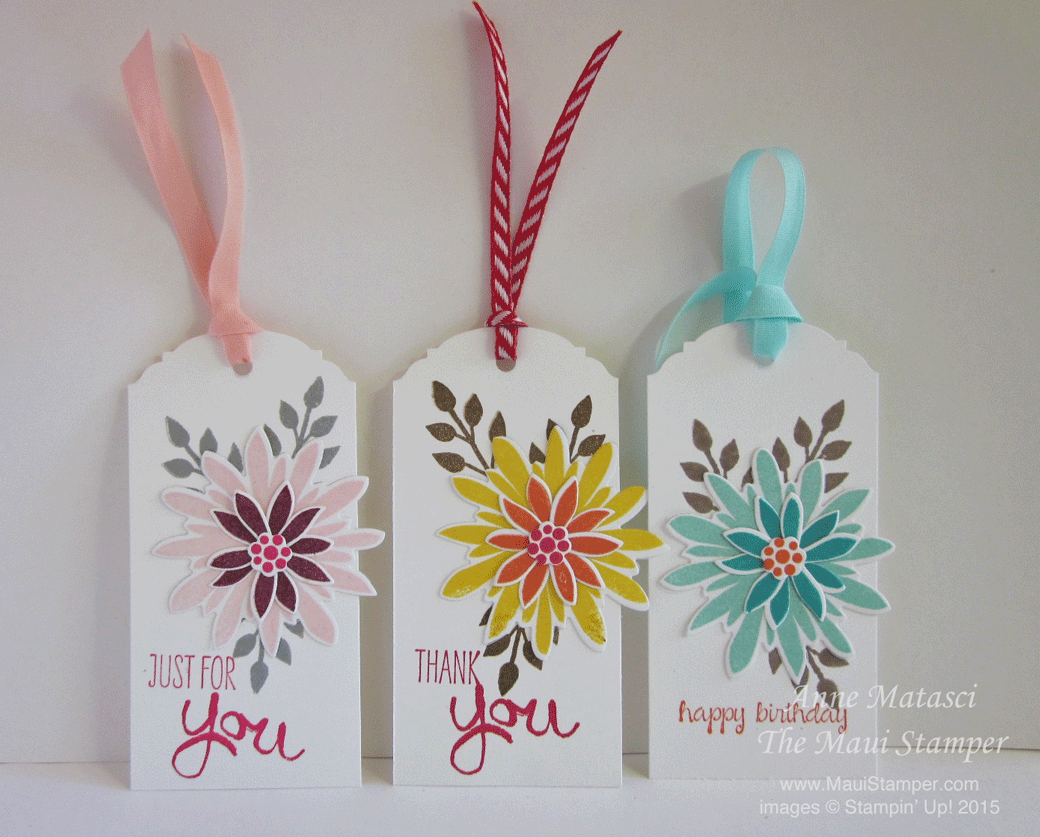
Last weekend I made a whirlwind trip to attend my high school reunion.  I took goodie bags for the people who made it happen – and they worked very hard!  Before I left, I made up some simple tags for the bags:

Maui Stamper Simple Thank You Tag

  • Stamps:  Wild About Flowers, Gorgeous Grunge, Tin of Cards
  • Color Palette:  Whisper White, Soft Suede, Basic Black, Real Red, Blushing Bride, Daffodil Delight
  • Accessories:  Scalloped Tag Topper Punch, Stamp n’ Write Marker, corner rounder punch

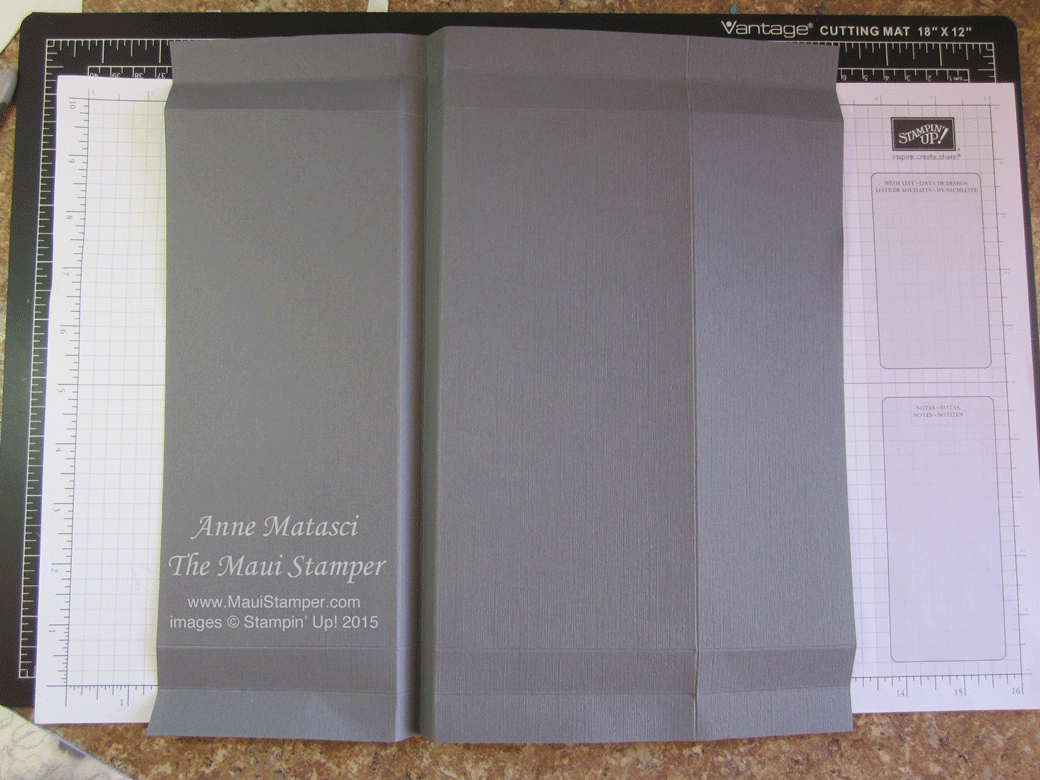
A hand-made tag is a lovely personal touch and I made 10 of these in about 15 minutes – you can’t get much quicker than that!  I cut our new heavy-weight Whisper White card stock into 2″ x 8 1/2″ strips and punched the each end with the Tag Topper, then cut them in half and rounded the opposite corners.  Stamp, stamp, stamp and done!

Maui Stamper Simple Thank You TagLast week I shared THESE tags, and they were quick too.

My trip, while insanely fast, was well worthwhile.  I got to spend time with my parents, which is always special.  My sister and her family joined us on Friday night for drinks (my niece has just turned 21) and then dinner.  I got to spend time with a dear friend from high school.  And I reconnected with people I knew, and built new relationships with people I barely knew.

Maui Stamper with Sally at reunionSally and I were friends in high school, college frosh roomies, and then went our separate ways for about 35 years.  A year or so ago, she tracked me down and we picked up where we left off.  If she hadn’t messaged me to say that she was coming to reunion and I should too, I wouldn’t have attended.  Lesson one:  reach out to old friends.

Lesson two:  EVERYONE feels nervous about attending reunion.  I talked to a lot of different classmates, and it seemed we all felt the same apprehension as we approached the event.  And yet, as we shared our stories, we laughed and agreed that we were so happy we’d made the effort.

I talked to people with whom I’d had classes or been in clubs together or shared a summer job.  And I also talked to people that I’m pretty sure were never on my radar in high school.  But I enjoyed renewing old relationships and especially developing new ones, and that made the trip worthwhile.  Lesson three:  The people you most enjoy speaking with may not be the people you thought you were coming to see.

Sally is escorting her youngest to college this weekend – it will be a bittersweet time for them both.  I’m home, slightly reeling from traveling over 5,000 miles in a weekend.  And we are both the better for the adventure.  And still crazy after all these years.

The Maui Stamper with Sally at our high school reunion


Punching out the Angry Birds

Recently, one of my regular stampers requested projects for kids.  I looked at what I had on my shelf and found stamps suitable for feminine or baby cards, but not really for KIDS.

Off to Pinterest, the Black Hole of the Internet!

PinterestSaladInJars

I found some great ideas and they weren’t even in mason jars!! Score.

Maui Stamper Angry Birds Punch Art Treat Bag

This was inspired by THIS great card, and I CASED it pretty liberally.  The Red Bird is punched from the 1 3/4″ circle, and the Yellow Bird is the old style Heart Punch.  I think you could get that shape using a square and a corner rounder.AngryBirds2

The white body portions are 1 3/4″ circles punched twice.  The orange beak is the Itty Bitty Heart (trimmed) and the head and tail feathers are from the retired Boho punch.  I think you could get the same look from the Flower Fair framelits.

AngryBirds3

The eyebrows are the end of the stem from the bird punch.  The birds aren’t angry until you add those eyebrows, so work them!!  The eyes are from the Owl punch, and I used the 1″ square for the yellow beak.

The Word Window and the Woodgrain TIEF make up the slingshot, and the linen thread finishes it off.  I trimmed a strip of Garden Green with Fringe Scissors, and the embellishment at the top is from Amazing Birthday.  We had to stamp SOMETHING!

These are last year’s bags – the current bags are plain, so you could even add some clouds as Sarah-Jane Rae did to her card.

Everyone loved the end result – but we agreed that these birds take a lot of little pieces!

Check out the RemARKable Bundles!

Welcome to the RemARKable Blog tour – this month, it’s all about bundles!

There are heaps of great bundles in the Annual Catalog, and I chose to focus on the Flower Patch stamps and framelits.  I don’t know about you, but when I create a card with a set like this I often have a lot of little pieces left over.  I pulled out those pieces to see what I could do:

Maui Stamper Flower Patch Tags RemARKable BundlesI ALWAYS need tags, and 9 times out of 10, I need a tag AT THE LAST MINUTE.  Can you relate?

As I worked on color combinations for these tags, it occurred to me that the best thing to do would be to make a lot of pieces, mix and match them to form pleasing combinations, and put them together to create a little stash for myself.

Maui Stamper Flower Patch Tags RemARKable Bundles

If I weren’t sharing these with you today, I would have left them without a sentiment.  That way, I could add the exact phrase I needed when I was looking for a last minute tag.

Maui Stamper Flower Patch Tags RemARKable Bundles

  • Stamps:  Flower Patch, And Many More, and Work of Art
  • Color Palette:  Whisper White with Daffodil Delight, Tangerine Tango, Real Red and Soft Suede; Blushing Bride, Rich Razzleberry, Melon Mambo and Smokey Slate; and Pool Party, Bermuda Bay, Tangerine Tango and Tip Top Taupe.
  • Accessories:  Flower Fair Framelits; Ornate Tag Topper Punch; Blushing Bride and Pool Party 1/4″ cotton ribbon; 1/8″ striped ribbon (sneak peek from Holiday catalog)

If you’re like me, you have lots of bits and pieces all over your crafting desktop.  Grab a Tag Topper punch and craft up some tags!

Maui Stamper Flower Patch Tags RemARKable Bundles

Next stop on the tour is Heather Mathiason – enjoy her great projects!


BundleTourIcon15-08Nancy Amato – http://stampinallnight.blogspot.com/2015/08/remarkable-stampers-blog-tour-bundle-up.html

Melissa Bolinger – http://creativeblessingsbymissy.blogspot.com/2015/08/remarkable-blog-tour-watercolor-wings.html

Tamra Davis –  http://www.thecardladies.com/remarkable-blog-hop-ready-for-fall/

Anne Matasci – http://wp.me/pCcBw-1Vk   YOU ARE HERE!!!

Heather Mathieson – https://inkyladybug.wordpress.com/?p=187

Audra Monk –
http://thecraftyyogi.blogspot.com/2015/08/remarkable-blog-hop-any-choice-bundle.html

Maria Pane -http://stampinandscrappinwithriri.blogspot.com/2015/08/remarkable-blog-tour-su-bundles.html

Michele Reynolds – http://inspirationink.typepad.com/inspiration-ink/2015/08/bundle-blog-tour.html

Pam Staples – http://wp.me/p3p2VA-14W

Janet Wakeland – http://wp.me/pHIQD-7m8

Stars for a star-swept couple

My niece was married in May, and I was delighted that she asked for my help with the favors for her wedding.  Their theme was Starry Starry Night, and they carried it out beautifully.  She had wine charms for her favors, and late one night we texted back and forth a dozen times until we came up with a plan:

Maui Stamper Starry Starry Night FavorsI’ve done enough mass production to know that you have to break it up into smaller tasks. I want to enjoy the process, and production isn’t my favorite thing to do.  It’s a gift that I can give, and I want to give it joyfully!

Maui Stamper Starry Starry Night FavorsThe first thing that I did was borrow another set of Star Framelits so that I would have two.  By carefully planning and cutting the card stock into strips, I could cut eight stars at a time…two pieces of card stock at time.  It’s not the recommended procedure, but if your shape is simple enough it works!  Having 2 sets meant I could put 4 framelits through at a time.

Maui Stamper Starry Starry Night FavorsI’ve also learned to work in stacks.  It helps me to keep track of my progress, and also helps avoid the inevitable shortage of one piece or another.

Maui Stamper Starry Starry Night Favors

Tools help too!  The piercing mat was a lifesaver 🙂  The stars are Night of Navy and Soft Suede, and I stamped one side with a star pattern from a retired Project Life set called Point and Click.  The other side had their names and wedding date printed – I confess that was mostly by trial and error using MS Word.  Print first, cut with framelits second!

Maui Stamper Starry Starry Night FavorsIt was a great feeling to get them all finished and ready to send off.  I confess that putting them in a Priority Mail package and sending them off across the ocean made me feel a little nervous, and I was quite happy to get that arrival email!  The Post Office has been good to me, and I am a big fan.

Maui Stamper Starry Starry Night Favors

We used to carry a fabulous product called Champagne Mist Shimmer paint, and I have a stash of it that I keep for very special projects.  Every star was sprayed front and back with Shimmer Spray, and it was a perfect finishing touch.

Finally, my card for the happy couple carried out the theme too:

Maui Stamper Shine Like Stars

The entire event was a glorious celebration of love, commitment and family.  Congratulations and many happy years together, Liz and Mark!


August Already??

What’s happened to our summer?? It’s hard to believe we’ve arrived at August FIRST!

Maui Stamper August 2015 DIY Easel Calendar

  • Stamps:  An Open Heart, Gorgeous Grunge
  • Color Palette:  Pool Party, Soft Suede, Crumb Cake, So Saffron
  • Accessories:  Aquapainter, sticky-note mask

I’m back to my birds…Stampin’ Up! just can’t make enough bird images in my opinion!  I love the size and detail of this one from An Open Heart.  I didn’t have any particular species in mind when I chose my colors, I was just coloring to make myself happy.  And what could possibly be wrong with that?

Maui Stamper August 2015 DIY Easel Calendar

I’ll enjoy watching this fellow on my kitchen counter this month.

Be sure you stop by to see what Cheryl and Crystal have created this month!

Sweet treats, Maui Stamper Style

I’m on the road, having survived PACKING. I should be better at it, but I’m not.  Weather always messes with my packing because I hate to be cold.  That’s a problem, because if it’s cold, I get cranky buying extra cold weather clothing that I won’t use at home.  First World Problems, as my son says.

First stop is a visit to my parents – I’ve discovered it’s an entirely different experience to spend time with just the two of them.  No Mr. Maui Stamper, no beloved grandchildren, not even my siblings – just me, Mom and Dad.  Oh, and Henry the Love Bug – he’s the cat that managed to work his way into the family after my Mom said No More Cats.  So it’s me, Mom, Dad and Henry, just hanging out, and it’s pretty nice.

Next stop is Salt Lake City and Inspire.Create.Share.2015!  Will you be there?  Come and see me – I have treats!

Maui Stamper Macnut Kisses XOXO

  • Stamps:  Sweet Stack
  • Color Palette:  Mint Macaron, Lost Lagoon, Soft Sky
  • Accessories:  Boho Chic TIEF, Banner Triple Punch, Rhinestone Jewels, Handheld Stapler

I DID NOT WANT THAT PUNCH.  Oh no, I did not, Sam-I-Am.  But I was wrong.  WRONG!!  That punch is the BOMB.  Can you imagine making these using your paper snips to cut each of those little banner flags?  I Think Not.

Maui Stamper Macnut Kisses XOXO

Crystal is a rock star.  She figured out that that the Banner Triple punch was just the right size to work with these little clear treat bags she found, and the Hershey Macnut Kisses were just the thing to go inside.  This was a simple project to put together – I think selecting the colors was the hardest part.  And I know I could have gone with colors that matched the Kisses a little more, but I chose what I chose.  So there, Sam-I-Am.

Maui Stamper Macnut Kisses XOXOAnd when you see me at Convention and say “I follow the Maui Stamper” we will both know that what you’re really after is the chocolate.  And that is perfectly fine.

Do come say hello – and don’t wait until Saturday.  I can’t carry these things around forever.


Red, White and July!

Every year I tell myself I will choose something BESIDES red, white, and blue for my July calendar…and…well, see for yourself:

Maui Stamper July 2015 DIY Easel Calendar

  • Stamps:  Flower Patch
  • Color Palette:  Real Red, Pacific Point, Soft Sky and Whisper White
  • Accessories:  Flower Fair Framelits, Rhinestone Jewels

When you team up Flower Patch with the Flower Fair Framelits, wonderful things happen in a blink of an eye!

Maui Stamper July 2015 DIY Easel CalendarSpeaking of Wonderful Things, today the Watercolor Wishes kit becomes available (p. 80 in the annual catalog).  I’m offering a class featuring this kit – let me know if you are interested!

Stampin' Up! Watercolor Wishes

Watercolor Wishes Card Kit and 12 Piece Photopolymer Stamp Set #140406 $35 Inclusive

Crystal and Cheryl are sharing their July DIY calendars too – check them out!

Let’s Get Going Places – RemARKably!

Welcome to the latest edition of the RemARKable Blog tour.  We’re certainly going places this month and we hope you’ll come along!  This is a long post with a lot of photos – if you want to move along, click on the graphic below to see what the talented Heather Mathiesen has done:

Maui Stamper RemARKable Blog Tour Going Places 2015Mr. Maui Stamper and I love to travel.  Sometimes we’re asked why we would ever want to leave our beautiful island.  As much as we love our home, we also love seeing new places.  More importantly, our three wonderful, independent, confident children are flung across 12 time zones in the world.  We love them, so we travel!

I’ve learned to take an envelope with me every trip to collect the receipts, ephemera, and mementos that accumulate when you travel.  At first it was a plain #10 envelope, then a 6×8 envelope, and finally, I’ve graduated to a travel wallet.

Maui Stamper RemARKable Blog Tour Going Places 2015With a little tinkering, I found a size that worked well and was quick to put together, and now I make one for each trip.  It gives me something pretty and new to use, and allows me to quickly locate the correct envelope for any given trip should I need to find a receipt or memento.

You’ll need:

  • a 12″ square piece of card stock
  • a 2 3/4″ x 9″ piece of DSP
  • a 2 3/4″ x 9″ piece of either card stock or DSP
  • The Simply Scored tool
  • a button or brad
  • a length of twine (about 14″)
  • a 1/8″ hole punch
  • adhesive – I use Tear and Tape and Tombo (the Wonder Adhesive)
  • Corner rounder punch

Let’s get started!

Maui Stamper RemARKable Blog Tour Going Places 2015Place the card stock on the Simply Scored tool and score at 4″, 4 1/2″, 5″ and 9 1/4″.

Turn the card stock a quarter turn so that you are scoring perpendicularly to the first set of score marks.  Score at 3/4″, 1 1/2″, 10 1/2″ and 11 1/4″.

If you don’t have the Simply Scored tool, you can measure and score the old fashioned way.

Maui Stamper RemARKable Blog Tour Going Places 2015Fold gussets across the middle and on either side as indicated by the score marks.  Your envelope will have a gusset along the bottom and on the sides.

Maui Stamper RemARKable Blog Tour Going Places 2015Trim off the sides as shown.  The narrow panel at the bottom of the photo will be your flap and will be 9 inches wide.  The second panel will be adhered to the third (top) panel to create the envelope.  Clear as mud?

Maui Stamper RemARKable Blog Tour Going Places 2015Adhere your DSP to the 9 inch wide flap.  I use Tombo (the Wonder Adhesive) so that I can get as close as possible to the edge.  (I use a bone folder to smooth out any bubbles and assure a smooth fit.) This is the fabulous new Timeless Elegance DSP, and I think it is gorgeous with Basic Grey card stock.  Use the Corner Rounder punch to (wait for it) ROUND THE CORNERS.  Lol.  I know.  I crack myself up.

Maui Stamper RemARKable Blog Tour Going Places 2015Fold in the gusset that will be at the bottom of the envelope, and then fold in the sides.  Apply our new Tear and Tape to the flap as shown.

Maui Stamper RemARKable Blog Tour Going Places 2015Snip a bit into the flap, because there’s some magic to be done.  That little snip will create a space for the flap to leap over the gusset.  When you adhere the sides this way, you won’t have a gap at the bottom for little things to slide through.  Practice once or twice before you remove the tape from the adhesive to get the feel of it.  It’s not hard!

Maui Stamper RemARKable Blog Tour Going Places 2015Once the sides are together, trim the ends that stick out at the top to a pleasing angle.

Maui Stamper RemARKable Blog Tour Going Places 2015Almost done!  Punch a 1/8″ hole in the center of the top flap and thread through your twine.  Tape into place – I use the Tear and Tape because I can.  (This beautiful Basic Grey and Vanilla twine is from the Gratitude for Days Simply Created kit on the Clearance Rack.  It’s a steal at $8.79!)

Maui Stamper RemARKable Blog Tour Going Places 2015Loop the twine around the brad before you open the prongs to be sure there is enough clearance.  Secure the brad.

Maui Stamper RemARKable Blog Tour Going Places 2015Apply Tear and Tape around the bumpy parts where the brad and the twine appear on the bottom.  (We’re going to cover those up!)  Apply Tombo (the Wonder Adhesive) to that second piece of card stock (2 3/4′ x 9″) and cover that mess!

Maui Stamper RemARKable Blog Tour Going Places 2015Yeah, I’m fussy like that.  Your travel wallet is ready for your next trip – where are you going?  I’m Salt Lake City bound next month for Inspire.Create.Share 2015!

Maui Stamper RemARKable Blog Tour Going Places 2015

The tour continues with Heather Mathieson, if you’ve been hardy enough to make it this far!  The rest of the team is listed below – enjoy the creative projects!


Nancy Amato – http://stampinallnight.blogspot.com/2015/06/remarkable-stampers-blog-tour-going.html
Melissa Bolinger –  http://creativeblessingsbymissy.blogspot.com/2015/06/remarkable-blog-tour-going-places.html
Tamra  Davis http://www.theCardLadies.com/remarkable-blog-tour-going-places/
Anne Matasci – http://wp.me/pCcBw-1RL    YOU’RE  HERE!!!
Heather Mathieson – http://wp.me/p2wIuv-2f
Audra Monk – http://thecraftyyogi.blogspot.com/2015/06/going-places-remarkable-blog-hop.html
Maria Pane – http://stampinandscrappinwithriri.blogspot.com/2015/06/remarkable-stampers-blog-tour-moving-on.html
Michele Reynolds – http://inspirationink.typepad.com/inspiration-ink/2015/06/going-places-blog-tour.html
Pam Staples – http://wp.me/p3p2VA-12t
Janet Wakeland – http://wp.me/pHIQD-7ij


Sweet Birds for the First of June

June’s Easel calendar is one last look at the retiring set For the Birds:

Maui Stamper June 2015 Easel CalendarIf you saw the RemARKable Blog tour in May, you’ll remember that I featured this stamp set.  It’s ideal for coloring with colored pencils.

Sweet Birds for the First of JuneSuch happy little birds!  If it wasn’t for Captain Stupidhead, I would have a bird bath in my yard.  Come to think of it, he’s gotten so old that he doesn’t even look when they are on the lawn 6 feet in front of him.  Maybe I’ll go bird-bath shopping…

Please take a look at what Crystal and Cheryl have done for the Merry Month of June.  And happy crafting!

May by the Seashore

Happy May Day!  Here in the blogging universe, it’s also Mini-DIY-Calendar-Blog-Tour-Day!  Take a peek:

Maui Stamper May 2015 Easel CalendarI was terribly disappointed to see By the Seashore on the list of stamps which will retire June 3, 2015.  The images are beautifully drawn and I’ve used them for cards, packaging, calendars, tags – just about anything.

Maui Stamper By the SeashoreI’ve just about convinced myself to purchase it as a wood mount stamp – I bought it in clear, and I will absolutely add it to my permanent archive.

Maui Stamper May 2015 Easel Calendar

I have a confession:  I pulled one other thing out of the archive.  I bought <many> bottles of Champagne Mist Glimmer paint before it retired a couple of years ago.  I have tried to refrain from sharing those projects, but it’s irresistible here.  I’m sorry if you don’t have any.

Please take a moment to see what Cheryl and Crystal have done for the first of May!  And Happy May Day!