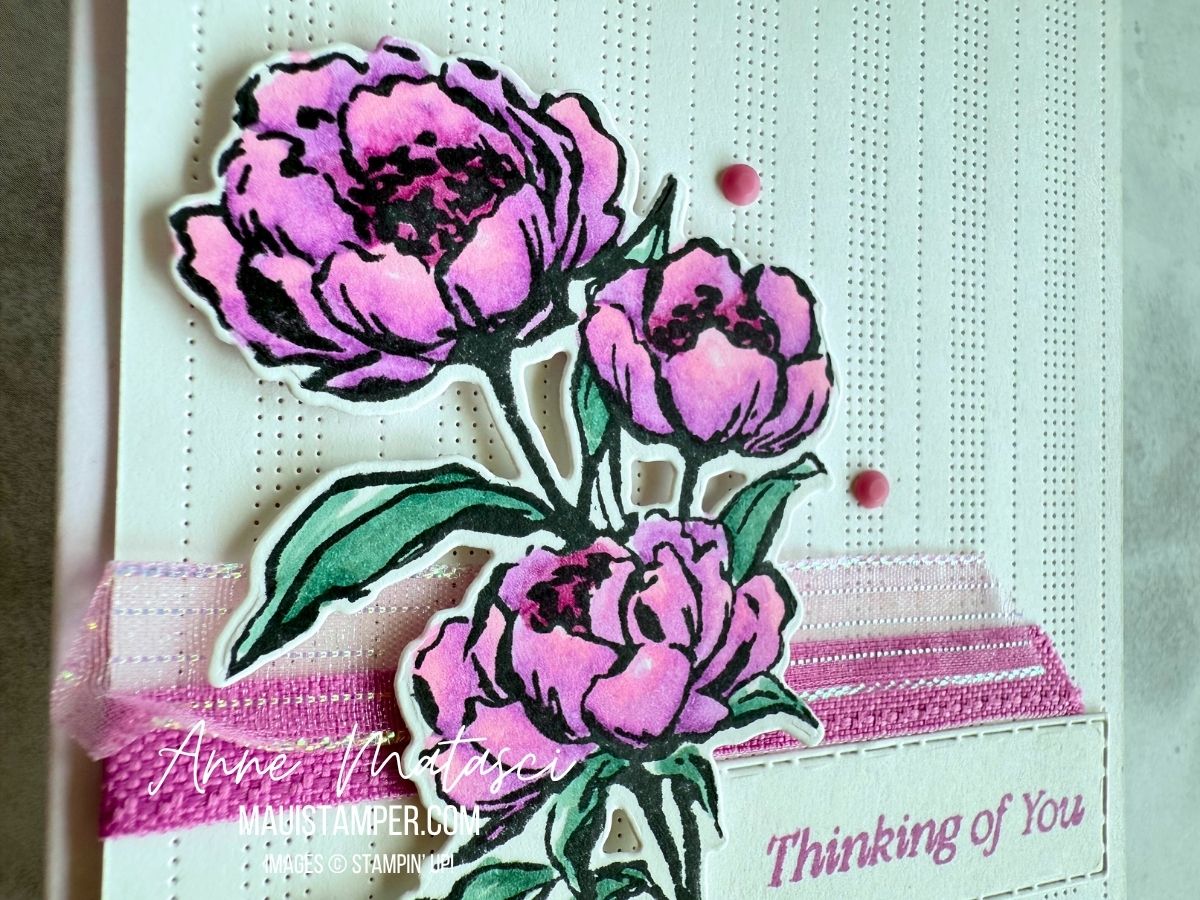
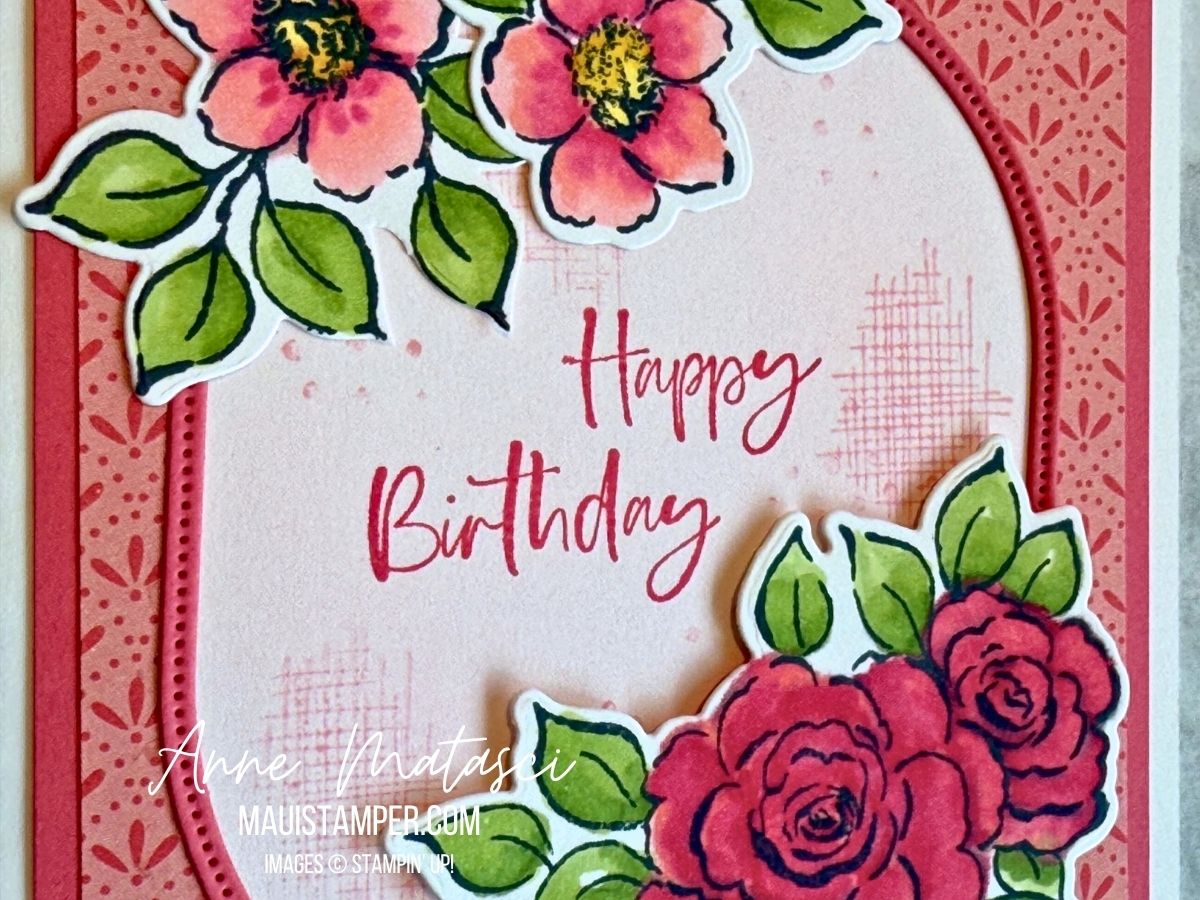
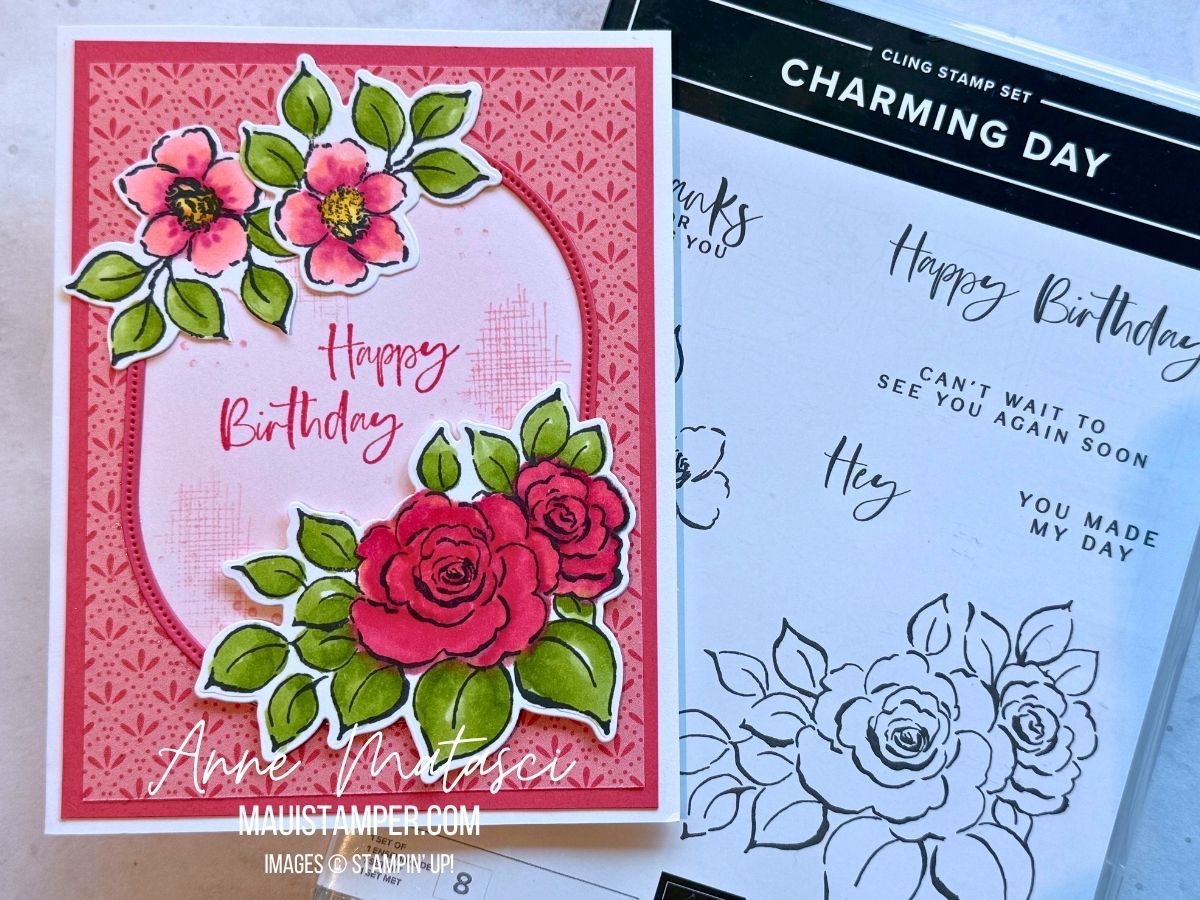
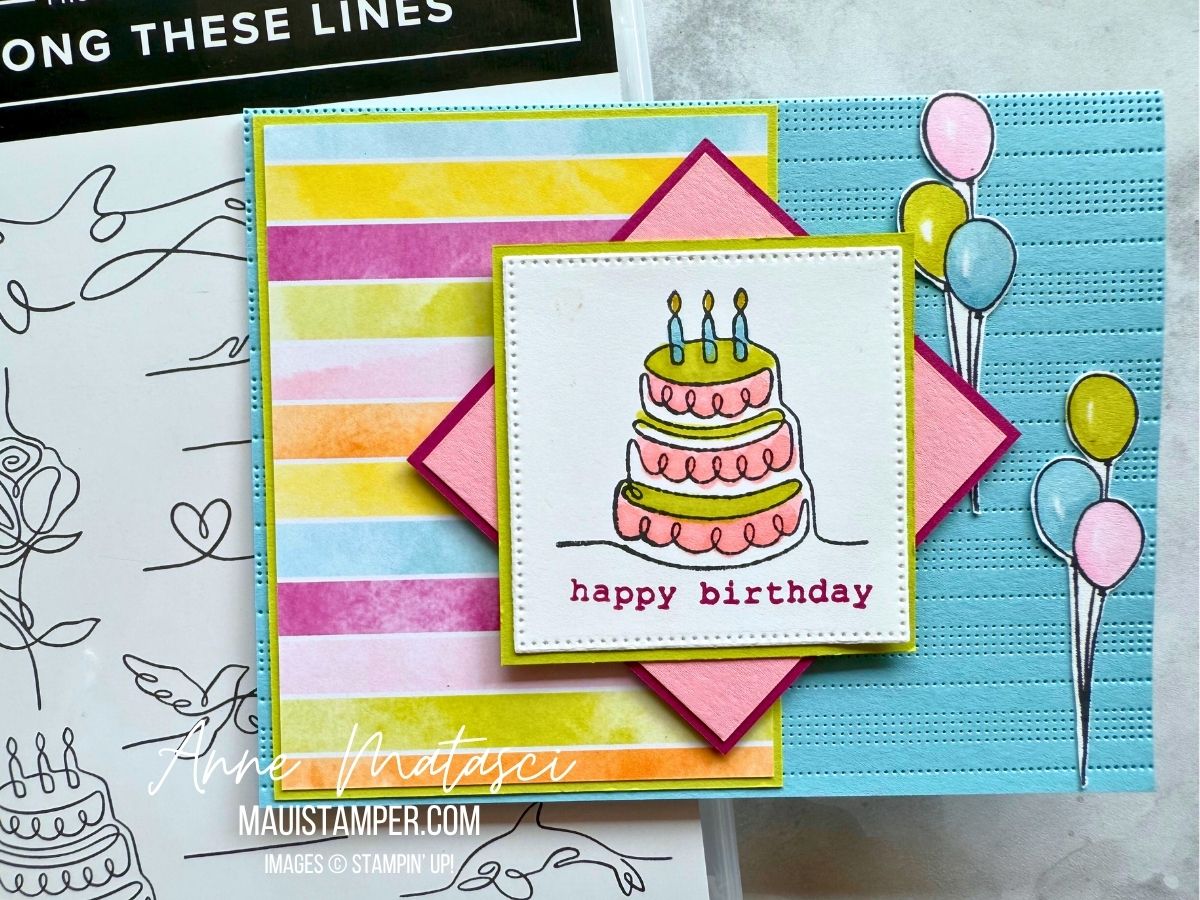
Easy Gate-Fold Card Tutorial with Kintsugi Inspirations

Do you have a Designer Series Paper stash? Mine is threatening a semi-hostile take over, but that doesn’t stop me from adding to my collection. I loved Kintsugi Inspirations the moment I set eyes on it at OnStage 2025 in Brisbane, and I couldn’t wait to cut into it and make something!

This is an easy gate-fold card that uses narrow strips of DSP. I find I have a lot of those when I cut larger pieces for card fronts. I love using up those scraps!

Here are the measurements you’ll need to make this card:

  1. Cut a piece of card stock to 5 1/2″ x 11″ for your card base.
  2. Score the long side at 2″, 3 3/4″, 7 1/4″ and 9“.
  3. Fold the 2″ and 9” outer panels towards the back and the 3 3/4″ and 7 1/4″ scores towards the center of the card. This creates the gate fold shape.
  4. Cut 2 each of DSP, choosing coordinating papers: 1 3/4″ x 5 1/4″ and 1 1/2″ x 5 1/4″
  5. Cut 2 each of coordinating card stock: 1 7/8″ x 5 3/8″ and 1 5/8″ x 5 3/8″
  6. Layer the DSP on the card stock panels. Adhere the narrower panels to the inside folds and the wider panels to the front. Add a focal point, embellish, and admire your beautiful work!

Gate folds often have some kind of closure, but I prefer the simplicity of this card as it is. Ready to give it a try? Your choice of Designer Series Paper will determine the mood of your card. Have some fun with it, and enjoy using up those scraps!

Suites and suite products are BOGO this month in the Online Store. Learn more about Stampin’ Up! Designer Series Paper HERE.

Processing…
Success! You're on the list.

Discover Colour Inkspiration #188: Crafting with Vibrant Colors

Oh, it has been a long time since I’ve done a challenge! We have enjoyed a LOT of travel in the first half of 2025. It’s been WONDERFUL, but it’s meant a lot of time away from crafting. It’s great to be home, to sit with all my crafty things and to be inspired!

This is ColourInkspiration #188. The challenge colours are Strawberry Slush, Timid Tiger, Coastal Cabana, and Gray Granite. This is a lively bunch of colours if I do say so myself!

  • Stamps: Pattern of Friendship
  • Color Palette: Basic White, Strawberry Slush, Timid Tiger, Coastal Cabana, Gray Granite
  • Accessories: Stamp Cut & Emboss Machine, Beautiful Motif dies, Daubers, retired flat dots, Stampin’ Dimensionals

Here’s the inspiration photo:

This image has lots going on but it’s filled with things I love: the sea, beautiful landscape, flowers, and lots of books! I wouldn’t mind spending a little time in that cove.

I confess: the splatters are from an ancient Stampin’ Up! tool. I *think* it was called the Color Spritzer, and it works by funneling a blast of air past the tip of a Stampin’ Write marker. I love how fine a splatter it creates – more a spritz, if in fact that was the name.

I’m not usually a super-bright color-combo crafter, so this was a bit of a stretch for me. I cut a variety of pieces with the Beautiful Motif dies and played with them until I liked them. I chopped quite a few of them into smaller pieces, allowing me to blend the colours more. And I used our daubers to add a little extra ink to the die cuts for dimension.

Pattern of Friendship is an Online Exclusive bundle. I bought it for the die – oh, just you wait, there are projects coming – but the stamps are all sentiments. I’ve decided I liked them better once they were in my hands. Does that ever happen to you, or is it just me?

Colour Inkspirations is a really fun challenge group. There’s plenty of time to create for each one, assuming you’re not galavanting around the globe. Plus it’s the nicest group of crafters you’ll find anywhere. Check them out, and give it a try!

Processing…
Success! You're on the list.

DIY CALENDAR BLOG HOP: June 2025

Welcome to the June DIY Calendar Blog Hop. I took a look at the last few months and decided it was time I focus on something other than FLOWERS. Almost everyone loves them, but I think there can be too much of a good thing! My June calendar is definitely different:

  • Stamps: Along These Lines, Elements of Text
  • Color Palette: Memento Black, Basic White, Secret Sea, Misty Moonlight, Azure Afternoon, Crumb Cake, Smoky Slate
  • Accessories: DIY Calendar Template, Stampin’ Blends, Paper Snips, Stampin’ Dimensionals

I was inspired by Jay Soriano’s blended ocean background. He does a masterful job of creating a smooth transition in his colors. I chose a slightly different palette from Jay, but I followed his technique and was very pleased with the outcome.

If you don’t have Elements of Text, consider adding it to your next order. It’s my GO-TO set whenever I need a little extra something. Well. On a card, anyway. 😉

I fussy cut the dolphin so they would really stand out. I considered masking them, but I was afraid the movement of the brushes might dislodge the masks. They’re small and simple, and fussy cutting allowed me to put one of them up on a dimensional.

Please take a moment to follow along on our hop and see what Malia, Cheryl and Sharon have created for the month of June. We’re very glad you chose to join us!

Would you like to make your own DIY Calendars? The template is just $5 – let me know that’s what you want and I’ll send you an invoice. Please tell me you’re a real being in the message box – I’m getting increasing amounts of spam. Everything is done digitally, so you’ll have it quickly.

You are only purchasing a template, which you can download and print for your personal use.

Processing…
Success! You're on the list.

Mass Produce Cards Using Everyday You + Me Bundle

I had the gorgeous Everyday Happiness DSP on my desk after making my Brisbane swap, and I decided to switch up the paper a bit. I’m not sure which version of this card I like better, but this one might have an advantage with a little Wink of Stella. 😉

  • Stamps: Everyday You + Me, Translucent Florals (sentiment, Last Chance)
  • Color Palette: Basic White, Lost Lagoon, Wild Wheat, Pretty Peacock
  • Accessories: Stamp Cut & Emboss Machine, Spotlight on Nature dies, Everyday You + Me dies, Wink of Stella, Jute Twine (Last Chance), Stampin’ Dimensionals

The narrow strips are varying widths but they’re all cut at the same angle. You can see the layout is quite similar to the swap from #OnStage2025Brisbane. This card is pretty easy to mass produce once you’ve done the die cutting!

I really love the Everyday You + Me bundle, both for the images and the large format sentiments. The Designer Series Paper is a little heavier weight, and it’s packaged as 12 sheets with 3 design sets (2 designs front and back) and 4 pages of each set. It’s great for making multiples!

Processing…
Success! You're on the list.

EVERYDAY YOU + ME SWAP #ONSTAGE2025BRISBANE

This is the card I took to Brisbane for general swapping. I wanted something that would pack well (which means it also mails well). The 3D Mini Corrugated Embossing Folder actually provides a little cushion for the card when you send it through the mail.

  • Stamps: Country Flowers (Last Chance. I love this sentiment – font, punctuation, all of it)
  • Color Palette: Basic White, Wild Wheat, Pretty Peacock, Lost Lagoon
  • Accessories: Stamp Cut & Emboss Machine, Spotlight on Nature dies, Mini-Corrugated 3D Embossing Folder, Citrus Blooms (Last Chance – the leaves), Everyday Happiness DSP, Stampin’ Dimensionals

I cut a LOT of those branches 😳 but I loved the way they looked together.

I gave them all away, and as I looked at this photo I realized it’s missing the jute twine! Check the Swap Board below – the completed card is in the bottom right corner. And you can shop the Online Store if you’re inspired!

Some days are like that. Even in Australia. 💕

Processing…
Success! You're on the list.

WOVEN TEXTURES DESIGNER SERIES PAPER BIRTHDAY

The Woven Textures DSP makes my heart sing! I love textural papers, especially ones based on natural materials. This is a great fit for Hawaii themed crafting.

  • Stamps: With You in Mind
  • Color Palette: Basic White, Lemon Lolly, Granny Apple Green, Crumb Cake, Mossy Meadow
  • Accessories: Woven Textures DSP, Sunny Springs Cards & Envelopes, Stamp Cut & Emboss Machine, Gallery Blooms dies, Country Flowers dies (flowers and leaves – Last Chance) Glue Dots, Stampin’ Dimensionals

The Gallery Blooms dies are amazing – in addition to all the floral images they cut out, there’s a single large die that cuts two frames and a center panel that all nest into each other. I’ve used the smaller frame and the center panel, and I cut 3 extra frames out of Crumb Cake card stock to stack together. I love the 3D effect it gives the frame.

Our Sunny Springs Cards & Envelopes have beautiful designs on the card bases as well as the envelopes. They make stunning cards effortless! Shop the Online Store.

Processing…
Success! You're on the list.

IMPRESSIONS ABLOOM DOUBLE GATE FOLD

Do you like making Fun Fold cards? This one is super easy. Plus, if you follow my color choices, you’ll have a VERRRY GIRRLY card for that friend – you know the one – that LOVES pink!

  • Stamps: Impressions Abloom, Elements of Text
  • Color Palette: Basic White, Garden Green, Pretty in Pink, Strawberry Slush, Melon Mambo, Lemon Lolly
  • Accessories: Stamp Cut & Emboss Machine, Impressions Abloom dies, Textured Notes dies, Floral Impressions DSP, In Color DSP, Bordered Ribbon, Stampin’ Dimensionals

The Textured Notes dies step up any project. Every size has a different design around the edge, but they all coordinate. They’re one of my absolute Go-To products.

Here are the basic dimensions for the gate fold:

  • Cut a card base to 5 1/2″ x 11″
  • Score at 2″, 3 3/4″, 7 1/4″ and 9″
  • Add DSP panels (with or without mats) to each side. This version uses mats that are 1/4″ smaller for length and width from the card base panel, and DSP that are another 1/4″ than the mat.

I adhered ribbon under the center panel. The panel itself is adhered with sticky strip to the left front panel and the ribbon wraps around the entire card.

See the new Floral Impressions Suite in the Online Store.

Processing…
Success! You're on the list.

A BOUQUET OF GALLERY BLOOMS

Do you ever finish a card and sit back and sigh with delight? That’s what happened when I finished this one. It’s not quite the picture I had in mind when I started, but guess what: IT’S BETTER. That doesn’t happen every time!

  • Stamps: Gallery Blooms, Beautiful Motifs
  • Color Palette: Basic White, Daffodil Delight, Highland Heather, Strawberry Slush, Melon Mambo, Granny Apple Green
  • Accessories: Stamp Cut & Emboss Machine, Gallery Blooms dies, Dauber, Blender Pens, paint brush, Bakers Twine 3 color pack, Stampin’ Dimensionals

Gallery Blooms are perfect for coloring, and I chose to use Blender Pens. It’s been a while since I pulled them out. but I wanted more control over the shading. I was quite happy with the results, and to be honest, it was faster and easier than using Stampin’ Blends in this case!

I Inked and colored the largest flower with Highland Heather ink, but the spray was inked in Melon Mambo and then colored with Strawberry Slush. With those small, repeated blossoms, I found I liked the deeper outline.

The final touch was ink splatters with a paint brush. Smash the closed lid of your ink pad to transfer ink to the lid. Open it and add a few drops of water. Pick up that dilute solution with a paint brush and splish splash!

It’s easier than it looks. Give it a try! All products are available in the Online Store.

Processing…
Success! You're on the list.

BEAUTIFUL GALLERY #2

I tell you, I can’t get enough of the Beautiful Gallery DSP! It has a little bit of everything and today’s card showcases that variety. I chose one of the “B” sides of the paper – a brushed gradient of grays. I had lots of inspiration for focal points, but ultimately decided to use the largest floral image from the stamp set.

  • Stamps: Gallery Blooms
  • Color Palette: Very Vanilla, Basic Black, Basic Grey, Gray Granite, Petal Pink
  • Accessories: Stamp Cut & Emboss Machine, Gallery Blooms dies, Petal Pink 3/8″ Scalloped ribbon, Glue Dots, Stampin’ Blends , Stampin’ Dimensionals

I colored the blossom in Petal Pink and the leaves in Gray Granite. Then I took the Gray Granite Blend and went all the way around the edges of the die cut, covering any white paper. The card base is Very Vanilla, but I chose to use Basic White for the die cut to keep the colors true.

The ribbon is tied through a small opening in the die cut and looped once. I used Glue Dots to hold the edges of the ribbon in place.

I considered adding a sentiment to the front, but decided I would wait until I decided who would get this card. I love having a stash of blank cards!

Shop the Online Store for this beautiful new suite.

Processing…
Success! You're on the list.

BEAUTIFUL GALLERY DSP; LET THE PAPER DO THE WORK

The Beautiful Gallery DSP is absolutely stunning. These 6×6 images are Old World masters quality, and they shine on the front of a card. I have two floral designs to share with you today, and the pair of cards took me less than 10 minutes to create.

  • Stamps: Layers of Beauty
  • Color Palette: Very Vanilla, Basic Black, Mossy Meadow
  • Accessories: Beautiful Gallery DSP, Stamp Cut & Emboss Machine, Textured Notes dies, Linen Thread, Stampin’ Dimensionals

I cut the rectangle with the Textured Notes dies and added the sentiment. I scored one side of the rectangle and tucked it in between the layers. I added Linen Thread before securing the panel to the card front.

The sentiment on this card is from the Textured Notes stamps set, and the Basic Black mat is replaced by a Pecan Pie layer. That’s it!

Shop the Online Store for this beautiful suite.

Processing…
Success! You're on the list.