One of the best reasons I know for making a handmade card is to honor someone special. I was invited to a bridal shower last month that I couldn’t attend (something about 2,363 miles over the ocean). I really wanted to be there, so I sent my heart in a handmade card:
Stamps: Delightful Wishes
Color Palette: Basic White, Crumb Cake, Timid Tiger
I used a LOT of different dies for this card. If it seems larger than usual, you have a good eye: I made this card a 5 inch x 7 inch format. I layered paper and texture, but since I had to mail it, I left off any embellishment other than my beloved Linen Thread.
My technique for this card was relatively simple: I set out a stack of papers of papers for layering and played with them, then die cut multiples of all my favorite floral bits and pieces and moved them in and out over the top panel until I was satisfied. It wasn’t exactly scientific, but it worked for me!
To add texture to the layers, I started with the Patterns of Friendship die. It’s one of my all-time favorites for texture, and I’m very sad to see it on the Last Chance list – but if you hurry, you can get a great deal on it. The Textured Notes dies are another product I consider indispensable for simple elegance – if they’re not in your crafty stash, maybe they should be!
Our niece – and Goddaughter – will be married in November, and that flight has been on the books for months! I won’t miss the wedding for the world. But since I couldn’t be at the shower, I sent her my love with a paper hug.
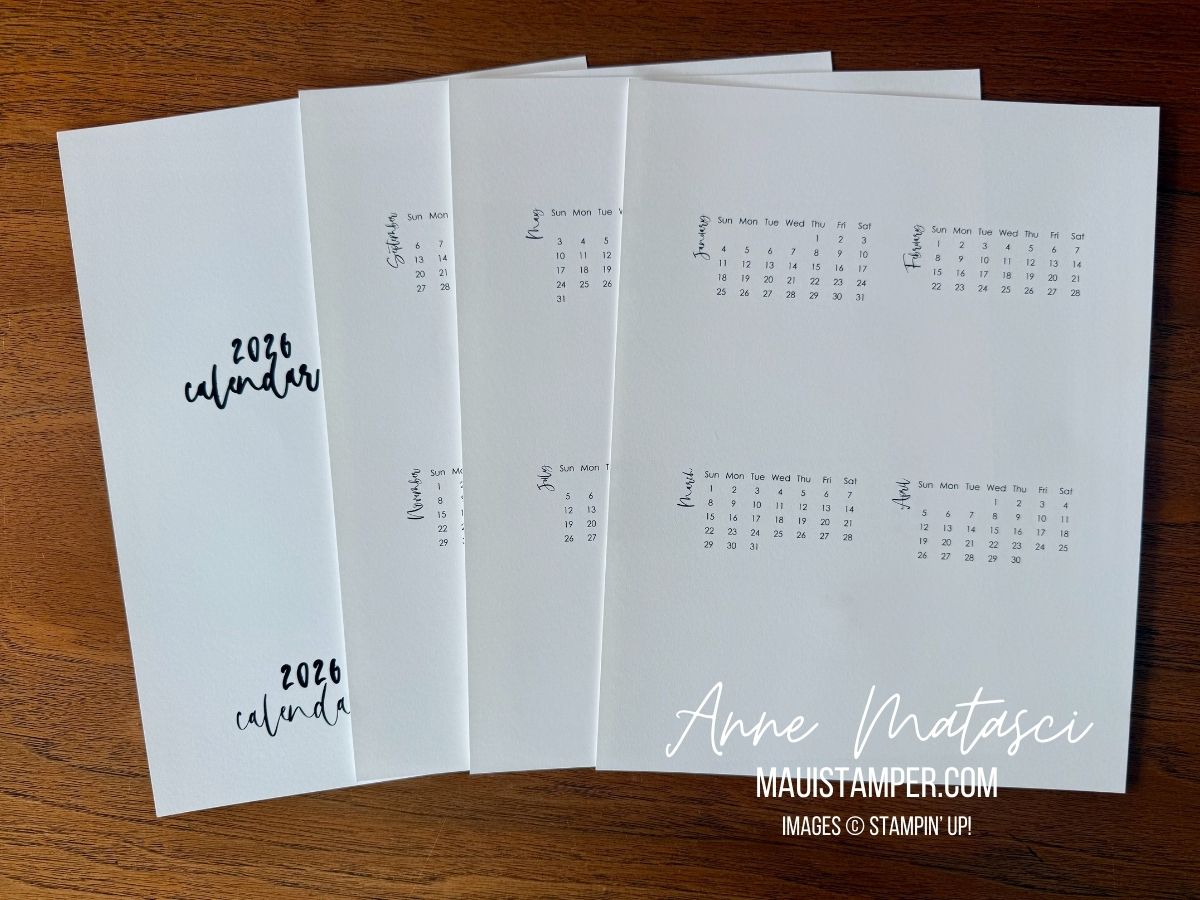
The 2026 DIY CALENDAR TEMPLATE is available! Buy it HERE.
Processing…
Success! You're on the list.
Whoops! There was an error and we couldn't process your subscription. Please reload the page and try again.
I’ve neglected the Maui Stamper all month, and sorry, but I’m not sorry. Our family celebrated a wedding last weekend and the past few weeks have been abundant with love and joy. The last of the family is headed back to the mainland today, and I am trying my best to re-enter my version of the real world.
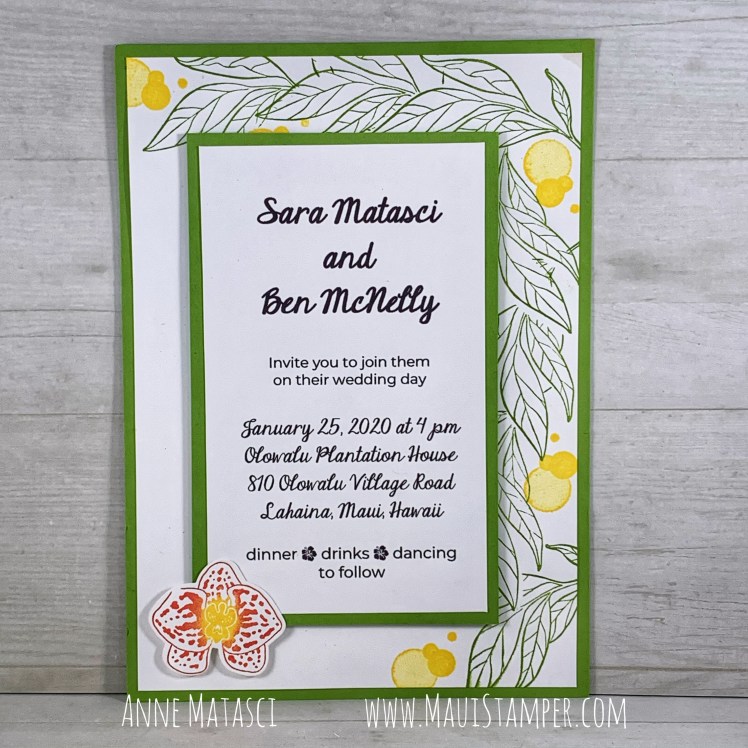
Let’s go back to the beginning – at least the Maui Stamper beginning! Here’s the Save-the-Date I collaboratively created for my daughter Sara and her fiancé Ben:
I’m not going to tell you how many of these I made, but I will tell you that my die cutting machine and my dies may never be the same and my fingers were WORN OUT. But it was worth it – I loved how they turned out, and so did Sara and Ben.
In both cases I printed the text onto Whisper White card stock, formatting with Microsoft Publisher. There was an additional card included with the invitation with a few more details, and it was cut to to the size of the interior panel. The Save-the-Date measures 4 1/4″ x 5 1/2″ and the Invitation is 5″ x 7″. We ordered yellow envelopes that coordinated well, since Stampin’ Up! doesn’t sell that size.
I sent Sara and Ben a sample of EVERY color of Stampin’ Up! card stock, as well as some samples of embellishments and embossing folders. Most of our design work was done via text and photo, with a couple of FaceTime sessions as we narrowed things down. It was such an enjoyable process, and an honor for me to make the invitations.
Fast forward to last weekend:
The ceremony was at Olowalu Plantation House, and despite some iffy weather earlier in January, the day was spectacularly gorgeous. Everything went smoothly, and the whales provided a nice touch as they spouted, breached, and showed their tales all afternoon. The flowers were amazing, done by Dellables and of exceptional quality. Look at the bride’s bouquet three days AFTER the ceremony:
There are advantages to being Mother of the Bride at a destination wedding – Mr. Maui Stamper and I brought home a lot of beautiful flowers!
Speaking of The Mister, he’s a craftsman in his own right. He created an extraordinary marker for the event: a redwood sign with the home town and distance of every wedding guest on arrows:
That’s the beautiful Maid of Honor, our oldest daughter Carol, with her wonderful partner, Shanti. There are more home towns and distances on the other side of the sign, and as an engineer, Mr. Maui Stamper made sure that each arrow pointed correctly towards its destination (within 22°). He also made quite precise measurements, and used the appropriate unit of measurement for the country. This sign was a big attraction!
A late addition to the décor was a set of table numbers and escort cards to help the guests find their seats. There wasn’t a set seating chart, but guests were grouped at their tables so that family and friends would be able to sit together.
I can’t say enough about White Orchid Weddings and my dear friend, Jackie Ishikawa. I’ve known her since our kids were in grade school together, and when it came time to find a wedding coordinator there was no question about who to ask. Jackie did a fabulous job of guiding Sara and Ben through the process, and made sure that on the day of the celebration we were all guests at the party!
The bride and groom kicked off the festivities and the celebration was one to remember. My family is spread across the globe, and having an occasion like this to gather made my heart sing.