Stampin’ Up! Holiday Extravaganza

Do you love a good sale?  Oh man, I sure do!  And you’d better believe that I’ve already made my order for the Holiday Extravaganza sale!  The bargains just go on and on…just in time for holiday gift giving.  (Or, as my beloved sister-in-law shops, “a present for you, a present for me, a present for you, a present for me…”)

Head on over to my Online Store and place your order.  You’ll find stamps and ribbons, punches and buttons, and an incredible Ultimate Stamper’s’ Starter bundle at 50% off!  Last year’s most popular bundles sold out before the Extravaganza was over, so don’t be disappointed – order today.  The sale ends November 30.


Item Description Regular Price Discounted Price
120280 Framed with Love Bundle

  • Framed with Love stamp set
  • Full Heart punch
$43.90 $21.95
120281 Thank You Kindly Bundle

  • Thank You Kindly stamp set
  • Scallop Edge punch
$29.90 $14.95
120976 Thank You Kindly Bundle (French)

  • Tous mes remerciements stamp set
  • Scallop Edge punch
$29.90 $14.95
120282 Animal Crackers Bundle

  • Animal Crackers stamp set
  • Star Designer brads
$25.90 $12.95
120283 Corduroy Button Bundle

  • Kraft Corduroy buttons
  • Pumpkin Pie Corduroy buttons
  • Summer Sun Corduroy buttons
  • Basic Gray Corduroy buttons
  • Chocolate Chip Corduroy buttons
$49.75 $24.88
120284 Game Night Bundle

  • Card Games stamp set
  • Game Night stamp set
$40.90 $20.45
120285 Four Square Bundle

  • Four Square stamp set
  • Scallop Square punch
$30.90 $15.45
120286 Heart to Heart Bundle

  • Love You Much stamp set
  • Heart to Heart punch
  • Pretty in Pink 1/2″ striped grosgrain ribbon
$49.85 $24.93
120310 Heart to Heart Bundle (Spanish)

  • Te Quiero Mucho stamp set
  • Heart to Heart punch
  • Pretty in Pink 1/2″ striped grosgrain ribbon
$49.85 $24.93
120311 Heart to Heart Bundle (French)

  • J’t’aime beaucoup stamp set
  • Heart to Heart punch
  • Pretty in Pink 1/2″ striped grosgrain ribbon
$49.85 $24.93
120287 Chipboard Letter Bundle

  • On Board Timeless Type
  • On Board Loads of Letters
$25.90 $12.95
120288 Double-Stitched Ribbon Bundle

  • Bashful Blue 1″ double-stitched grosgrain ribbon
  • Rose Red 1″ double-stitched grosgrain ribbon
$17.90 $10.74
120289 Ultimate Stampers’ Starter Bundle*

  • Best Wishes & More stamp set
  • Eight Great Greetings stamp set
  • On a Pedestal stamp set
  • Earth Elements Stampin’ Spots
  • Earth Elements assorted card stock (8-1/2″ x 11″)
  • Whisper White card stock (8-1/2″ x 11″)
  • Old Olive 1/2″ striped grosgrain ribbon
  • Flower Designer brads
$127.70 $76.62
120290 Build-A-Brad Bundle

  • Calendar Alphabet stamp set
  • Pewter Build-A-Brad
  • Antique Brass Build-A-Brad
$40.85 $24.51
120291 Enjoy Every Moment Bundle

  • Enjoy Every Moment stamp set
  • Circle Designer brads
  • Flower Designer brads
$43.85 $26.31
120312 Enjoy Every Moment Bundle (French)

  • Profiter de chaque instant stamp set
  • Circle Designer brads
  • Flower Designer brads
$43.85 $26.31
120292 Cheep Talk Bundle

  • Cheep Talk stamp set
  • Note cards
  • Pumpkin Pie Corduroy buttons
$42.85 $25.71
120293 Sock Monkey Bundle

  • Sock Monkey stamp set
  • Sock Monkey Accessories stamp set
  • Chocolate Chip Corduroy buttons
$58.85 $35.31
120313 Sock Monkey Bundle (French)

  • Sing-chaussette stamp set
  • Sock Monkey Accessories stamp set
  • Chocolate Chip Corduroy buttons
$58.85 $35.31
120294 Alphabet Bundle

  • Jayne’s Type Alphabet stamp set
  • Lovely Letters stamp set
$87.90 $52.74
120295 Simply Said Bundle

  • Simply Said stamp set
  • Old Olive 1/2″ striped grosgrain ribbon
  • Full Heart punch
$52.85 $31.71
120314 Simply Said Bundle (French)

  • Amitié stamp set
  • Old Olive 1/2″ striped grosgrain ribbon
  • Full Heart punch
$52.85 $31.71
120296 On Board Bundle

  • On Board So Tweet
  • On Board Batch of Blooms
  • On Board Essentials
$42.85 $25.71
120927 Christmas Décor Bundle #1

  • Holly Berry Wreath Décor Elements (Kraft, Real Red)
  • Real Red Vintage Ornaments Décor Elements
  • Chocolate Vintage Ornaments Décor Elements
$74.85 $44.91
120298 Christmas Décor Bundle #2

  • Holly Beary Wreath Décor Elements (Chocolate, Real Red)
  • Real Red Vintage Ornaments Décor Elements
  • Chocolate Vintage Ornaments Décor Elements
$74.85 $44.91
120299 Christmas Décor Bundle #3

  • Holly Berry Wreath Décor Elements (Old Olive, Real Red)
  • Real Red Vintage Ornaments Décor Elements
  • Chocolate Vintage Ornaments Décor Elements
$74.85 $44.91
120300 For All You Do Bundle

  • For All You Do stamp set
  • 5/16″ Neutrals Jumbo brads
$36.90 $25.83
120315 For All You Do Bundle (French)

  • Merci pour tout stamp set
  • 5/16″ Neutrals Jumbo brads
$36.90 $25.83
120316 For All You Do Bundle (Spanish)

  • Por todo lo que haces stamp set
  • 5/16″ Neutrals Jumbo brads
$36.90 $25.83
120301 Striped Ribbon Bundle

  • Bashful Blue 1/2″ striped grosgrain ribbon
  • Pumpkin Pie 1/2″ striped grosgrain ribbon
  • Old Olive 1/2″ striped grosgrain ribbon
  • Pretty in Pink 1/2″ striped grosgrain ribbon
  • So Saffron 1/2″ striped grosgrain ribbon
  • Real Red 1/2″ striped grosgrain ribbon
$47.73 $33.41
120302 Bling Bundle

  • Sticky Pages
  • Sticky Cuts Sweet
  • Fine Supernova Stampin’ Glitter
  • Fine Galaxy Stampin’ Glitter
$43.80 $30.66
120303 Fresh-Cut Bundle

  • Fresh Cuts stamp set
  • Fresh-Cut Notes
  • 5/8″ Neutrals Jumbo brads
$37.85 $26.50
120317 Fresh-Cut Bundle (French)

  • Fraicheur exuise stamp set
  • Fresh-Cut Notes
  • 5/8″ Neutrals Jumbo brads
$37.85 $26.50
120304 Pendant Note Bundle

  • Pendant Park stamp set
  • Pendant notes
  • 5/8″ Neutrals Jumbo brads
$39.85 $27.90
120318 Pendant Note Bundle (French)

  • Adorable parc stamp set
  • Pendant notes
  • 5/8″ Neutrals Jumbo brads
$39.85 $27.90
120319 Pendant Note Bundle (Spanish)

  • Un dia en el parque stamp set
  • Pendant notes
  • 5/8″ Neutrals Jumbo brads
$39.85 $27.90
120305 Sporting Bundle #1

  • Large Night of Navy Sporting Décor Elements
  • Night of Navy Just Sports Décor Elements
$67.90 $47.54
120306 Sporting Bundle #2

  • Large Chocolate Sporting Décor Elements
  • Chocolate Just Sports Décor Elements
$67.90 $47.54
120307 Sporting Bundle #3

  • Large Black Sporting Décor Elements
  • Black Just Sports Décor Elements
$67.90 $47.54
114864 Ginormous Flowers I Décor Elements $39.95 $27.97
114863 Ginormous Flowers II Décor Elements $39.95 $27.97
112534 5/16″ Neutrals Jumbo brads $7.95 $5.57
112533 5/8″ Neutrals Jumbo brads $6.95 $4.87
112081 Scallop Square punch $15.95 $11.17
113693 Full Heart punch $15.95 $11.17
113694 Heart to Heart punch $15.95 $11.17
112091 Scallop Edge punch $15.95 $11.17
112571 Circle Designer brads $5.95 $4.17
112579 Flower Designer brads $5.95 $4.17
112572 Star Designer brads $5.95 $4.17
114785 Small Wonderful Flowers Décor Elements $39.95 $27.97
114786 Medium Wonderful Flowers Décor Elements $69.95 $48.97
114791 Small Wonderful Leaves Décor Elements $39.95 $27.97
114792 Medium Wonderful Leaves Décor Elements $64.95 $45.47

*This bundle is only available while supplies last.


Happy Shopping!!

Ah, Medallion!

If I had to choose only a few stamps to work with, Medallion would be very near the top of the list.  It’s elegant, it’s symmetrical, it’s layerable, and it looks great even if you cut part of the image off.  There are so many ways to embellish it, and it looks wonderful all by itself with no embellishment.

I felt the need to step away from Christmas.  This is the week to give thanks, to remember, to be grateful.  I looked for a color combination that I hadn’t worked with lately, and pulled out a sheet of Bravo Burgundy.  What a wonderful, rich color…a perfect Autumn color…but I wasn’t necessarily looking for an Autumn card.  It wasn’t until I had this card put together with Brocade Blue that I realized these were the colors from my oldest daughter’s high school.  I really like the medium blue with the burgundy.

  • Medallion and Thank You Kindly stamp sets
  • Brocade Blue, Bravo Burgundy and Very Vanilla cardstock
  • Brocade Blue and Bravo Burgundy Classic ink pads; Versamark ink pad
  • Clear embossing powder, heat tool, 1/8″ circle hole punch (retired), Stamp-a-ma-jig, Very Vanilla Taffeta ribbon, Wine Organza ribbon (retired)

Those little burgundy dots are just holes punched from cardstock and attached with the indispensable Tombo All purpose adhesive.  I apologize for using a retired ribbon, too….it used to be a regular product in the catalog, and I happen to have a stash of it because I’d used it for a custom invitation a few years ago.  Seems like organza has fallen out of favor, but I enjoy using it as a layer.

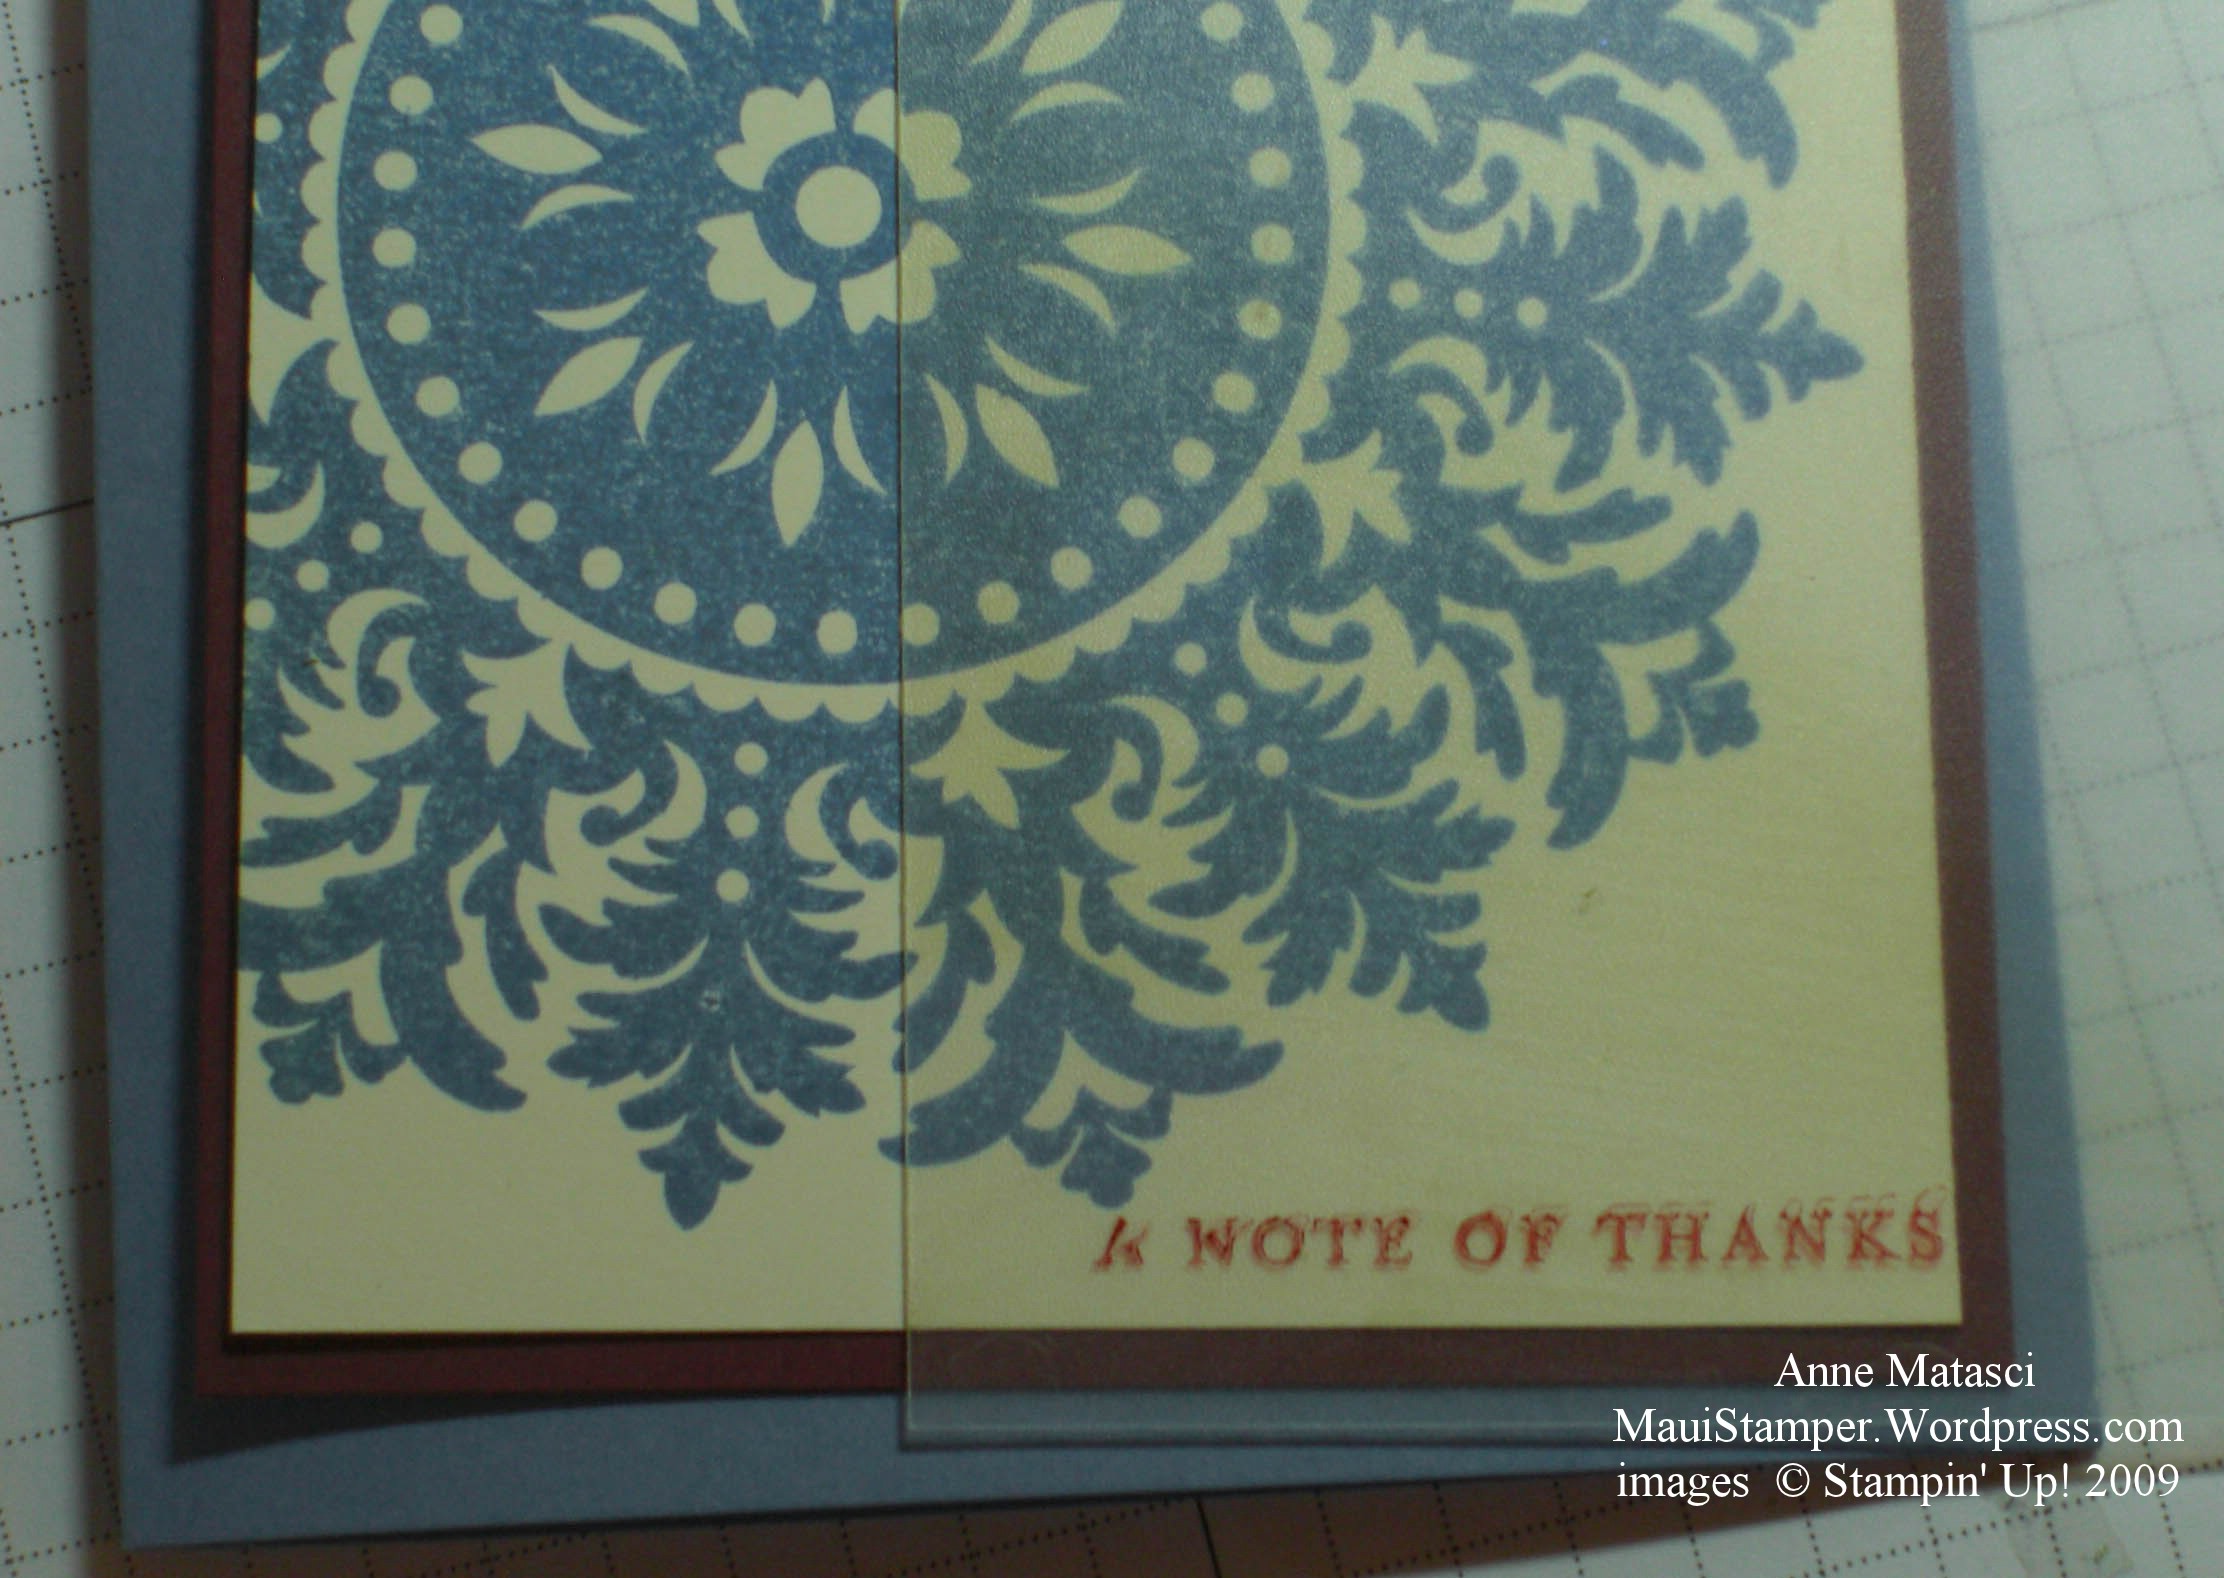
I found a great use for the Stamp-a-ma-jig.  Sometimes I can’t decide what image, especially sentiment, I want to use to finish a card.  I was goofing off one day and realized I could put the options on different corners of the SAMJ and layer them over my project to see how each would look – like this:

“Thanks” on the Stamp-a-ma-jig

“A Note of Thanks” on the Stamp-a-ma-jig

I think it looks good with either choice, but I liked the more ornate font on the “Thanks” stamp to dress up the simple layout of this card.

The added bonus of this trick is that your SAMJ is all ready to go when it’s time to add your sentiment, so you’re less tempted to wing it – and end up with a crooked sentiment.  Not that I ever have crooked sentiments.


An elegant package

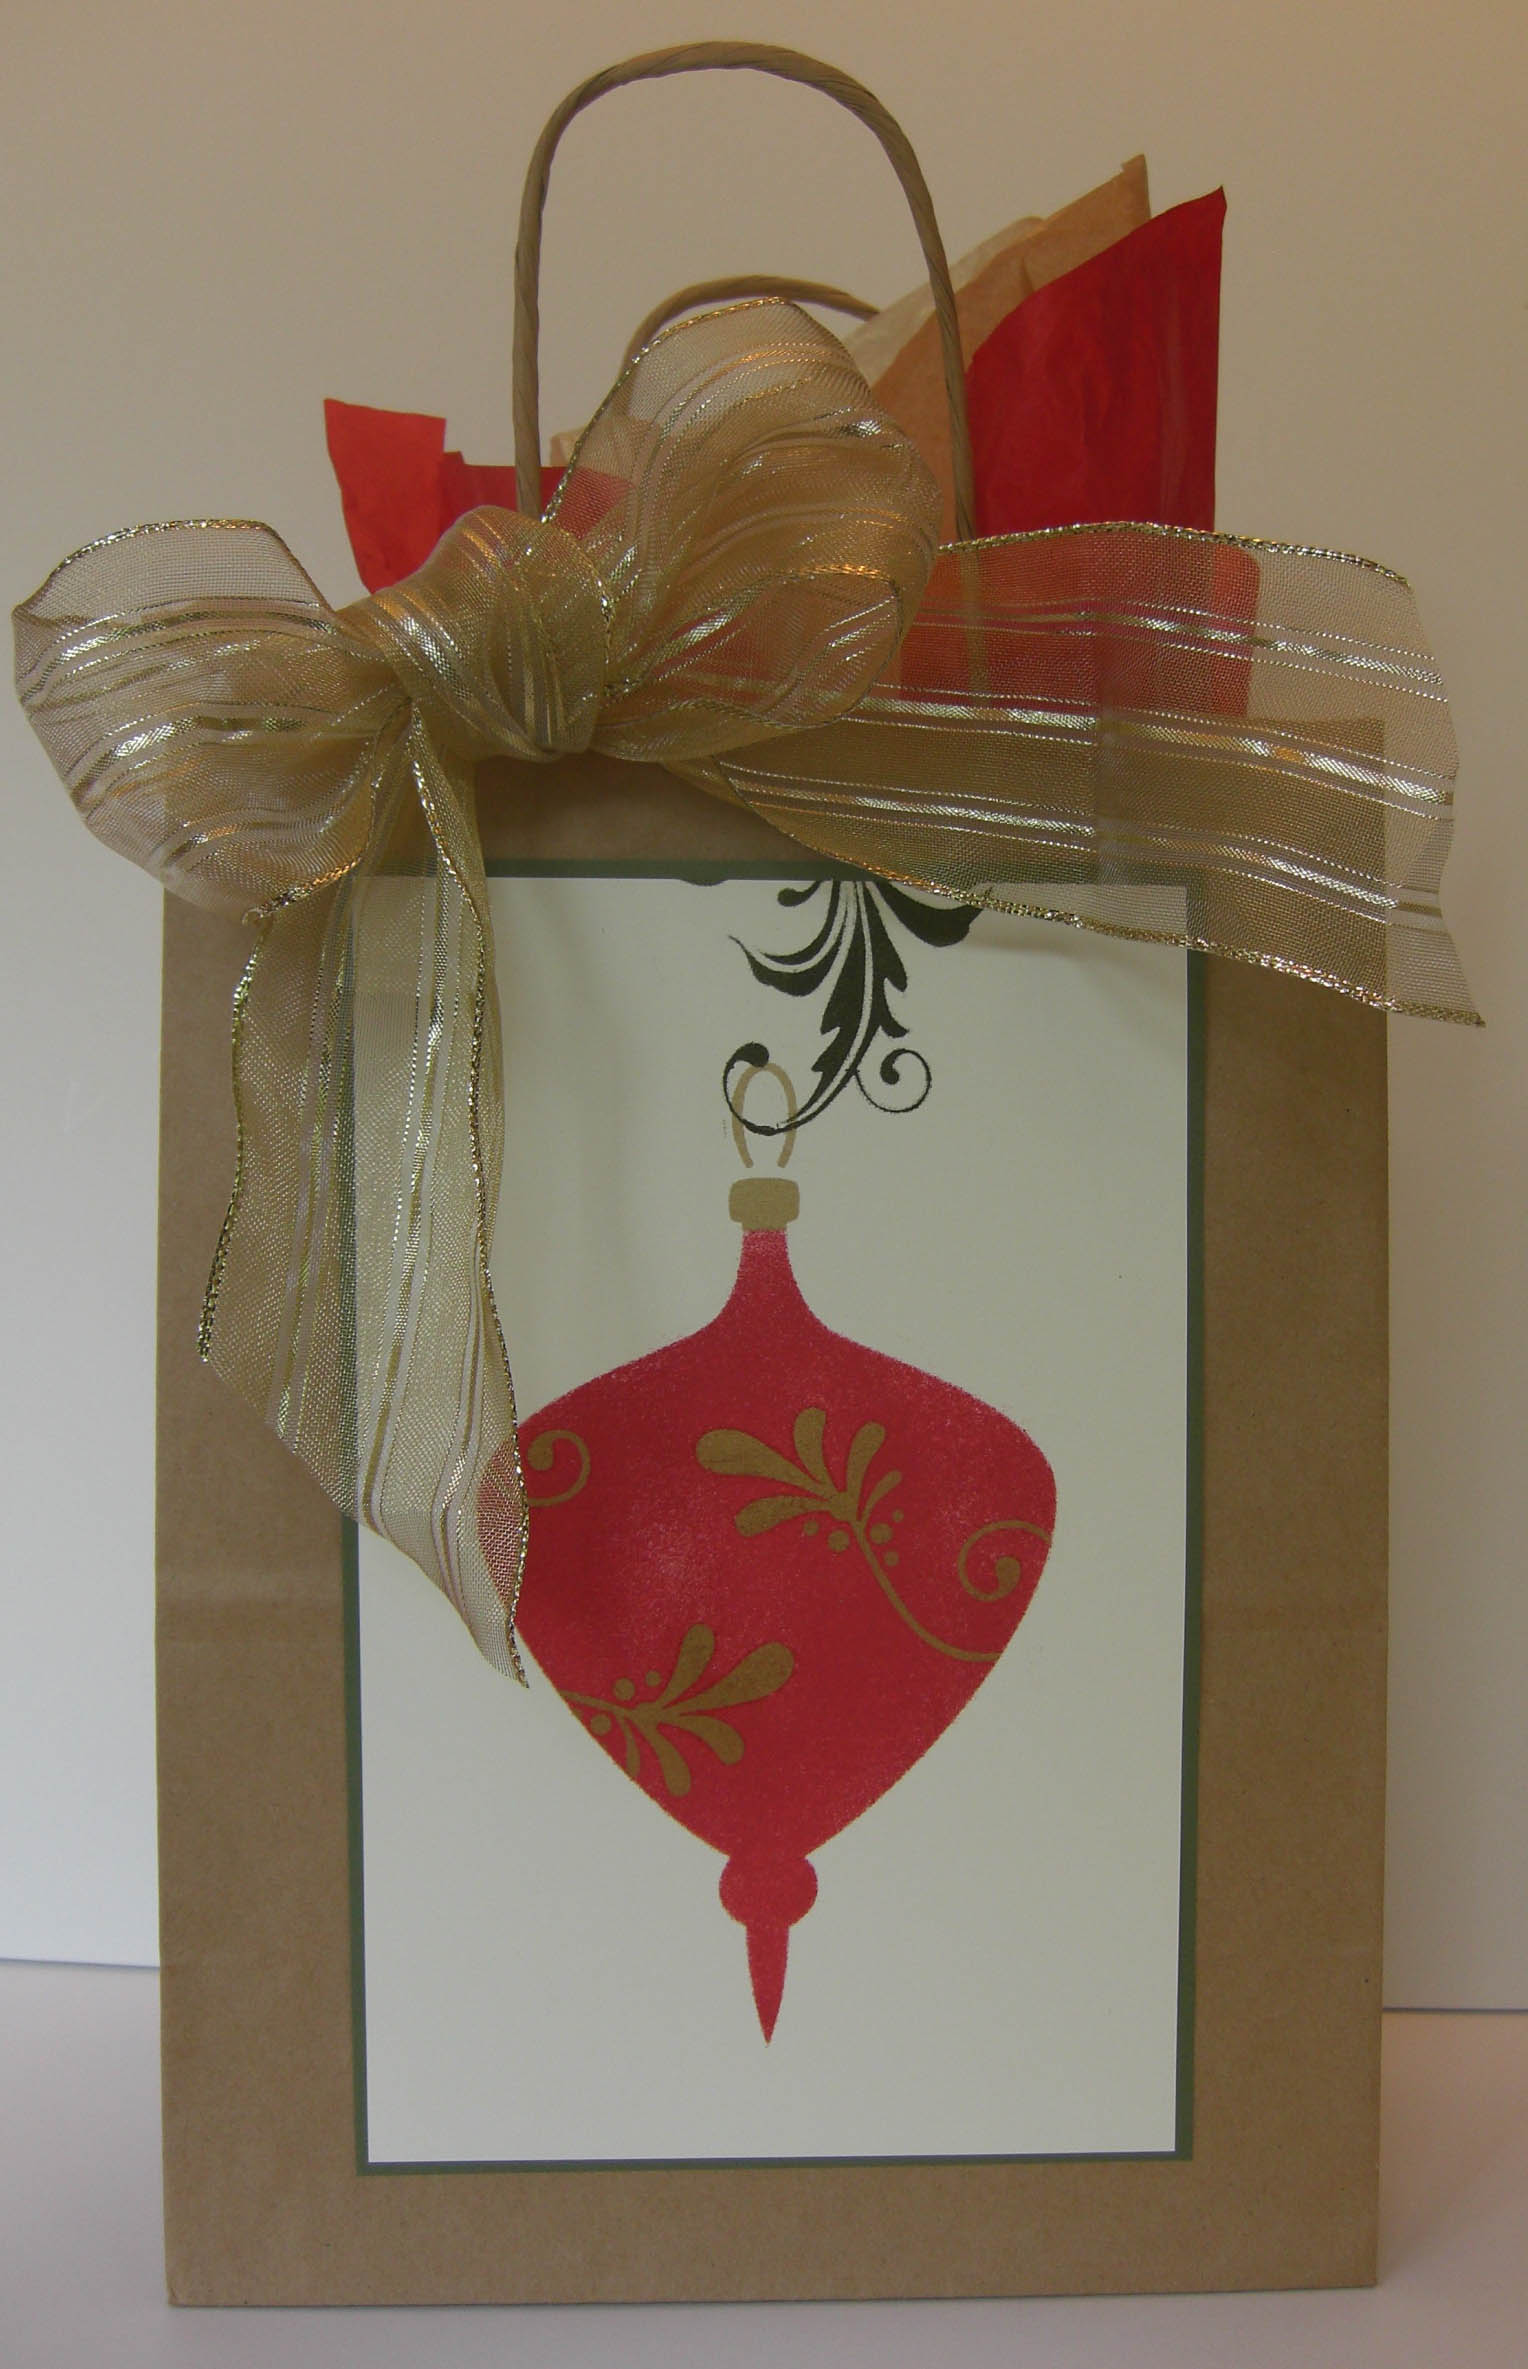
Here’s a gift bag worthy of royalty, in my humble opinion.  I am really pleased with the elegant simplicity of this stencil – and I am really pleased that Stampin’ Up!’s Decor Elements line has introduced stencils as a design option.  They’re easy, they’re fun, and they can be so much larger than stamps!

  • Vintage Ornaments I Decor Elements Stencil
  • Always Artichoke and Ruby Red Craft ink pads, Encore Gold ink pad
  • Stampin’ Sponges
  • Very Vanilla and Always Artichoke cardstock
  • Purchased kraft bag, gold wire ribbon, and tissue

I used a sticky note to mask off the top of the ornament in order to make it a proper gold hanger.  This image is equally beautiful using Classic ink, with a softer, more vintage look.

I’m looking forward to stenciling some canvas bags with this image.


Sometimes simple is best

I’m a huge fan of the Clean and Simple (CAS) look…I just can’t seem to pull it off myself.  I come from the “More is More” school of card design, finding it hard to hold back from adding just one more ribbon, brad, or texture.

Today’s card is more of a CAS style than anything I usually do, although it still has more layers than a purist would use.  It’s a pretty card, and an easy one to make in quantity.  (Did I mention I haven’t made my cards yet?  Are we wondering where all this recent discussion about “production” has originated?  No mystery there.)

Clean and Simple Petals a Plenty Tree

  • All Holidays stamp set
  • Shimmer White, Brushed Gold, Real Red and Always Artichoke card stock; Vellum
  • Real Red Classic Ink pad; Champagne Mist shimmer paint
  • Big Shot and Petals a Plenty embossing folder
  • Small star punch; 1/16″ hand held circle punch; gold brads; sponge dauber

You can stamp on vellum with Classic ink – just be sure to give it plenty of time so it doesn’t smear.  The Plenty Petals on the tree are brushed with my favorite Champagne Mist Shimmer paint and a sponge dauber.

To create the tree, cut your triangle piece first, then run it through the embossing folder.  You’ll get a cleaner edge than if you try to cut that heavily embossing paper with your paper trimmer.

And that Petals a Plenty folder is GOING AWAY, girls and boys!!!  That’s a mini-catalog item and if you want one, you’d better get yourself to my Online Store and click that Shop Now! button and order one!  Pronto!

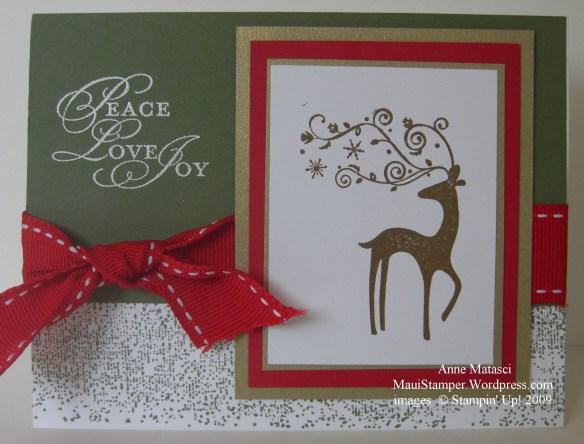
Another dashing reindeer

If you’re like me, you’re suddenly looking at the calendar and saying “DANG!  I need to get my Christmas cards made!”   (I am the Queen of the Last Minute.  But that’s a story for another time.)  Just flip open the back of your catalog and check out Mr. Dasher on page 208.  Well, it could be Ms. Dasher, but frankly, with those antlers, I’m thinking we’re looking at the male of the species.

There are so many ways to use this great image.  Today’s card is one that could easily be made in quantity, with steps that are easily broken down for assembly line production.  Just the thing for someone who needs a heap of cards in a hurry.Easy Dasher in artichoke

  • Dasher and All Holidays stamp sets
  • Always Artichoke, Real Red, Brushed Gold and Whisper White card stock
  • Soft Suede Classic Ink pad; Whisper White Craft ink pad
  • Texture Jumbo Wheel; Always Artichoke jumbo ink cartridge
  • White embossing powder; Heat tool; Real Red stitched grosgrain ribbon

I’m a big fan of diverse greeting sets.  All Holidays and Teeny Tiny Wishes are always close at hand when I’m designing cards.  They’re higher priced sets, but the cost-per-use is very low and I consider them a great investment.  I’m also a big fan of white craft ink and white embossing powder – you can emboss pretty quickly when you’re in production mode, and the results are always eye-catching.

What would be on your “Marooned on a desert island” list of supplies?


A Christmas Topiary

This is not an original design, and I am thrilled to be able to remember that THIS card is the source of my inspiration.  I’m embarrassed by the number of times I’ve used someone else’s work as a starting point, but can’t remember the crafter, website, or anything else that would allow me to give credit where credit is due.  It’s a very clever use for these images, and I really enjoy finding ways to expand the use of a stamp set.

Berry Christmas Topiary Crop

  • Berry Christmas and Holiday Best (Hostess Level I) stamp sets
  • Big Shot and Stampin’ Up! Perfect Details Texturz plate
  • Old Olive, Ruby Red, Very Vanilla, Really Rust and Brushed Gold card stock
  • Old Olive and  Ruby Red Classic Ink pads
  • Scallop Square punch, Stamp-a-ma-jig, Iridescent Ice Stampin’ Emboss Powder and Heat Tool

The sentiment is trimmed from the Holiday Best Christmas image.  This is a pretty simple card – no ribbons, no brads, nothin’ – and it relies on the texture from the Big Shot and the bit of sparkle from the embossing powder to set it apart.  We sure do love our embellishments, but if you don’t have much, you can still make an appealing card.

To get all of this lined up, you really need to get out the SAMJ or you’ll waste a lot of paper.   Trust me on this.

Build-a-Santa-Bear

Last weekend was the final class in Anne and Crystal’s fantastic Holiday Series.  This bag definitely got high marks in the cute department, and would make any boy or girl – big or small – anxious to get a look inside.  We all agreed that you couldn’t put a gift for Just Anyone in such a cute bag…it would have to be a special someone, a someone who would appreciate both the Cute Factor and the effort that goes into attaching all the little pieces that make this bear so darn…well…cute!

BAB_bag

  • Big Shot, Stampin’ Up! Bear die, Stampin’ Up! Beary Merry die
  • Stampin’ Up! Pawsitively Embosslit, Stampin’ Up! Backgrounds 1 Texturz plate
  • Real Red, Old Olive, Whisper White, Basic Black, and Summer Sun cardstock
  • Many Merry Messages stamp set
  • Scallop edge punch, 1 3/4″ circle punch,  Gold Elastic cord, Old Olive 1/2″ striped grograin ribbon
  • Purchased kraft handle bag

I’m a big fan of gift bags.  In addition to being the easiest wrapping job you could imagine, they’re re-usable.  I’ve noticed a big difference in the amount of trash we collect on Christmas morning since we’ve started using more bags.  They’re not peek-proof, though, and I usually have all the gift bag gifts hidden (and hidden well, I might add) to be placed under the tree on Christmas Eve.  Just because my kids – and dear husband – are mostly grown up is no assurance that they won’t peek.  They all like to poke, prod and shake, and gift bags are just too great a temptation.


Dasher in the Holiday Lounge – MojoMonday113

I am SO excited I’m going to have to disable the Caps button on my keyboard so I don’t just shout this entire post!  (Perhaps I’ll disable the exclamation mark, too.)  This is such a late post for me today…all day I’ve tried to get to the Mojo Monday sketch, and all day there have been other things that got in the way.  I’ve been thinking about what I wanted to do, and Heaven help me, when I finally sat down to put it together it was even better than I imagined!  (OK.  Breathe here.)

So, what do YOU think??Mojo Monday 113 Dasher in the Holiday Lounge

  • Dasher and Holiday Best (Hostess Level I) Stamp sets
  • Whisper White, Taken with Teal, Brushed Gold, Sahara Sand and Ruby Red cardstock; Holiday Lounge Designer Series Paper
  • Encore Gold Pad; Taken with Teal and Ruby Red Stampin’ Write Markers
  • Whisper White taffeta ribbon; Piercing tool and template; Stampin’ Dimensionals; Clear Detail embossing powder and heat tool

I’ve had so much trouble with the Mojo Monday sketches in the past…this makes me really, really happy.  I hope you like it too.

Autumn leaves

Another of the projects that I’ve wanted to tackle forever has made it to completion.  There’s a beautiful wreath on page 92 of the Stampin’ Up! Idea Book and Catalog made with the Leaves #2 Originals die (113459, $15.95).  I had my own color scheme in mind, and over the past couple of weeks I’ve cut out leaves and figured out what to use for a form.  I finally took a big breath and starting attaching the leaves to the base.  I often get stuck at that commitment point – my idea seems so clear in my head, and I get all the components ready to go, but putting the project together makes my fingers go all shaky.

Yesterday the wreath came into being and I am very pleased with the results.

Leaves_Wreath

  • Big Shot, Sizzix Leaves #2 Originals Die, and Stampin’ Up! Backgrounds 1 Texturz plates
  • So Saffron, Old Olive, Always Artichoke, and Soft Suede cardstock
  • Thoroughly Modern, Old Olive Patterns, and a retired Designer Series Paper
  • 12″ Wire wreath form, cheesecloth, hot glue and gun, and purchased Gold 1 1/2″ wire edge ribbon

Here are the basic construction steps:

  1. Wrap cheesecloth around the wire frame and secure with loose basting stitches
  2. Cut 24 sheets of leaves (4 leaves per sheet)
  3. Attach leaves to outside edge of wreath, one at a time, using hot glue and overlapping
  4. Repeat process for inside edge of wreath
  5. Fill in the center of the wreath, balancing for shape and color
  6. Attach ribbon and bow; hang wreath and admire!

Here’s what the wreath form looked like before the leaves went on:

Wreath_bones

Wreath_first_l;ayer


I hope you’re inspired – it was much easier than I thought it would be.  It’s a great way to use up those odd sheets of Designer Series papers, too, as each page yields 4 sheets of leaves.  Now pull out that Big Shot and get crankin’!!


Shimmery pines

It amazes me how quickly days pass by.  It’s always been that way for me.  I’m sure  I thought Christmas or my birthday or whatever longed-for day in the future would never arrive when I was small, but I don’t remember that.  I just know that every day I wake up thinking “How am I going to do everything I want today?” and every night I wonder where the day went.

This card has been waiting patiently in the To-Do list of my mind for a while.  A few days ago, it actually made it to the paper To-Do list, which is a significant step on the road to “git ‘er done”.  This was going to be a Dasher Snow Globe, because I had a lovely comment which put that idea into my mind, but Dasher is off visiting Crystal and his Snow Globe Debut will have to wait.

Shimmer_Pines_Snowglobe

  • Patterned Pines and All Holidays Stamp sets
  • Whisper White and Brushed Gold cardstock
  • Old Olive and Tempting Turquoise Classic Ink pads; Chocolate Chip Stampin’ Write Marker
  • Champagne Mist Shimmer Paint, Old Olive wide grosgrain ribbon, Irridescent Ice Embossing Powder, Heat Tool, Stampin’ Sponges

Cards are SO difficult to photograph!  You can’t see the Shimmer mixed in with the Tempting Turquoise sponged on as background, but I promise you it’s there.  The First Star just to the left of the center Pine is stamped in Shimmer Paint too.  And the base of the globe is gold, not olive.   Really.

I’m working on posting the template for the Snow Globe card since so many of you are interested, but for now, leave me a comment with your email address if you would like a copy.   The template is now available HERE

If you’re interested in an Over-The-Top Snow Globe, check out THIS tutorial over at SplitCoastStampers.  But don’t say I didn’t warn you.  Your To-Do list will languish for days if you get hooked on those.