PATTERNS OF FRIENDSHIP: THE BIG DIE YOU DIDN’T KNOW YOU NEEDED

I initially overlooked Patterns of Friendship because the stamps didn’t stand up and shout at me. But when I started seeing projects with this amazing texture, I went back to the Online Store and looked again, and there she was: the Patterns of Friendship die.

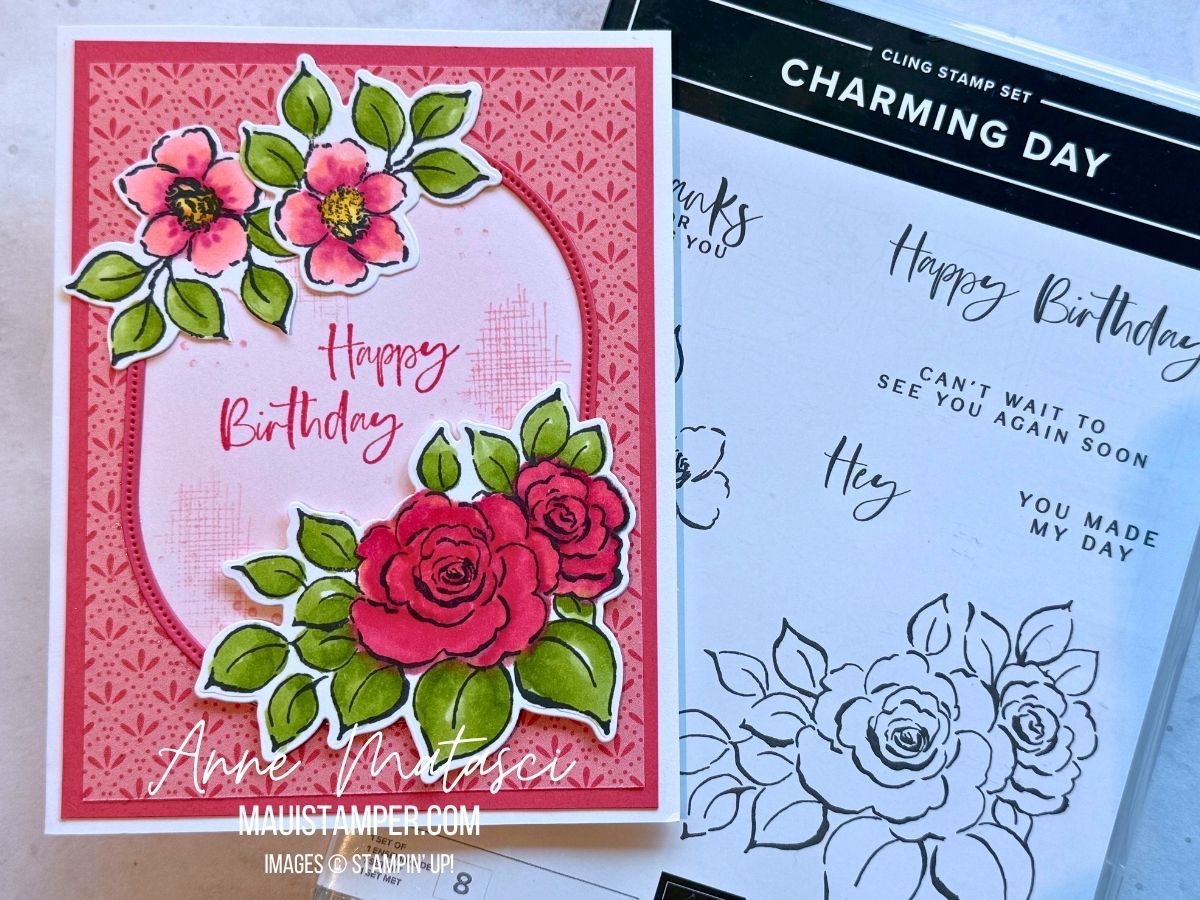
  • Stamps: Gallery Blooms, Elements of Text, Country Flowers (retired)
  • Color Palette: Basic White, Cloud Cover, Fresh Freesia, Daffodil Delight, Granny Apple Green
  • Accessories: Stamp Cut & Emboss Machine, Patterned Friendship dies, Gallery Blooms dies, Textured Notes dies, Stylish Shapes dies, Cloud Cover Faux Linen Ribbon, Floral Impressions DSP, Stampin’ Dimensionals

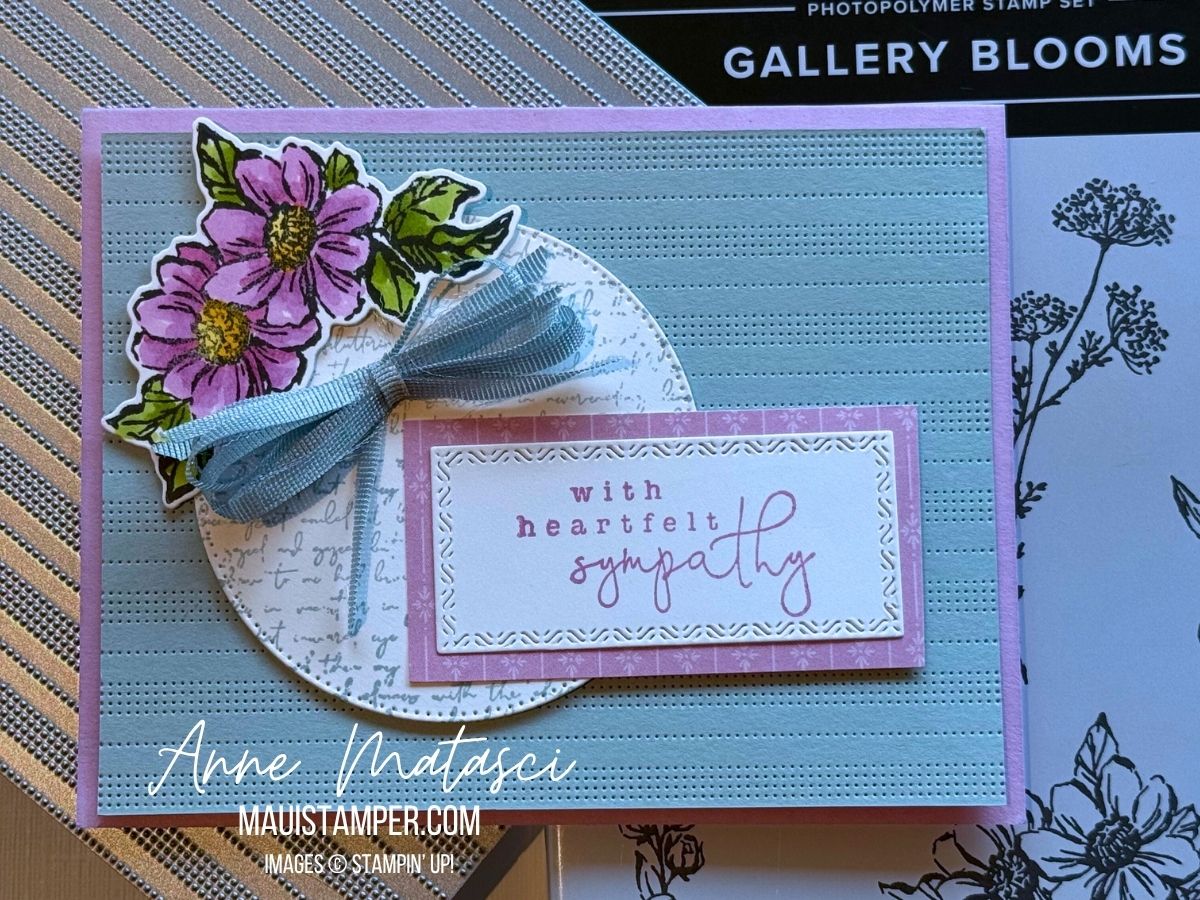
Have you added one of the In Color Faux Linen Ribbons to your crafty stash? Oh, my – it’s gorgeous! I sliced this one lengthwise and used just a single strand to secure the bundle. That keeps the bow a little softer and mailing-friendly.

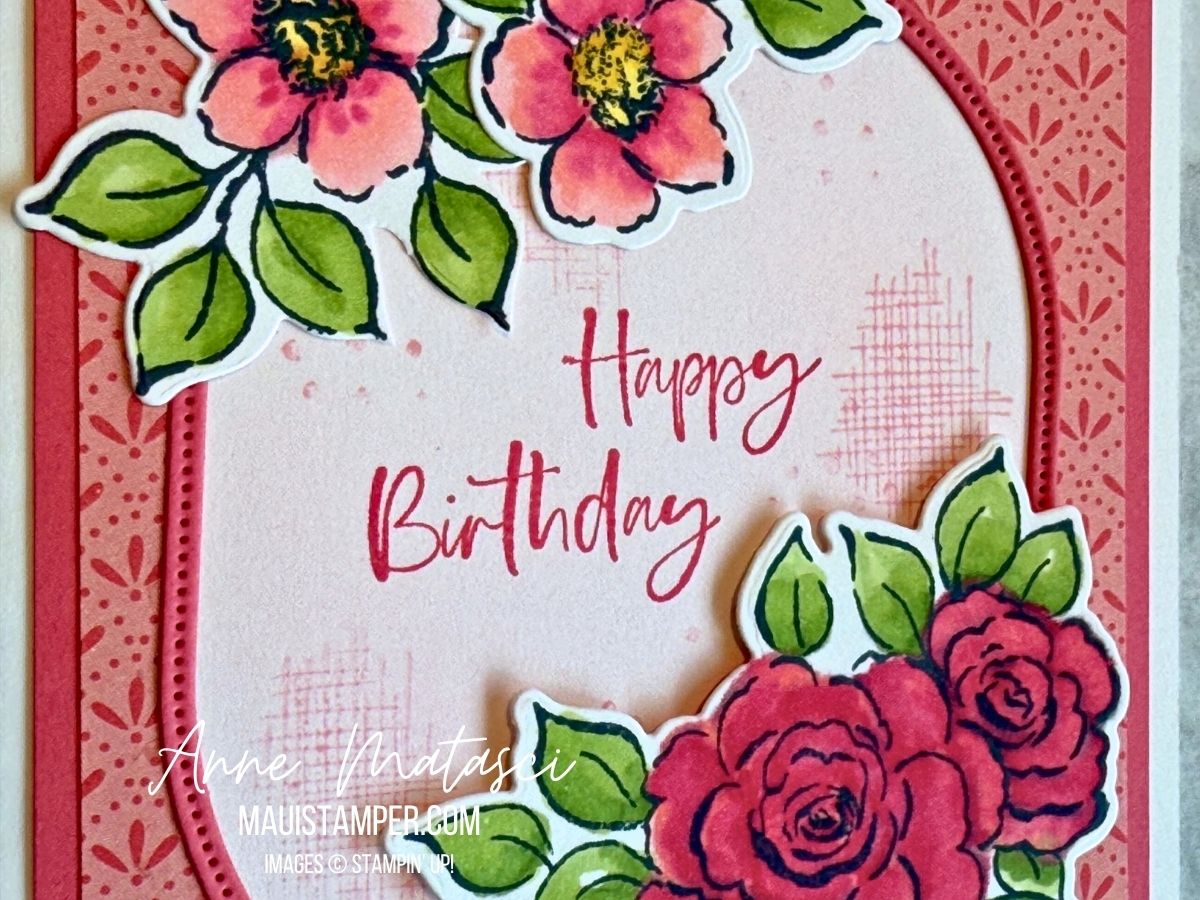
Gallery Blooms are perfect for coloring, and I used Stampin’ Blends this time. This closeup reveals a little detail: I used a scrap of Floral Impressions DSP behind the sentiment. It’s a little extra bit of texture in a card that’s already bursting with texture.

The Patterns of Friendship die is 6″ x 6″ so you can cut your panel to run either horizontally or vertically. If you look closely, you’ll see that the rows of little dots are balanced so that a 4″ card stock panel lands exactly between the rows. I love those kind of (semi-OCD) details.

I’m a bit of a texture nerd, so you can imagine how pleased I am with this new die. (Bonus: when you peel the card stock off the die, it makes a very satisfying noise.) There are multiple layers here: the dies, the paper layers, the DSP, and that big crazy ribbon. Have fun with it! You can find everything you need in the Online Store.

Processing…
Success! You're on the list.

CHARMING (BIRTH) DAY

Have you seen Charming Day? It’s a new Online Exclusive, and yes, it’s another flower set. Telling myself “NO more flowers!” doesn’t seem to be working very well. In this case, it was the sentiments and the fonts that pushed me to Add To Cart. 😆

  • Stamps: Charming Day, Spotlight on Nature
  • Color Palette: Basic White, Strawberry Slush, Pretty in Pink, Daffodil Delight, Granny Apple Green
  • Accessories: Stamp Cut & Emboss Machine, Charming Day dies, Impressions Abloom dies, Floral Impressions DSP, Stampin’ Blends, Blending Brush, Stampin’ Dimensionals

I used a couple of tricks to make this easy. I used a Blending Brush with Pretty in Pink ink to create a light wash of color on my Basic White card base, then added a few textural elements from Spotlight in Nature. I inked the words on the sentiment separately so that I could offset them on the card front.

I cut the DSP and the mat to size and used just a little adhesive to hold them in place, then ran them through the Big Boss together. DSP is lighter weight than card stock, so the two pieces cut through cleanly. I pulled out the center ovals, then finished adhering the card stock and DSP and added them to the card front. The stitched frame on the inside fits inside the opening, so it needs to be carefully glued into place.

The Floral Impressions DSP is all about gorgeous florals, but the “B” sides of the papers are gorgeous tone-on-tone designs. So many options! Time to get crafting, friends.

Processing…
Success! You're on the list.

IMPRESSIONS ABLOOM DOUBLE GATE FOLD

Do you like making Fun Fold cards? This one is super easy. Plus, if you follow my color choices, you’ll have a VERRRY GIRRLY card for that friend – you know the one – that LOVES pink!

  • Stamps: Impressions Abloom, Elements of Text
  • Color Palette: Basic White, Garden Green, Pretty in Pink, Strawberry Slush, Melon Mambo, Lemon Lolly
  • Accessories: Stamp Cut & Emboss Machine, Impressions Abloom dies, Textured Notes dies, Floral Impressions DSP, In Color DSP, Bordered Ribbon, Stampin’ Dimensionals

The Textured Notes dies step up any project. Every size has a different design around the edge, but they all coordinate. They’re one of my absolute Go-To products.

Here are the basic dimensions for the gate fold:

  • Cut a card base to 5 1/2″ x 11″
  • Score at 2″, 3 3/4″, 7 1/4″ and 9″
  • Add DSP panels (with or without mats) to each side. This version uses mats that are 1/4″ smaller for length and width from the card base panel, and DSP that are another 1/4″ than the mat.

I adhered ribbon under the center panel. The panel itself is adhered with sticky strip to the left front panel and the ribbon wraps around the entire card.

See the new Floral Impressions Suite in the Online Store.

Processing…
Success! You're on the list.