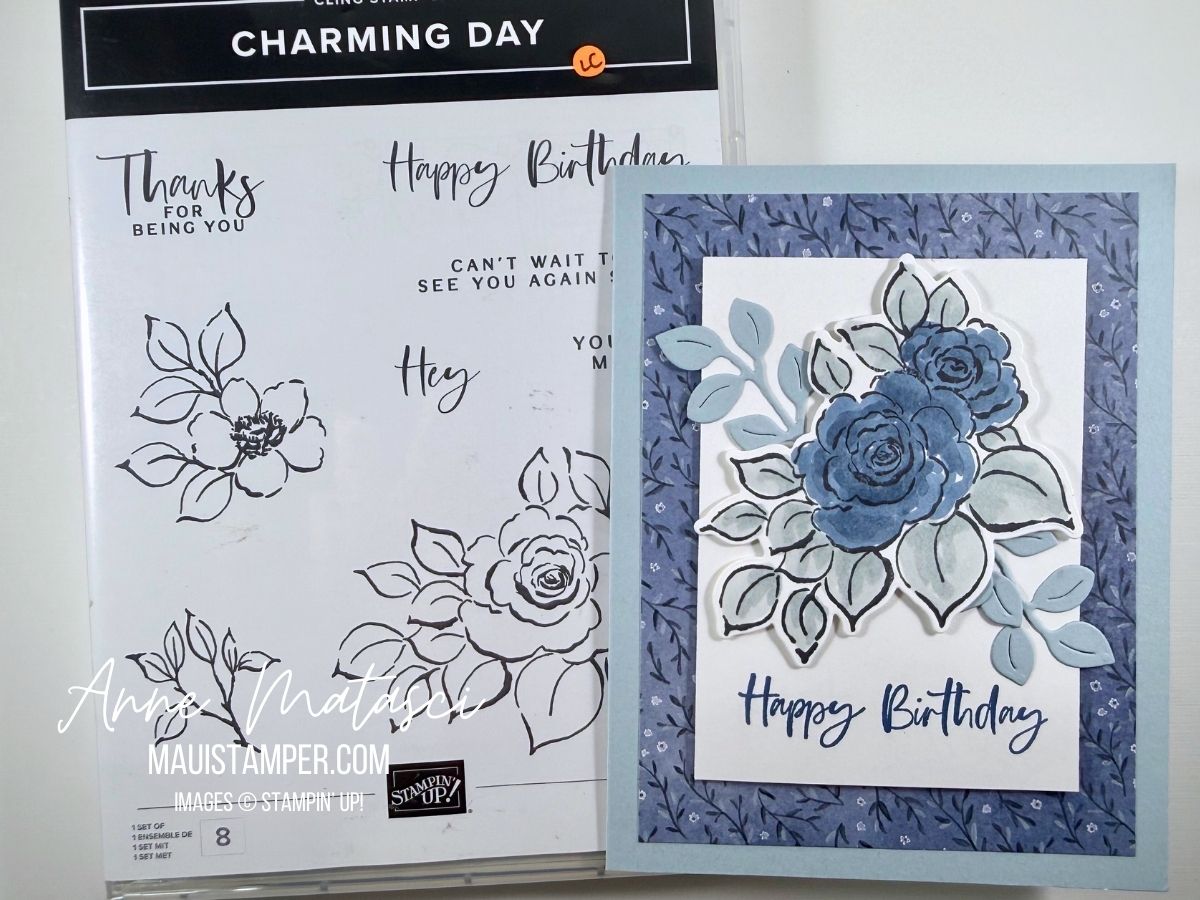
The Charming Day stamps have left the Online Store, but the dies are still available. I’m sad to see them go (how often do I say that???) but when something leaves, it makes room for something new. And our March Online Exclusives are just begging to be released (they’ll be available on March 3rd)!
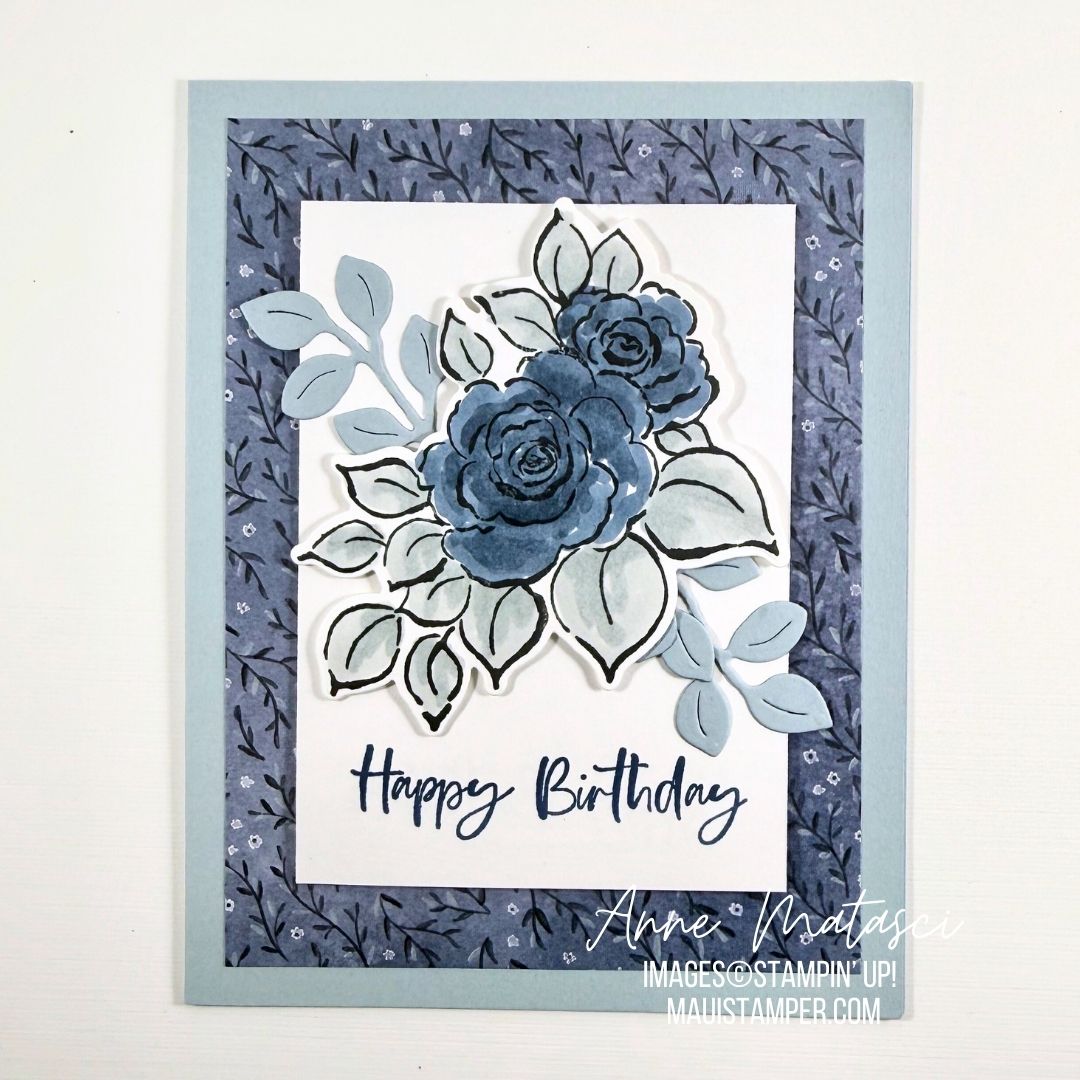
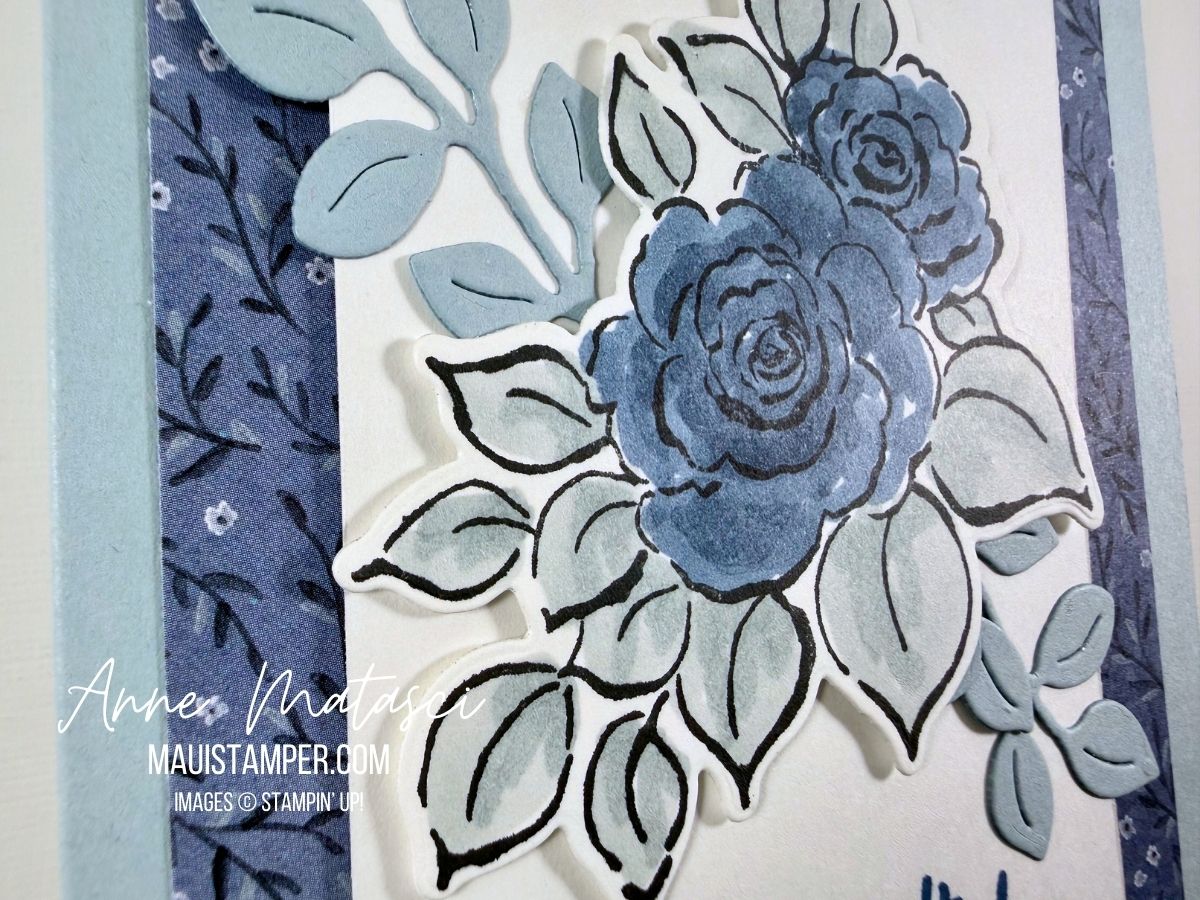
Stamps: Charming Day
Color Palette: Basic White, Cloud Cover, Misty Moonlight, Memento Black
The True Blue DSP is still available as a Product of the Month selection. Everyone is allowed just one Product of the Month purchase for a given month, whether you’re a demonstrator or a customer. If you haven’t purchased True Blue, take a look! The threshold for qualifying for a Product of the Month is the same as qualification for Free Shipping, available through February 20th. It’s a fabulous double dip!
The good news is that even if you don’t have Charming Day, we have a LOT of gorgeous florals. Pick one and try this simple layout! Shop the Online Store.
Processing…
Success! You're on the list.
Whoops! There was an error and we couldn't process your subscription. Please reload the page and try again.
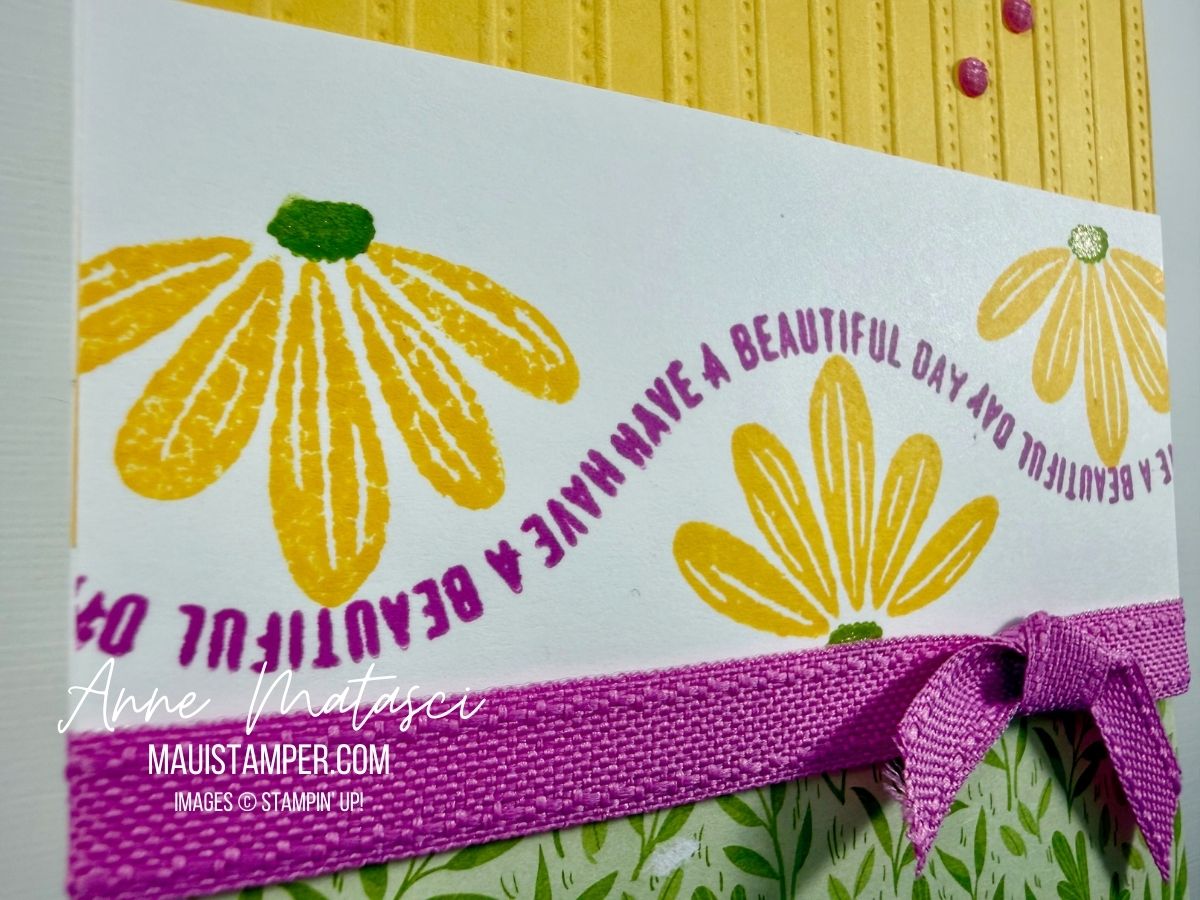
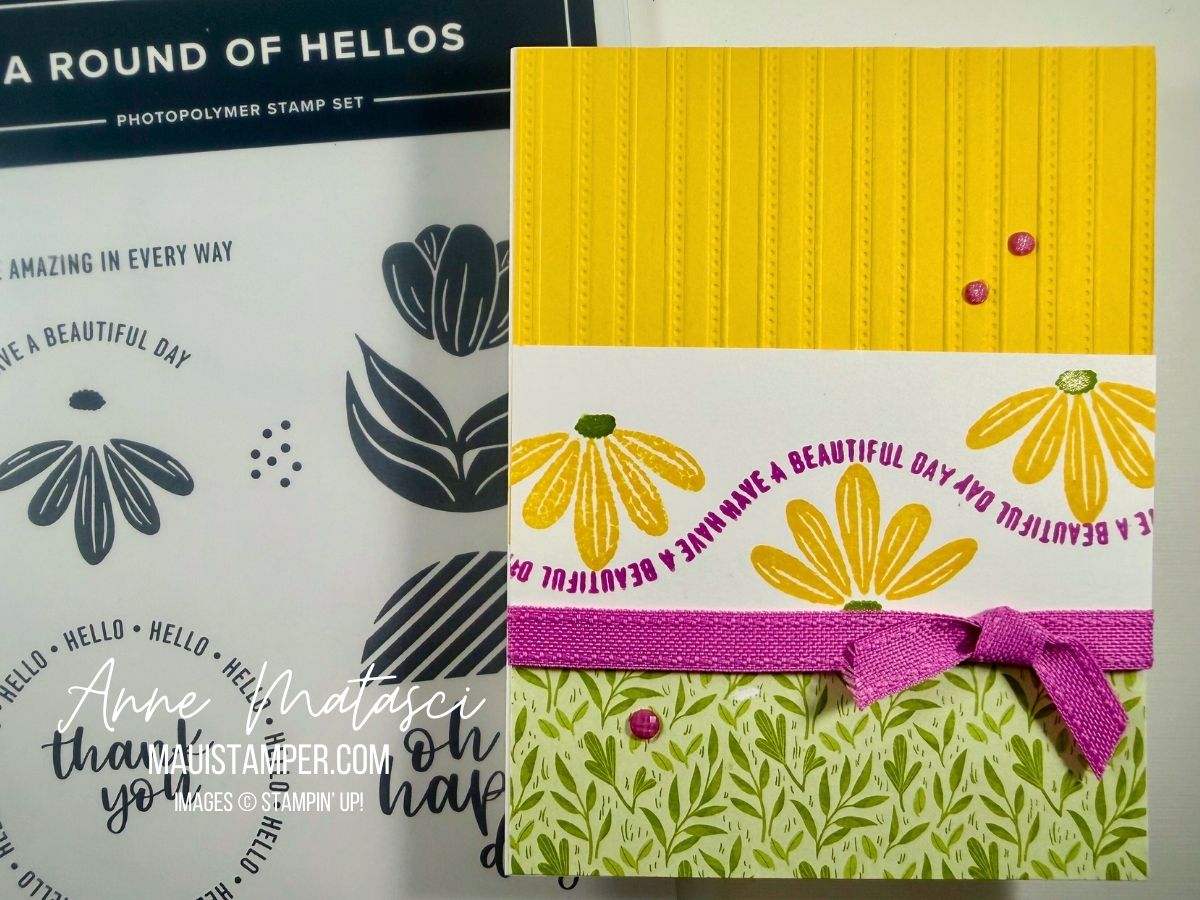
Color Palette: Basic White, Daffodil Delight, Garden Green, Petunia Pop
Accessories: Stamp Cut & Emboss Machine, Lovely Stripes 3D embossing folder, Petunia Pop Bordered Ribbon (retired), Gathering Together DSP, Charming Shimmer Faceted Dots, Wink of Stella
The flowers are flipped up and down, and the curved sentiment is upside down in places. I think this reflects my personal style quite well 😆
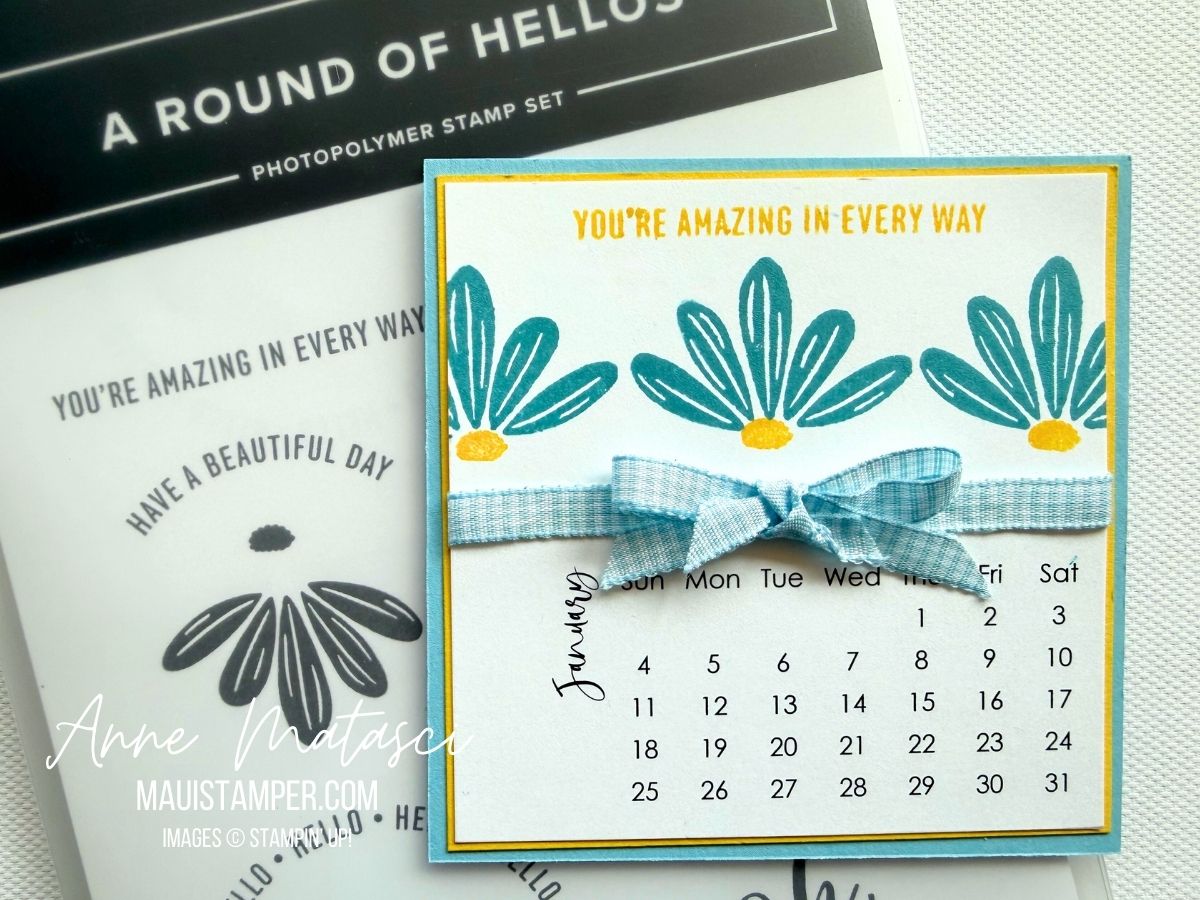
There are a few retired products on this card, but our product selection is so diverse that you can easily find a substitute. The Round of Hellos stamp set is currently alive and well in the Online Store!
Happy Valentines Day 💕 I’ll be at the beach and riding the tandem with Mr. Maui Stamper. Can’t think of a better way to celebrate!!
Well, maybe shopping for Stampin’ Up! goodies at the Online Store for those of you who aren’t married to Mr. Maui Stamper 😉
Processing…
Success! You're on the list.
Whoops! There was an error and we couldn't process your subscription. Please reload the page and try again.
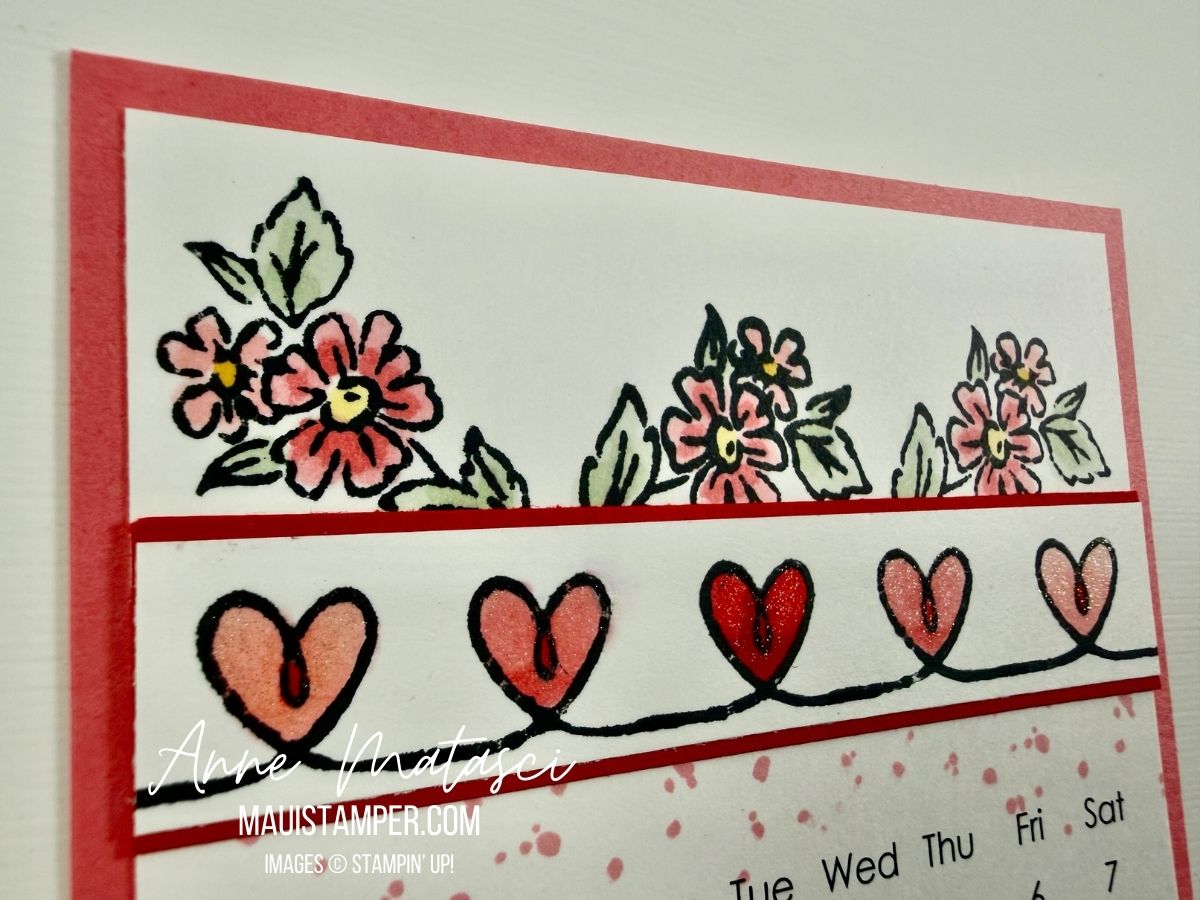
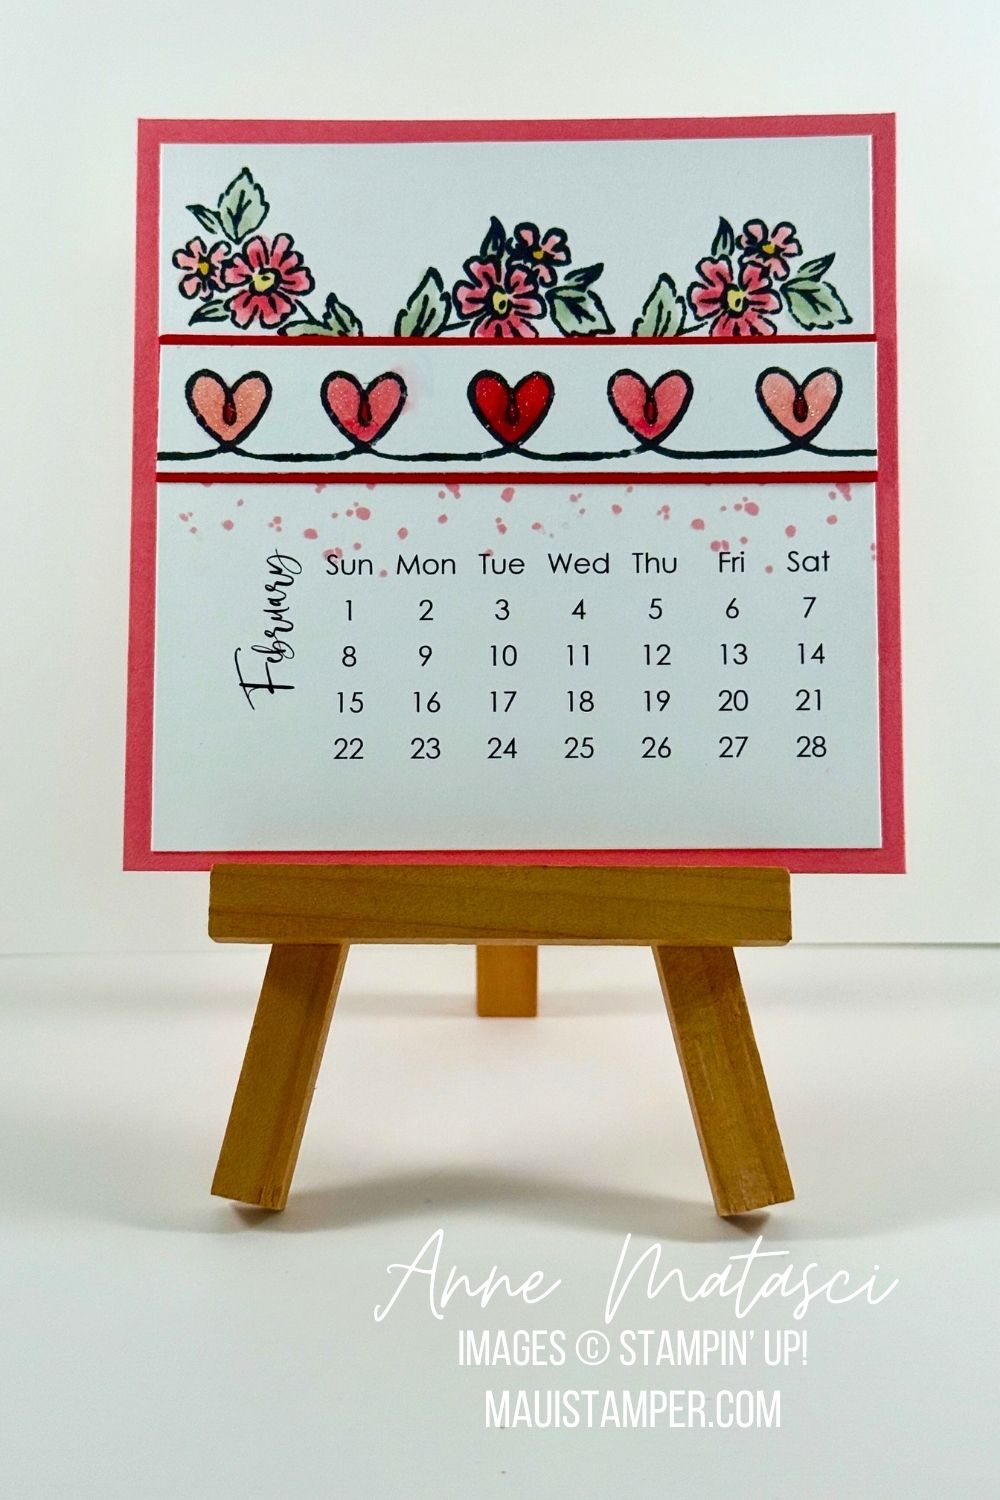
Hello there Calendar makers and enjoyers! We’re glad you’re here and hope you’ll enjoy our February calendars. This month, I’m using a number of stamp sets to create my calendar – and a brand new, not -yet-released tool! Tell me what you think:
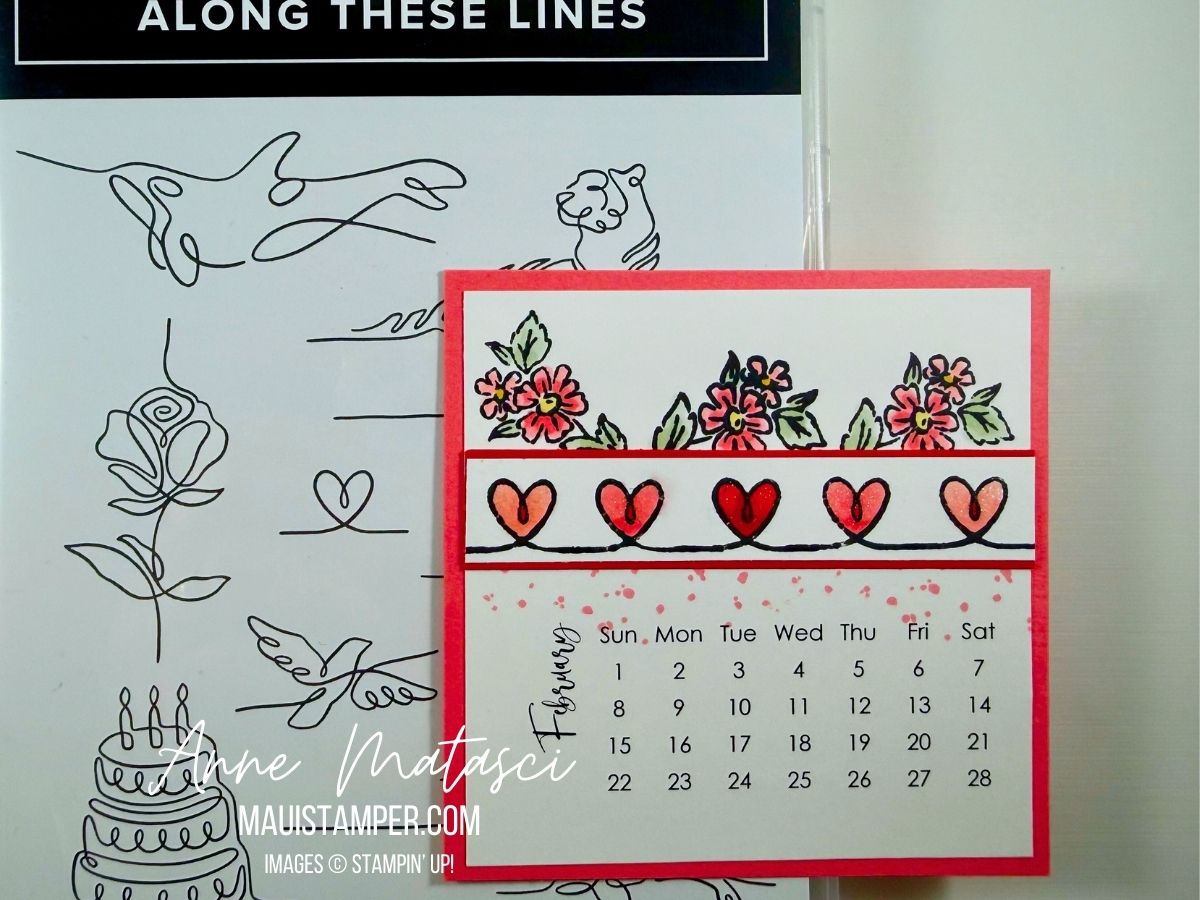
I started with the line of hearts from Along These Lines, then decided they weren’t enough. Before I knew it, More Was More. Hearts. Flowers. Little Pink Dits. Doesn’t that say Valentines’ Day to you?? 😆
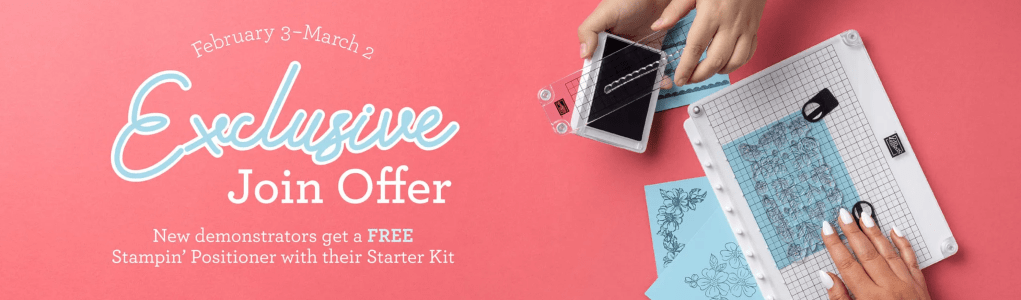
Those hearts are aligned with our brand new Stampin’ Positioner, available February 3rd. But wait, there’s more!
Join Stampin’ Up! and get your Positioner for free with your kit! Crafting is even more fun with community, and when you join my team you’ll enjoy all the perks that come with that, like a 20–25% product discount, early access to the latest products and catalogs, and so much more – plus a free Stampin’ Positioner. There are absolutely no strings attached. Message me and we can chat about whether or not this is right for you.
Click the button to travel through the Blog Hop and see what Sharon and Cheryl have created this month. We’re so glad you’ve joined us!
Would you like to make your own DIY Calendars? The template is just $6. Visit my secure page to make your purchase. (You can also find the page on the banner across the top of my home page.) You’ll receive links to download the templates in an email after you’ve paid. You’ll need to cut and paste those links into your browser. (You may need to check your spam folder to find that email.)
You are only purchasing a template, which you can download and print for your personal use. I hope you’ll enjoy it!
Processing…
Success! You're on the list.
Whoops! There was an error and we couldn't process your subscription. Please reload the page and try again.
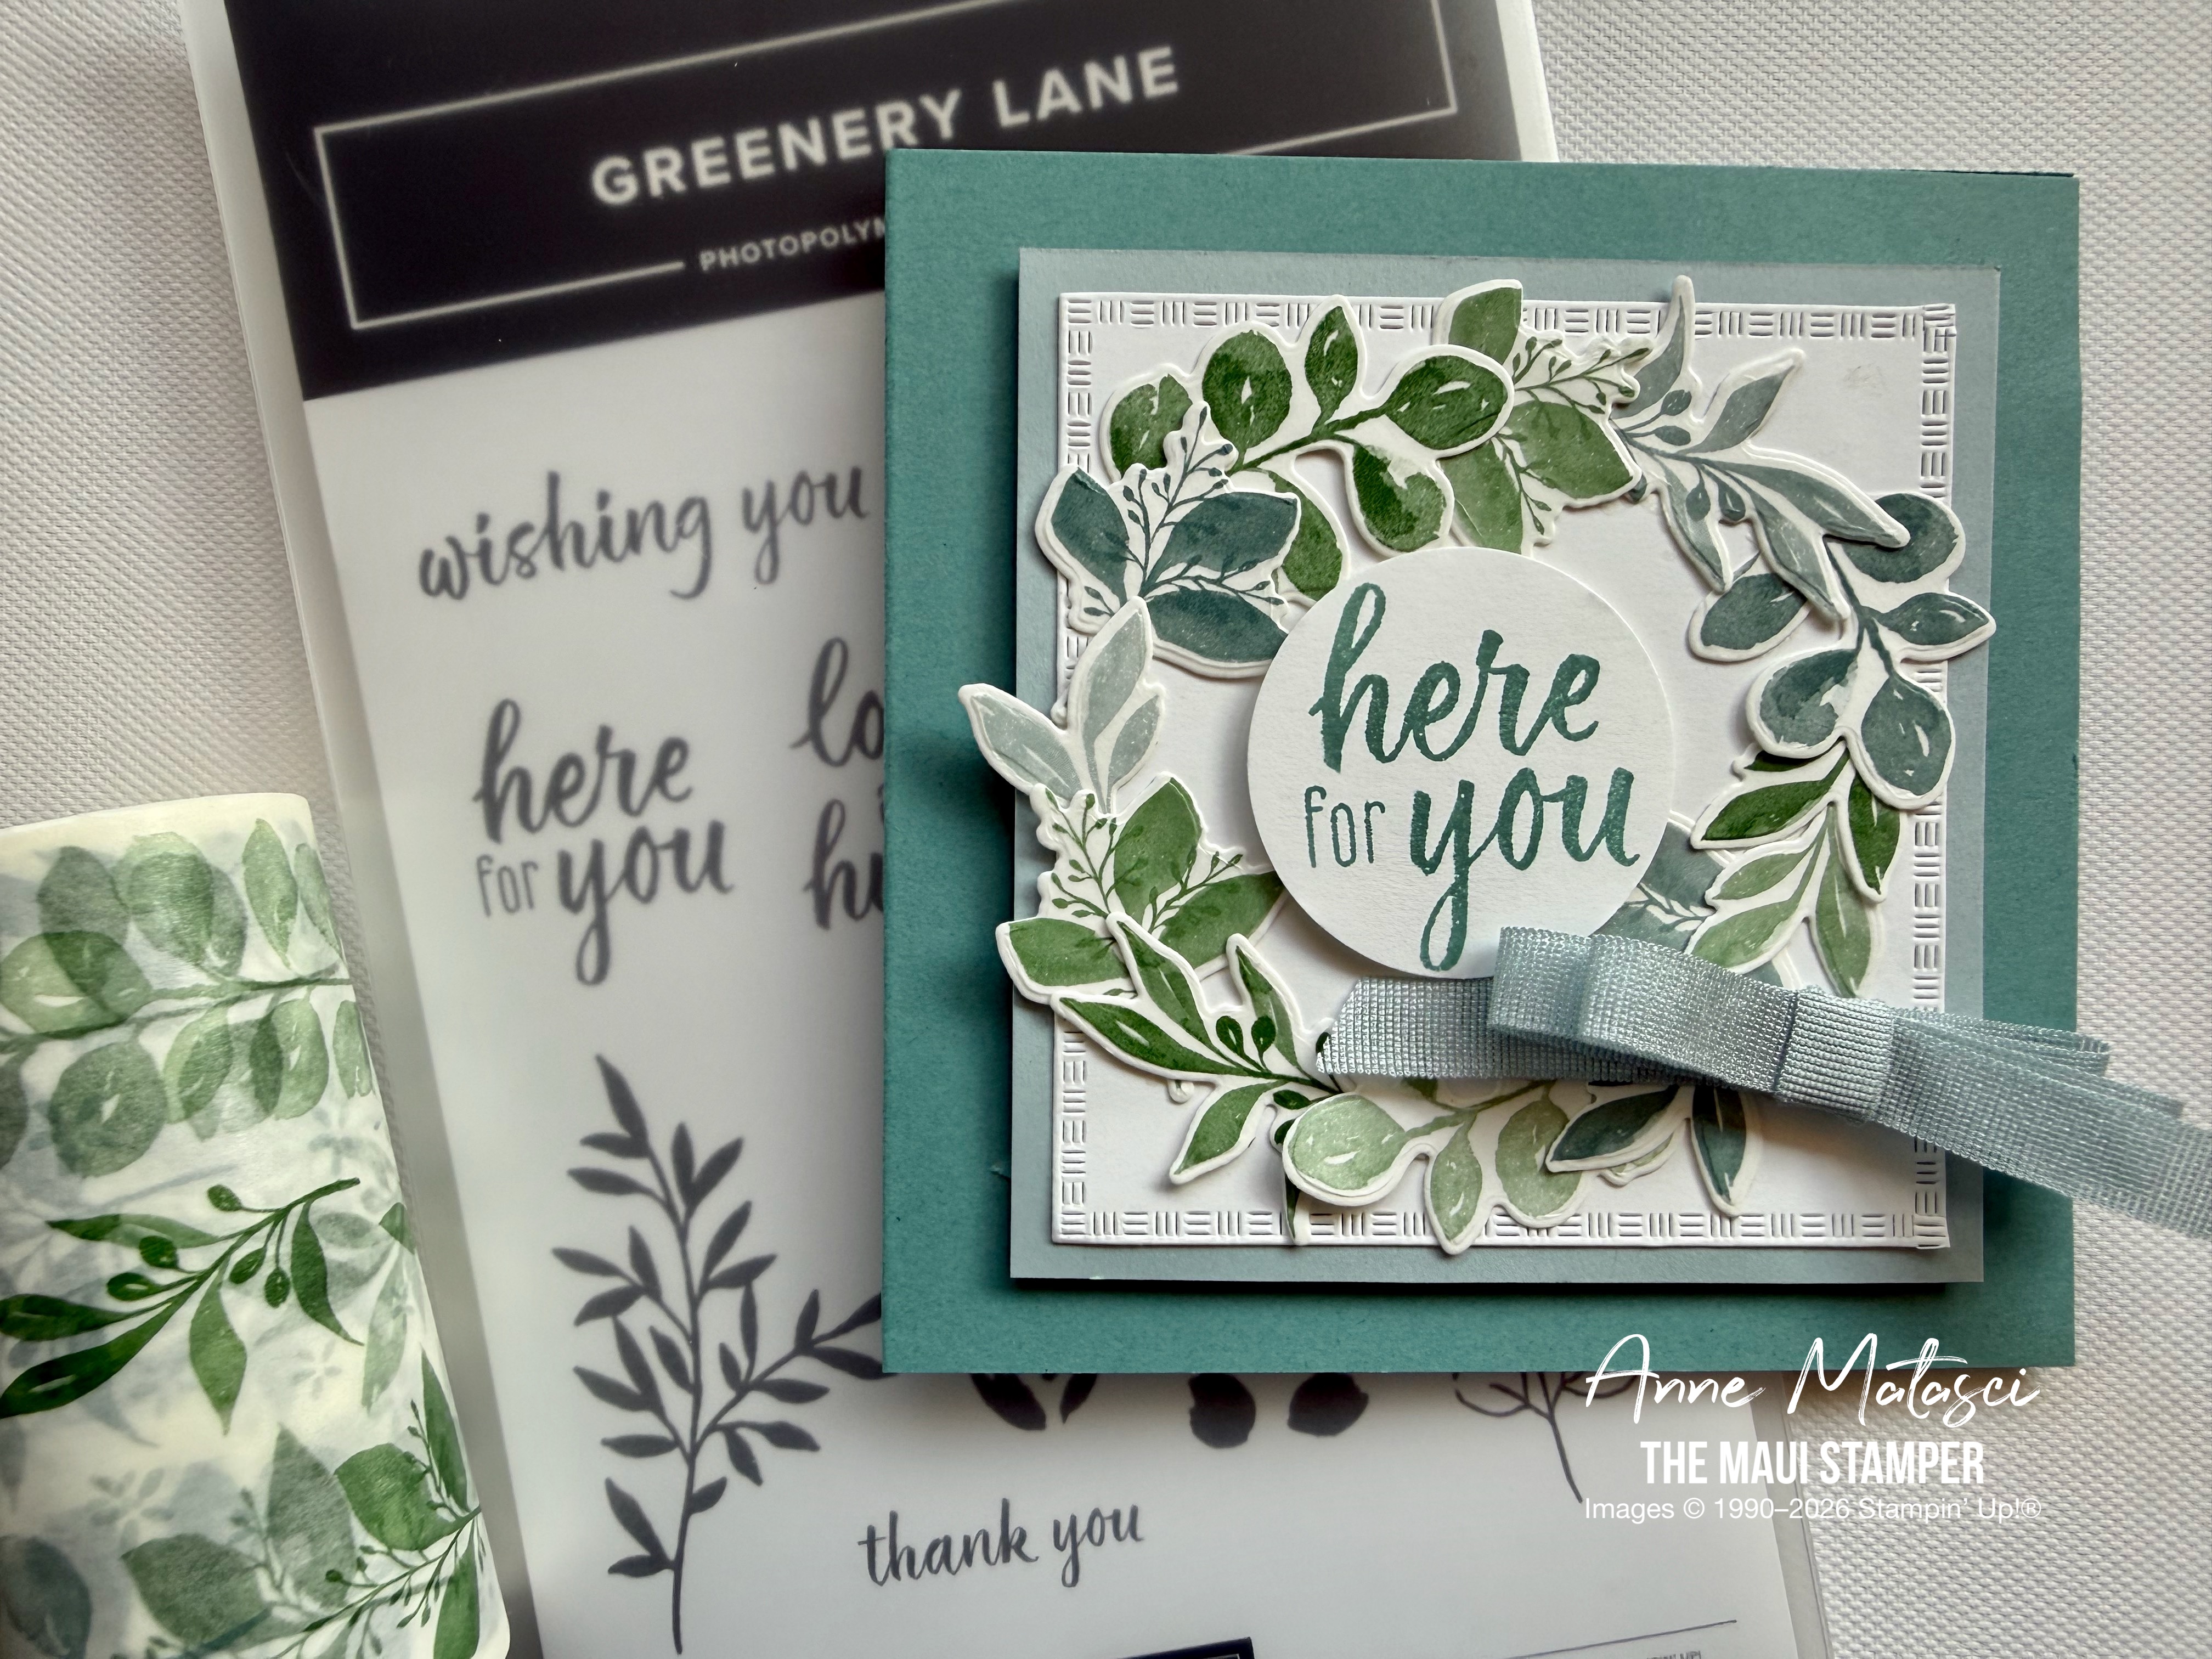
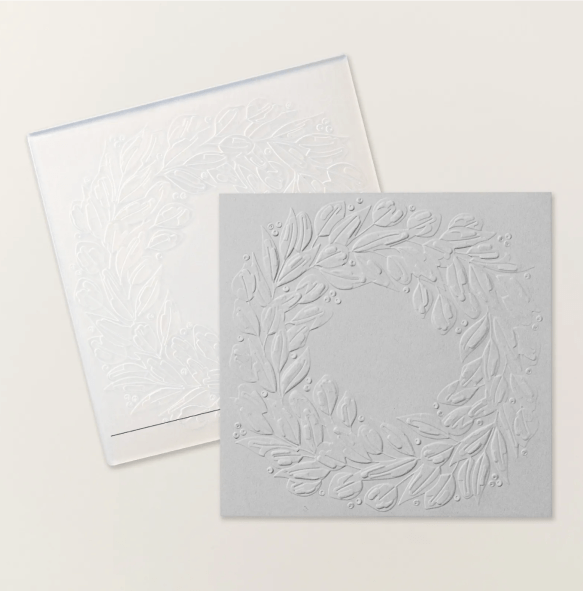
The Greenery Lane bundle is so versatile, and today I’m experimenting with the gorgeous washi tape that compliments the Greenery Lane dies. Have a look!
Stamps: Greenery Lane
Color Palette: Basic White, Lost Lagoon, Pretty Peacock, Cloud Cover
Accessories: Stamp Cut & Emboss Machine, Spotlight on Nature dies, Greenery Lane stamps and dies, Greenery Lane Washi Tape, Cloud Cover Faux Linen Ribbon, Circle Punch, Stampin’ Dimensionals
I adhered the Greenery Lane washi to Basic White card stock for stability and cutting ease. I like the softened look it gives, almost as if it were vellum. I cut a number of leaves somewhat randomly and played with them on the card base.
I’m currently in Australia visiting my daughter, her husband, and my brand new GORGEOUS grandson, Jarrah. As a result, I don’t have all the details on this project, but I’ll give it a go and if you have questions you can leave them in the comments. When I’m home at the end of the month I’ll sort it out.
This washi is gorgeous! I’ve set aside an extra roll just for putting on envelopes. It’s available now, as the January-April mini has been released in the US. Don’t forget the Product of the Month! It’s a super stamp set you’ll reach for again and again.
Have a look at what’s new in the Online Store – and don’t forget, Product of the Month is limited availability – don’t wait to get yours!
Processing…
Success! You're on the list.
Whoops! There was an error and we couldn't process your subscription. Please reload the page and try again.
Happy New Year, friends! We’re especially happy to share with you today as we begin a fresh New Year. I LOVE a new beginning – and this year I’m beginning it ahead of schedule as we’re in the South Pacific to meet our new grandson. 💕 Life is good.
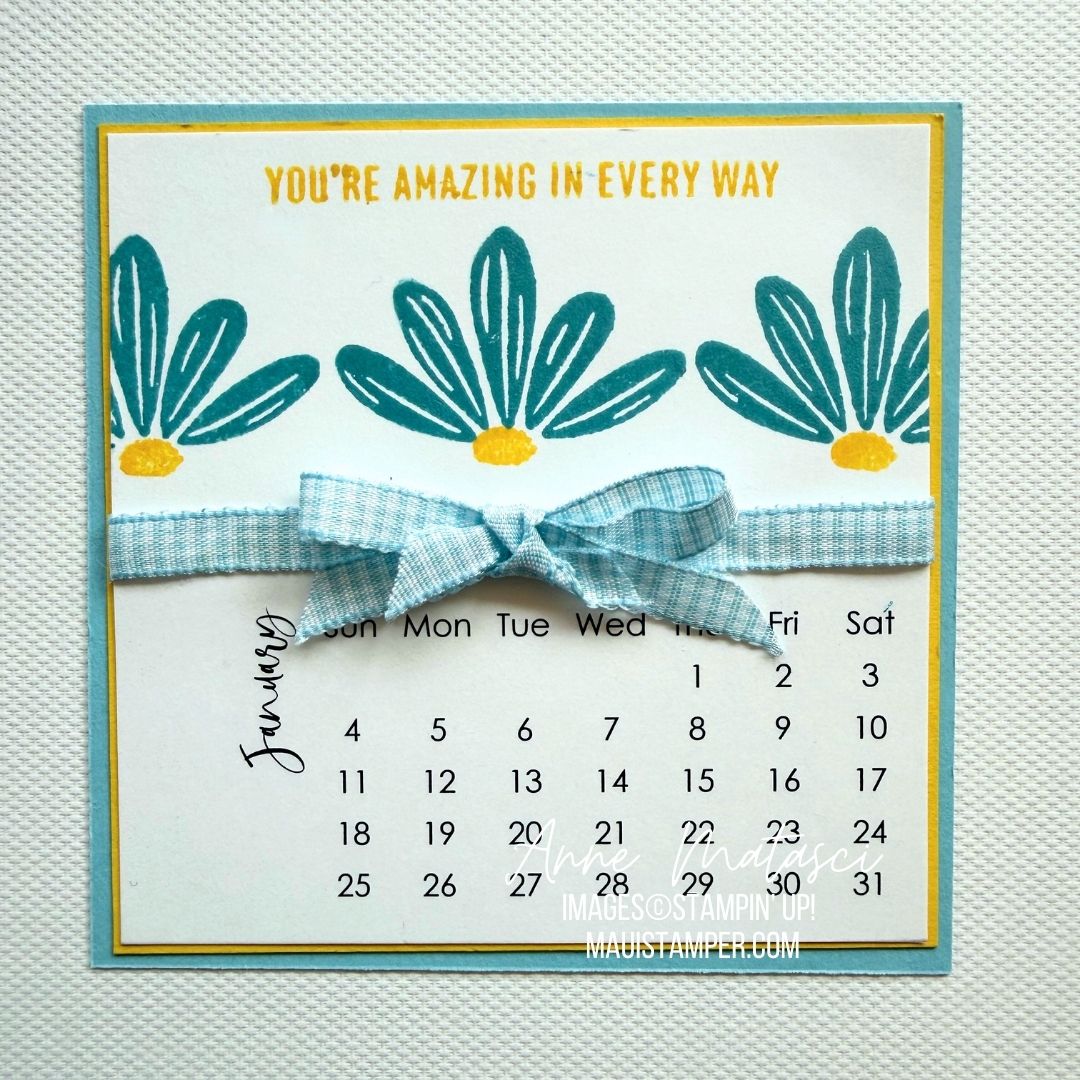
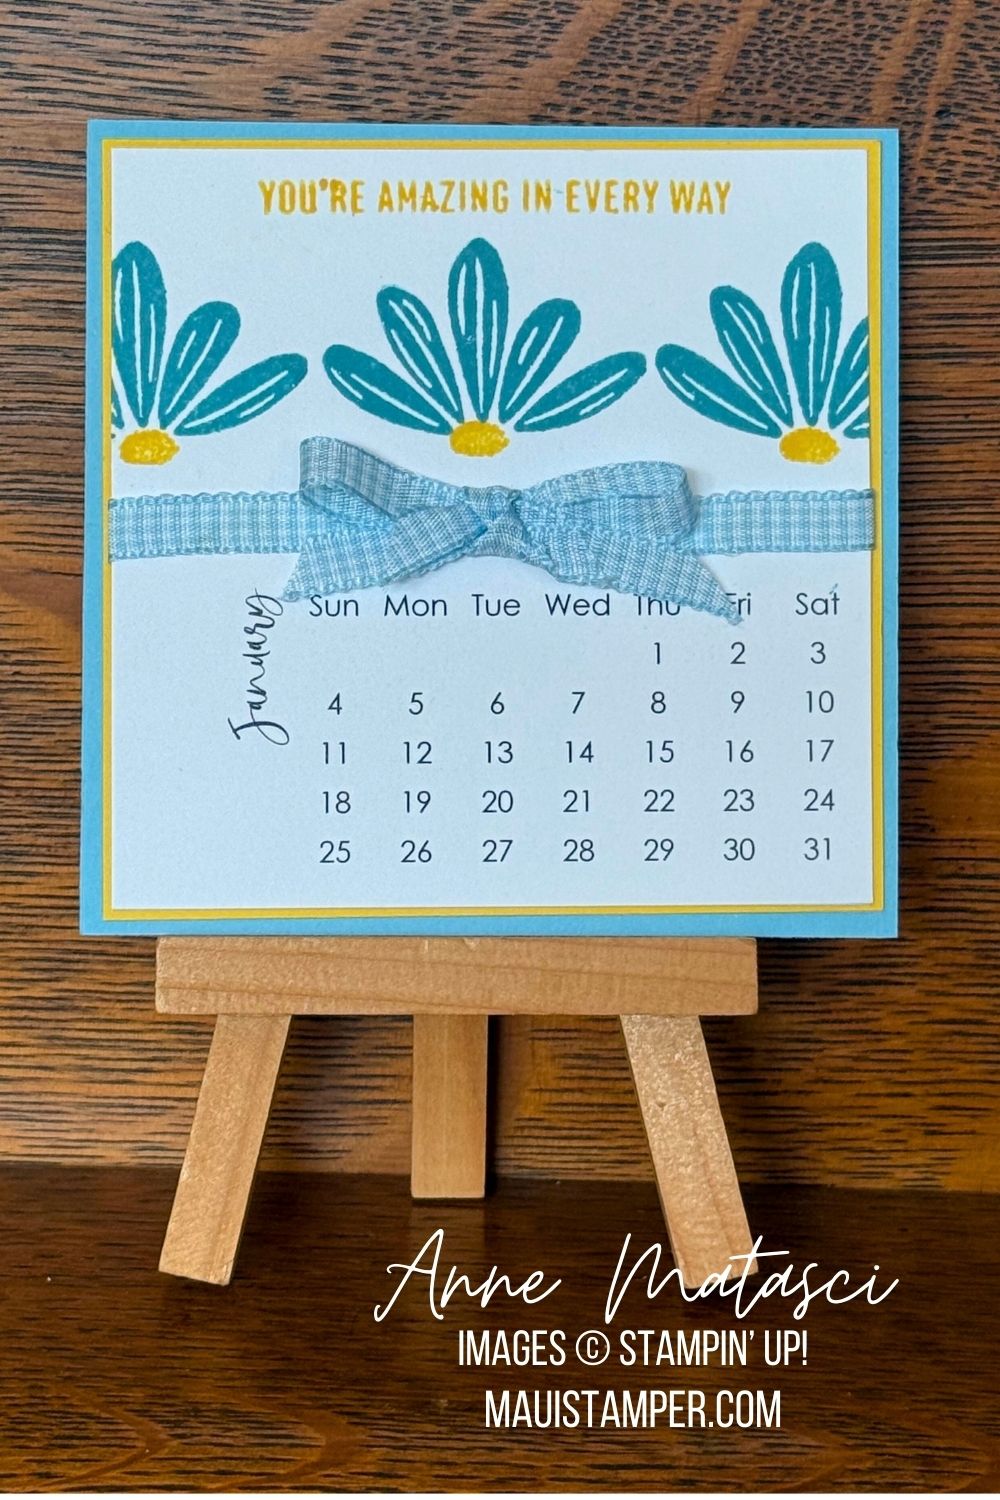
Stamps:A Round of Hellos, available January 6th
Color Palette: Basic White, Daffodil Delight, Balmy Blue
Accessories: DIY Calendar Template, Balmy Blue Gingham Ribbon (January 6th)
I don’t know if I’ve ever used ribbon on a DIY calendar, but it summed up how I feel about a New Year. Put a bow on it! And the sentiment is admittedly a bit of self-encouragement 😉
What sentiment would you choose for your January calendar? Take a look through your stash and find one that gives you a lift. Then take a moment to click below and see what the DIY Squad has for you this New Years morning.
Click the button to travel through the Blog Hop and see what Sharon, Cheryl and Malia have created this month. We’re so glad you’ve joined us!
Would you like to make your own DIY Calendars? The template is just $6. Visit my secure page to make your purchase. (You can also find the page on the banner across the top of my home page.) You’ll receive links to download the templates in an email after you’ve paid. You’ll need to cut and paste those links into your browser. (You may need to check your spam folder to find that email.)
You are only purchasing a template, which you can download and print for your personal use. I hope you’ll enjoy it!
Processing…
Success! You're on the list.
Whoops! There was an error and we couldn't process your subscription. Please reload the page and try again.
It’s the last day of December, and it’s my tradition to review my DIY Easel Calendar month-by-month. Are you ready? Let’s start with JANUARY:
I started the year with Terrific Toadstools for January 1, 2025. Such cheery little fungi!
Delightful Wishes is still a current set, and it made me think of lilac blossoms. See the details in my post on February 1, 2025.
Everyday You and Me remains one of my favorites, though it’s retired now. Check out the original post on March 1, 2025.
If you’ve followed me for a bit, you know I love my garden! Impressions Abloom is on the last chance list now. See this post for my April 2025 calendar.
In May I stayed in the garden, but kept it simple. There’s a soft wash behind the flowers from Pretty Florals. Can you identify the colors before you check the May 1, 2025 post?
I used another wash but this one got a LOT of color! Along These Lines is still current if you have a thing for dolphins. Read the details for this calendar page from June 1, 2025.
Perfectly Pears was just the thing for July. You can see the details on July 1, 2025.
In August, it was time for something cool and refreshing. Cheers and Sips is another classic on the Last Chance list. You can see it all HERE.
I have had so much fun with Long Time No See, and I’m sad to see it on the Last Chance. Look at this adorable pooch featured in my September 1, 2025 post.
I went another direction for October this year, focusing on fall foliage. The tropical images from Branching Out worked perfectly. See the October 1, 2025 post.
I loved Branching Out so well I repeated it with the November 1, 2025post.
And finishing up the year was Traditions Of Christmas. Sharp eyes might have noticed that I initially created the December calendar on the November page. Aiyah. Some days are like that! See it HERE.
That’s it for 2025. I hope you enjoyed all of our creations, and perhaps followed the links to see what my DIY friends did each month. It’s such a joy to create these little pages and share them with you.
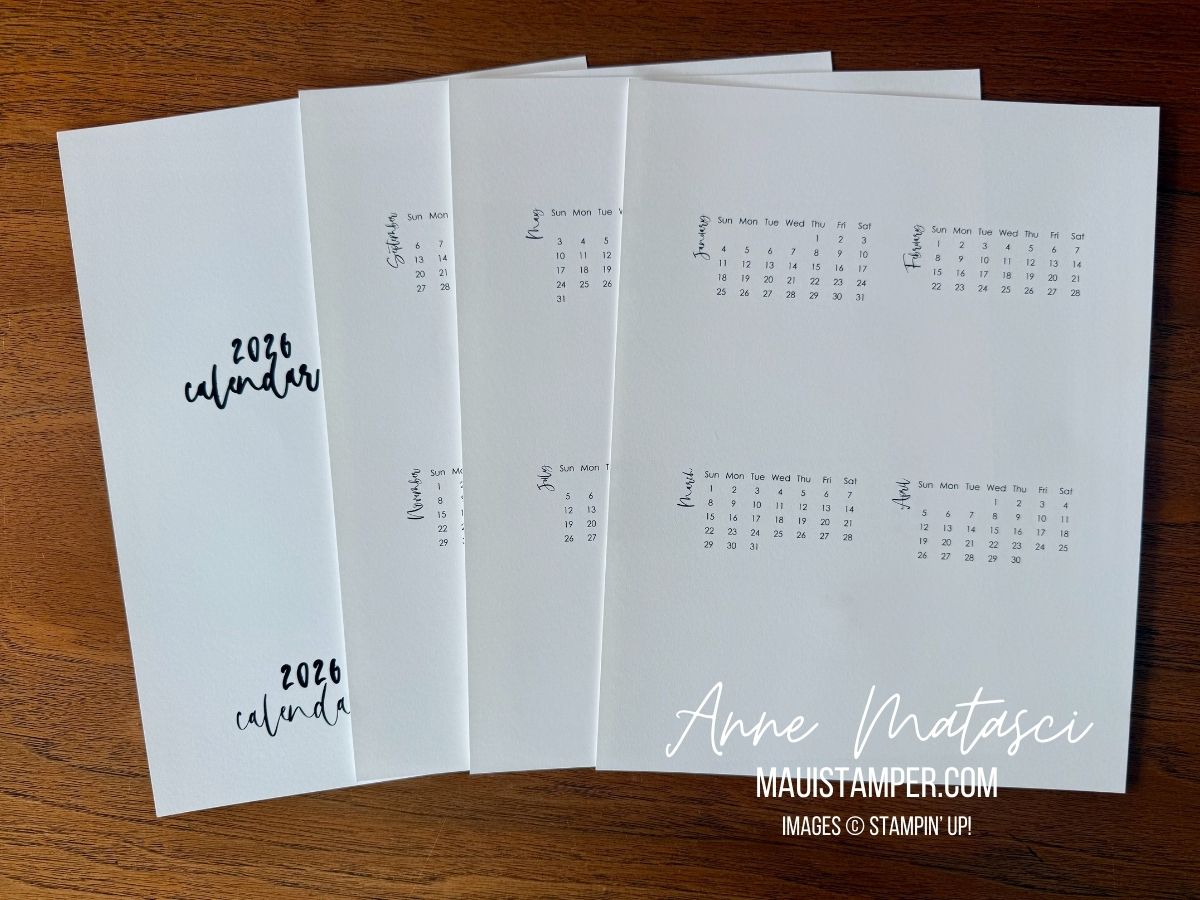
If you feel inspired, you can create your own calendar for 2026. The 2026 DIY Template is just $6 and you may use it to make as many calendars as you like. It includes a page of covers and 12 monthly calendar blocks (4 to a page). The blocks are designed to be cut to 3 1/2″ square. Visit my secure ordering page to purchase your own template.
Thanks for following the Maui Stamper and sharing in my crafting journey. Tomorrow starts a New Year, and I’m looking forward to sharing it with you. Aloha 🌺
It’s almost bedtime here on the Valley Isle, but I can’t rest until I share these favorites that are on the Last Chance list. Take a look and tell me if you agree!
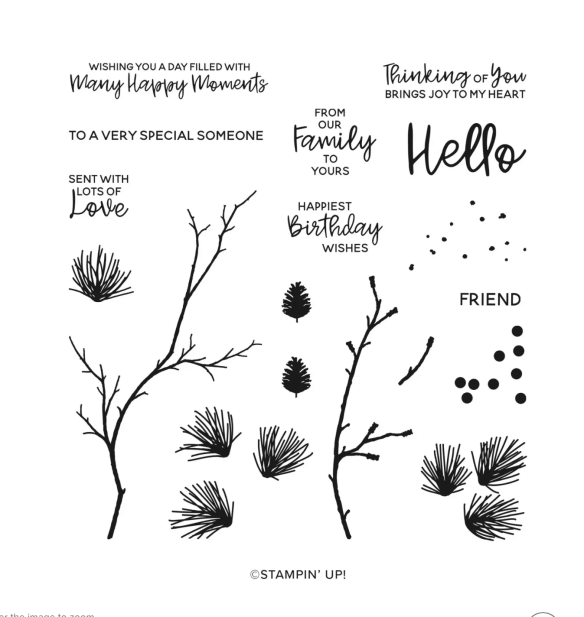
Branching Out is a classic, year round set. It can be evergreens, or florals, or a wreath…don’t let this one slip by.
I personally think Wishing You Joy is a sleeper. It hasn’t gotten a lot of attention, but it should! 4 classic sentiments, expressed in 4 classic fonts – you’ll reach for it year after year.
The Traditions of Christmas DSP is a fabulous mix of florals and neutrals that will give your holiday crafting a quick boost. BONUS: the coordinating Christmas Greenery dies cut out multiple images from this DSP. If you want the companion stamps, order the dies and stamps as separate products. The bundle isn’t discounted, but the individual products are. IYKYK!
I was pretty sure Petal Arrangements would be on this list as it is a red rubber cling set. If you love tropical flowers, check this one out – the 6 images can be assembled as shown and stamped, or can be separated and used individually. I’m sad to see this one on Last Chance.
There’s so much more on the list…Stampin’ Up! really cleaned house this time. Take a look and see if your list is different from mine. Either way, you’ll find it all in the Online Store.
Processing…
Success! You're on the list.
Whoops! There was an error and we couldn't process your subscription. Please reload the page and try again.
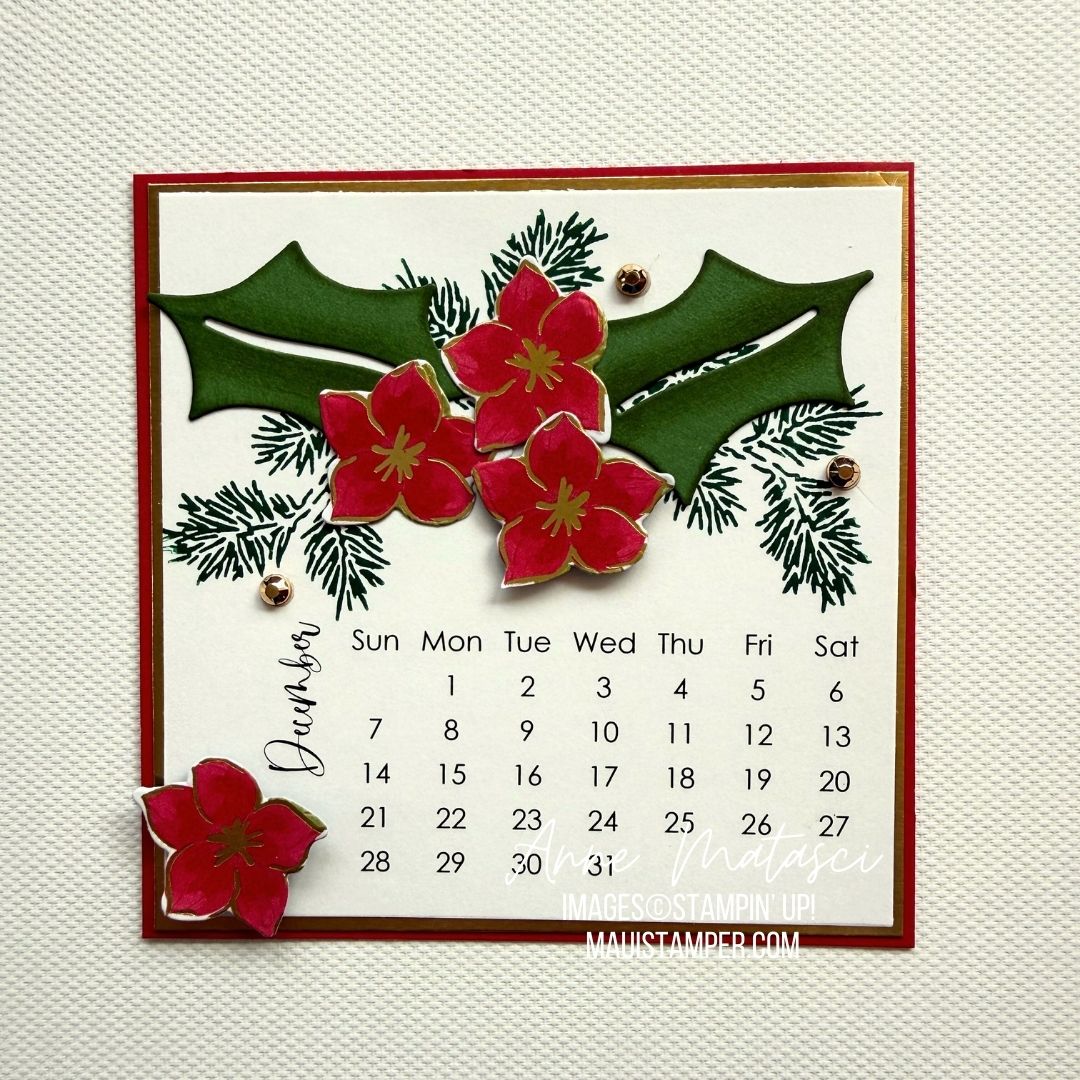
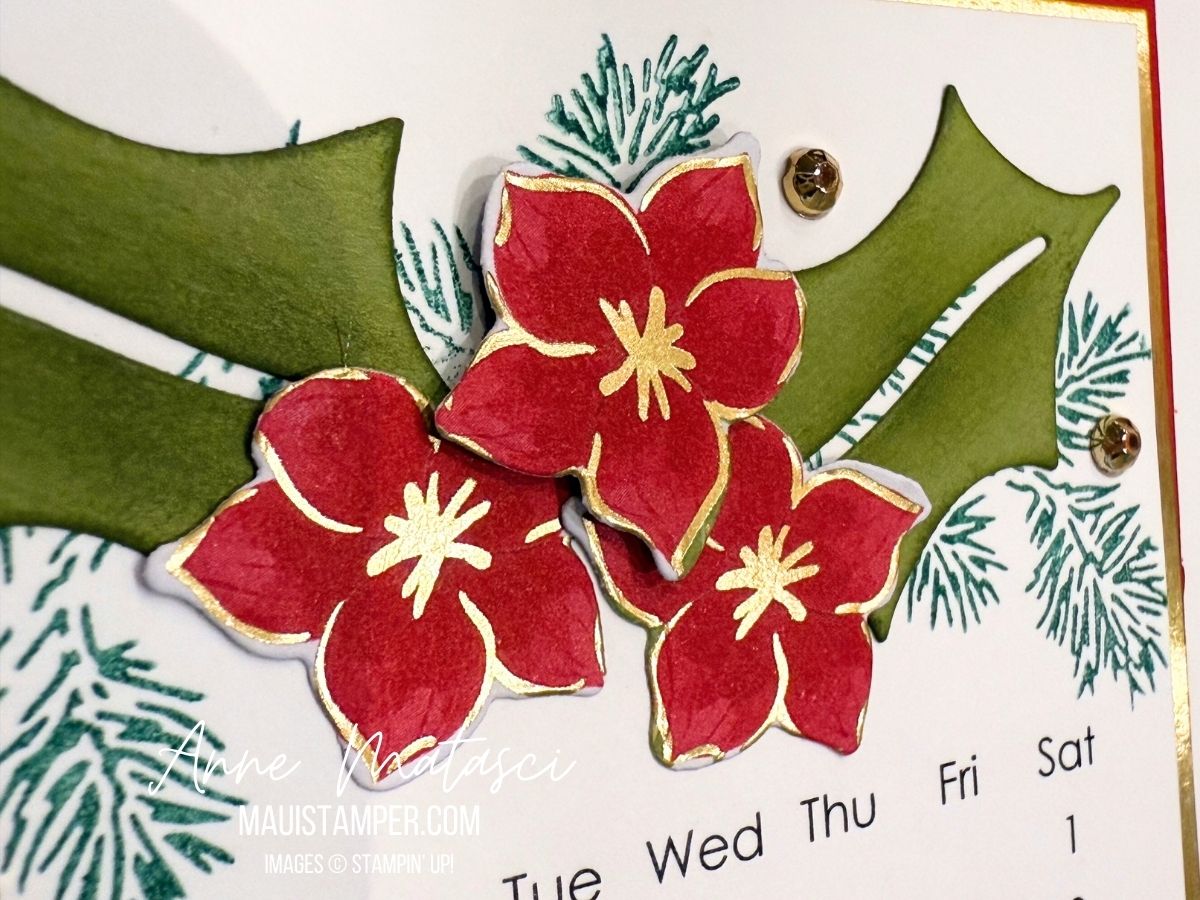
Hi there friends! Welcome to the last calendar hop of 2025. Our calendars provide a little snapshot of what Stampin’ Up! released during the year, and it’s fun to reminisce. In December, I’m taking advantage of the gorgeous Traditions of Christmas Designer Series Paper to give my calendar a little extra pop.
Stamps: Seasonal Tags
Color Palette: Basic White, Real Red, Old Olive, Shaded Spruce, Gold
These gold-enhanced, watercolored flowers come straight from the DSP and are die cut with the coordinating Christmas Greenery dies. I also cut the holly leaves with the same dies, giving them a little ink brush with my dauber to add dept.
The past couple of months I’ve been double-matting my calendars. This month, the design just begged for a little extra glimmer around the edge. I don’t expect to do it every month, in fact I don’t think it’s usually necessary – but I did it in December!
December is such a busy month, and Mr Maui Stamper and I were away for almost 3 weeks in November so I’m kicking into high gear! Using DSP is a great way to save a little time. Stop back on December 31st when I’ll have my annual DIY roundup – all 12 months in one glorious post!
Click the button to travel through the Blog Hop and see what Sharon, Cheryl and Malia have created this month. We’re so glad you’ve joined us!
Would you like to make your own DIY Calendars? The template is just $6. Visit my secure page to make your purchase. (You can also find the page on the banner across the top of my home page.)
You’ll receive links to download the templates in an email after you’ve paid. You’ll need to cut and paste those links into your browser. (You may need to check your spam folder to find that email.)
You are only purchasing a template, which you can download and print for your personal use. I hope you’ll enjoy it!
Processing…
Success! You're on the list.
Whoops! There was an error and we couldn't process your subscription. Please reload the page and try again.
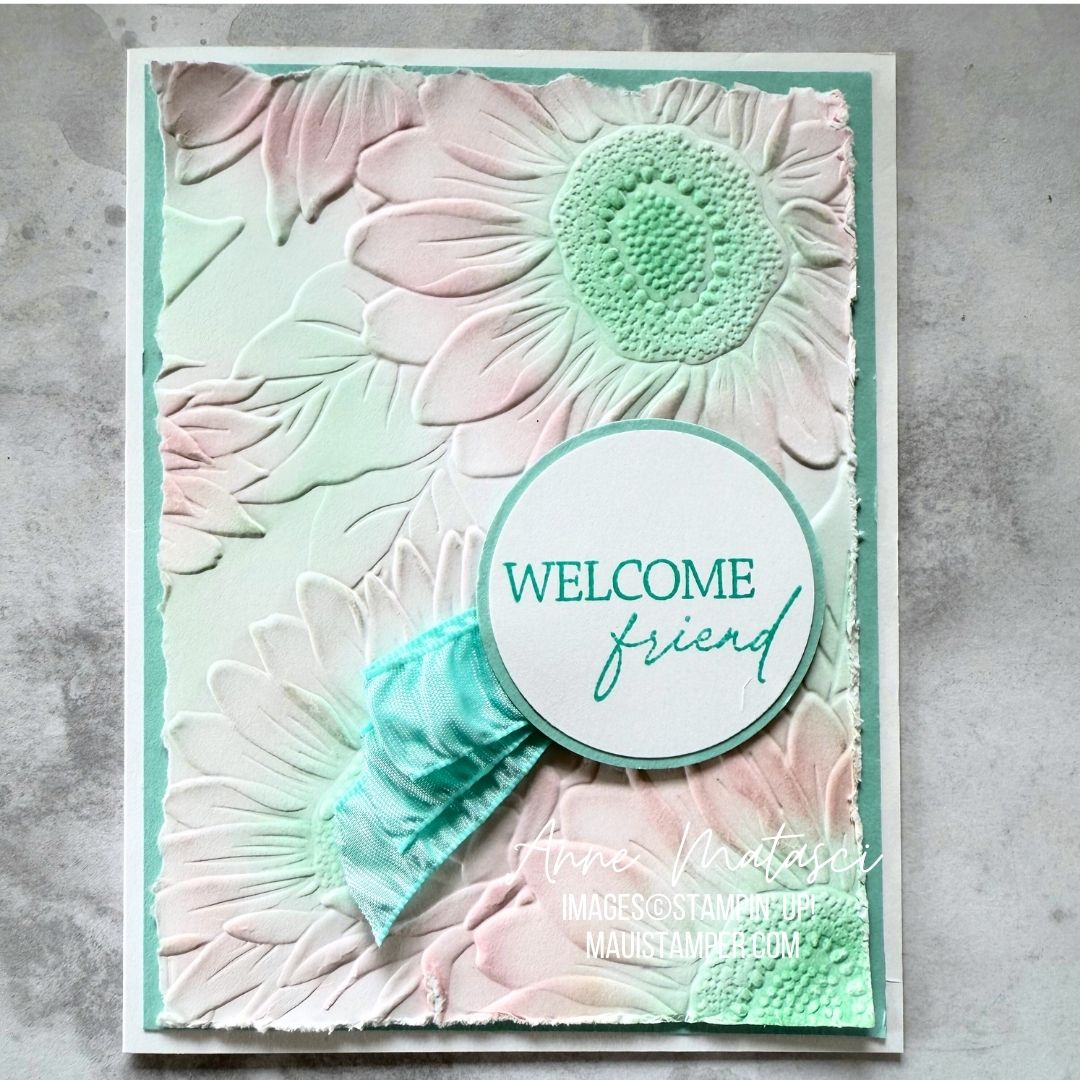
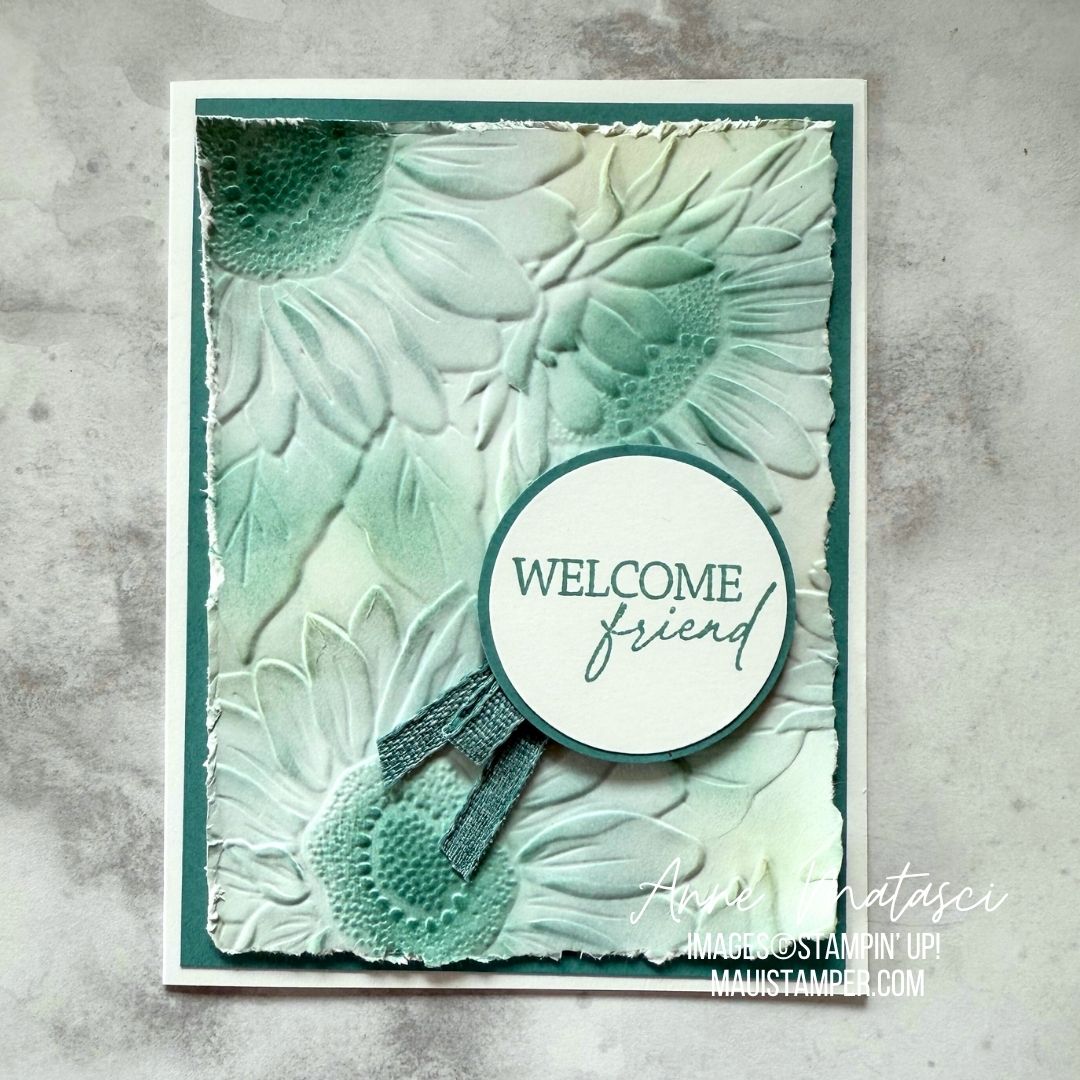
It’s been a minute since I shared a Sunflower 3D Embossing Folder card but that doesn’t mean I’m ignoring it. I spent a very happy and relaxing afternoon playing with color on the embossed image, and I think you’ll love the end result.
Stamps: Retired sentiments
Color Palette: Basic White, Lemon Lolly, Daffodil Delight, Peach Pie, Timid Tiger, Pool Party, Bubble Bath, Coastal Cabana, Lost Lagoon
Accessories: Stamp Cut & Emboss Machine, Sunflower 3D Embossing Folder, various circle punches, retired ribbons, Stampin’ Dimensionals
I confess I took the opportunity to use up some retired bits and pieces I had languishing in the studio. These cards were to welcome new members of the Maui Stampers team, and I needed quite a few (so glad you’ve joined us!!). That gave me the perfect opportunity to play with the theme.
Each embossed panel has been colored using daubers and whatever color combination came to mind. I generally used analogous colors like Cloud Cover, Pool Party, and Lost Lagoon, but it was a pretty whimsical choice process. I had a LOT of embossed panels to experiment with!
I tore the edges and curled them a bit to add more dimension since there weren’t any embellishments aside from the ribbon. This was a very playful project!
I hope you’ll give it a try! The Sunflower 3D Embossing Folder is currently out of stock, but you can request an email notification in the Online Store.
Processing…
Success! You're on the list.
Whoops! There was an error and we couldn't process your subscription. Please reload the page and try again.
If you know Mr. Maui Stamper, you know he likes all the colors as long as they’re blue. The Peaceful Garden DSP makes both of us happy – he gets his blues, and I get my florals.
Color Palette: Basic White, Cloud Cover, Misty Moonlight
Accessories: Peaceful Garden DSP, Misty Moonlight and Silver ribbon, Hues of Blue Flowers, Stampin’ Dimensionals
You have to look for those little flowers, but in person they’re much easier to spot. This could be a holiday card, a wedding card, or a birthday card.
Wishing You Joy is another sleeper stamp set in the September-December mini catalog. There are 4 sentiments: Wishing You Joy, Sending You Cheer, May Your Christmas Be Bright, and Noel. They’re offered in 3 different fonts, in different sizes and shapes. It’s a perfect all-purpose holiday stamp set! Find it in the Online Store.
Processing…
Success! You're on the list.
Whoops! There was an error and we couldn't process your subscription. Please reload the page and try again.