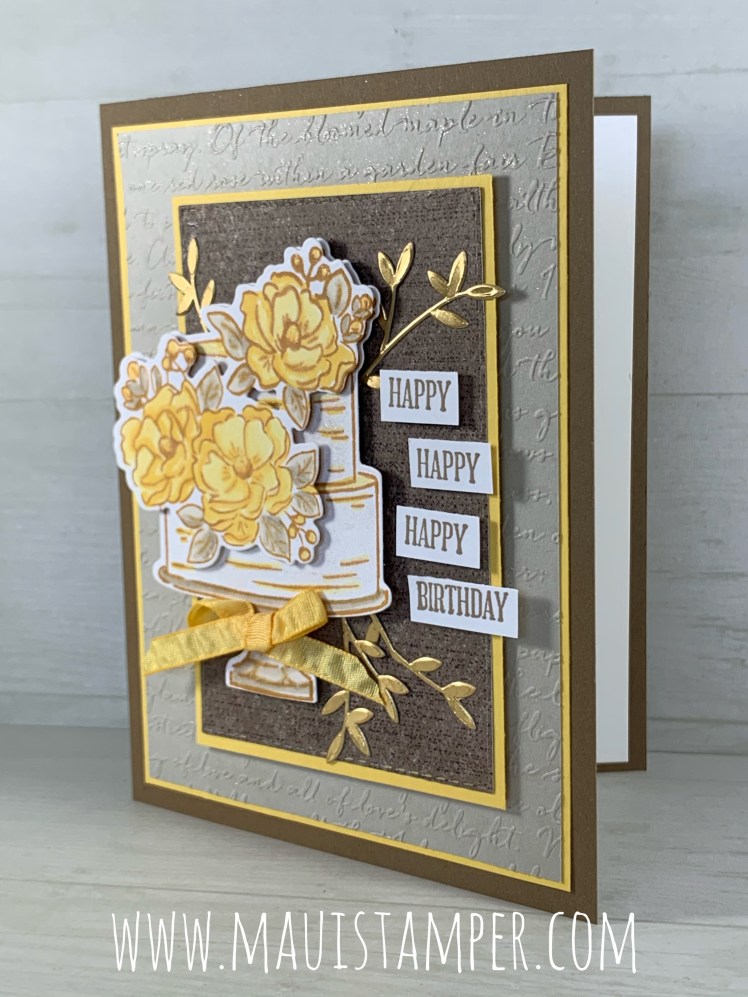
Sale-a-bration 2020 has been over for more than two weeks, but I’m still wrapping up a few projects left on my desk. Do you have bits and pieces? I have so many random “parts” that I could probably make cards for weeks without cutting into anything new. This card has been in my head for at least a month, and it finally came together this week:
This stamp and die combo just begs to be colored over and over again with Stampin’ Blends in every possible color combination. I have multiple sets of these images on my craft desk, some of which are in the most unexpected colors you can imagine! I’m going to have to do a wild, bring-on-all-the-colors card in order to put them all to use.
It’s really satisfying to use up the “parts” as well as to bring my vision to life. Tell me, how many random bits and pieces are lurking around on your craft desk??
If you’re done with pieces and ready for some full sheets of card stock, I’d be grateful and honored if you shop HERE.
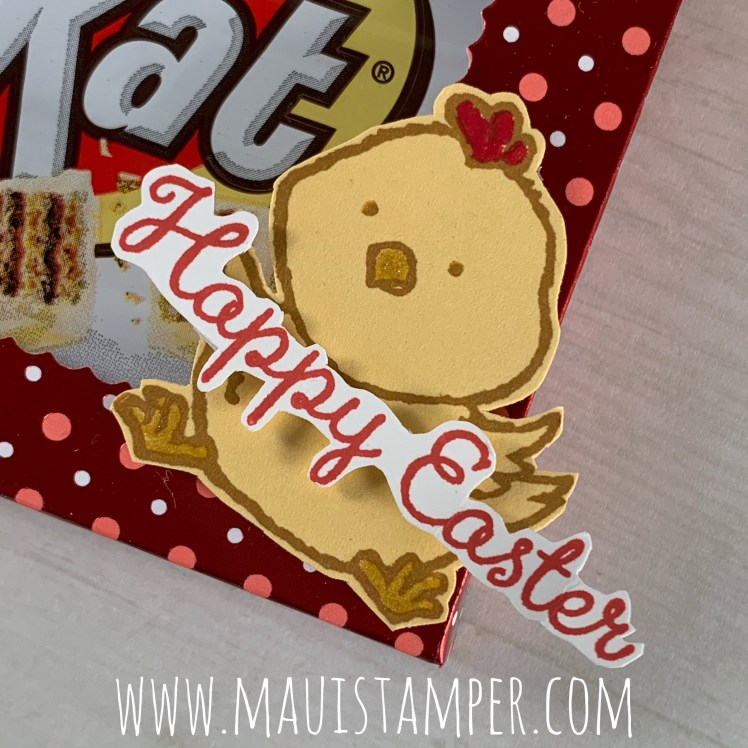
If you’re lucky enough to have a Kit Kat bar (…break me off a piece!) in your Stay Home Stash, I’ve got a cute idea for you. I found these bars weeks ago, back in the olden days when you walked through a store browsing. I wanted to use this idea for a group, but even then there must have been some panic buying because there were just a few in stock:
The Stitched So Sweetly dies have an awesome assortment of shapes that are really versatile. They’re currently available as a bundle with the So Sentimental stamp set, and I’m crossing my fingers that they’ll carry over to the 2020-2021 Annual Catalog because I have more ideas than time right now!
To create a box for any candy bar, just measure the bar and add a SMIDGE – maybe 1/8″ – to those dimensions for the dimensions of your box. Use the Simply Scored tool to quickly create that box, being sure to leave a 1/4″ tab to adhere the sides, and enough extra in the height of the box to create overlap when you close the flaps. Choose a die that fits inside your largest side and cut out one section. You may have to be a little creative to fit things through your die cutting machine!
It didn’t take long to cut the chick out, but fussy-cutting Happy Easter took a couple of tries. I always want to get it reaaaaaallllly close, and that doesn’t always work!
I hope you have something yummy to enjoy on Easter morning! Mr. Maui Stamper and I will have a delicious home-cooked brunch (who am I kidding, EVERYTHING WE EAT is home cooked these days. SHEESH.) We’re looking forward to an exuberant visit with our family via the wonders of Zoom. We are spread over MANY time zones so coordinating these calls is quite complex. (what is it with me and ALL CAPS today? Apparently I am tired of being alone and feel the need to shout. Sorry.)
We’re still shipping, and Stampin’ Up! is being extremely conscientious about staffing and environment in the warehouse in order to protect the SU team as well as each of you receiving your box o’ happiness. If you need a little something crafty to brighten up your day, you can shop HERE – and mahalo.
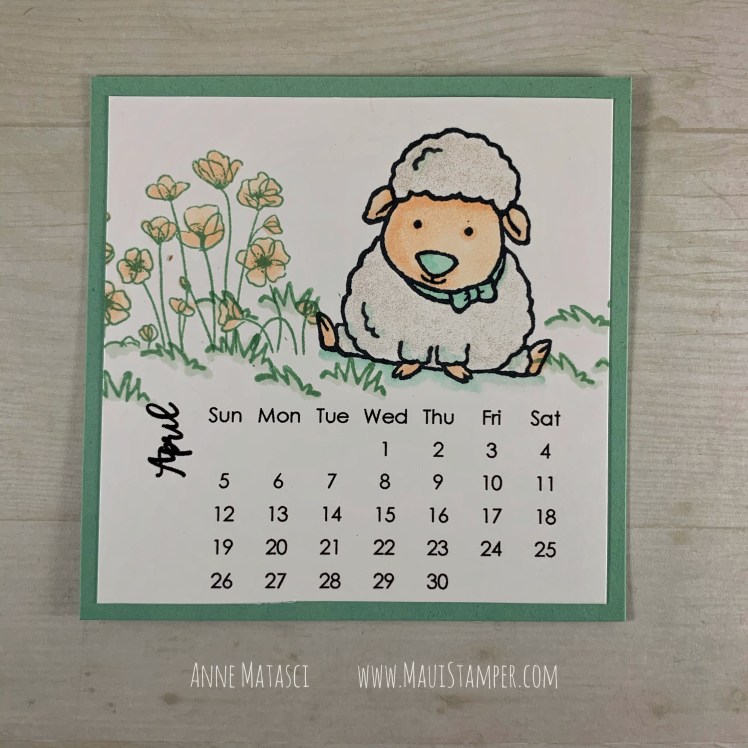
How can you not love this lamb? This is the I-can-do-yoga, Upavista Konasana lamb! She is fluffy and has a perfect little half-smile that says “If I can do this, you can too!”
Well. But I cannot. My legs will not do that, no matter how I try. Even as a young girl, I could never do anything resembling the splits. But once again, I digress.
Just cuz she’s fluffy doesn’t exclude the possibility that she’s sparkly too!!
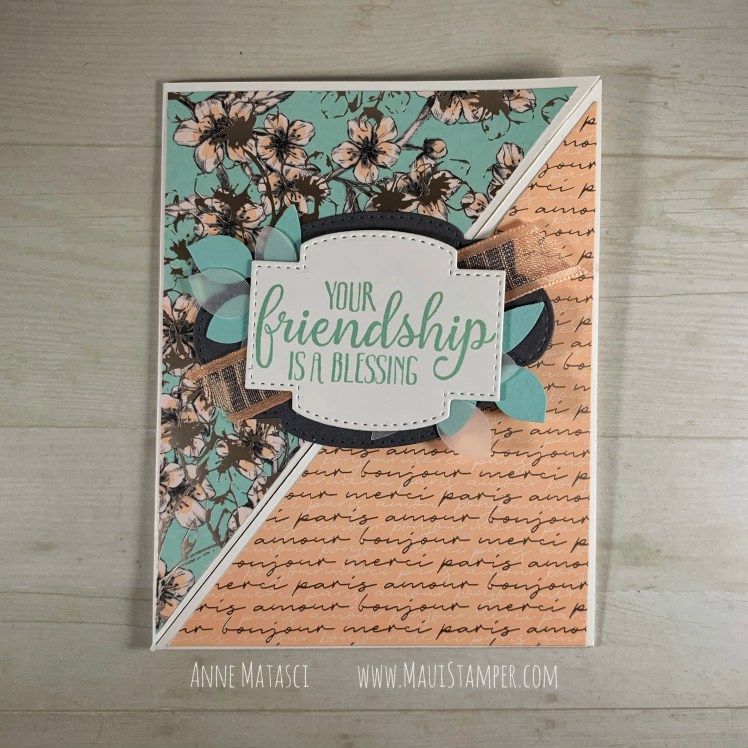
The Parisian Blossoms DSP is a specialty paper with foil embossing on one side of each sheet, and I think it adds the perfect glimmer to this card. That little silver foil ornamentation is from the Painted Labels dies which are sadly unavailable right now. Don’t have them? If you rummage through your stash of dies and even trims, I’ll bet you can find a substitute!
Have some fun with what you have – that’s the name of the game right now! And if there’s something you truly need, you can shop HERE!
There’s a new card challenge on Instagram, hosted by the very talented @MartinMayhem. He’s a Stampin’ Up! Artisan and has come up with 30 days of card prompts to keep us inspired.
I’m not very good at challenges because I have consistency issues. Today’s card is a case in point: this is the prompt from Day 3, which was, oh, I don’t know, a few days ago. But hey, there’s a pandemic on, I’ll make my own schedule. RIGHT?
I wanted to soften that Whisper White card stock just a little. I experimented with a couple of techniques and came up with the idea of the Stamping Sponge. You can layer the color and it keeps the image crisp, unlike watercoloring that blurs the edge.
I added a few leaves on the inside too. That leaf is from Timeless Tropical rather than the Rooted in Nature leaf, as I preferred the serrated edge for this card. If you look closely, you’ll see a little line detail on the Garden Green strip between the two sets of leaf panels.
Martin Stone is a Stampin’ Up! Artisan and you can find him – and his challenge – on Instagram @martinmayhem. You might be inspired to try one of his challenges too! He’s quite generous about timing, so pick a day, any day, and make a card!
If you need supplies, the Stampin’ Up! warehouse is still shipping! Shop HERE.
I’m smitten with this little sheep, with her posture and her fluffiness. I can’t decide if she’s doing a seated wide angle yoga pose (Upavista Konasana) or if she’s a cheerleader doing the splits, but I know this: she’s pretty flexible!
Crystal and Cheryl have calendars to share as well on this April morning. Please stop by and say hello! And if you need a little Wink of Stella or your own Chunky Lamb, please shop HERE. There’s also a brand new early release suite from the 2020-2021 Annual Catalog called Ornate Garden – be sure you check it out! That big bold THANK YOU is going to be amazing.
I made a big stack of cards to swap at an event…that has been deferred. This was to have taken place a couple of weeks ago, and I was so discouraged that I set the entire project aside for a while, but they’re done now – and I’m quite happy with them, if I do say so myself:
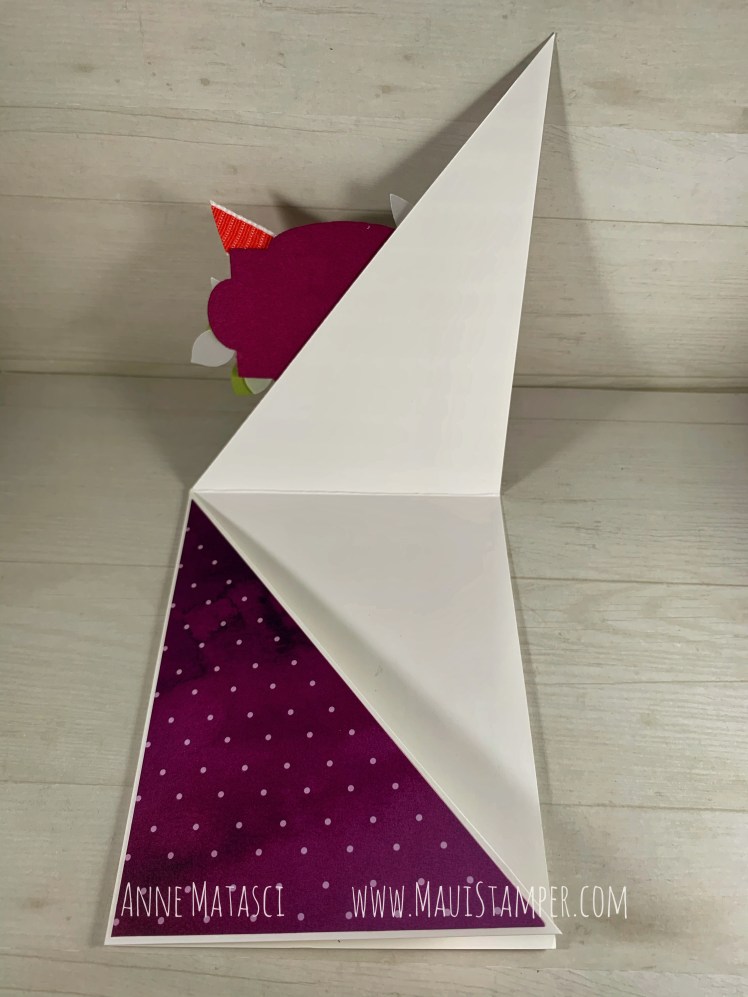
This is an exceptionally easy fun fold to do, especially with our paper trimmer. Score a sheet of 8 1/2″ x 11″ card stock both horizontally and vertically. Place it diagonally along the cutting edge of your trimmer, making certain that you’ve centered the top and bottom corners. (The “X” in the center of the scored lines should be along the cutting line of the trimmer as well.) Cut your card stock diagonally – the trimmer cutting edge isn’t quite long enough to make it to the ends, but if you slide the cut piece of card stock out of the trimmer, you can finish it up with your snips – it’s less than 1″ on either side.
Cut your DSP into 4″ x 5 1/4″ rectangles, and cut them diagonally as well. One design goes on one triangular panel, the other design goes on the other. A focal point/shaped image attached to one panel finishes the card and helps to keep it closed at the same time.
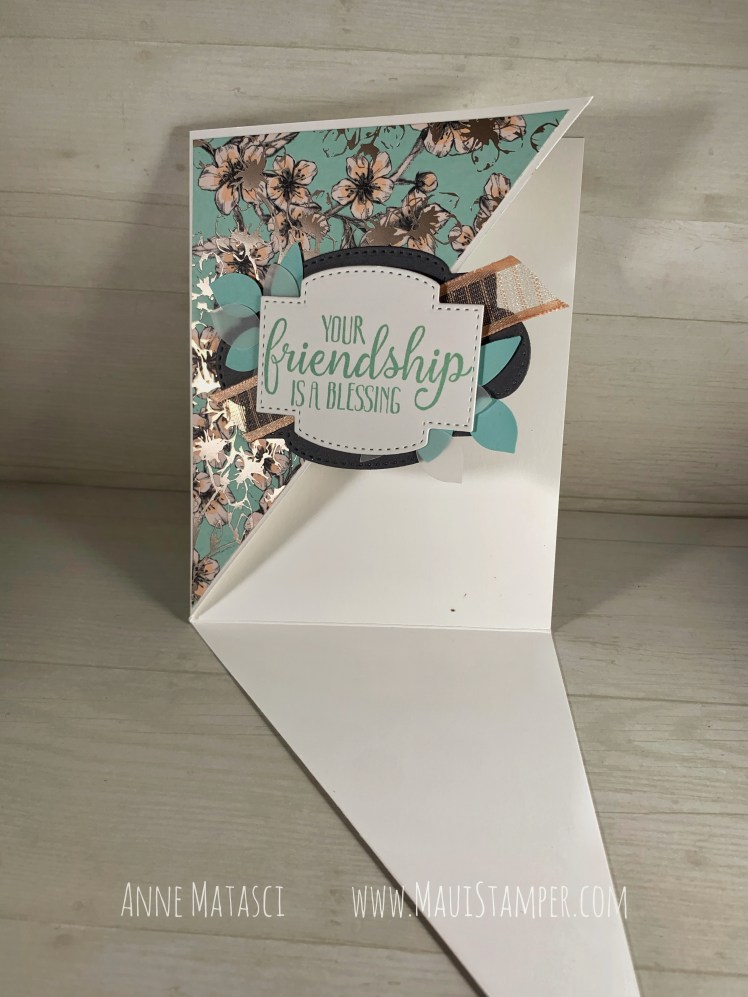
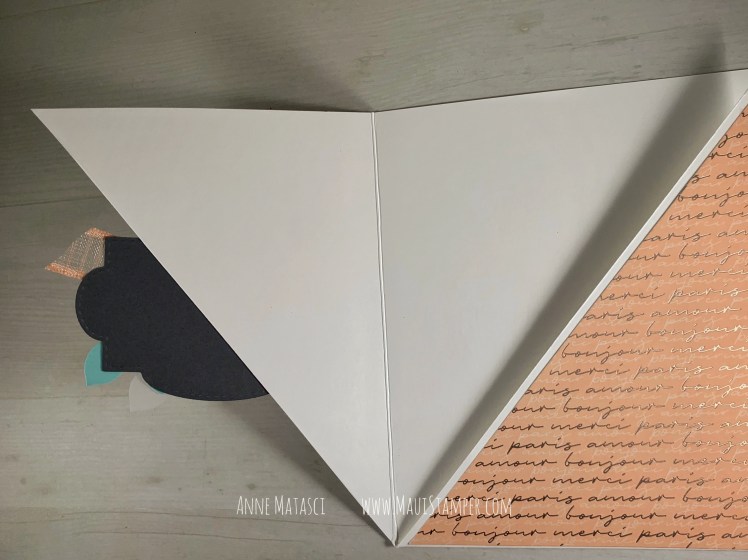
Here’s what it looks like with one panel open. And here it is with the other panel open:
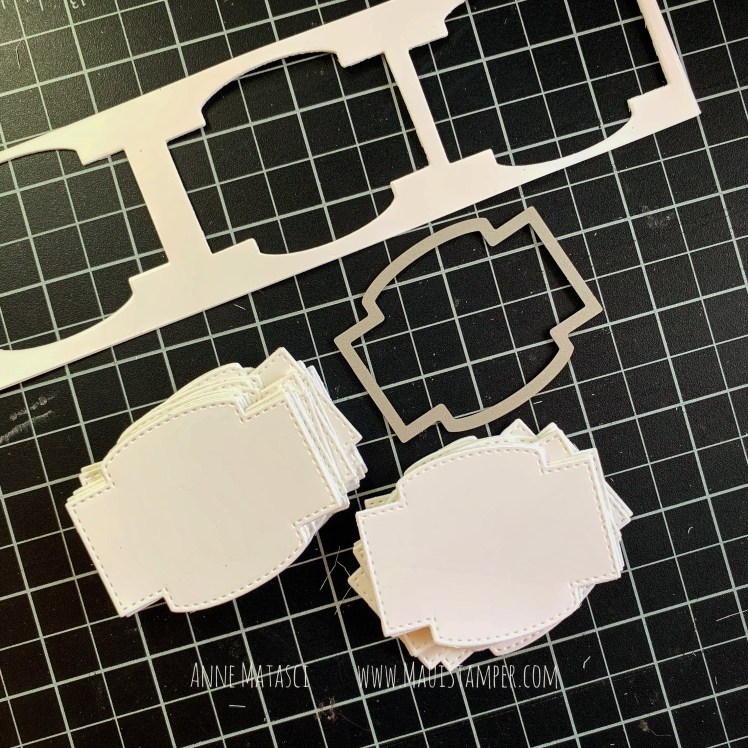
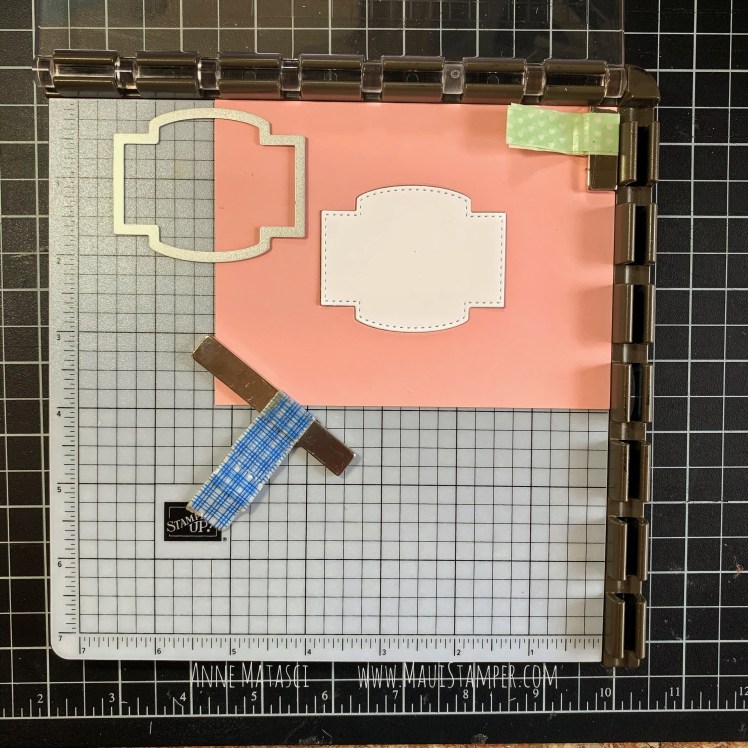
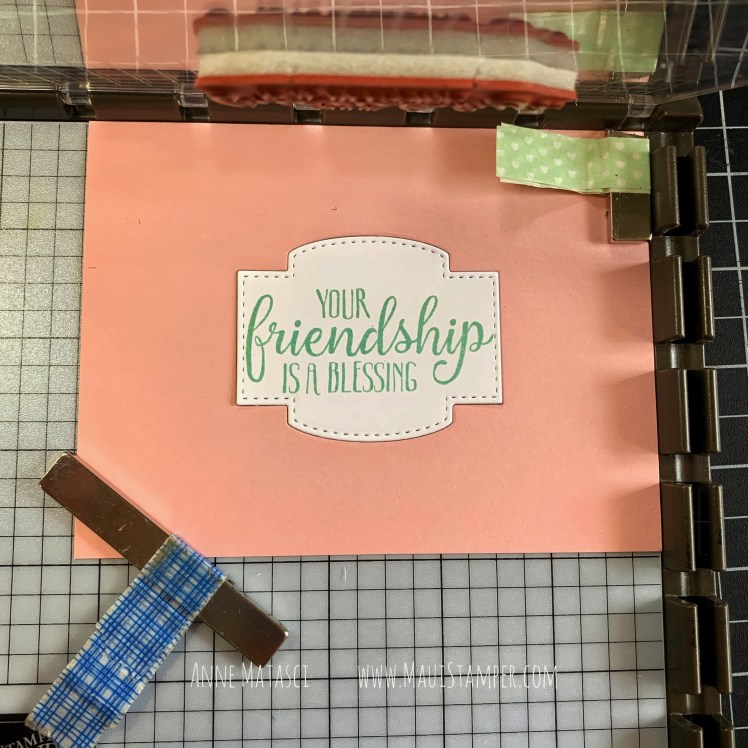
I used the Stamparatus to mass-produce those white die cut sentiment panels. It’s MUCH easier to cut them without the sentiment – you don’t have to position the die so precisely, and if it wiggles a little before it goes through the die cutting machine it’s NBD (No Big Deal). If you use the lighter weight Whisper White card stock, you can even cut two at a time!
Now you have a stack of die cut panels ready to be stamped.
Create a template by cutting your die cut out of the center of a good sized piece of card stock. Place your mass-produced die cut blank in the center of that template.
Align the clean sentiment stamp you have chosen on top of the positioned die cut and close your plate, picking up the stamp.
Add ink to your stamp, press the plate, and lift. Perfect placement every time – and you can do a stack of these in a hurry!
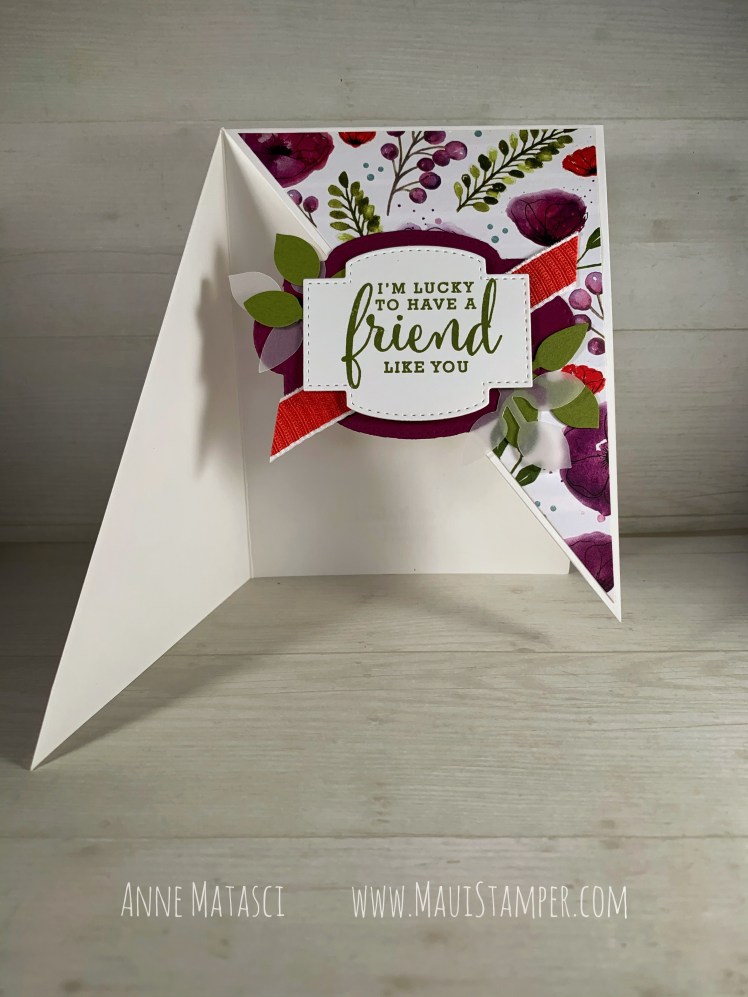
Since this design was being mass produced for a swap, I used two different DSP combinations to finish them. I didn’t realize it at the time, but I oriented the card stock on the opposite diagonal between the batches, so they open differently. Here’s the second version:
You can see the difference in the way the card opens:
This opens up instead of down compared with the card above, but the side still opens to the left – the shape is just inverted.
This card uses the gorgeous Peaceful Poppies DSP, and the sentiment is from Love What You Do. The two cards are the same layout, with the same embellishments. The difference is the DSP and color palette, and the sentiment on the focal point.
There are just a few more days until Sale-a-bration 2020 is in the rear view. We have one final release of SAB Rewards that include current catalog product, so be sure and take a look at the choices available as a free reward for your $50 purchase. You can start shopping HERE!
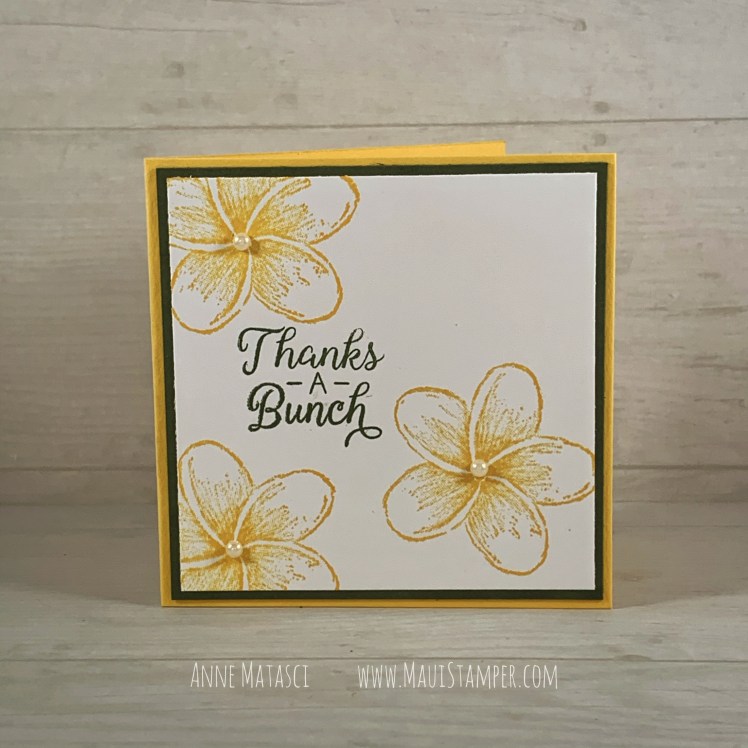
Sometimes you just need a little something to write a quick note. You don’t have a lot to say (I KNOW, but it happens!!). The card doesn’t need to go in the mail – it’s going on a package or in a lunchbox. Short and sweet!
The Sponge Daubers are the easiest way to apply ink directly and precisely onto a rubber stamp. When you want more than one color, “a little daub’ll do ya!”
These are the same colors and stamps, but by using the plumeria image I’ve changed the feeling of the entire card. The only embellishment is a pearl jewel, and there is absolutely no measuring or placement involved in this card. Change the sentiment, or do as I do and make a few with no sentiment at all. When you need a note, add the appropriate sentiment and you’re set! These note cards fit perfectly in our 3″ x 3″ Whisper White envelopes.
Keep it easy and keep a stash! Need supplies? Shop HERE.
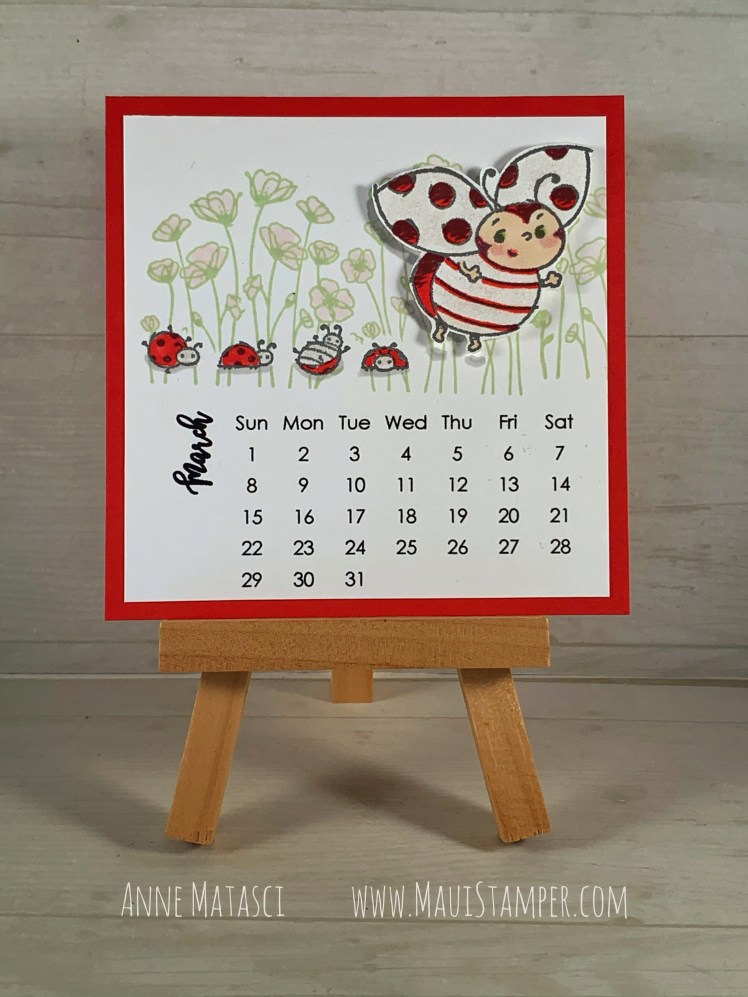
I used my Snips to fussy cut all the Ladybugs (Officially Lady Bird Beetle, from the family Coccinellidae. (There are dies, I just didn’t have them at hand!) If you are using anything other than Stampin’ Up! paper snips, do yourself a ginormous favor and spend the $10. You won’t believe how they will Change Your Life.
I’ve seen a lot of them colored with red wings, but I just couldn’t do it. This girl clearly has her hands full with those four roly-polys, and she needs a little sparkle to get through the day. I certainly would.
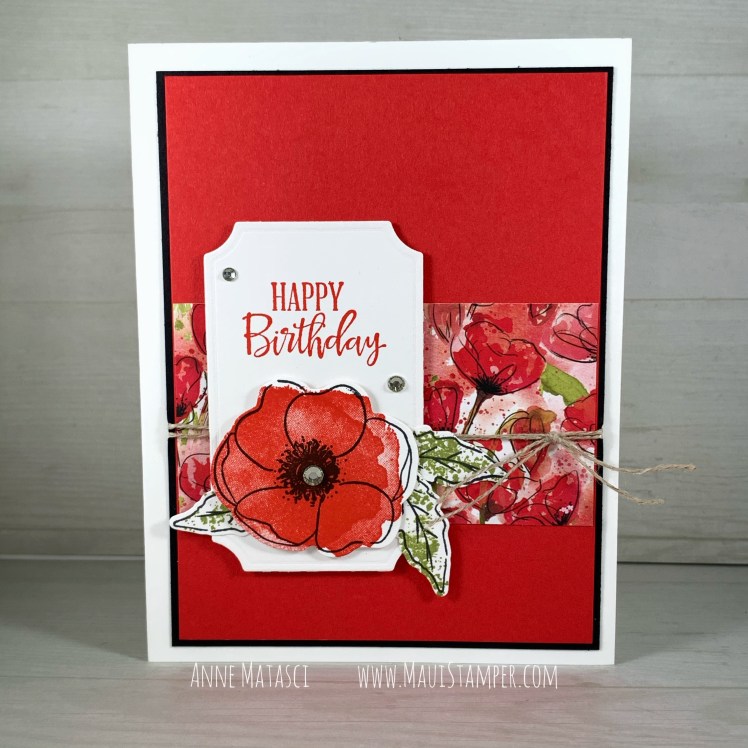
I’ ve said it before, and I’ll say it again (and again, and again). That field of poppies image from Peaceful Poppies might just be the best image in the entire January – June spring catalog.
If you’d like your own 2020 template, click on “Contact the Maui Stamper” and I’ll send you an invoice. For $5, you can print all the calendar pages you’d like! And for those of you EARLY BIRDS who are looking for 2021, hold on! We’ll get there, I promise, and you’ll be the first to know.
Stop by to see what Cheryl and Crystal are doing for March. If you’re ready to do a little shopping to start the month of right, head over to the Online Store.
It’s difficult to see the texture from the embossing folder because, well, it’s SUBTLE, but in person it really makes a difference. I think the Subtle EF is my favorite of our entire line because it works on any type of card. It gives you the ability to have textured card stock in any color at your fingertips, and I often reach for it to lift a simpler card up a step.
At first, I had a little trouble with the filler stamp for the poppy. I lean towards OCD (my daughter says she’s a recovering perfectionist, and that describes me too). The filler doesn’t “match” and the texture is uneven. I ended up stamping it twice over the Memento Black outline, rotating the filler stamp a quarter turn for the second impression. That gave me a little more coverage and depth, and I was happy with the result.
If you haven’t ordered the Painted Poppies bundle yet, you need to know that the Painted Labels dies are currently on backorder. The Peaceful Moments bundle is in Low Inventory status, meaning it is approaching backorder. Once the backorders reach a pre-determined level, Stampin’ Up! will make the product unavailable until the backorders are received in the warehouse. It helps manage costs and expectations, but if you like this set, save yourself some disappointment and get in line HERE.
This is a fast card – even the coloring with the Blends goes quickly. The main panel is applied to the black mat, and that assembly is lifted with Stampin’ Dimensionals to create more focus. The ribbon looks red in the photo, but trust me, it’s as Lovely a Lipstick as they come!
You can see I didn’t worry too much about coloring inside the lines. That’s actually one of my goals this year – not to be so fussy. 9 times out of 10 it doesn’t matter! My goal is to get the cards made and in the mailbox, and that’s where this one is headed.
If you need some quick cards and you’re need a little somethin’ to pull it all together, shop HERE.