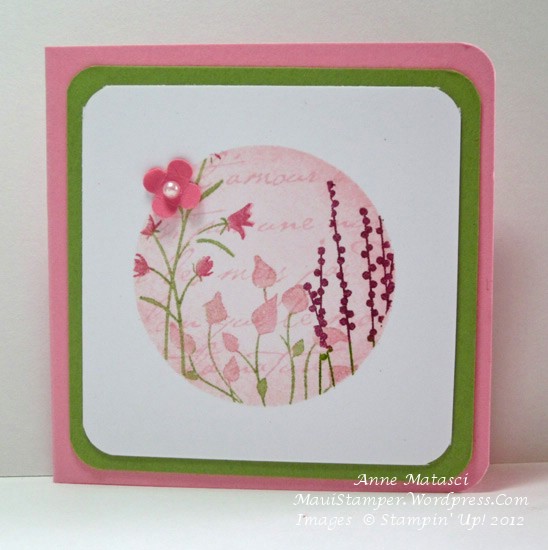
Musings on square cards

Aside

Recently I had a little time and I browsed through a papercrafting forum I used to visit often, but haven’t visited in a long time.  Ah, so much inspiration!  There are so many talented artists, and it’s at once inspiring and discouraging to see their work.  It’s inspiring, because it gives me ideas; it’s discouraging, because there isn’t enough time in the day to play with all of those ideas.

Today’s card is simple and has a hint of Japanese Spring in the colors:

Image

  • Pocket Silhouette and French Script stamp sets
  • Whisper White, Lucky Limeade and Regal Rose card stock
  • Lucky Limeade, Regal Rose, Rose Red, and Rich Razzleberry Stampin’ Write markers
  • Pink Pirouette Classic ink pad
  • Bitty Punch Pack
  • 1 3/4 inch circle punch
  • Corner rounder punch
  • Pearl Jewels
  • Stampin’ Sponge

I punched a circle from a sticky note and used it as a stamping template.  I also used a Stampin’ Sponge and whirled some Pink Pirouette ink around the circle to give it definition and softness (there’s a contradiction for you – but you know what I mean!)

I need to play around with this a little more to find a way to create this card as a larger card – it’s a 3 x 3 notecard here.   The USPS doesn’t seem to like square cards, but they’re a completely different type of canvas – and they make a hand-crafted envelope almost mandatory!   That’s a job for the new Diagonal Scoring Plate 🙂

I hope there are trees in Heaven

I love using the image of the tree from Thoughts and Prayers for a sympathy card.  It’s a full, graceful tree that hints of a life well-lived, of abundance and generosity and beauty.

It also seems like a little piece of heaven.  Haven’t been there myself, but it seems to me that heaven must have a feeling like  being in the woods…and like walking on a white sandy beach…and like climbing tall, majestic mountains…all of those beautiful, powerful places that bring the presence of God alive in a very tangible way.  I hope this card conveys that feeling of  God’s presence to my friend.

Thoughts and Prayers Limeade

  • Thoughts and Prayers and Teeny Tiny Wishes stamp sets
  • Very Vanilla, Soft Suede, Lucky Limeade and River Rock card stock
  • Lucky Limeade Prints Pack Designer Series Paper
  • Lucky Limeade and Soft Suede Stampin’ Write markers
  • Lucky Limeade Classic ink pad
  • Piercing tool and Mat
  • 1/8 inch Lucky Limeade Organdy Ribbon (SAB)

I made holes on either side of the tree trunk with the piercing tool and used a big upholstery needle to thread the Organdy Ribbon through.  It’s soft and easy to work with, and I much prefer tying my ribbons onto cards instead of attaching them with Glue Dots.  Don’t get me wrong – I love those Glue Dots – but I don’t want to take the chance that the ribbon will fall off.  I’m picky that way.


Looking ahead to Easter

I took this layout straight off Pinterest:

Mixed Bunch Blushing Bride for Easter

  • Mixed Bunch and Delightful Dozen stamp sets
  • Whisper White and Blushing Bride card stock
  • Whisper White and Blushing Bride Classic ink pads
  • Pear Pizazz seam binding
  • Blossom punch
  • 3/4 circle punch
  • Big Shot
  • Vintage Wallpaper Textured Impressions Embossing Folder
  • Stampin’ Dimensionals

I’ve been doing a lot of these raised panels lately – I’m SEEING a lot of them too!  I like the look, and I like the possibilities…you can selectively emboss, easily wrap ribbon around the panel, raise the panel with Stampin’ Dimensionals…I’ll bet you can think of other techniques!  Leave me a comment if you have an idea – I’m always looking for new tricks 🙂

Blushing Bride is such a grown-up pink, and I’m going to miss it when it bows out of our Stampin’ Up! color palette with the end of the catalog on May 31.  I do my best to embrace change, but to be very honest, I have a hard time letting go of things.  Take a peek in any closet in my house (well, except Mr. Maui Stamper’s closet) and I’m sure you’ll agree – I’m not a minimalist!  I’m trying to be more clutter-free, but it’s a lifestyle that is going to take some time to embrace.  My Gramsie on my mom’s side kept EVERYTHING – old vegetable drawers from the refrigerator that stopped working (after all, they were useful for storing things), back issues of the Wall Street Journal (we found issues from the 60’s when we moved her from her big 3 bedroom home in the early 90’s) – so I’m just carrying on a family tradition.

Well, except I don’t subscribe to the Wall Street Journal.

Hello there, Everyday Enchantment!

Such soothing colors for this card!

Elementary Elegance Pool Party

The images from the Everyday Enchantment Designer Series paper coordinate so perfectly with all of the Sale-a-bration stamp sets – this one is Elementary Elegance.  I punched out the sentiment on with the Curly Label and brushed the edges with a dauber dunked in Lucky Limeade ink and one-two-three I was done!

This card is kinda begging for more bling, and I am going to revisit it after Spring Break.  I don’t think EVERY card has to be ready to pop in the mail.  I have a little hint for you too – when you make a panel with two different pieces of DSP, cut a narrow strip of cardstock – I used Very Vanilla but anything would work – just 1/4 inch shorter than the width you are joining, and maybe 3/4 inch wide.  Cover it with SNAIL and you have a platform to join and stabilize your DSP  – you can butt the edges together and there is no waste!

Just 3 more weeks of Sale-a-bration!

Layers, layers, layers

I do hope you’re not tired of this little typewriter yet…


You're My Type in Marina Mist

Did you notice that the First Edition Designer Series paper is all about the news?  And did you see my little bit of black “typewriter ribbon”???  I KNOW.

Keeping a card interesting when there is just a single image can be challenging.  I usually do one of two things – lots and lots of layers, or no layers whatsoever.  In this case, it’s lots of layers (brilliant, huh? – I’m a rocket surgeon in my spare time!)  I did have to fight the temptation to add buttons and brads and all of that.  I’m still on my “gotta be able to mail it” kick.  Don’t know how much longer that’s gonna last, because my fingers are gettin’ twitchy for some big bling.

I’m trying to keep a minimalist attitude these days.  Spring break is coming, and we’ve got a trip planned.  Mr. Maui Stamper has decided that we should carry on luggage – for a 9 day trip.  You know, travel light.   I feel like the Little Engine that Could – I think I can, I think I can, I think I can.  I think I have the clothing thing down – black is a wonderful color, and with temperatures in the 50’s, it will be layers, layers, layers!  I have the shoe thing down – I’m a comfort-before-beauty kind of girl when it comes to shoes.  The problem is that dog-gone quart ziploc bag.  All of my girl-stuff is NOT going to fit, and I NEED my shampoo, and conditioner, and lotions and magical potions!  I may have to leave the “Hair-be-tame” potion behind, which means I will have hair like nobody’s business – GINORMOUS.   There may or may not be a photographic record of this trip, at least as far as my presence is concerned.  Stay tuned.


So much simpler than it looks…REALLY!

We made this card at club last week.  When I pulled it out, everyone ooh-ed and aah-ed, but when I told them this was the card du’jour, they were all SHOCKED.  Once I demonstrated how you pull it together, they gave me a bad time about how many little flowers they were going to have to punch, but they were ready to give it a whirl:

Floral Cascade card

Doesn’t it look like a flower garden at its peak in the middle of summer?  Here’s what it looks like opened up:

Floral cascading card open

No supply list – it’s any and all paper and texture stamps you have around plus every floral punch you own (and the XL Bird).  Pull out EVERYTHING and you’re ready to rock and roll!

Here’s what it looks like from the top when it’s open:

Floral cascading card  top view

I encounted this card on Pinterest and you can see Sonia’s post HERE.  She offers a tutorial for the card, and shares how thrilled she was to have it published in Papercraft Inspirations.  Prety fabulous stuff, if you ask me!

My little Swiss gnome

I have a gnome.  He used to sit in my garden, but the sun here is SO strong that his colors got completely washed out, so I gave him a fresh coat of paint and moved him to my shady potting bench.  (Hijack:  if you didn’t already know it, Mr. Maui Stamper is THE BEST.  I couldn’t find a potting bench I liked, so he BUILT me one for my birthday a couple of years ago.  I love it.)   Anyway, my little gnome sits on the top shelf looking benevolently over my projects.

He’s a genuine Swiss gnome; I bought him at a hardware store in Locarno in 2005 when we visited Mr. Maui Stamper’s family there.  I think our hostess thought I was nuts, buying this goofy terra cotta gnome to haul all over Switzerland and Italy in my suitcase.  And perhaps I was (and still may be!)  But this fellow reminds me of a wonderful trip, and keeps an eye on things for me.  It’s dark outside right now, but tomorrow I need to go out there and take his picture so you can see what a charming fellow he is.

Now you can understand why this is just one of those stamp sets that wouldn’t let me say no:

Gnome Sweet Gnome Birthday

  • Gnome Sweet Gnome and You’re My Type stamp sets
  • Whisper White, Real Red, Daffodil Delight and Not Quite Navy card stock
  • Staz-on Black ink pad; Old Olive and Not Quite Navy Classic ink pads
  • Big Top Birthday Designer Series Paper
  • Real Red, Not Quite Navy, Daffodil Delight, Old Olive, Basic Grey and Blushing Bride Classic Ink refills
  • Aquapainter
  • Real Red 1/8 inch taffeta ribbon
  • Brights Brads
  • 1 1/4 inch circle punch

It’s just silly as can be, and those gnomes…well, they certainly have a personality of their own.  The little frog makes me laugh, and the gnomes…well, they remind me of Switzerland.


Sending love and sympathy

Recently I needed sympathy cards.  I try to have one or two on hand, but I much prefer making just the right card.  It allows me to create something just for the person who has lost a loved one, and I can also spend some time thinking about them and praying for them as they grieve.

These cards were made for young adults – a brother and sister who lost their dad.  This is the card I made for the young woman:

Simply Soft Sympathy

  • Simply Soft and Faith in Nature stamp sets (both hostess sets)
  • Old Olive, Baja Breeze and Naturals White card stock
  • Old Olive, Baja Breeze and Not Quite Navy Classic ink pads
  • Baja Breeze seam binding

I considered adding pearls and other embellishments, but ended up rejecting all of that for the simplicity of the flowers.  I folded the seam binding in half – it’s so soft that it takes that treatment easily and can still be mailed without extra postage.

Lately, cards that can be mailed without extra postage have become more of a focus for me.  I think twice before adding buttons, big brads and other heavy bling.  I LOVE those embellishments – don’t get me wrong – but I mail a lot of cards and those extras create headaches at the post office.  I’m keeping the 3-D goodies for hand-delivered cards, and there are plenty of those, too.

Here’s the companion card for the young man:

Medallion Sympathy

  • Medallion and Thoughts and Prayers stamp sets
  • Old Olive and Naturals White card stock
  • Old Olive, Baja Breeze and Not Quite Navy Classic ink pads
  • 1/2 and 1 3/4 inch circle punches
  • Stampin’ Dimensionals
  • Crystal Effects

The “brad” in the center is nothing more than a circle of cardstock covered with Crystal Effects, and I left off that girly-frou-frou ribbon stuff.

Although these cards are similar in color and general style, the fact that they coordinate was more for my benefit than that of my young friends.  As I thought of the two of them,  putting these complimentary cards together gave me a little comfort.  I hope it did the same for them.


Froggy thoughts

Trends are fun to watch and follow, but I have to confess I am not much a trend-setter.  I’m not exactly late to the party, but I’m not at the head of the parade, either.  I’ve played with flags and pennants a little, but it wasn’t until today’s card that I felt I came up with something a little bit different:

  • Fabulous Phrases and Gnome Sweet Gnome stamp sets
  • Whisper White, Pool Party, Pear Pizazz and Wisteria Wonder card stock
  • Pool Party, Pear Pizazz and Wisteria Wonder Classic ink pads
  • Pear Pizazz Stampin’ Write marker
  • Cupcake Builder punch
  • Heart to Heart punch
  • Pool Party, Lucky Limeade and Wisteria Wonder Bakers Twine
  • Piercing Tool and mat
  • Big Shot and Stripes Textured Impressions Embossing folder

We made this card at my Last Minute Valentines class a couple of weeks ago.  No one believed me when I said I sewed the Baker’s Twine to the card – but it was easy and secure.  I used the piercing tool (aka the Pokey Doodle) to make a hole under the spot for the pot (made from the Cupcake punch – and trimmed).  I threaded all 3 strands of twine through the hole and scotch taped them to the back of the panel.  Then I made two holes above the place I wanted each of the 3 flags to be and threaded one color down and back up each set of holes – clear as mud?  The two holes created an anchor for the single color of thread that coordinated with the flag, and with a simple knot at the top my twine was secure.  I LOVE Glue dots, but they don’t hold ribbons and twine securely enough for my satisfaction.  Call me picky.

Change up the words and you could have any sort of card.  This card seems to span gender and generation as well – a neat trick if I do say so myself.  And who can resist the little frog from the Gnome set?  I do hope we’ll see that set in the new catalog – coming JUNE 1st!!


Plunging into pink

I’m not usually an all-pink kind of person, but every now and then the girly-gene takes over and Ican’t resist:

Simply Soft in pinks

  • Simply Soft stamp set
  • Whisper White, Regal Rose, Pretty in Pink and Wild Wasabi card stock
  • Pink Pirouette Classic ink pad
  • Regal Rose and Wild Wasabi Stampin’ Write markers
  • Pink Pirouette 3/8 inch taffeta ribbon
  • Big Shot and Adorning Accents textured impressions embossing folders

This was a valentine but it could be used for any girly occasion.  I left the front without a sentiment and stamped it inside, just because.

I wasn’t sure if I would like the Adorning Accents Textured Impressions Embossing folders, but of course I do.  I don’t know why I ever bother to wonder if I’ll like something – there’s very little I truly dislike.  This particular folder isn’t very wide, but that’s the idea: it allows you to emboss a strip across a card at the top, bottom or the middle. I suppose if you were feeling very hearty you could do all three.

I’ll be sad when the 2011-2012 Idea Book and Catalog closes out the end of May and Simply Soft goes the way of all hostess sets.  The images are exactly what the title says – simple and soft.  I’ve used them all many times, so I suppose the positive way to look at it is that I have gotten my money’s worth.  Of course, since this is a hostess set I didn’t pay real dollars for it, so to say I’ve gotten my money’s worth is rather silly.  Hmph.  And silly is where all of this is going!

It’s late, as usual.  I’m a night owl.  Time to hoot at the moon and get to bed.