Tag – You’re RemARKably IT!!

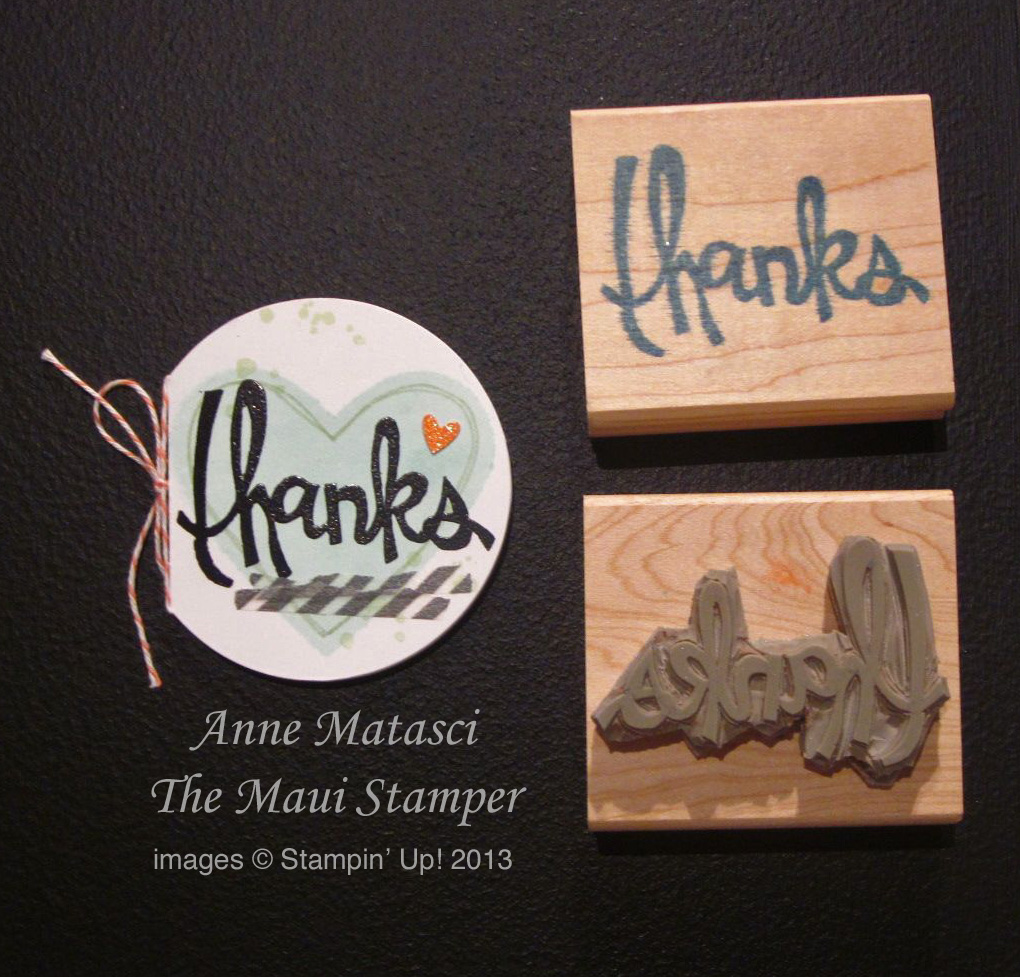
Just cause it’s called “Tag It” doesn’t mean you can’t use it on a card!

MauiStamper Tag It Handmade Card RemARKable Blog TourI took a page right out of Pam Morgan’s stamping demonstration at convention and just used the image – no coordinating framelit – to keep it simple.  The images in this set are VERY versatile – it’s awesome if you have the framelits, but you DON’T HAVE TO HAVE THEM to use the set.   (I KNOW.  What a SHOCK.)

I inked the image twice – once with Gumball Green (my new fave green) and once with  Primrose Petals.  I cut the Primrose Petals image up to get the “Celebrate” flag and the accent balloon, then added the Summer Starfruit Dahlia with a glue dot.

MauiStamper Tag It Handmade Card RemARKable Blog TourThat eyeball is begging for embellishment but I held back.  Make a note – that doesn’t happen often with me.

Of course, the stamp set is called TAG It.  In my book that mean’s it’s just begging to be a tag, and while I was at it I tossed in the coordinating Chalk Talk Framelits for good measure (you knew I had them – when I said you didn’t need them I meant it in the most hypothetical sense.  Of course you need them.)

MauiStamper Tag It Handmade Tag RemARKable Blog TourThis little tag just makes me happy.  Same color scheme with a little bit of Soft Suede, cuz now we’re talkin’ dirt.  And take a closer look at the pearls in the middle of the flowers:

MauiStamper Tag It Handmade Tag RemARKable Blog TourYellow Sharpie Marker to the rescue!  Had to be done.

I used the negative of the Chalk Talk Framelit to create an opening in this tag.  If you jumped on the Magnetic Cutting Pad bandwagon before we sold 13 weeks of inventory in 3 weeks (Yes Ma’am!!) it will be a snap to get that tag image cut squarely in the center of the Gumball Green tag.  (If you didn’t jump on the bandwagon, don’t worry, they are coming – you just have to be patient.  I’m not good at that.)

Layer a piece of Very Vanilla card stock behind with some dimensionals to keep it floating and you’re good to go:

MauiStamper Tag It Handmade Tag RemARKable Blog Tour

It’s a special priviledge to feature the Tag It! stamp set for this month’s RemARKable blog tour.  This set is the 2013-2013 Ronald McDonald House Charities fundraiser stamp set.  For every set sold, Stampin’ Up! donates $3.00 to RMHC in support of the good work that organization does to support families in crisis.  Learn more about  the Stampin’ Up! giving program and RMHC.

Your next stop on the tour is the Trinity Design Studio – I know Robin has a treat for you!

Maui Stamper Stamp of the Month Blog Tour

Here are all the tour participants should you want to make your own itinerary:

Nancy Amato              http://stampinallnight.blogspot.com
Melissa Bolinger          http://www.stampinup.net/blog/2089191
Jackie Bottomley         http://www.jackiebottomley.blogspot.com
Susan Carlson             http://stampinmomoffour.blogspot.com
Tamra Davis                 http://www.thecardladies.com
Connie Deibler             http://www.conniestamps.com
Danielle Denhardt        http://www.purrfectlycreative.com
Sherri Eddleblute         http://www.sweetestdesigns.blogspot.com
Crystal Kondo             http://www.card-ed.com
Deb Lehigh                 http://thestampinhut.typepad.com
Anne Matasci             http://www.MauiStamper.wordpress.com
Robin Merriman          http://www.trinitydesignstudio.blogspot.com
Audra Monk                http://thecraftyyogi.blogspot.com
Maria Pane                 http://www.stampinandscrappinwithriri.blogspot.com
Andi Potler                  http://www.absolutekreations.com
Michele Reynolds        http://www.inspirationink.typepad.com
Vicki Soni                    http://www.paperinkle.com
Pam Staples               http://www.sunnygirlscraps.com
Jeri St. John               https://jerrisgemtastics.blogspot.com
Jeannette Swain         http://www.stampsnwhatnot.com
Janet Wakeland          http://www.remarkablycreated.com

Burlap texture

Have you gotten your hands on the gorgeous burlap ribbon in the Holiday catalog?

Maui Stamper HandmadeCard Flower Shop Chevron

  • Flower Shop, Oh Hello and Chevron Background stamps
  • Very Vanilla and Baked Brown Sugar card stock
  • Primrose Petals, Daffodil Delight and Baked Brown Sugar FFIP
  • Bitty Circle and Pansy Punches
  • Big Shot and Ovals Collection Framelits
  • Burlap ribbon
  • Pearl Jewels
  • Mini Glue Dots

The Flower Shop stamp set has one Pansy shape in 6 different textures – this one is burlap!  It’s a little thing, but it matters to me.

The little yellow centers in the flower are applied with Mini Glue Dots.  They give more lift than Tombo, less lift than Stampin’ Dimensionals, and fit better behind the small circles than a dimensional would.  Another little thing…

Did you see my un-tutorial on using the Pansy Punch?  Check HERE to simplify your life 🙂

This is a very quick card and it is USPS friendly!!  It would be easy to switch that sentiment out to suit your need.  I often make cards like this without the sentiment inked in.  Having them on hand gives me an instant custom card when the moment strikes.

Stop by on Sunday for another RemARKable Stamp of the Month tour!


The Convention Tag It Bag

At convention, Pam Morgan showed us a trick for adapting our new Tag a Bag gift bags.  I brought home my Make ‘n Take projects (they were Take ‘n Makes for me!  Much easier to bring home on the plane) and used her technique to step up my Tag It project.

MauiStamper Tag It Handmade Gift Bag

  • Tag It (Ronald McDonald House Charities) stamp set
  • Tag a Bag Gift Bags and Accessory Kit (tags, coral twine, clothespin)
  • Calypso Coral card stock (I added the background flag)
  • Calypso Coral and Coastal Cabana Stampin’ Write markers
  • Coastal Cabana Ruffled Stretched ribbon
  • Subtles Candy Dots
  • Uniball Signo White Gel pen and black Sharpie marker

Didja see his EYEBALL?

MauiStamper Tag It Handmade Gift BagI had a little giggle fit over this one, I guarantee ya!  This is a Maui Stamper Original Idea 🙂

Pam showed us how to put the gusset in the bottom, and I’ll give you the instructions for that too, but I also want to show you one more Maui Stamper Original Idea (MSOI – you knew that was coming, didn’t you?)  She suggested we put a little piece of grunge chipboard inside the bag (that kinda junk cardboard that keeps your Stampin’ Goodies from getting bent when they’re shipped.)  My MSOI was to wrap that little bad boy so when you look into the package it’s pretty, not grungy.

The dimensions for converting the bag are at the end of the post – here’s the how to wrap the base:

MauiStamper Custom Wrap The Grunge BoardCut your grunge chipboard just a hair short of 2″ x 3″.  Cut a piece of DSP to 3″ x 4″.  (This is Quatrefancy Specialty DSP.)

MauiStamper Custom Wrap The Grunge BoardApply a thin coat of Tombo (the Wonder Adhesive) to one side of the grunge chipboard.  You want it to be spread smoothly and evenly to avoid any bubbles in the finished product.  Center the chipboard over the wrong side of the DSP and use your fingernail or a bone folder to create the DSP at each edge (you crafters with the beautiful manicures will  already have that bone folder in your hand).  Trim the corners on the diagonal.

MauiStamper Custom Wrap The Grunge BoardSpread a little more Tombo on the flaps and use your bone folder to press them over the edge and firmly across the bottom of the grungy cardboard.

MauiStamper Custom Wrap The Grunge BoardWhen Pam put her bag together on stage at convention, she made it look really easy to get it squared but I had a little trouble until I had this MSOI.  I put some SNAIL on one of the short flaps on the side of the bag and attached the bottom side of the covered grunge chipboard to the flap.  This gives you something to wrap the bag around when you assemble the bottom.  Once the first flap is secured, put SNAIL on the opposite flap, turn it under and stand the bag with the base squarely on top.

MauiStamper Custom Wrap The Grunge BoardDoesn’t that little wrapped base look pretty?!  And see how the wide flaps are pressed to the outside?  Reach down into the bag with the bone folder and press the two narrow side flaps in place, then add a little more SNAIL to the two wide flaps and fold them in to finish the bottom of your bag.  E-Z!!

To make the flat bag into a gusset bag, trim a narrow strip off the bottom – just to open it up.  Score at 1 1/2″ from the bottom of the bag across the short end (I actually scored on both sides, flipping the bag over on my Stampin’ Score to be sure both score lines were solid.)  Then score your bag at 1″ from each long edge.  Snip along that 1″ score line on all 4 sides up to the 1 1/2″ score line – when you open up the bag it will resemble the open bag in the first couple of photos.  Be sure to really press each of those score lines in well with your bone folder before attempting to assemble the bag.  Don’t forget to invert and score the “gusset” fold on each side. Here’s a shot of the Big Screen at convention:

MauiStamper Custom Wrap The Grunge BoardAnd there you have it!  A package all ready for Iggy the Eyeball Iguana and some very special treats.

Be sure you stop by this weekend for another RemARKable Stamp of the Month tour featuring Tag It, the stamp set chosen this year to benefit the Ronald McDonald House Charities.  Stampin’ Up! will donate $3 for every single Tag It stamp set sold.  We’re proud of this support, and Stampin’ Up! as a company has donated over $1,000,000 to RMHC.  In addition, Stampin’ Up! demonstrators world-wide lend their hands and hearts to RMHC, putting smiles on the faces of families in crisis.  It’s just another way we’re Making a Difference.

Butterflies and This ‘n That

Maui Stamper Butterfly Handmade cardI love the textures and colors of the This n That Designer Series paper (that’s DSP to those who’ve ever cracked a Stampin’ Up! catalog).  I love how Stampin’ Up! DSP – and every other product that we sell – coordinates perfectly.  And I love making cards 🙂

Maui Stamper Butterfly Handmade card

  • Express Yourself (hostess) stamp set
  • Very Vanilla and Pool Party card stock
  • Epic Day This n That DSP
  • Calypso Coral FFIP
  • Calypso Coral Bakers Twine
  • Big Shot and Honeycomb TIEF
  • Elegant Butterfly punch
  • Word Window punch
  • Stampin’ Dimensionals

2013 Holiday Catalog Stampin' Up!Have you seen the new Holiday catalog?  There’s a link right over there in the sidebar – or you can just click HERE!  LOTS of great holiday decorating and packaging options to make your holiday planning and preparations enjoyable and easy!   Let me know if you need a copy.

And keep your eyes here on the Maui Stamper – I’m expecting my new Thinlets Flip Card dies this week!  They were announced at convention, but we had to wait for August 1st just like the everyone else to order them!


Sum-Sum-Summertime!!

Nothing says summer to me like bright yellow flowers:

Maui Stamper 2013 Calendar August

  • Summer Silhouettes stamp set
  • Whisper White and Daffodil Delight card stock
  • Daffodil Delight, Tangerine Tango and Real Red FFIP
  • Rhinestone Jewels
  • Pearl Jewels
  • Red “Sharpie” marker

Summer Silhouettes is one of my favorite all time stamp sets and I was tremendously relieved when it survived the Social Security line (Stampin’ Up! Retiring Stamps List).  I’ve used it for my daughter’s wedding invitation, countless swaps, cards, and projects.   The images are clean and graceful and I  honestly don’t think you make anything but a beautiful project using this stamp set!

Coloring the rhinestone with a Sharpie takes about 3 seconds and is a fun little step-up technique.

Convention Swap: Top Notch Swap

Too Kind was one of my first “Must Have” stamp sets from the 2013-2014 Annual Catalog.  It was an easy choice for a swap:

Maui Stamper Convention 2013 Top Notch Swap

  • Too Kind, Petite Pairs and French Script stamp sets
  • Crumb Cake, Soft Suede, Old Olive, Very Vanilla and Crushed Curry card stock
  • Soft Suede, Old Olive, Crumb Cake and Crushed Curry FFIP
  • Versamark ink pad
  • Clear Embossing Powder
  • Heat Tool
  • Embossing Buddy
  • Linen Thread
  • Big Shot
  • Lattice TIEF
  • Window Frames Framelits
  • Paper Piercing Tool (aka Pokey Doodle)
  • Piercing Mat and Festive Paper Piercing pack
  • Stampin’ Dimensionals

I was surprised to see how much depth of color I achieved by using clear embossing powder for the second part of the two-step stamping.  That’s just Versamark with a dunk in the Crushed Curry ink and embossed with clear.  (Do you know that technique?  If you don’t have embossing powder in a color you want to use, take a clean stamp and ink it with Versamark.  Before pressing onto the paper, press your stamp into your colored ink pad.  When you stamp, the color transfers onto the paper first and the Versamark sits on top.  Quickly cover your image with clear embossing power and heat emboss!)

Maui Stamper Convention 2013 Top Notch Swap Too Kind This card is the other candidate for my Swap Cards class on August 24th.  Your vote will help me to decide!

Maui Stamper Convention 2013 Top Notch Swap Too KindI only made 20 of these cards and I’m glad that’s all I signed up for.  This Top Notch swap yielded another set of gorgeous swaps, and  everyone really did put their best effort into creating for their fellow demonstrators.  Thanks to all the Top Notch swappers!

Convention Swaps: WOW Cards

Maui Stamper Convention 2013 WOW Card Swap Floral ShopI wanted to do another oval card for one of my swaps.  It’s fun, it’s easy, it fits in a standard envelope, and you don’t see too much of it.

The technique is simple.  You fold a 4 1/4 x 11 inch piece of cardstock in half at the 5 1/2 mark and place the folded side slightly inside of your oval framelit.  This works best with our lighter weight cardstocks, Very Vanilla and Whisper White.  The framelit will cut cleanly through two layers of these papers, giving you the card base.  Once that’s ready, I like to cut another complete oval out of my featured color of cardstock and adhere that to the Very Vanilla card – I use Tombo, the Wonder Adhesive.

Maui Stamper Convention 2013 WOW Card Swap Floral Shop

  • Flower Shop and Express Yourself (hostess) stamp sets
  • Very Vanilla, Pool Party, and Crumb Cake card stock
  • Epic Day This n That DSP
  • Bermuda Bay and Daffodil Delight FFIP
  • Daffodil Delight Seam Binding
  • Bermuda Bay 1/8 inch taffeta ribbon
  • Big Shot
  • Oval Framelits
  • Honeycomb TIEF
  • Lattice TIEF
  • Pansy Punch
  • Vanilla Smooch Spritz
  • Dazzling Details
  • Tombo, the Wonder Adhesive
  • Stampin’ Sponges
  • Stampin’ Dimensionals

Maui Stamper Convention 2013 WOW Card Swap Floral ShopOn August 24th, I’m holding a class to make two of my swaps.  We are definitely going to make the Very Vintage card, but I haven’t decided if I should include this card or the Too Kind swap I’ll be posting in a few days.  I’d love to hear what you think!


Convention Swaps: Vintage Card

I really love swapping at Convention each year.  I participate in organized swaps for the challenge and quality of swaps received, and I participate in general floor swapping because it’s such fun and it’s a great way to meet new people.

Today’s card is a swap I made for the Very Vintage Swap run by Barbara Welch.  I received GORGEOUS swaps in return – everyone did an outstanding job.  Hope they liked my card!

Maui Stamper Stampin' Up! Convention 2013 Very Vintage Swap

  • Apothecary Art, Loving Thoughts and Affection Collection stamp sets
  • Naturals Ivory, Pool Party and Crumb Cake card stock
  • Crumb Cake FFIP
  • Pool Party Stampin’ Write Marker
  • Uniball Signo White Gel Pen
  • Big Shot
  • Apothecary Accents and Labels Collection Framelits
  • Beautifully Baroque TIEF
  • Finishing Touches Edgelits
  • Tea Lace paper doilies
  • Pool Party Seam Binding
  • Linen Thread
  • Very Vintage Designer Buttons (how could I not?)
  • Vanilla Smooch Spritz
  • 7/8″ scallop circle punch
  • silver brads
  • Stampin’ Sponges
  • Stampin’ Dimensionals

Maui Stamper Stampin' Up! Convention 2013 Very Vintage Swap

This card was a labor of love, and I enjoyed every minute of it.  One thing I’ve learned over time is that swaps with small group sizes (this one was only 12) are more enjoyable to create and seem to produce better results.  It’s just no fun to make 120 of the same card, at least in my opinion!

VintageSwap5

I’ll be featuring this card in class on Saturday, August 24th if you’d like to make one for yourself.  All products are Stampin’ Up!, of course 🙂

How about a deal on My Paper Pumpkin?

Maui Stamper Stampin' Up! My Paper Pumpkin_Promo_AugAre you riding the Paper Pumpkin train yet?  You ought to be!  The projects are delightful, simple to assemble, and include exclusive stamps that you will use again and again.  The monthly subscription includes pre-measured and pre-cut paper, stamps, ink and embellishments – everything except adhesive that you need to create a project in 30 minute or less.

My Paper Pumpkin is perfect for busy moms who can only steal a few minutes before bedtime for their crafting.  It’s a great group project for a Girl’s Night Out.  You can even complete one on your lunch hour and have time left over to eat lunch!

Best of all, sign up HERE before August 31 and pay only $10 each month (plus tax) for your first two months!  The regular price is $19.95, so you’re saving almost half.  The subscription service is easy to manage, and you can suspend it when you are traveling – although who would want to miss one magical box?

Here are some samples I’ve shared previously – click on the photo for to visit the whole post:

Stampin' Up! Maui Stamper June Paper Pumpkin Hello to YouThe June 2013 pumpkin kit used a hexagon theme for four cards.

Stampin' Up! Maui Stamper May My Paper PumpkinThe April pumpkin featured the SERIOUSLY fabulous stamp and gorgeous papers to create 4 completely different cards!

Maui Stamper My Paper Pumpkin Welcome Kit This is the Welcome kit, so all new subscriptions begin with this set of stamps and supplies.  You’ll love the font for the sentiments, and there’s an awesome splatter stamp that accompanies this set as well!

Want to see the July kit?  Mine is waiting at home – and I’m not there yet!  Check out THIS video for a sneak peak.

Sign up now to save 50% for your first two months!

Undefined

Ever wanted a totally unique stamp?  Meet Undefined.

Maui Stamper Stampin' Up! Undefined Carve Your Own StampYou can make any image you want.  You carve it yourself.

NOW STOP.  I know what you are saying.  “I’m not artistic”, you say.  “I can’t draw”, you say.  “It looks hard”, you say.

It’s just like when you began stamping and you weren’t sure if you were holding the stamp right, or if you had enough ink, or whether you had stamped with enough pressure.  You do it.  You learn.  Crystal and I did!

Maui Stamper Stampin' Up! Undefined Carve Your Own StampSee!  I’m smiling!  I’m calm!  This was taken BEFORE I threw firmly placed the cutting tool on the counter and said “THIS SUCKS.”  The wonderful SU staff member behind the counter did for me what I have done for countless customers.  She immediately came over and reassured me that I could do it and showed me how to hold the cutting tool.  Turns out I was holding it sideways.  Cutting with the cutting tool held sideways does suck.  Cutting with the cutting tool held correctly is awesome!  Here’s how it works:

Maui Stamper Stampin' Up! Undefined Carve Your Own StampStep One:  Sketch your design true to size in pencil, and go over the design so that there is plenty of graphite on your paper.

Maui Stamper Stampin' Up! Undefined Carve Your Own StampStep Two:  Transfer your image from the paper to the rubber by placing one against the other and rubbing firmly with your finger.

Maui Stamper Stampin' Up! Undefined Carve Your Own StampStep Three:  Cut out your design with the cutting tool.  It’s kinda hard to do this AND take a photo 🙂

Step Four:  Apply the self-adhesive foam to the back of the rubber and cut out the your shape.

Maui Stamper Stampin' Up! Undefined Carve Your Own StampStep Five:  When it’s all trimmed out, and before you adhere the rubber to the back of the wood block, ink up your image with Staz-On and stamp it on the front of the block.

Step Six:  Adhere the rubber to the back of the wood block.

Maui Stamper Stampin' Up! Undefined Carve Your Own StampStep Seven:  Stamp and ADMIRE!!

Don’t think you can come up with an original idea?  Each kit comes with multiple templates for you to begin with – just trace and carve.  Or you can use one of these ideas from The Home Office:

Maui Stamper Stampin' Up! Undefined Carve Your Own StampNotice that the letters are carved out, but the stamp doesn’t have to be too closely trimmed out around the outside.

Maui Stamper Stampin' Up! Undefined Carve Your Own StampI am SO going to make my own word bubble.  The kit is already ordered.

Maui Stamper Stampin' Up! Undefined Carve Your Own StampThis is a BIG @ sign!  There are a variety of block sizes in the kit for you to play with.

Included in the Stamp Carving Kit #133402:

  • 2 carving tools
  • 3″ x 4″ rubber
  • 3″ x 4″ foam
  • 4 wood blocks (various sizes)
  • 1 Island Indigo Stampin’ Write Marker
  • 3 postcards
  • Instruction sheet
  • Stamp image templates

You can do this!  And you will be thrilled, I promise, with your very own custom-made stamp.  Visit my Online Store today!