An afternoon with Forever Fern

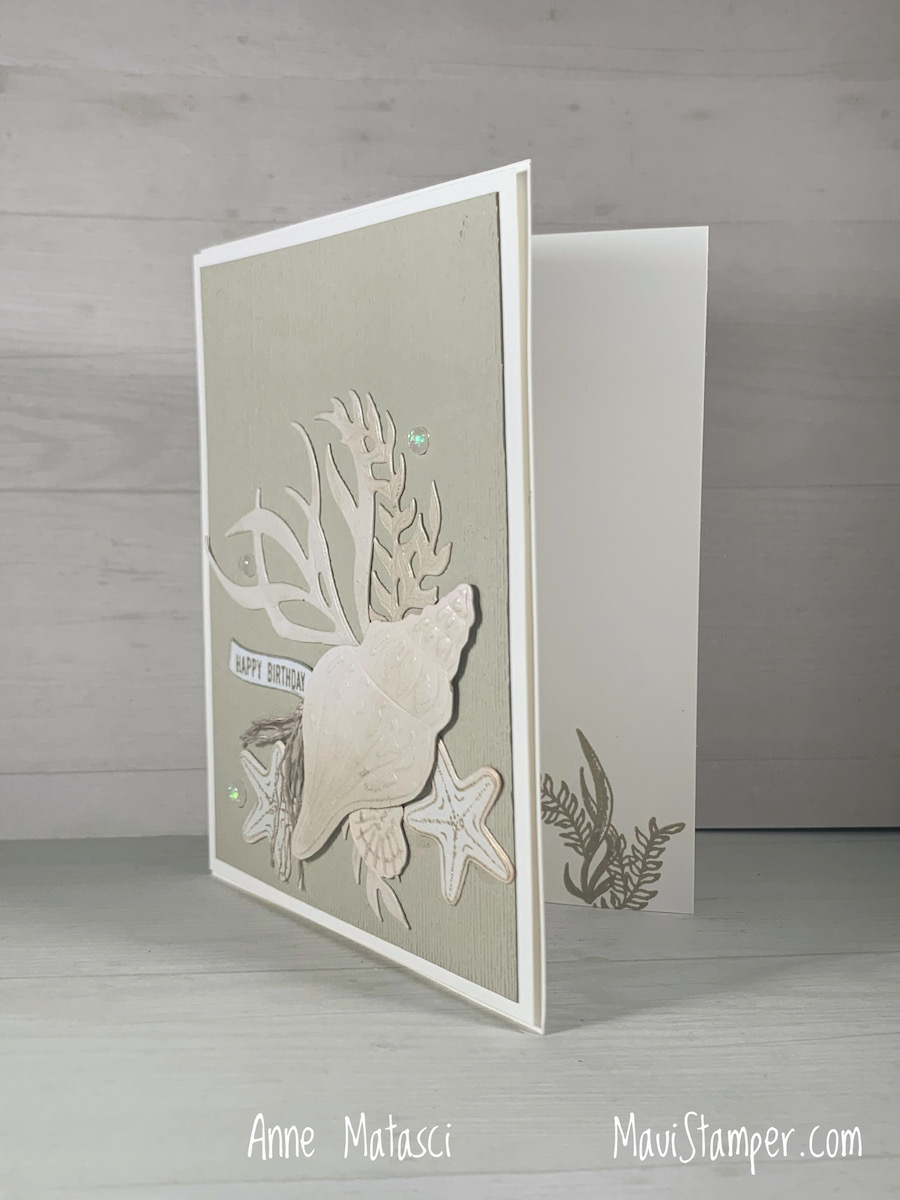
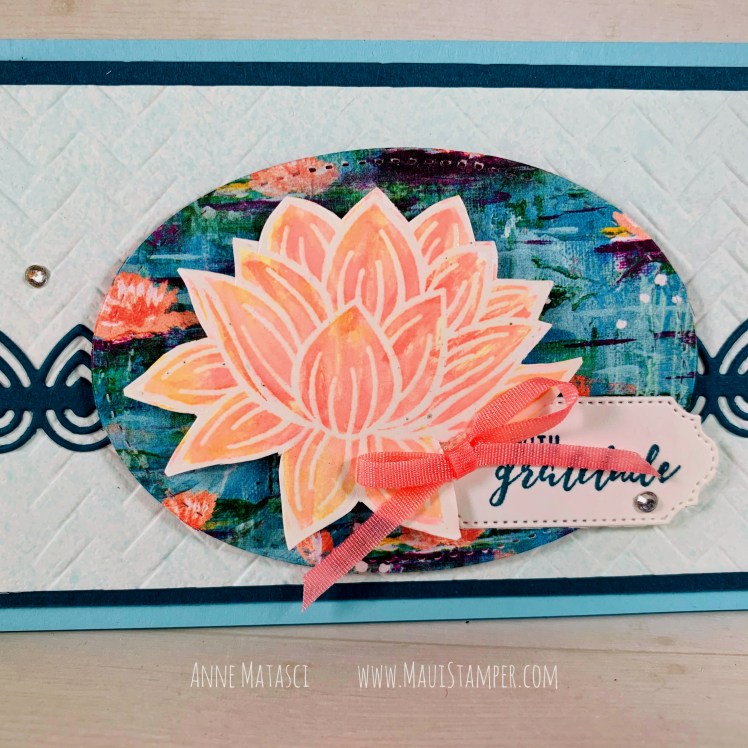
I’m a keeper. I keep stuff – bits and bobs, odds and ends – because I just know I’ll need it. Sometimes I do, sometimes I don’t. But I’ve had an assortment of die cut Forever Fern pieces in multiple shades of greens in my collection for months, and Today Was Their Day.

Maui Stamper Stampin Up Forever Fern Monochromatic card
  • Stamps: Forever Fern, Itty Bitty Greetings (retiring May 3)
  • Color Palette: Basic White, Garden Green
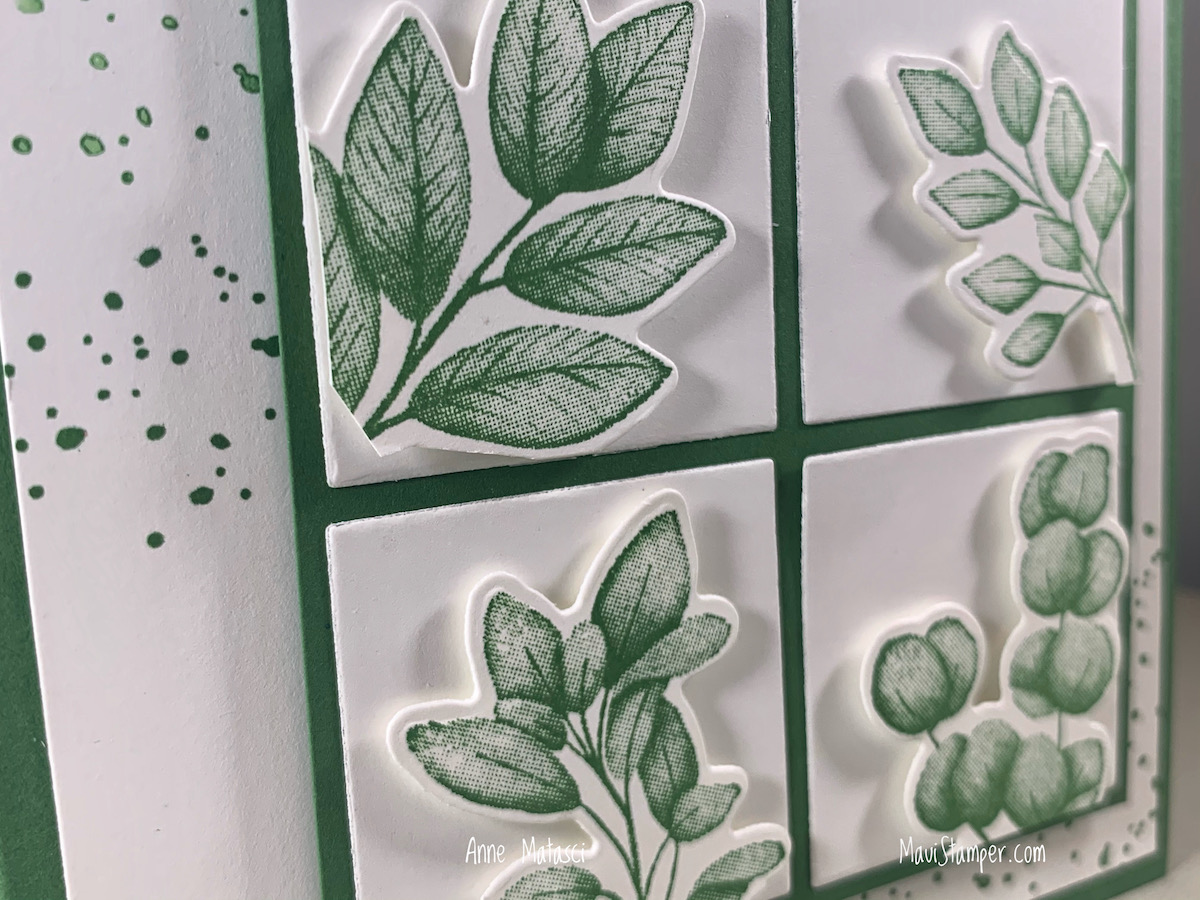
  • Accessories: Big Boss, Forever Flourishing Dies, Layering Squares dies, Stampin Dimensionals

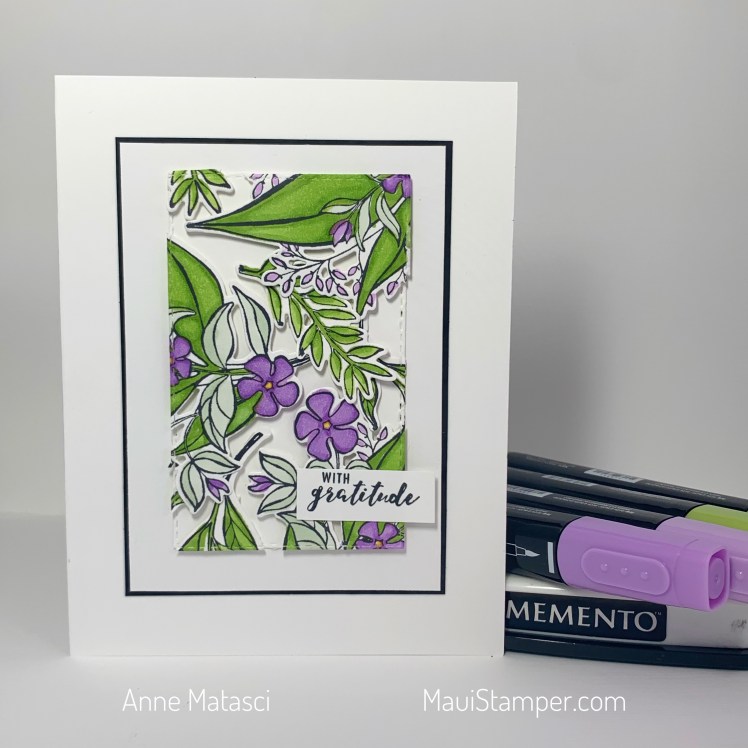
This card layout is a CASE (Copy And Share with Everyone) of a card I spotted in the new 2021-2022 Annual Catalog. Yes, I’m sure you’ve heard – demonstrators get an advanced copy of the catalog, and this one is going to rock your world!

The retiring Layering Squares dies aren’t absolutely essential, since it’s pretty easy to cut a square. That said, how easy is it to cut 4 squares EXACTLY the same size?? I’ll be keeping this set of dies for certain.

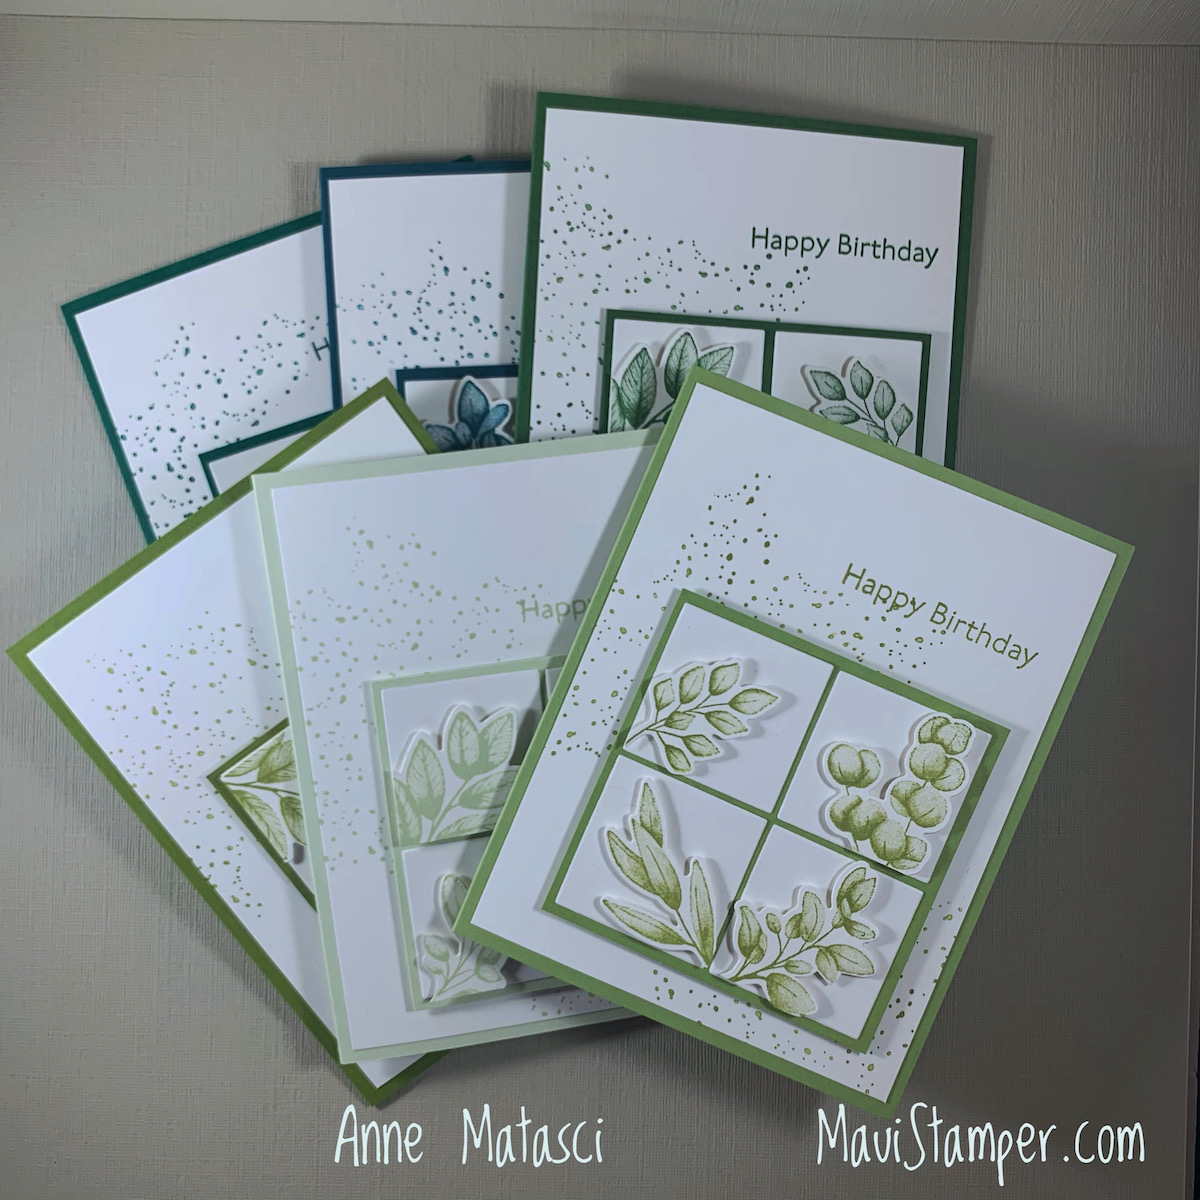
I made a BUNCH of these in a relatively short period of time because I had all of these bits!! Each card turned out a little differently because I was having such a good time orienting the branches. Tell me what you think:

Big Boss, Forever Flourishing Dies, Layering Squares dies

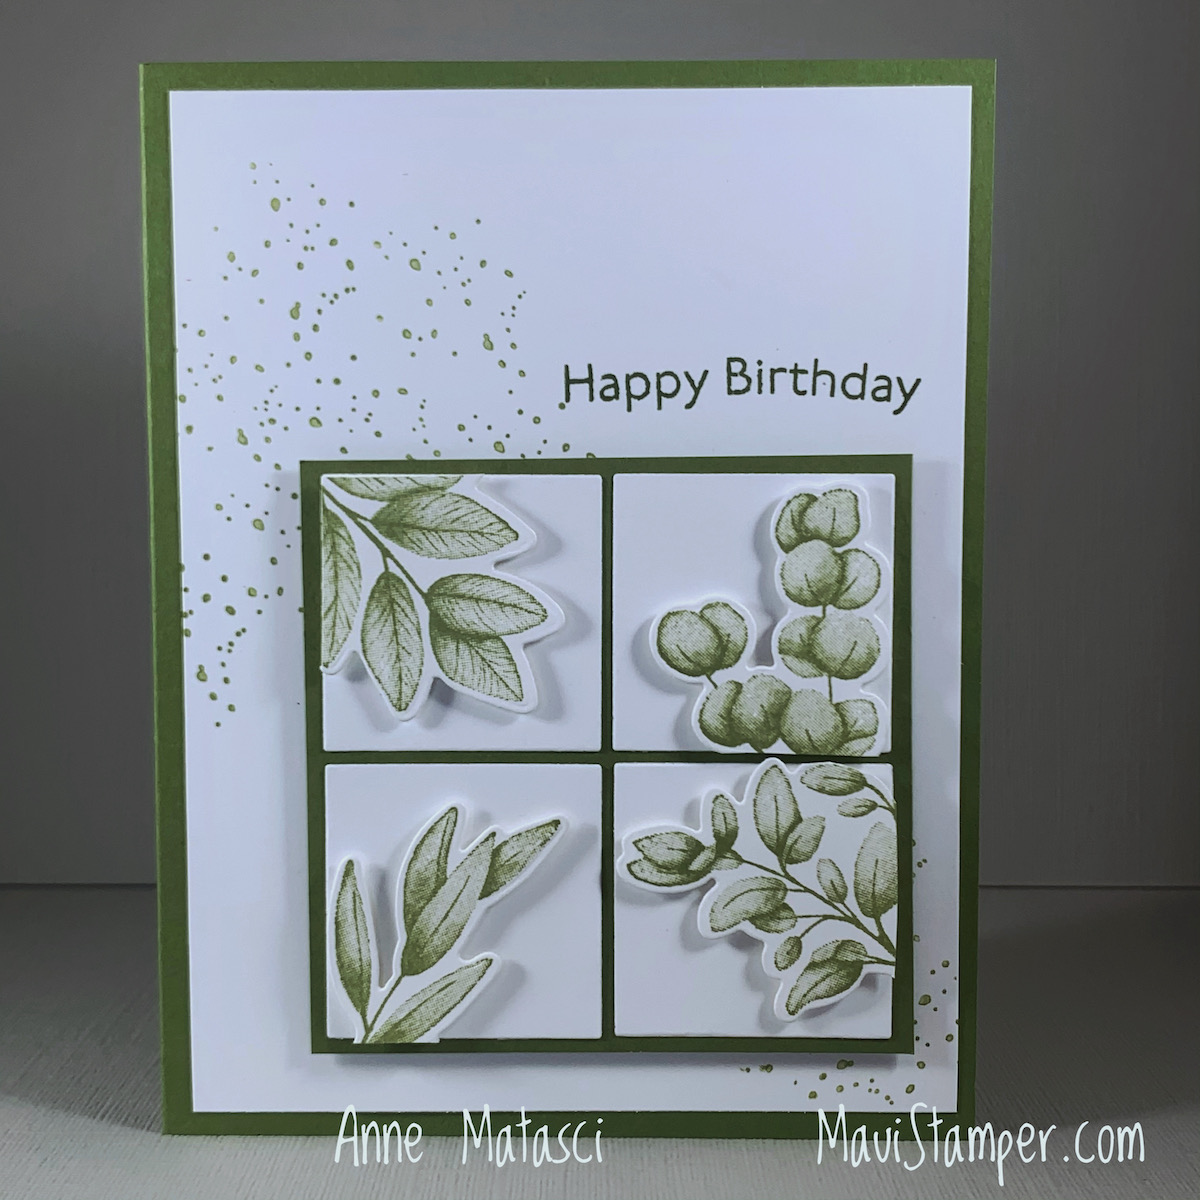
This one is in Old Olive. I think this one was the first one I did.

Big Boss, Forever Flourishing Dies, Layering Squares dies

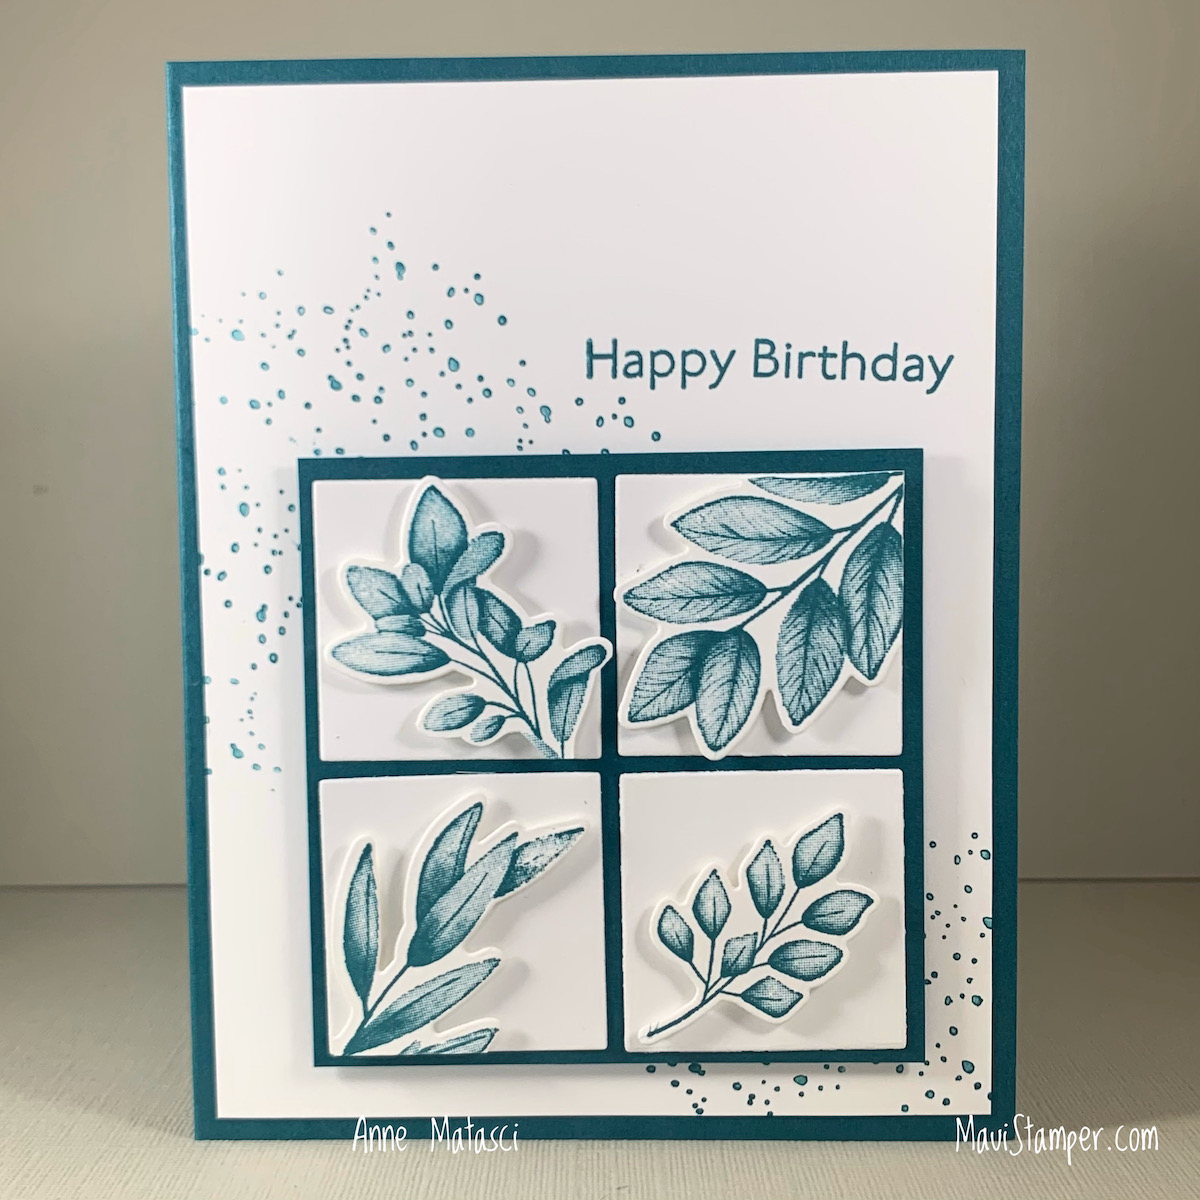
Next I used the retiring Pretty Peacock In Color from 2019-2021. I’m really going to miss this shade, as it’s one of my favorites, not just for crafting but in Real Life.

This is Pear Pizazz. I had some fun with these branches as I worked them into a bit of a wreath arrangement. I thought about putting something in the center, but I wanted these cards to lean a bit masculine.

Maui Stamper Stampin Up Forever Fern Monochromatic birthday card

With this Shaded Spruce version I did the opposite – I worked from the center outward. I’m still a little undecided about this one!

Maui Stamper Stampin Up Forever Fern Monochromaticbirthday card

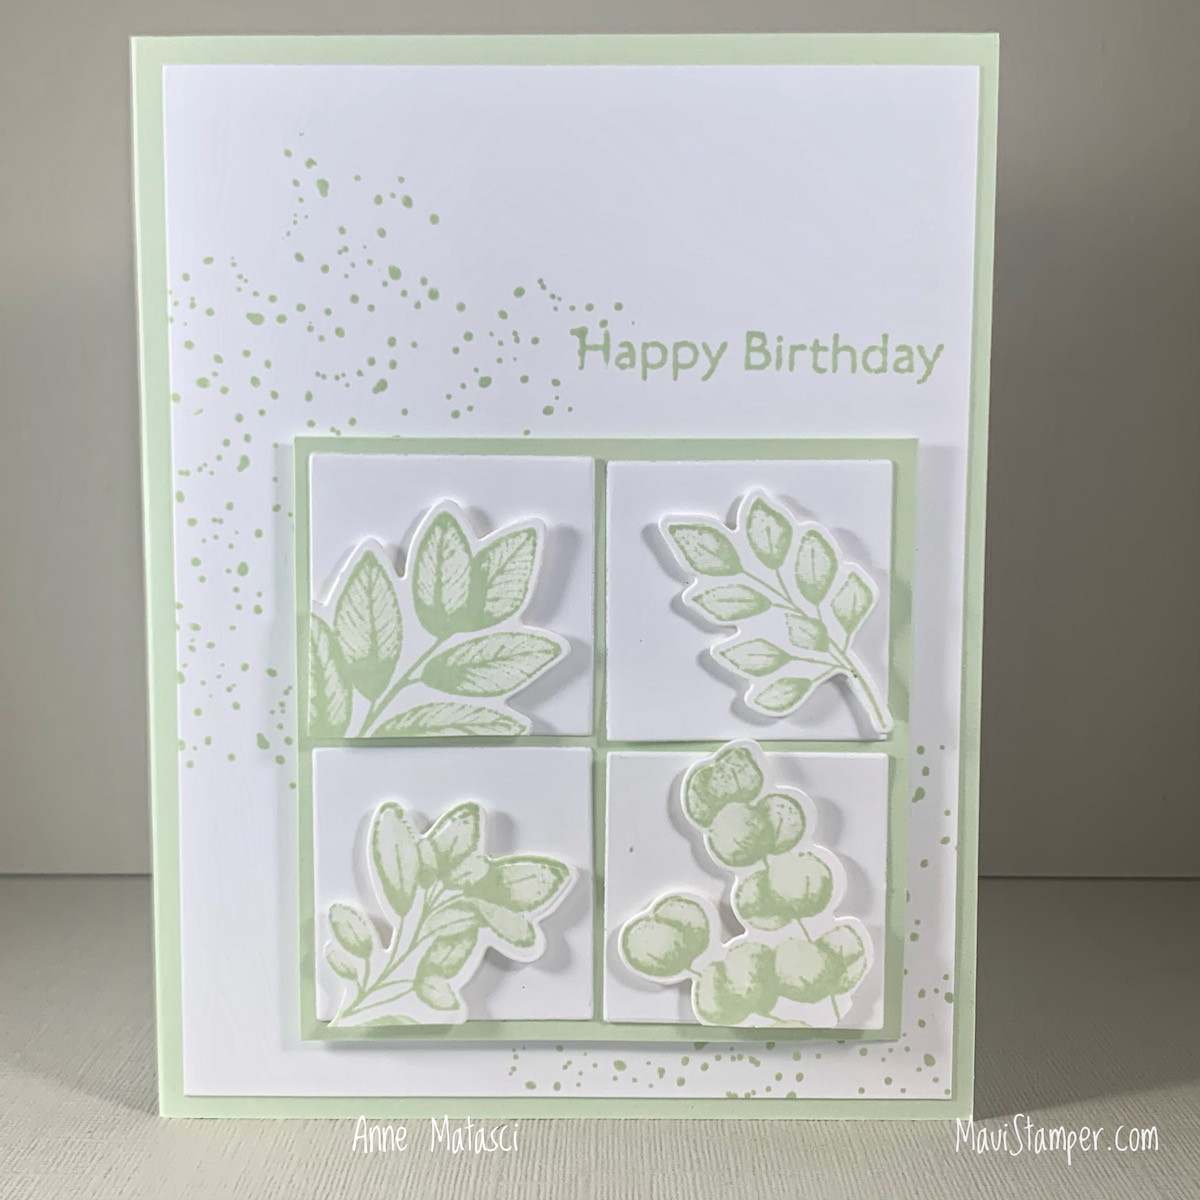
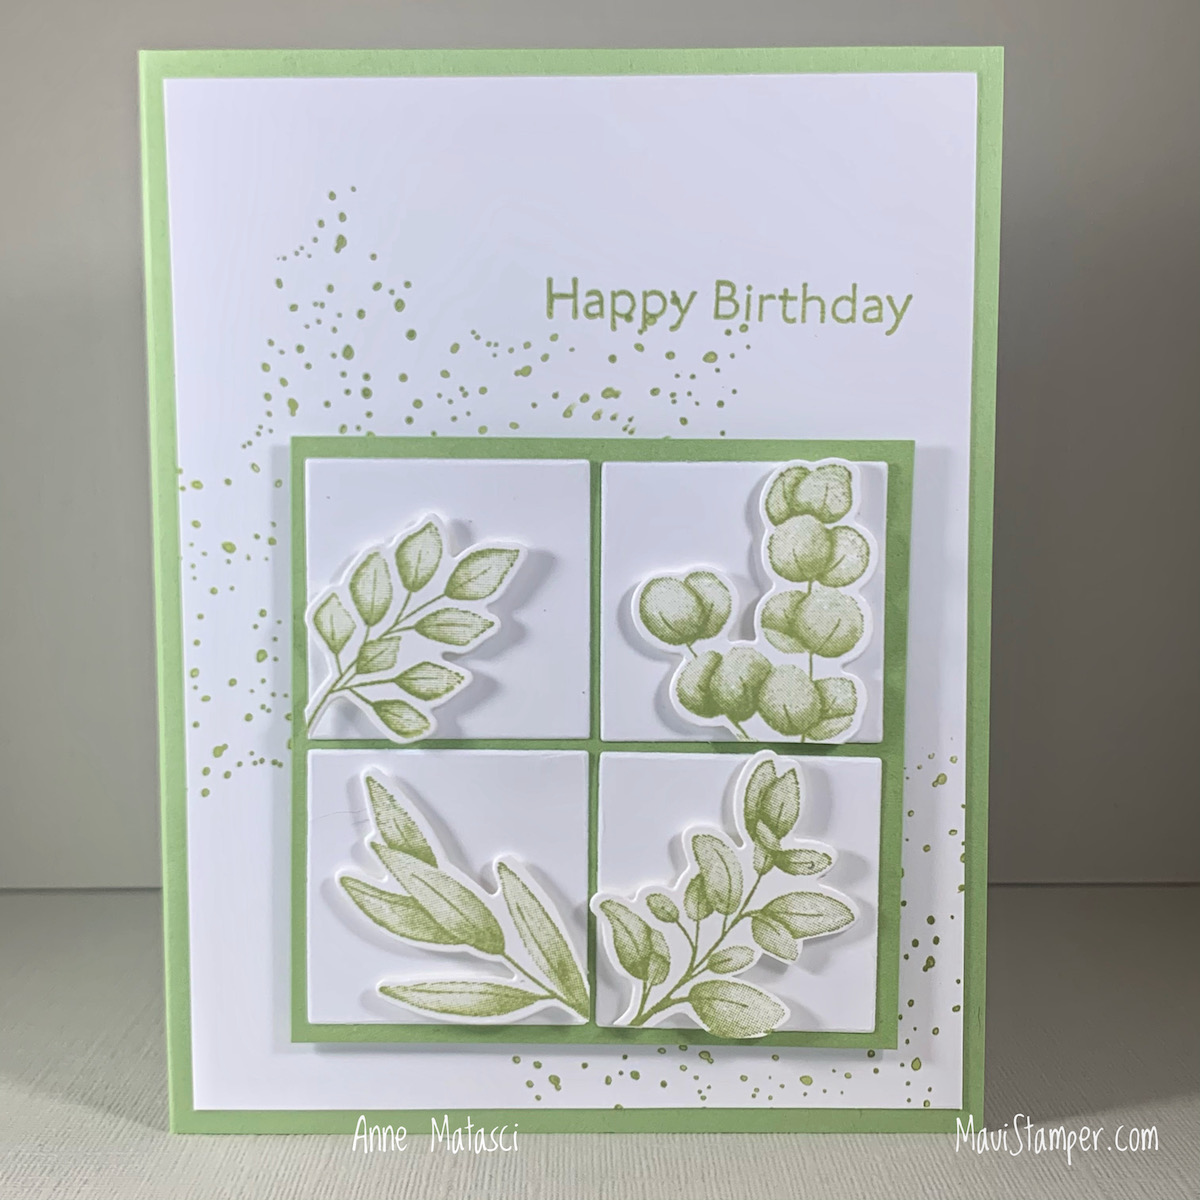
This is Soft Seafoam, one of my favorite greens. It’s really a versatile tone and definitely lends a more feminine touch to this card layout.

Maui Stamper Stampin Up Forever Fern Monochromaticbirthday card

Forever Fern has a great variety of botanical images, but as my friend Heather pointed out, none of them actually appears to be a fern. Go figure.

If you suddenly need the Layering Squares dies, or anything else for that matter, pop on over to the Online Store lickety split! And thanks for stopping by today.

Sand and Sea Suite: Unconstructed

When you combine the Seashells Embossing Folder from the Sand and Sea suite with the all-in-one die, you get a stunning panel that works all by itself. But when you cut apart all the elements, the combinations are endless:

Maui Stamper Stampin Up Sand and Sea Suite Friends Are Like Seashells
  • Stamps: Friends Are Like Seashells, Itty Bitty Greetings
  • Color Palette: Whisper White, Sahara Sand, Petal Pink
  • Accessories: Stamp Cut and Emboss (Big Boss), Seashell Embossing Folder, Subtle Embossing Folder, Seaside Seashells dies, Ornate Frames dies, Shimmery White paper, Linen Thread, Opal Rounds, Stampin Dimensionals, Blending Brush, Paper Snips

You really need Paper Snips for this task, because they are super sharp and their pointy little tips get right into the littlest spots! The other indispensable tool I used is the Blending Brush, which layers color consistently and smoothly. I KNOW they’re not available to order right now 😟 but they are due in the warehouse the week of April 5!

Maui Stamper Stampin Up Sand and Sea Suite Friends Are Like Seashells handmade card

Did you notice the Opal Rounds in the January-June Mini Catalog? I completely missed them until just a few weeks ago, but I’m doing my best to make up for that now! They’re perfect with the Shimmery White card stock (or any other project you might be working on.) And I think it is a universal truth that there is no substitute for Linen Thread.

Maui Stamper Stampin Up Sand and Sea Suite Friends Are Like Seashells handmade card

The Friends Are Like Seashells stamps include the images on the Embossing Folder, but also include a great assortment of other images that really round out the suite. I used a little bit of ocean flora on the inside of my card – because it’s there, just waiting for some ink!


156205 Friends Are Like Seashells Bundle

The Retiring List for the 2020-2021 Annual Catalog comes out today (March 24) at 1pm MST. Every year, there’s a lot of excitement swirling around what will stay and what will go, and I confess that I get a little nervous when I think about some of my favorites! This year the calendar is a little different, so pay close attention: The 2020-2021 Annual Catalog is available (while supplies last once the list has been published) until May 3, 2020. The new 2021-2022 Annual Catalog will debut on May 4th!

The January-June Mini Catalog remains current until June 30 (again, there’s that pesky “while supplies last” clause). If you’re making a plan, be sure to make note of those two dates!

And if you’re ready to shop, please visit the Online Store.

Maui Stamper Stampin Up Sand and Sea Suite Friends Are Like Seashells handmade card

Lots of Heart for Valentines Day

While it’s perfect for creating Valentines, the Lots of Heart stamps from the January-June mini catalog are truly year-round images. The companion Many Hearts dies provide great options as well, and I spent a delightful afternoon creating a variety of cards:

Maui Stamper Stampin Up Lots of Heart Valentines Handmade Cards
  • Stamps: Lots of Heart, Lovely You
  • Color Palette: Basic White, Coastal Cabana, Poppy Parade, Gold
  • Accessories: Stampin’ Cut and Emboss, Many Hearts dies, Sunflowers dies, Curvy dies, Forever Greenery dies, Forever Greenery trim, Stampin’ Dimensionals, Vellum card stock
Maui Stamper Stampin Up Lots of Heart Valentines Handmade Cards

Do you keep a little stash of die cut bits? I can’t seem to bear to throw them away, but eventually it drives me crazy to have all those pieces. My goal this month is to use ’em or lose ’em!

Maui Stamper Stampin Up Lots of Heart Valentines Handmade Cards

One I got started, was on a roll. This version most closely resembles Melissa Davies card, which I used for my inspiration. I wanted to play with some non-traditional Valentine colors, and Highland Heather and Daffodil Delight were a great way to switch it up.

Maui Stamper Stampin Up Lots of Heart Valentines Handmade Cards

The greeting is from Itty Bitty Greetings – one of my most indispensable stamp sets. You can see just a hint of the Subtle Embossing Folder on the Highland Heather panel, and the end of the Purple Posy strip was shaped with the Lovely Labels Pick a Punch. There’s a little Wink of Stella too [wink, wink}.

Maui Stamper Stampin Up Lots of Heart Valentines Handmade Cards

My intent was to create a rainbow with that row of horizontal hearts, but I stopped after 4 rows. I liked the way it looked, and I was eyeballing it and they were lurching downhill! That’s Rich Razzleberry, Magenta Madness, Calypso Coral and Mango Melody, and the Bumblebee Gingham ribbon across the front.

Maui Stamper Stampin Up Lots of Heart Valentines Handmade Cards

I confess that I squealed a little teeny squeal when I realized the gingham echoed the design in the heart! A few Champagne rhinestones finished this one off.

Maui Stamper Stampin Up Lots of Heart Valentines Handmade Cards

I went monochromatic in my favorite blues and greens for this version. That’s Misty Moonlight, Just Jade, Bermuda Bay and Coastal Cabana in the lineup, and I used the Scripty Embossing folder on the Misty Moonlight panel. I left off the glitz and glamor to give this one a more masculine feeling.

Maui Stamper Stampin Up Lots of Heart Valentines Handmade Cards

I really love that horizontal row of tiny hearts!

I think I spent more time cleaning the stamps than I did putting these cards together! It was a lovely way to spend an hour or so, and these will be in the mail in time for Valentines Day.

If your heart is just bursting for any of these supplies, you can shop right HERE. You don’t even need to put on your shoes to do it! And don’t forget to make your Sale-a-bration choice – there are just a couple of weeks left.

Snailed it for Mojo Monday 552

I haven’t joined in for a challenge in ages. Mojo Monday popped up in my social media and I liked the layout and thought “why not?” Why not indeed? This was a great chance to celebrate the Snailed It snails!

Maui Stamper Stampin Up Snailed It Ombre DSP MojoMonday552
  • Stamps: Snailed It, Itty Bitty Greetings, The Right Triangle, Stacked Stone
  • Color Palette: Basic White, Bermuda Bay, Granny Apple Green, Coastal Cabana, Pool Party
  • Accessories: Big Boss, Snailed dies, Stitched Shapes dies, Textured Textiles Embossing Folder, Greenery Embossing Folder, Ombré DSP (Sale-a-bration 2021.1), Blending Brushes, Stampin Blends, Wink of Stella, Fine Tip Glue Pen, Stampin’ Dimensionals, tiny clear dots from a long-past Paper Pumpkin
Maui Stamper Stampin Up Snailed It Ombre DSP MojoMonday552

This card was all about texture. With all those layers, it required something too distinguish them! I used embossing folders, background stamps, sparkle and shine, dimensionals, and Designer Series Papers to create dimension on this project. The sentiment tab and the narrowest patterned paper were gently brushed with Blending Brushes and Pool Party ink to give them very soft color.

If you’ve missed The Right Triangle, check out all of the textures you can find in that stamp set!

Maui Stamper Stampin Up Snailed It Ombre DSP MojoMonday552

I repeated my sparkly eyes trick, using Wink of Stella and the Fine Tip Glue pen to bring her eyes to life. I also did a little spattering with Stella on the Oh So Ombre DSP, and added some “dits” with a textural stamp from Right Triangle.

Maui Stamper Stampin Up Snailed It Ombre DSP MojoMonday552

The sketch challenge really inspired me. I’d felt like I was in a rut, that everything I created had an element of sameness to me. Maybe it did, and maybe it didn’t, but working with a sketch helped me see paper and layers with fresh eyes, and I feel like my creative energy stores have been replenished.

If you’re ready to shop the January – June mini catalog and get in on the great deals available during Sale-a-bration, visit my Online Store! If you’d like to see more about Mojo Monday, take a look at what Julee is doing at Poetic Artistry. And thanks for stopping by!

A Congratulations Easel Card

I’ve gotten VERY creative with projects for my clubs the past couple of months, as we’re crafting together via zoom. It’s not quite the same as being together in one place, but it’s much better than not being together at all! Since I can only provide paper and my club members have to go through their stashes to find stamps, ink, and any extras they want, I’ve been working to come up with designs that are flexible. Last month we created an easel card for a graduate:

Maui Stamper Stampin Up Congratulations Easel Technique

This card is more about the concept than the execution. The card base is 4.25″ x 11″ and is scored at 5.5″ and 2.5″. I cut a Whisper White panel to 2.5″ x 4.25″ (the same size as the bottom half of the card front) so that I could be sure and get a perfect Buffalo Check grid. The Stamparatus is an indispensable resource.

The little label from the Ornate Labels dies is the “bumper” for the folded top of the card. It’s mounted on two mini-dimensionals, which are just high enough to hold the easel, but still soft enough to mail with regular first class postage. I’ve used a piece of rogue washi across the card below that bumper, and I can’t begin to tell you anything about it other than the fact that I’ve had it along time!

Maui Stamper Stampin Up Congratulations Easel Technique

On the inside of the card, I created an optional gift card pocket. If your graduate was naughty, well then, leave the pocket off – this is only for graduates who have earned a little reward! The pocket is 4 5/8″ x 2 5/8″ and is scored on 3 sides at 1/2″. Use a circle punch to create a little extra space to slide the card in and out. It looks like it’s upside down, but when you hold the card upright it’s right side up.

There are so many ways to stamp and embellish this card! But if you need a quick and simple version, this will do. And if you need supplies, please visit the Online Store.

One last SAB Birthday

Sale-a-bration 2020 has been over for more than two weeks, but I’m still wrapping up a few projects left on my desk. Do you have bits and pieces? I have so many random “parts” that I could probably make cards for weeks without cutting into anything new. This card has been in my head for at least a month, and it finally came together this week:

Maui Stamper Stampin' Up! Happy Birthday To You SAB 2020

This stamp and die combo just begs to be colored over and over again with Stampin’ Blends in every possible color combination. I have multiple sets of these images on my craft desk, some of which are in the most unexpected colors you can imagine! I’m going to have to do a wild, bring-on-all-the-colors card in order to put them all to use.

Maui Stamper Stampin' Up! Happy Birthday To You SAB 2020

It’s really satisfying to use up the “parts” as well as to bring my vision to life. Tell me, how many random bits and pieces are lurking around on your craft desk??

If you’re done with pieces and ready for some full sheets of card stock, I’d be grateful and honored if you shop HERE.

The Gorgeous Lilypad Suite

I’ve been playing with coloring techniques using an embossed image from Lovely Lilypad. I went back to the Aqua painter and found more success this time by remembering to wet the entire image before I start. Those of you with any training likely do this automatically!

Maui Stamper Stampin Up Lovely Lilypad

The Lily Impressions DSP is bold, and creates a great background pop on this otherwise neutral card. The card base is from DEEP in the archives, something I discovered recently during a mad “what the HECK is in here anyway?” clean up. It’s 6 1/2″ wide by 3 1/4″ tall, and was sold with matching envelopes. Speaking of…

Maui Stamper Stampin Up Lovely Lilypad

I get busy and forget to do this, but I love the sense of anticipation that comes with a stamped envelope! I’m also completely smitten with the new Coastal Weave embossing folder – the additional textures are gorgeous! I spritzed it with a few drops of Coastal Cabana ink mixed with rubbing alcohol in a Stampin’ Spritzer.

Maui Stamper Stampin Up Lovely Lilypad

I liked the first one so well, I made a second in an alternate color palette. The lily is colored with Purple Posy (the ink has been retired for quality issues, but there are Stampin’ Blends available) and the accent color is Highland Heather. I used the Stitched Nested Labels for the ground shape.

Maui Stamper Stampin Up Lovely Lilypad

Which do you prefer – I can’t choose! But I’ll tell you this – these cards are headed out in the mail quite soon, so if you placed an order in the last month, watch your mailbox. Two of you will get a Lovely Lilypad!

If you’d like to create your own, shop HERE.

Colour Inkspiration 54: Wonderful Romance

This is the first card I created for the Colour Inkspiration 54 challenge – Black and White with a POP of colour. I love how it turned out, but I didn’t feel it represented the POP very well.

Maui Stamper Stampin' Up! Colour Inkspiration 54 Wonderful Romance

What do you think? I love the softness of the composition, but that’s exactly why I don’t think it qualifies for a POP of colour. It’s more muted, especially with the grey tones added in.

There’s one little trick you might not have noticed. The smallest rectangle in the Rectangle Stitched Framelits isn’t that small. I stamped my greeting and aligned one end of the framelit with the beginning of the message. Once I’d run it through the Big Shot, I carefully repositioned the framelit on the other end and rolled it through the Big Shot just enough to cut off the opposite end right where I wanted it!

Maui Stamper Stampin' Up! Colour Inkspiration 54 Wonderful Romance

The Wink of Stella helps brighten these pretty white flowers. I wish there were dies of all three blooms in the set of framelits, because I think that would really enhance the composition and set off the floral aspect. I usually don’t mind fussy cutting, but I just wasn’t feeling it on this one. It is what it is!

I think this image could really work in a lot of other colour combinations. I currently have one in process on my craft desk, but it’s giving me a little bit of a fit trying to figure out how to finish it off. If I’m successful, I’ll share it with you next week. To share your own beautiful Black and White and POP project, visit the Colour Inkspiration Facebook page.

ColourINKspiration Challenge #54

In the meantime, there are all kinds of gorgeous products at great discounts available on the Clearance Rack. The retiring stamps, bundles, and accessory products are selling quickly, and when those products are gone, they’re gone. (Hint: bundles are priced with a 10% discount – they may continue into 2019-2020, but they won’t be bundled and you won’t have the opportunity to save.) If there’s something you love, I highly recommend you take immediate action. Shop HERE if you’re feeling inspired!

Cling Wrap Part Two: Wonderful Romance

One of the serendipities of the Cling Wrap Frame technique is that it’s a “two-fer”: when you cut the frame, you get an extra piece that functions as a beautiful focal point on a second card. Today I’m sharing that card!

Maui Stamper Stampin' Up! Wonderful Romance Cling Wrap Technique Wonderful Romance

The Stitched Rectangle shape was the middle of the frame from THIS post, and I was pleased with the balance of color and shape. It really didn’t need much embellishment, but I decided to emphasize it a bit by adding a narrow black mat.

Maui Stamper Stampin' Up! Wonderful Romance Cling Wrap Technique Wonderful Romance

The sentiment was stamped on a little strip of paper and trimmed to fit. I kept it small and simple to offset the detailed design and images from the focal panel.

Are you ready to try this for yourself? It’s not hard and the results are so satisfying.

And there’s more good news! The Bunny Builder Punch and the Best Bunny Bundle are back in stock, just in time for your Easter crafting. Shop HERE!

Tropical Playtime

The Tropical Escape Suite is Right. Up. My. Alley.

Holy Moly. These stamps, the DSP, the accessories – they speak my language! I love the splash of Blushing Bride mixed in with all of the green tones. These leaves are growing in my back yard – literally – and the thinlit shapes are gorgeous. This is a set I’ll keep!

Maui Stamper Stampin' Up! Tropical Chic Tropical Escape DSP

Maui Stamper Stampin' Up! Tropical Chic Tropical Escape DSP

I had such fun with the details. I used a sponge dauber to add a little Flirty Flamingo ink to the center of the flower. The thinlits cut out the stamped images, but there are also dies to cut detailed leaves out of cardstock. The possibilities are endless.

The Designer Series Paper is Buy 3, Get One Free for the rest of July. I purchased multiple packages.

Maui Stamper Stampin' Up! Tropical Chic Tropical Escape DSP

Using this darker DSP in the background completely changed the feeling of the card. The designs are gorgeous, and can stand on their own as a card front with minimal embellishment. (I was not feeling minimalistic.)

Maui Stamper Stampin' Up! Tropical Chic Tropical Escape DSP

As you can see, I just kept going! I didn’t know that I needed Tropical Elements until I opened the package, but now I’m convinced. I think they look particularly smashing with Linen Thread (everything looks smashing with Linen Thread.)

Need a little Tropical Escape? Shop HERE.