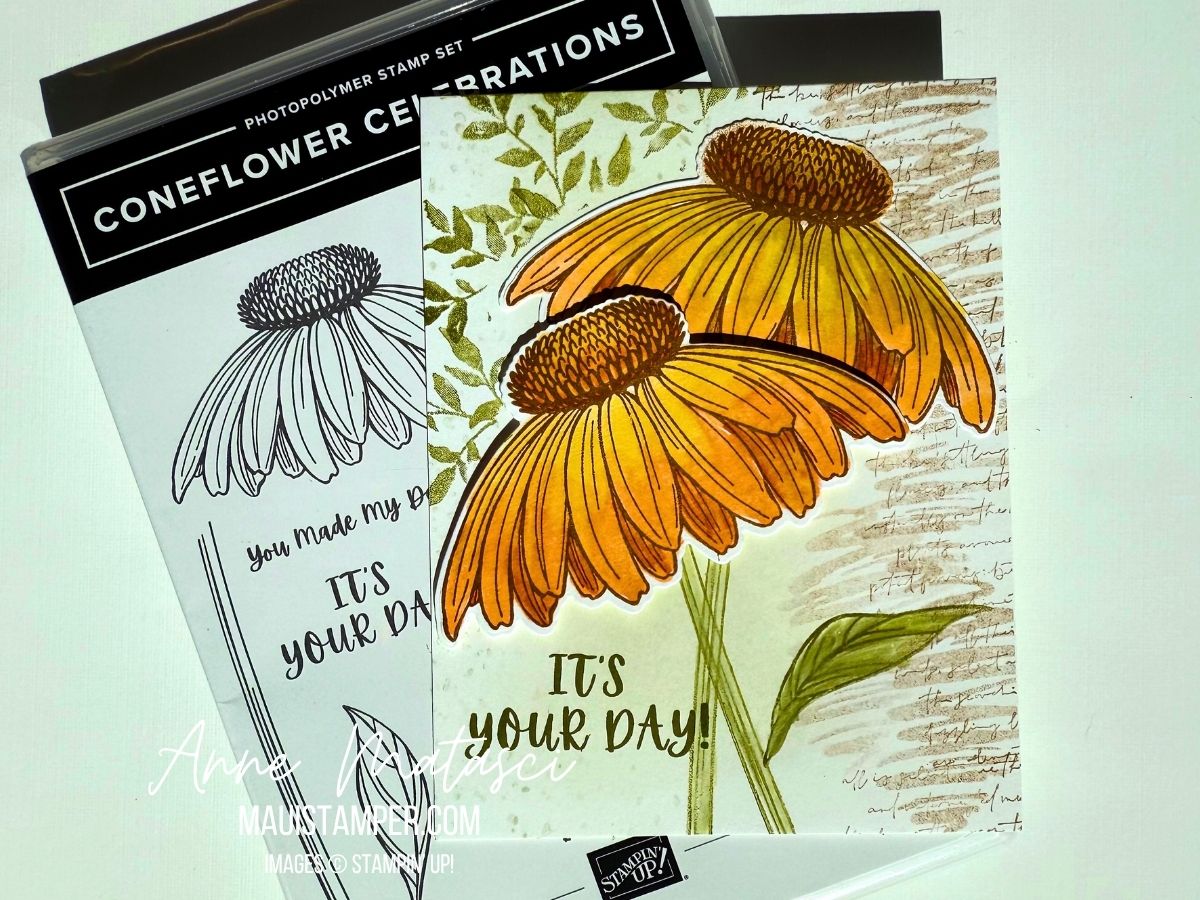
I love this coneflower image, but it’s big. It fills a card front pretty quickly, so I decided to focus on the background. After a few tries, I hit on the idea of a medley of background stamps. I had a pretty big mess on the my craft desk when I was done!
Stamps: Coneflower, Beautiful Motifs, Textured Notes, Elements of Text (retired)
Color Palette: Basic White, Daffodil Delight, Peach Pie, Timid Tiger, Old Olive, Pecan Pie
Both flowers are colored with Stampin’ Blends and cut with the Coneflower dies, but one is adhered directly to the card front and one is on Stampin’ Dimensionals. Is it even possible to make a card without Stampin’ Dimensionals?
I played with the layers for the collage for quite a white. I haven’t done much collage, so it takes a long time for me to find the color, shape and textural combination. There was a lot of trial and error, but isn’t that what crafting is all about??
Find yourself a nice big image and play with the background. Then come back an tell me how you did!
Today is the final day of Pride month and I’m sharing my first-ever Pride card. I’ll confess it took me a while to create the design, as rainbows aren’t a big part of my style (and therefore my crafting supplies). But once I came up with the concept, this was a very satisfying project.
Stamps: None
Color Palette: Basic White, Secret Sea, Real Red, Pumpkin Pie, Daffodil Delight, Shaded Spruce, Night of Navy, Highland Heather
Accessories: Stamp Cut & Emboss Machine, Alphabet Ala Mode dies, Pattern of Friendship die, Stampin’ Blends, Masking Paper, Stampin’ Dimensionals
The first step was to create the rainbow panel. I measured the height of the Alphabet Ala Mode dies: 1 9/16″, to be precise. I made my panel 2″ high, which meant each stripe was approximately 1/3″ high. Turns out this was easier to do in the metric system, so my panel was 50mm high and each stripe was 8 1/3mm (which was easier to estimate).
I cut a large focal panel with extra space on both the height and width. I marked my distances on the side of my focal panel, and used Masking Paper to block off each stripe. I colored each one with a Stampin’ Blend, and I found I got best results by using a fresh piece of Masking Paper for each edge.
Once the Rainbow panel was complete, I used Washi Tape to secure the letters evenly across the panel before running it through the Stamp Cut and Emboss Machine. I held my breath as I did this step, hoping that a) the letters were straight and b) the Washi wouldn’t stick to the rainbow. WHEW. I was so glad when it worked!
After that, it was super easy. I matted the rainbow, matted a second panel, and created a third panel with the Pattern of Friendship die. Add liberal quantities of Stampin’ Dimensionsals, and it’s done!
You could make someone’s day with this card. Let them know you support them. All products are available in the Online Store.
Processing…
Success! You're on the list.
Whoops! There was an error and we couldn't process your subscription. Please reload the page and try again.
I received Along These Lines as a Prize Patrol at #OnStage2025Brisbane. I’ll confess that initially, I was not especially excited about the images. But of course, it was a gift, and I was happy to have it – and when I started to think about how I might use it, I felt inspired.
Stamps: Along These Lines, Everyday You and Me
Color Palette: Basic White, Poppy Parade, Gray Granite, Basic Black
Accessories: Stampin’ Blends, Masking Paper
I began by cutting a few masks of the bike. Next I stamped a couple of images, masked them, and stamped a couple more. I wanted the feeling of a race, but without racers – just the bikes.
I added just a little emphasis with the Gray Granite Stampin’ Blend around the wheels and handlebars. My pop of color was the seat to help each bike stand out.
I want to try this again with multiple colors for the seat, and perhaps with another monochromatic color. I’m thinking I’ll try Azure Afternoon or Crushed Curry – what do you think?
You’ll find Along These Lines – along with a lot of other new products – in the Online Store.
Processing…
Success! You're on the list.
Whoops! There was an error and we couldn't process your subscription. Please reload the page and try again.
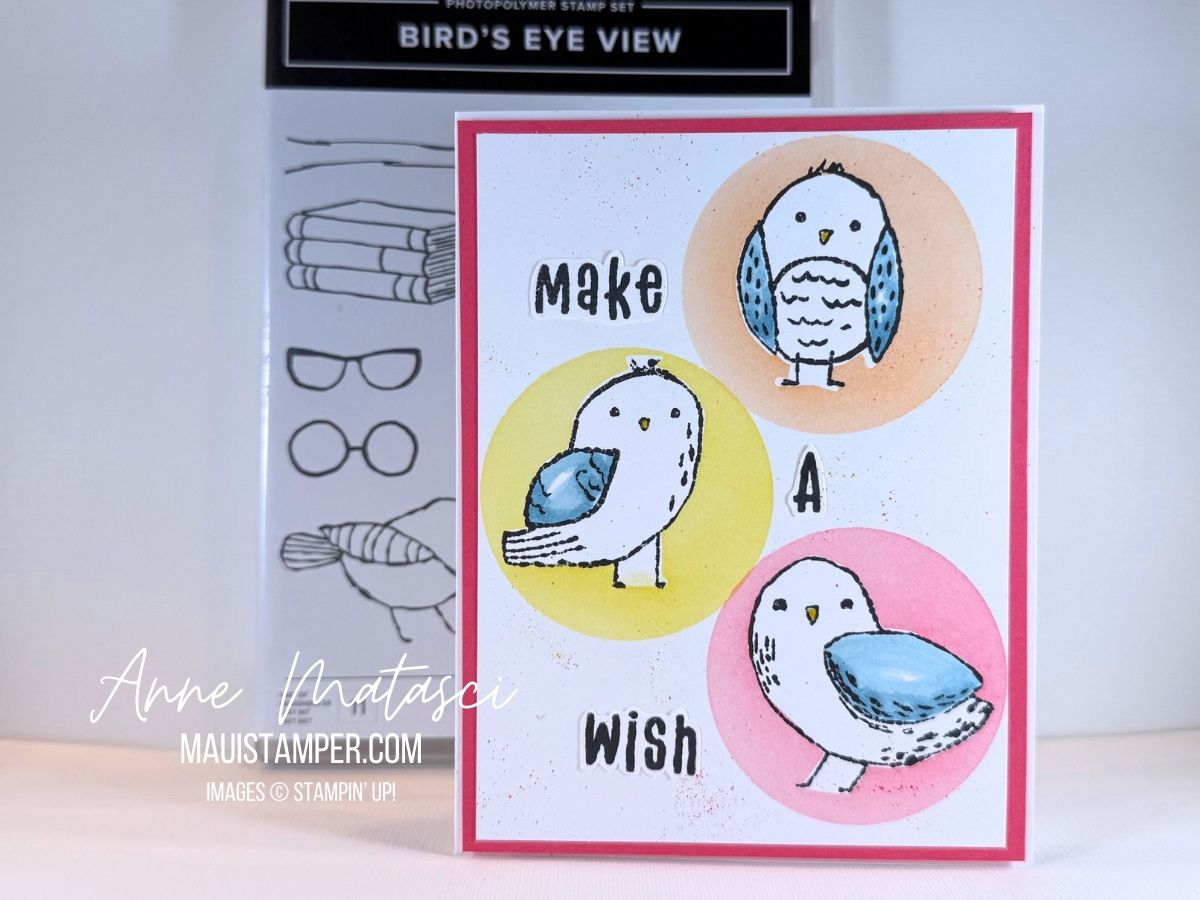
Welcome back to my April Last Dance/Last Chance series! Bird’s Eye View was an early choice for me back in 2023, and I was delighted to have it in the catalog for a second year. But it’s time to make room for new birdies.
Color Palette: Basic White, Timid Tiger (25-27 IC), Darling Duckling (25-27 IC), Strawberry Slush (25-27 IC), Balmy Blue, Memento Black
Accessories: Stamp Cut & Emboss Machine, Circle dies (I used the retired Layered Circles), Window Sheets, Blending Brushes, Masking Paper, Stampin’ Write Markers, Paper Snips, Stampin’ Dimensionals
I started by stamping each of the birds on Masking Paper and cut each one out with my snips. After stamping each bird on the card front panel I covered it with its masked image. I created a mask by using a circle die and a window sheet (I tried to punch it, but it was too thick and I was unhappy with the results). I used washi tape to secure the mask over each bird, then created a “color halo” with a Blending Brush. The Balmy Blue Stampin’ Blends added a touch color to the wing on each bird.
I also stamped the “Make A Wish” sentiment from Ice Cream Swirl three times and cut out each word. I could probably have done it with one image, but I’m lazy and didn’t want to pay that much attention to my fussy cutting. There’s a few flicks from the Stampin’ Write marker around behind the sentiments.
I used the birthday cake image and sentiment from Attention Shoppers on the inside. And sharp eyes will notice that the front panel is on Stampin’ Dimensionals. I don’t remember the last time I made a card without them!
Timid Tiger, Darling Duckling and Strawberry Slush are 25-27 In Colors and will be available on May 7th. In the meantime, skit-skat-skoodle-doot* off to the store to pick up Bird’s Eye View, Attention Shoppers, and Ice Cream Swirl before they disappear for good!
*Any Chicka Chicka Boom Boom fans out there??
Processing…
Success! You're on the list.
Whoops! There was an error and we couldn't process your subscription. Please reload the page and try again.
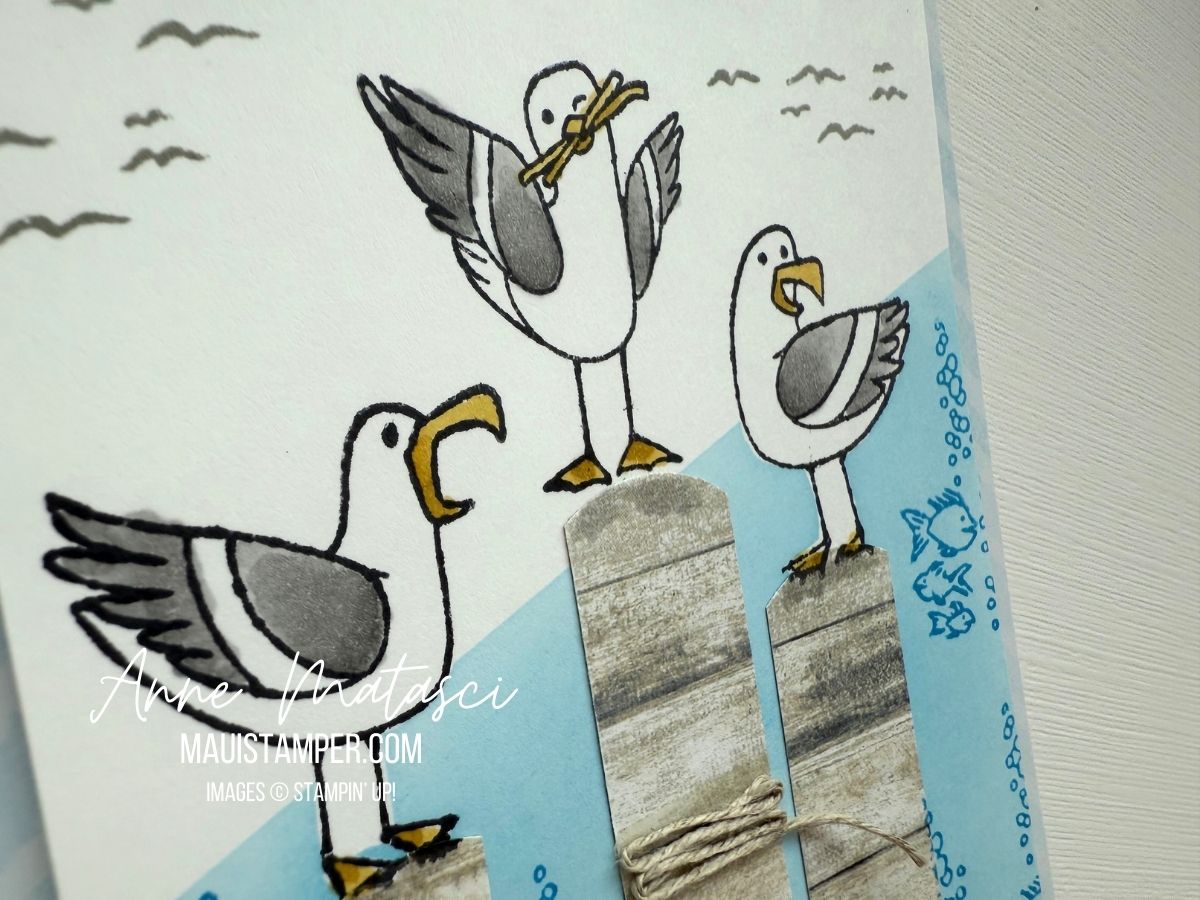
Today’s card is a pretty close CASE of Connie Babbert’s card. My purpose was to recreate it without having to fussy cut all 3 of those seagulls 🤣. I fussy cut one for Wednesday’s card, and that was plenty!
Don’t miss the Stripes & Florals Mix & Match Cards & Envelopes from the January – April 2025 Mini Catalog – they’re beautiful and they add a polished look to your projects. You’ll thank yourself, trust me.
Time is running out to add these Sassy Seagulls to your crafty bag o’ tricks! (the birds, bubbles and fishies are all from this same set). Grab some coordinated cards and envelopes and a pack of DSP and add the Friendly Seagulls to your order for FREE in the Online Store.
Processing…
Success! You're on the list.
Whoops! There was an error and we couldn't process your subscription. Please reload the page and try again.
I’m crossing my fingers that the Perennial Postage dies stick around for a while. I especially like the look I get when I mask off the edges. They were perfect for this special Galentine:
I masked the edges of the large die cut to create that “postage stamp” look. I also masked off the mailbox and the circle in the middle of the “postmark”. I’ll tell you a secret: masking the mailbox was to make it easier. 😉 I used the Blending Brushes to create the backgrounds, and let me tell you, they are SO forgiving!
The sentiments in Sending Love are perfect. I like to use this one on the back of the envelope, too.
Hope your Valentines’ Day is sweet!
Processing…
Success! You're on the list.
Whoops! There was an error and we couldn't process your subscription. Please reload the page and try again.
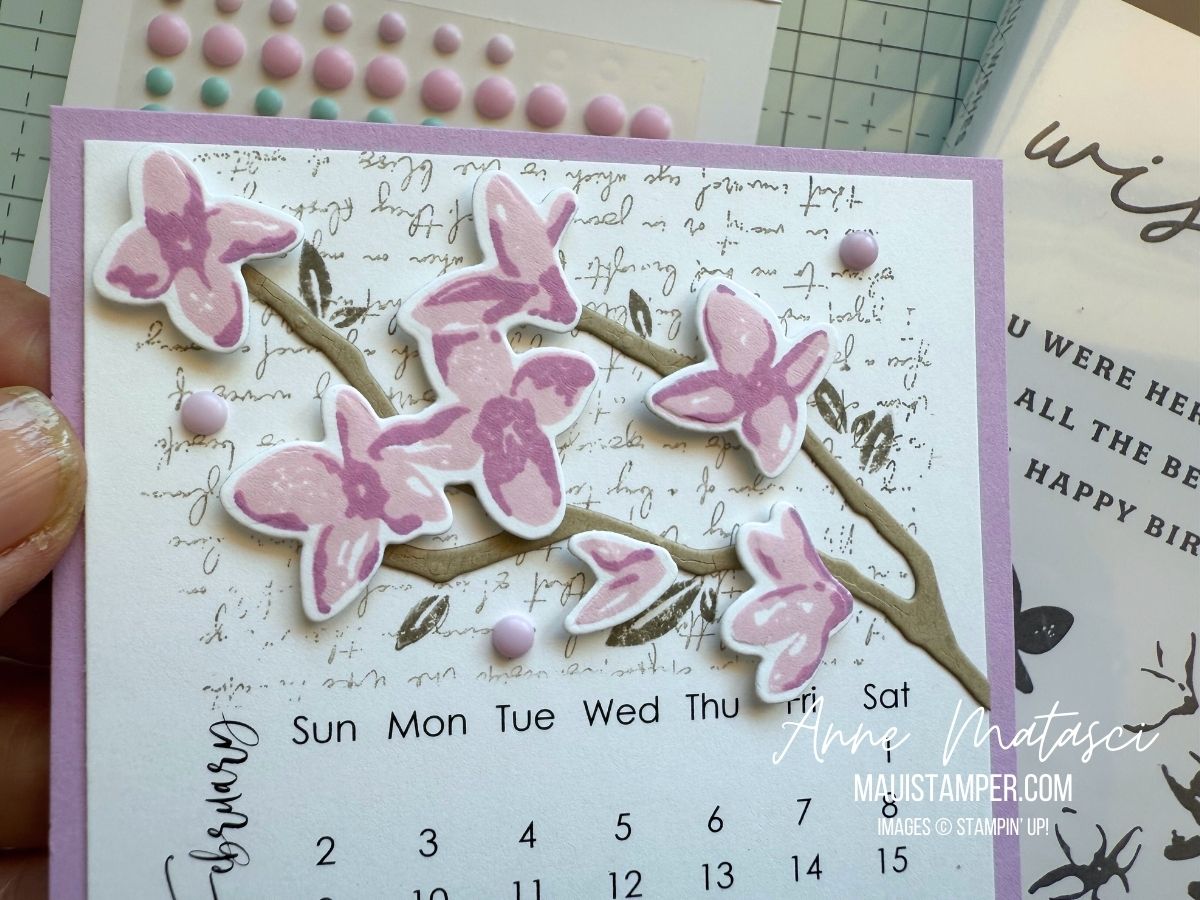
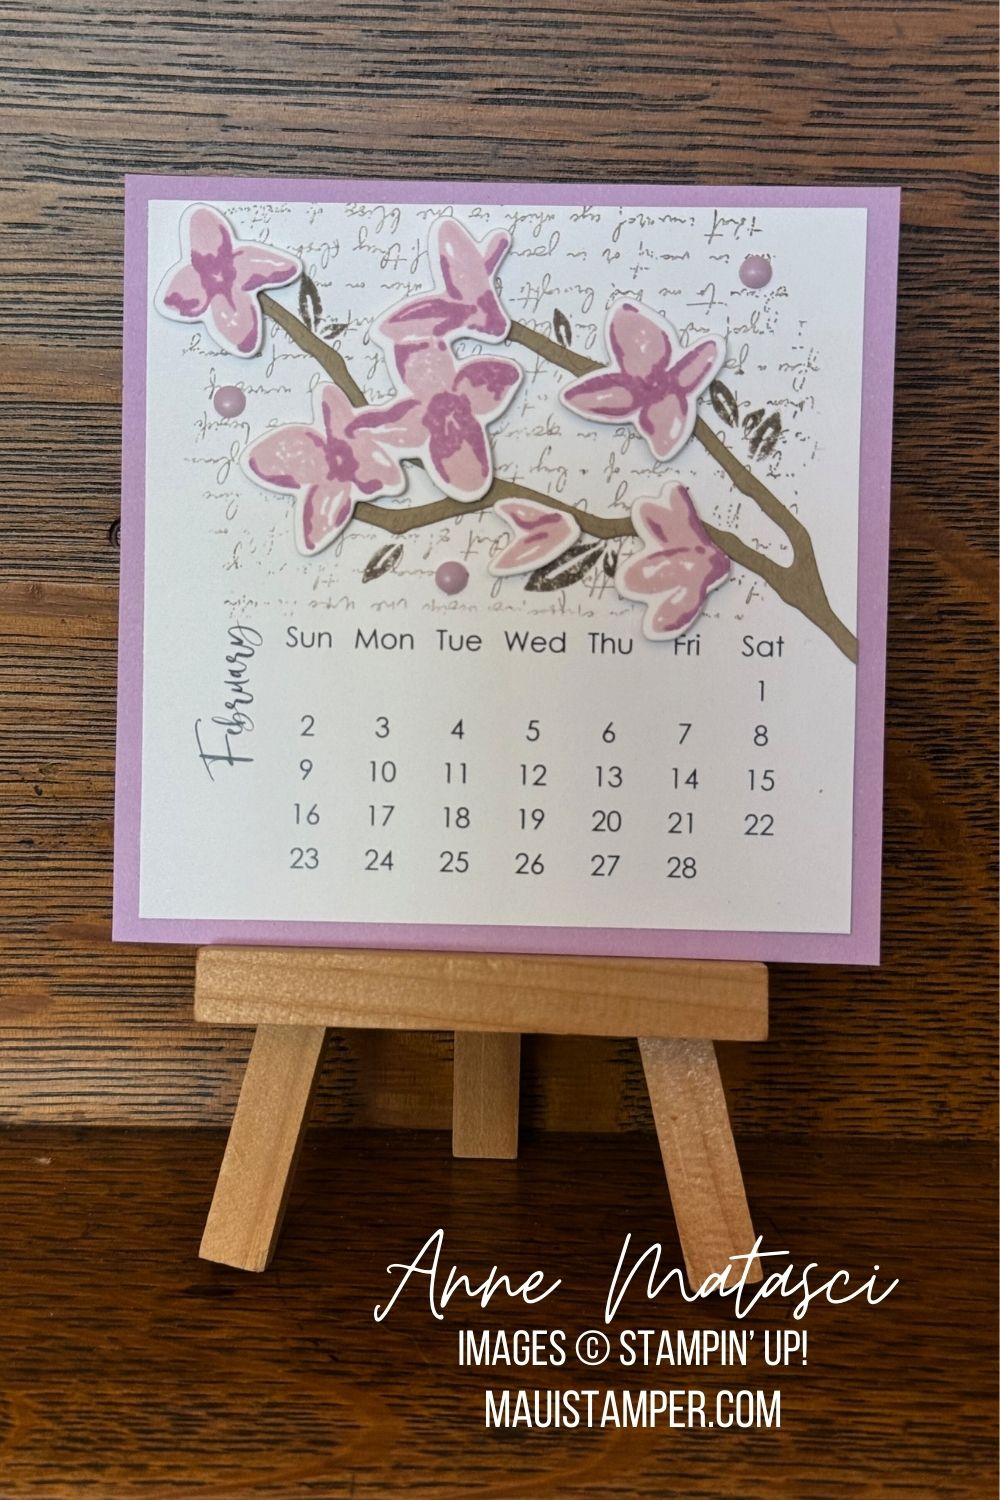
Welcome to the second DIY Calendar Blog Hop of 2025. I hope you’re ready for some inspiration from our crafty calendar crew!
I am smitten with the Floral Delight Suite, but I’ve primarily worked with the yellow tones of the DSP. It was time to branch out (get it???) and try a new color combination. I’m loving the lavenders!
This branch can be die cut or stamped, and for the calendar I wanted the extra lift of the die cut. Adding each blossom takes a little more time, but I hope you like the end result. I don’t think I would do this for a stack of cards, but it’s no problem for a little calendar page.
And for the record, I LOVE LOVE LOVE our new Elements of Text stamps. Trust me when I tell you that you NEED this stamps set!!
I created this “cheat sheet” for the floral spray if you prefer to stamp them. The stamps are mounted on blocks and each block is numbered. The number is placed at the top of the block to make it easier to line up the flowers. I designed the cheat sheet for THIS project.
How do you like Delightful Wishes in lavenders? It’s a completely different feeling, much more calm and gentle versus the happy exuberance of shades of yellow.
Click the button to see what Cheryl, Malia and Sharon have in store for this month. Thanks for visiting today!
Would you like to make your own DIY Calendars? The template is just $5 – let me know that’s what you want and I’ll send you an invoice. Please tell me you’re a real being in the message box – I’m getting increasing amounts of spam. Everything is done digitally, so you’ll have it quickly.
You are only purchasing a template, which you can download and print for your personal use.
Processing…
Success! You're on the list.
Whoops! There was an error and we couldn't process your subscription. Please reload the page and try again.
There is a fabulous selection of Designer Series Papers available for FREE in Sale-a-bration 2024. Sunny Days has gorgeous designs and they coordinate really well, making it a great choice for a fun-fold card:
Stamps: Bright Skies
Color Palette: Basic White, Pool Party, Lost Lagoon, Daffodil Delight
Accessories: Stamp Cut and Emboss Machine, Stylish Shapes dies, Masking Paper, Sunny Days DSP, Stampin’ Write Marker, Tear n Tape
I used the “rainy dots” image from Bright Skies and stamped off to create this pattern on the interior panel. To add a message to this card, I would either use the inside flap (on the left) or a really FAT marker to say “I LOVE YOU” on top of that pattern. You could certainly leave it off if you wanted more room to write.
Here are the dimensions for this card:
Card base (Pool Party) 6 3/4″ x 5 1/2″, scored at 2 1/2″ on the long side
Inside Panel (Basic White) 5 1/4″ x 4″ (DSP is layered on top of this panel)
Right DSP Panel (Rainbow DSP) 5 1/4″ x 1 1/2″
Left/Front DSP Panel (Cloud DSP) 5 1/4″ x 2 1/4″
Fold over flap (Lost Lagoon) 3 1/2″ x 3″ scored at 1/2″ (makes a 3″ square)
White panel is the largest of the Stylish Shapes dies. It’s 2 7/16″ squared
Basic assembly:
Stamp the Basic White Inside Panel if desired and adhere the 5 1/4″ x 1 1/2″ DSP panel.
Put Tear n Tape (aka TNT) on the 1/2″ scored strip of the Lost Lagoon 3 1/2″ x 3″ panel
Adhere the 1/2″ scored strip to the back of the Basic White Inside Panel and fold forward
Stamp the Stylish Shape Square and adhere to the Lost Lagoon panel.
Adhere the entire assembly to the card base
I used Masking Paper to stamp just half of the sun image. I also masked each flower when I stamped the leaves. I used the Lost Lagoon Stampin’ Write marker to put a contrasting center on each flower.
This is a 100% mail friendly card – no ribbon or embellishment to create lumps and bumps! You could certainly add those things if you desire.
Sale-a-bration 2024 ends at midnight MOUNTAIN TIME on FEBRUARY 29th – stock up on paper, ink, and adhesive and be rewarded for getting the basics! Don’t miss out – shop HERE.
Just a few more days of everyone’s favorite time of the Stampin’ Up! year – Sale-a-bration! This year we’re featuring an unprecedented variety of products including LOTS of gorgeous, coordinating Designer Series Papers. There is also a bonus selection of Annual Catalog products available as of February 1. See a digital copy of the original brochure HERE or go straight to the ONLINE STORE. for the entire selection.
Say hello to the January April 2024 Mini catalog! See a digital copy HERE, or go straight to the ONLINE STORE.
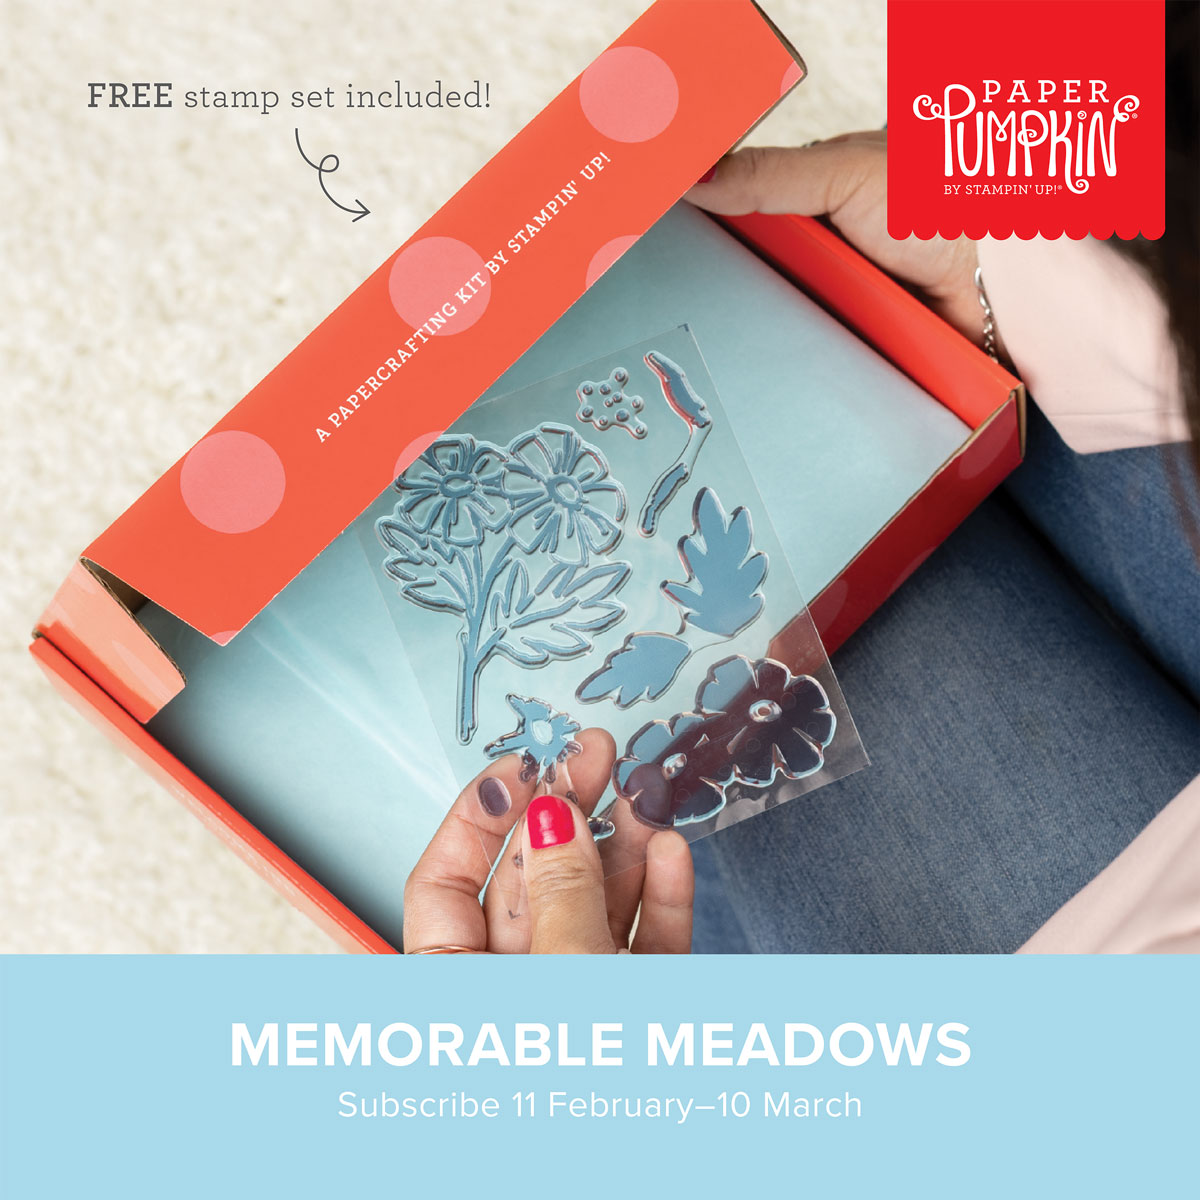
The March Paper Pumpkin kit contains supplies for 9 cards and envelopes and coordinates with the Meandering Meadows Suite and the Garden Meadow Bundle. It features precut vellum and wood pieces and includes a bonus full stamp set. An exclusive coordinating set of dies coordinates with all 3 first quarter Paper Pumpkin offerings. Subscribe HERE by March 10th.
Paper Pumpkin subscriptions deliver ready-to-go projects to your doorstep every month, but you have ultimate control to skip or cancel 😱 if you decide it’s not for you. Stampin’ Up! also features an exclusive collection of kits that don’t require a subscription. Visit the Online Store to see what’s available.
Processing…
Success! You're on the list.
Whoops! There was an error and we couldn't process your subscription. Please reload the page and try again.
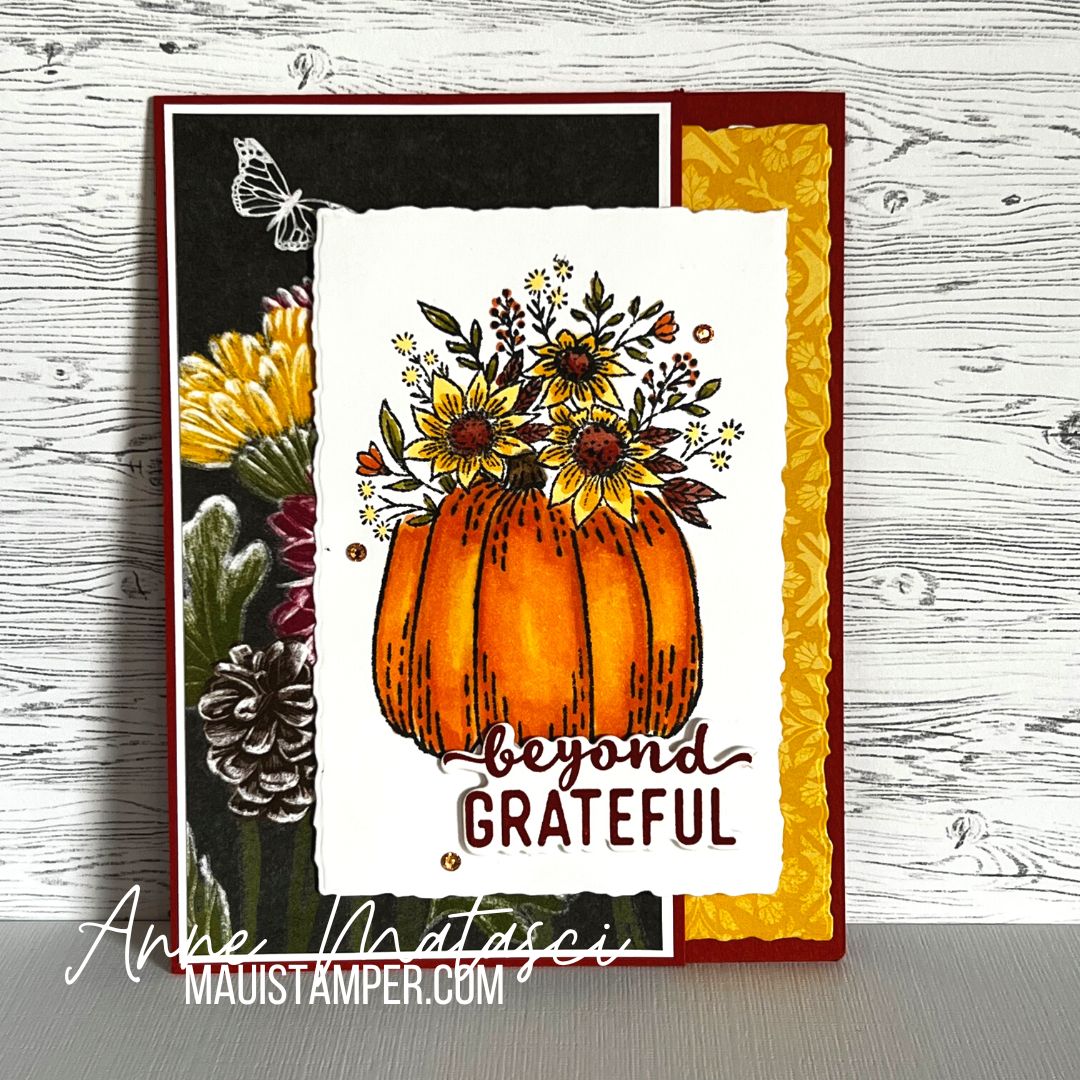
Hello Harvest stamps lend themselves to the masking technique, and today I’ve placed the floral image on top of that big juicy pumpkin with the help of our masking paper. It’s a great card to reproduce, as once you’ve cut the mask it’s good for many repetitions.
Stamps: Hello Harvest, Charming Sentiments
Color Palette: Basic White, Memento Black, Cajun Craze, Pumpkin Pie, Crushed Curry, Old Olive
I created a mask with the floral image by stamping it on our new masking paper and cutting it out with my snips. (The die would have been much faster, but my brain wasn’t working very well that morning.) You could use a sticky note instead of masking paper, but the beauty of masking paper is that the entire page is sticky, so you don’t have lifted edges. It’s also quite thin, so your layered image doesn’t have gaps.
I stamped the flowers first, then covered them with the mask and stamped the pumpkin. The next step was coloring, and oh, I do love to color, especially with Stampin’ Blends! I chose a sentiment from the Charming Sentiments bundle, inked it in Cajun Craze, and cut it out with the matching die. Both the sentiment and the focal point panel are mounted on Stampin’ Dimensionals.
On the inside, I came up with a little trick to expand the interior panel. I cut a strip of DSP about 1 1/4″ wide and placed it on the long edge of the Basic White panel. I ran both pieces through the Big Boss together using the Deckle Rectangle dies. I’ve actually skooched (highly technical stamping term) the DSP to the right a bit so I could get a wider interior panel.
This card could be a birthday card, thinking of you, or any number of other sentiments. I like to keep a few of these in my card stash without the sentiment – it just takes a moment to stamp and cut what you need and attach it to the front with dimensionals.
The leaves and amber gems are not available but are expected the week of November 7th. In the meantime, you can put together this entire card and add the gems later or substitute something you already have. Don’t wait on the Rustic Harvest DSP – it’s on the Low Inventory list! Shop today!
If your wish list is over $99, you may want to become a discount shopper and purchase the customizable starter kit. Through October 31st, you’ll save even more – you’ll get $155 in product + business supplies + free shipping. Click JOIN MY TEAM. Need more information? Message me.
Be sure to subscribe by November 10th for your Craft Escape in a box! The November kit coordinates with last month’s card kit, and makes 12 sparkly tags so you’ll be ready to wrap your packages.
Paper Pumpkin subscriptions deliver ready-to-go projects to your doorstep every month, but you have ultimate control to skip or cancel 😱 if you decide it’s not for you. Don’t miss this kit!
Our Mini Catalog is packed with new designs and products to inspire and delight. There’s something for everyone, and one of my favorite Do-Not-Miss-This products is our Embossing Additions Tool Kit with all the tools you’ll need for perfect results.
The 2023 DIY Template is now available! It’s just $5 and you may use it to make as many calendars as you like. It includes a page of covers, 12 monthly calendar blocks (4 to a page), and a set of cutting instructions. The blocks are designed to be cut to 3 1/2″ square.
Contact me to make your payment – I use Square to invoice, and you don’t need an account to use it.