Stitched Triangle Trees Two Ways

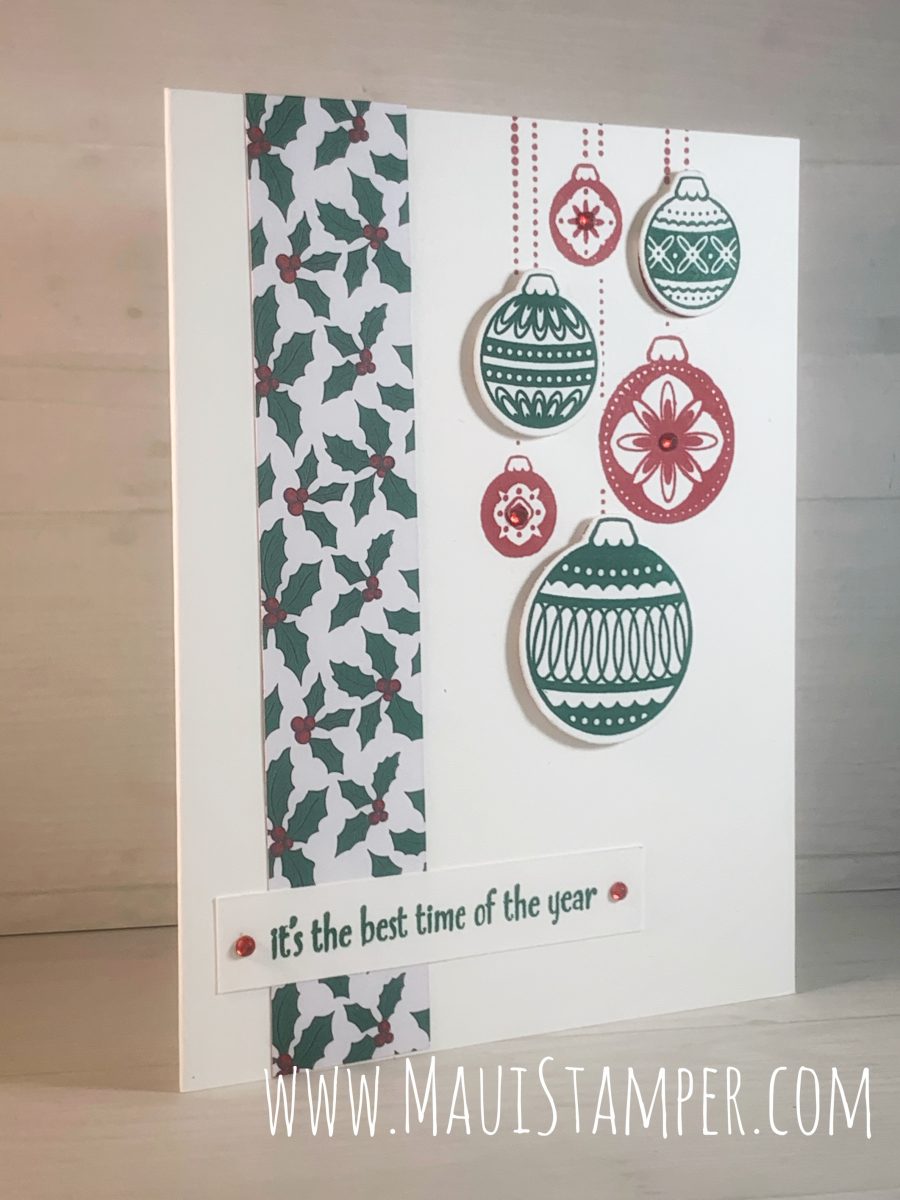
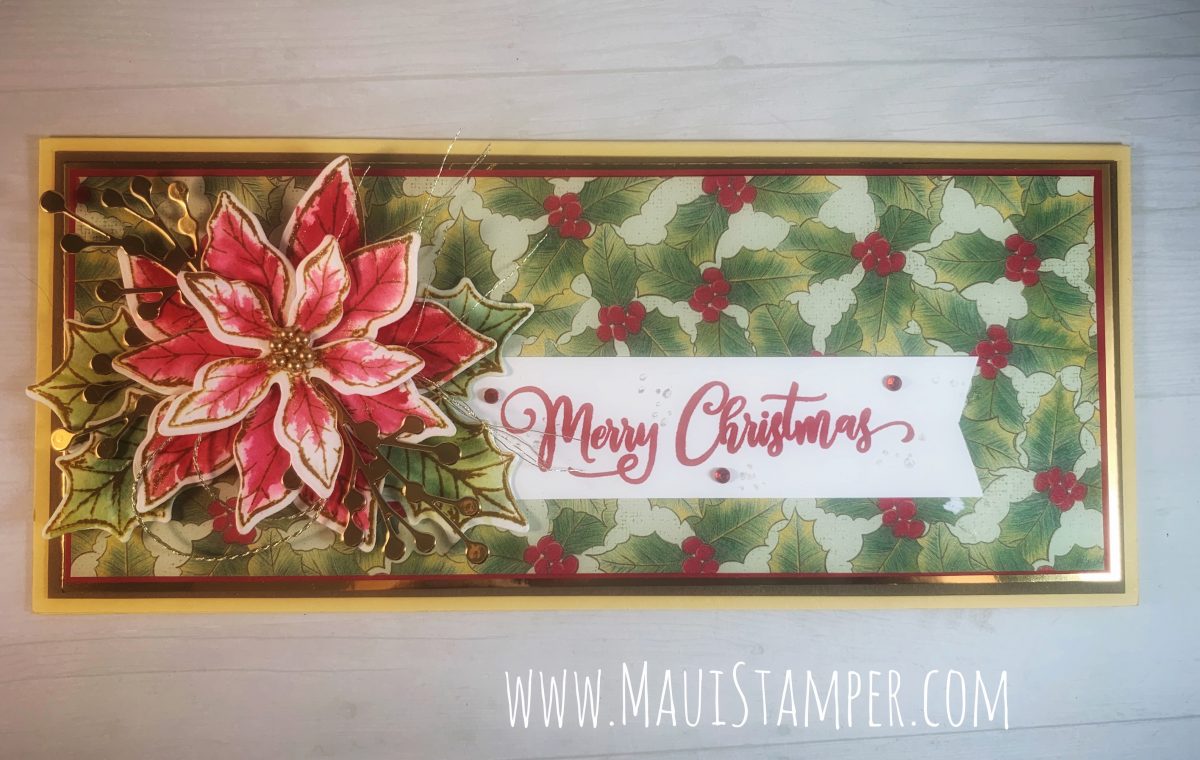
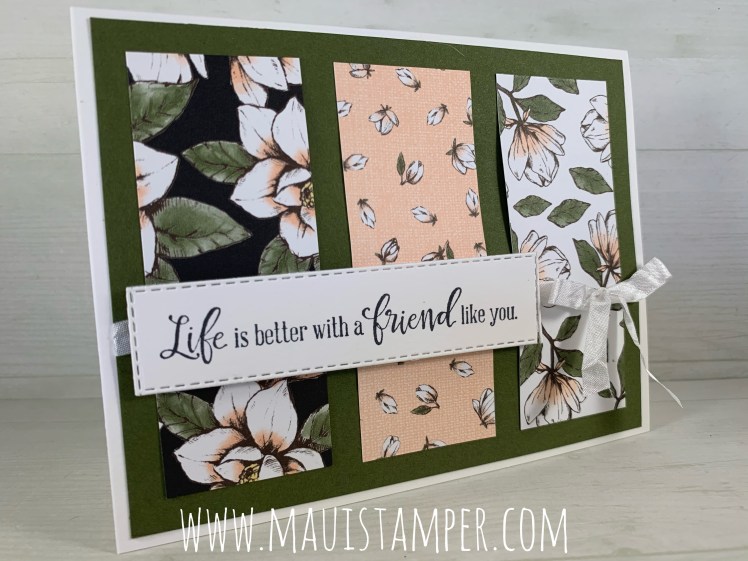
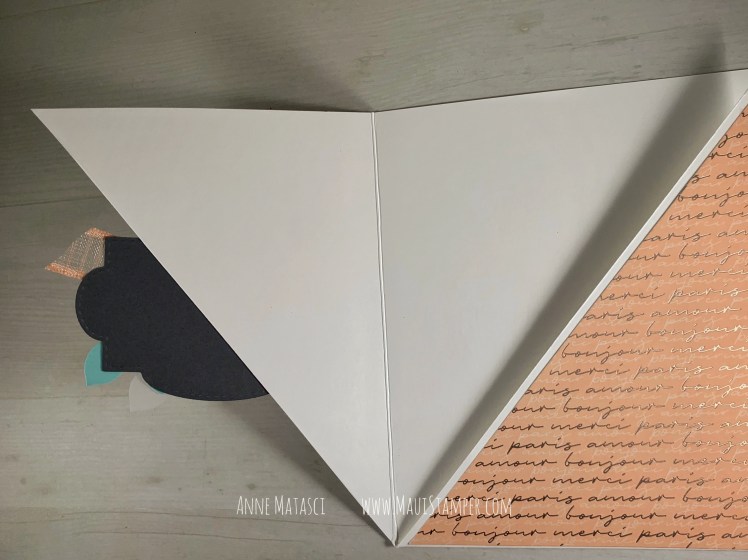
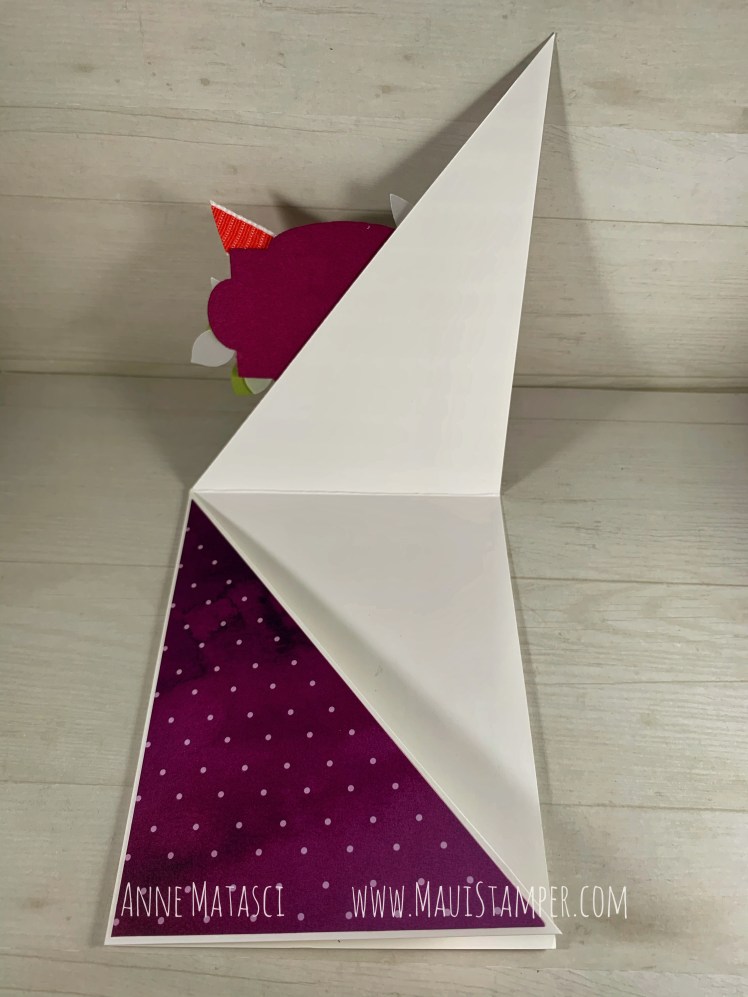
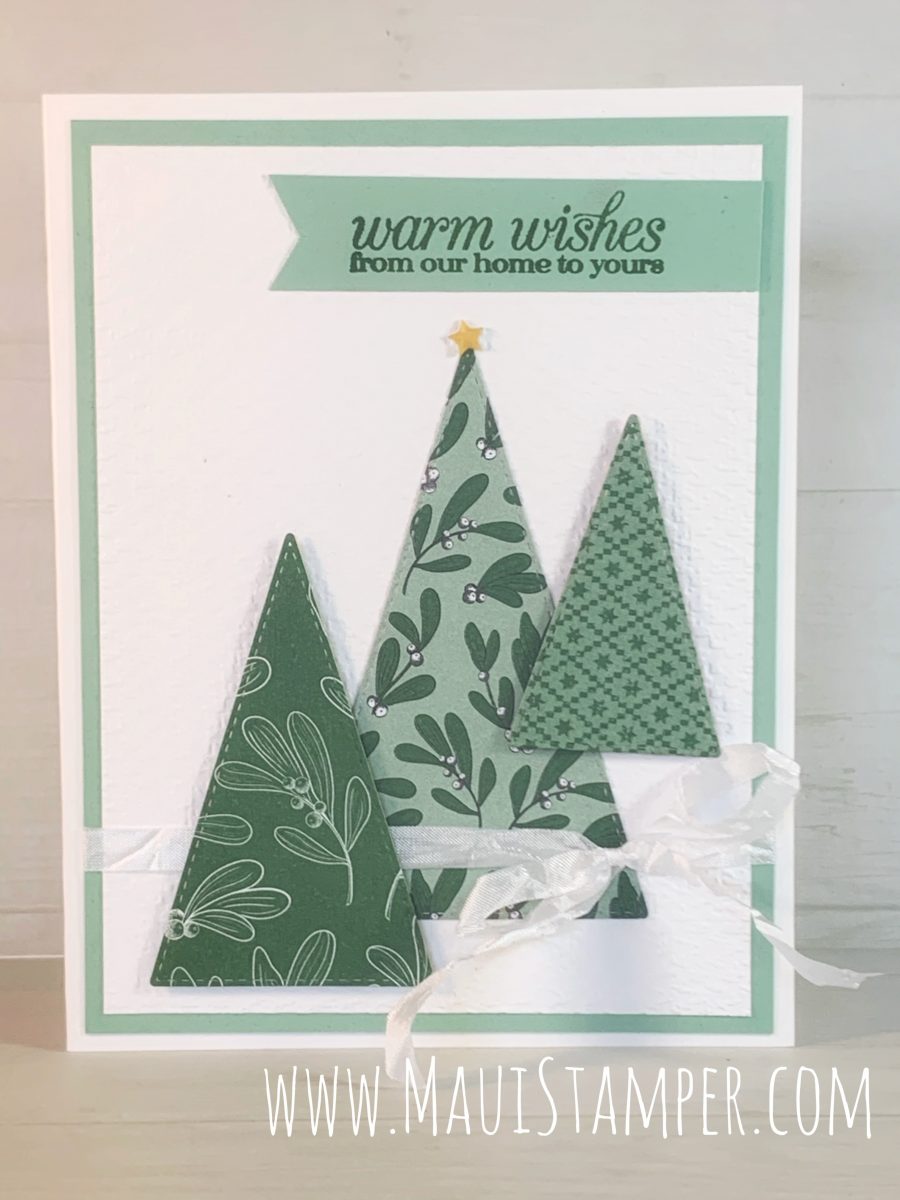
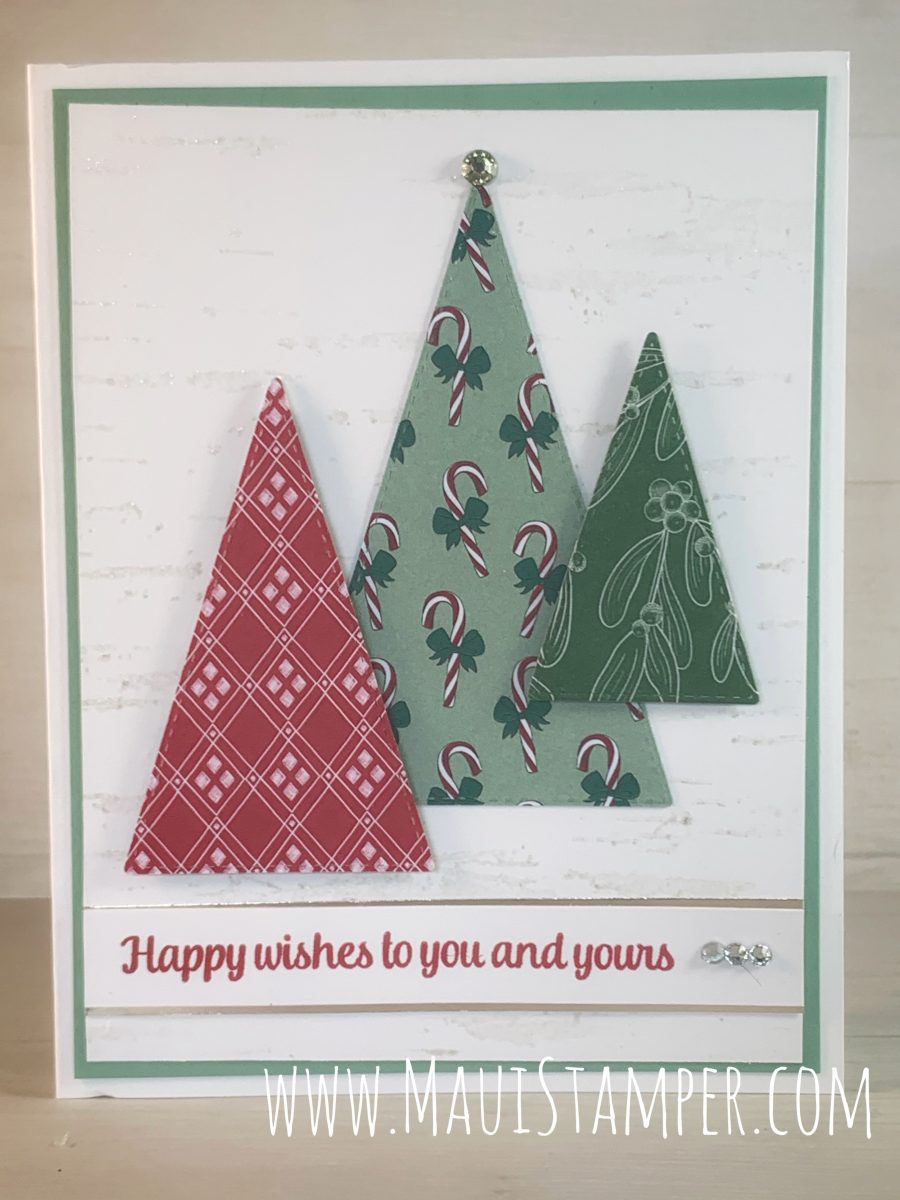
Our series of Stitched Dies – Stitched Triangles, Rectangles, Ovals, Circles, Labels – provide a quick and easy “step up” to any project. The Tree Angle stamps in the August – December mini catalog got me thinking, but in the end it was Tis the Season Designer Series Paper that made these cards come to life.

Maui Stamper Stampin Up Tis the Seasons Stitched Triangle Tree handmade card
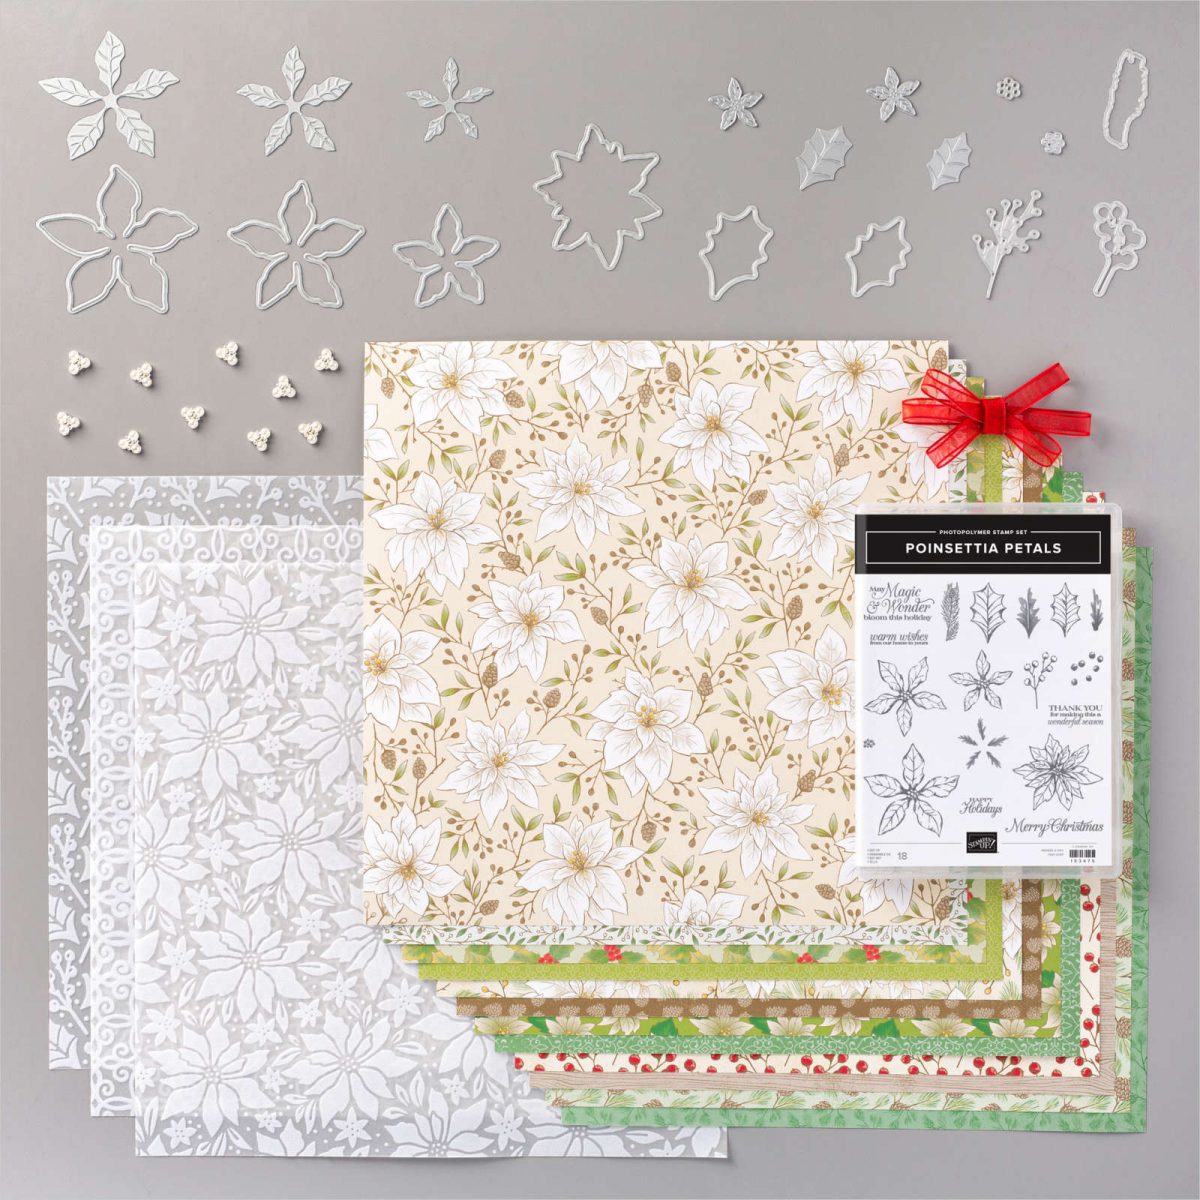
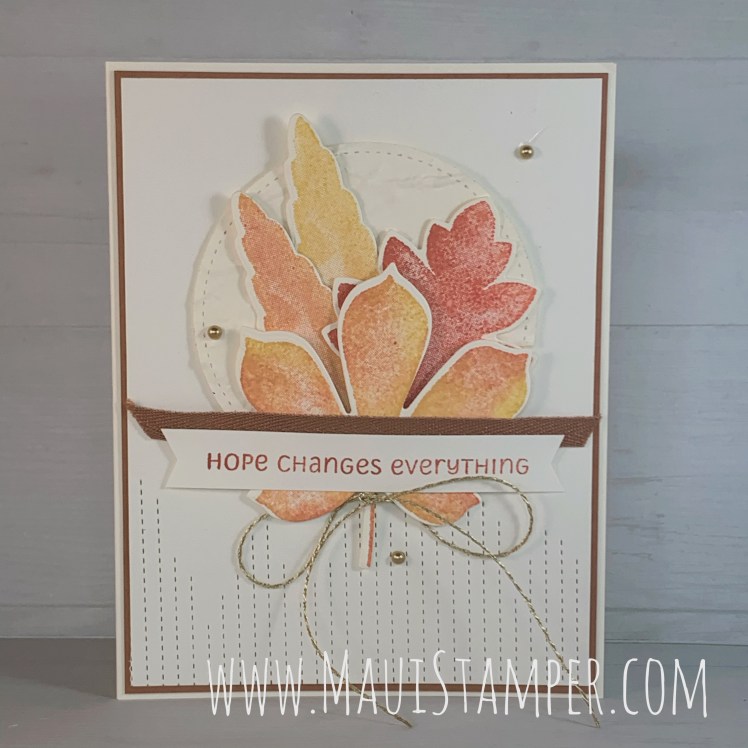
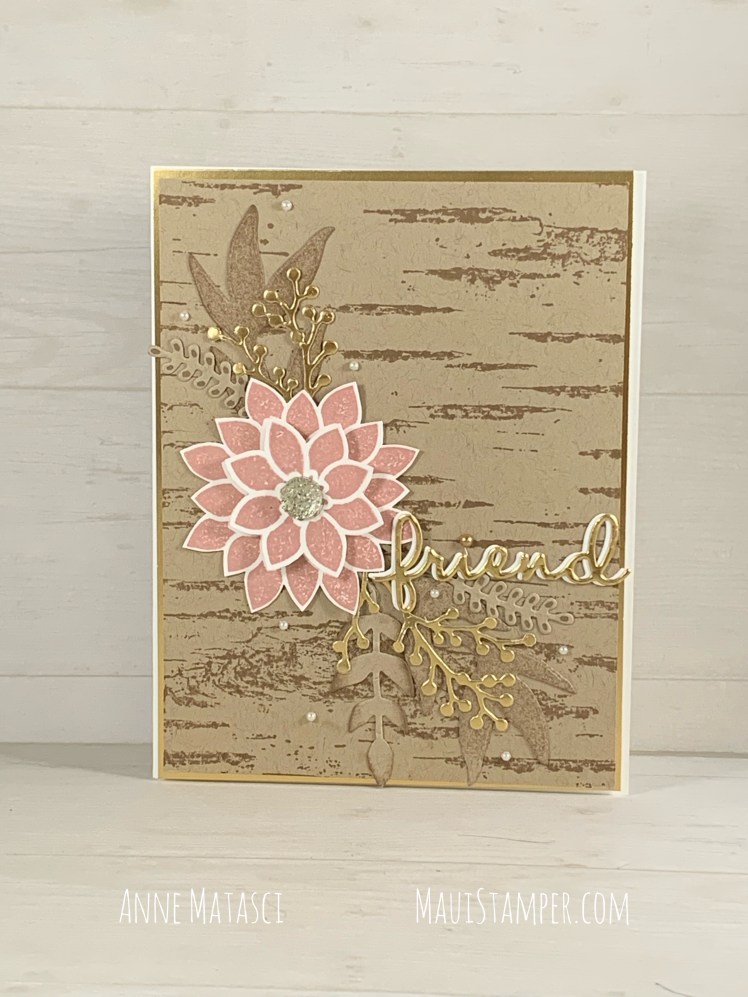
  • Stamps: Tree Angle, Poinsettia Petals, Birch
  • Color Palette: Whisper White, Real Red, Shaded Spruce, Mint Macaron
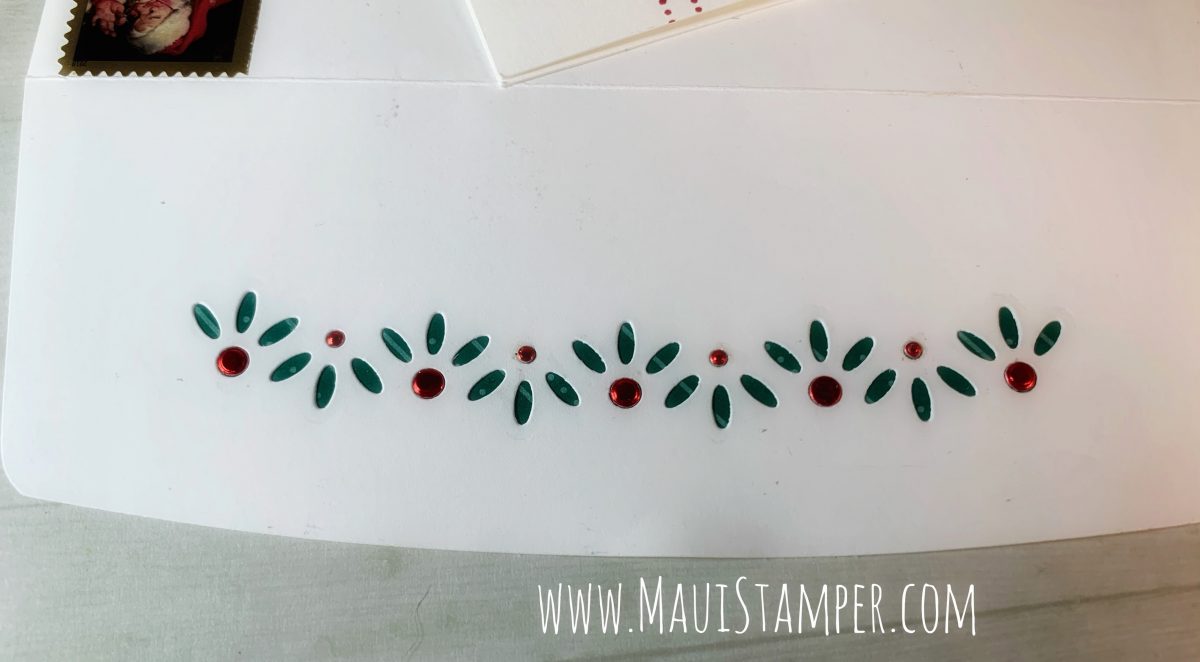
  • Accessories: Stitched Triangle dies, Stampin’ Cut & Emboss, Tasteful Textile Embossing Folder, All the Trimmings Embellishments, Rhinestone gems, Wink of Stella, Crinkle White Seam binding, Stampin’ Dimensionals

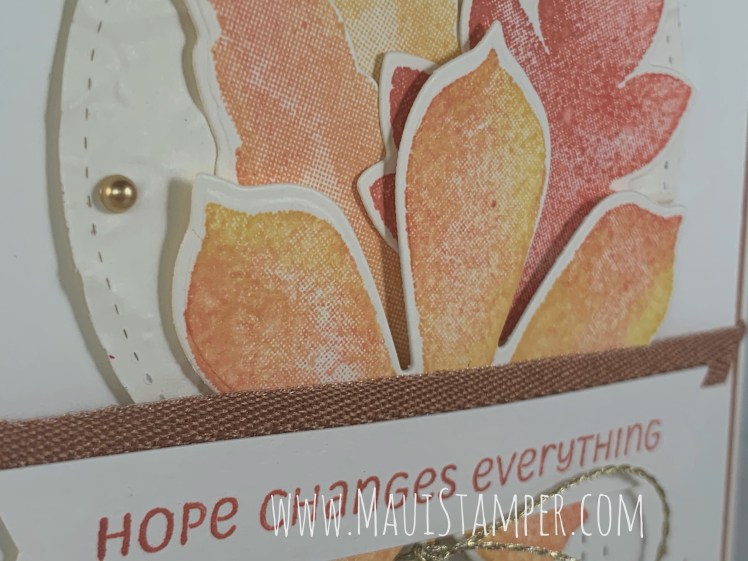
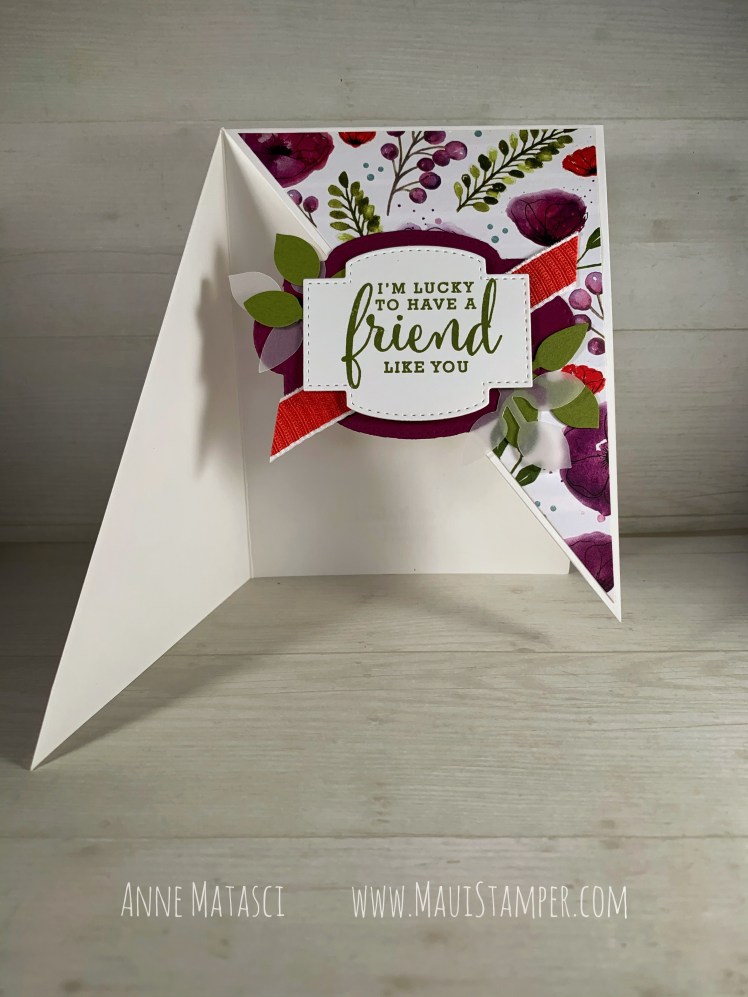
I love that little Bumblebee star at the top of the tree! That star was the reason I purchased the All the Trimmings Embellishments. I’m sure I’ll find a use for the Poppy Parade and Whisper White dots, but ooo that star!

Maui Stamper Stampin Up Tis the Seasons Stitched Triangle Tree handmade card

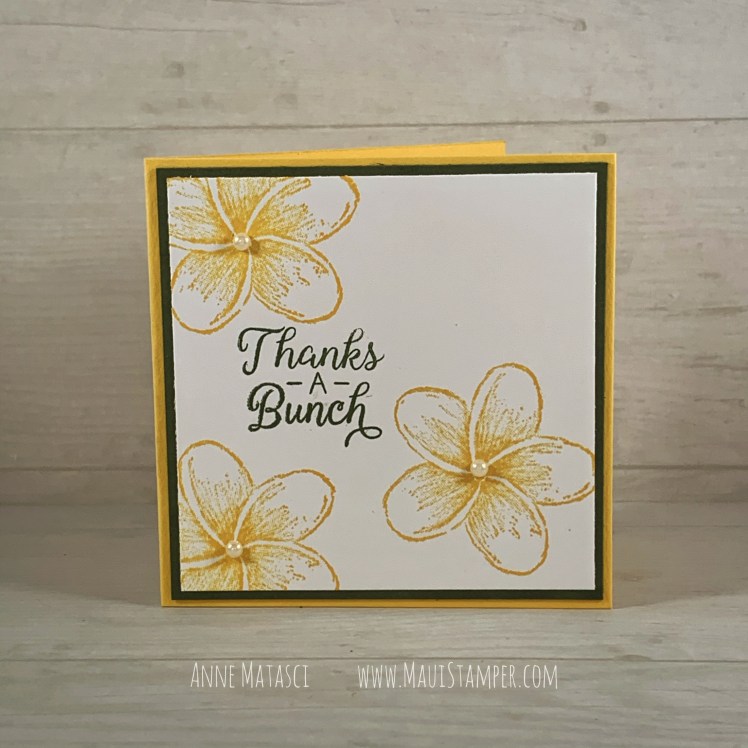
It’s hard to see the texture from the Tasteful Textile EF, but it makes such a difference. It’s my current favorite EF because it has presence and it’s subtle (but not as subtle as the Subtle folder, ha!). There are other ways to accomplish texture, though:

Maui Stamper Stampin Up Tis the Seasons Stitched Triangle Tree handmade card

I used the Birch background stamp, and one of my new techniques is to paint directly onto the stamp with Wink of Stella. Stella has enough shimmer that you can see it even without lighting.

Maui Stamper Stampin Up Tis the Seasons Stitched Triangle Tree handmade card

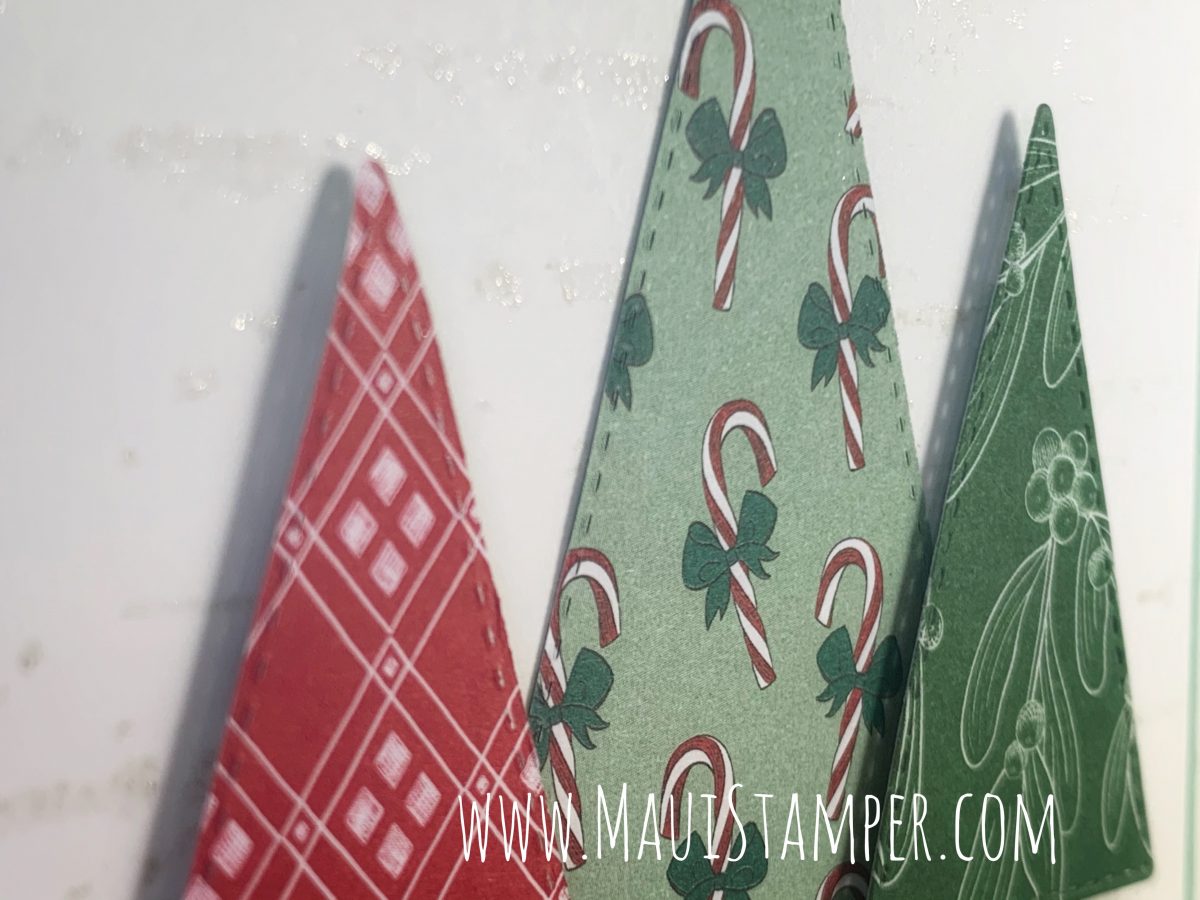
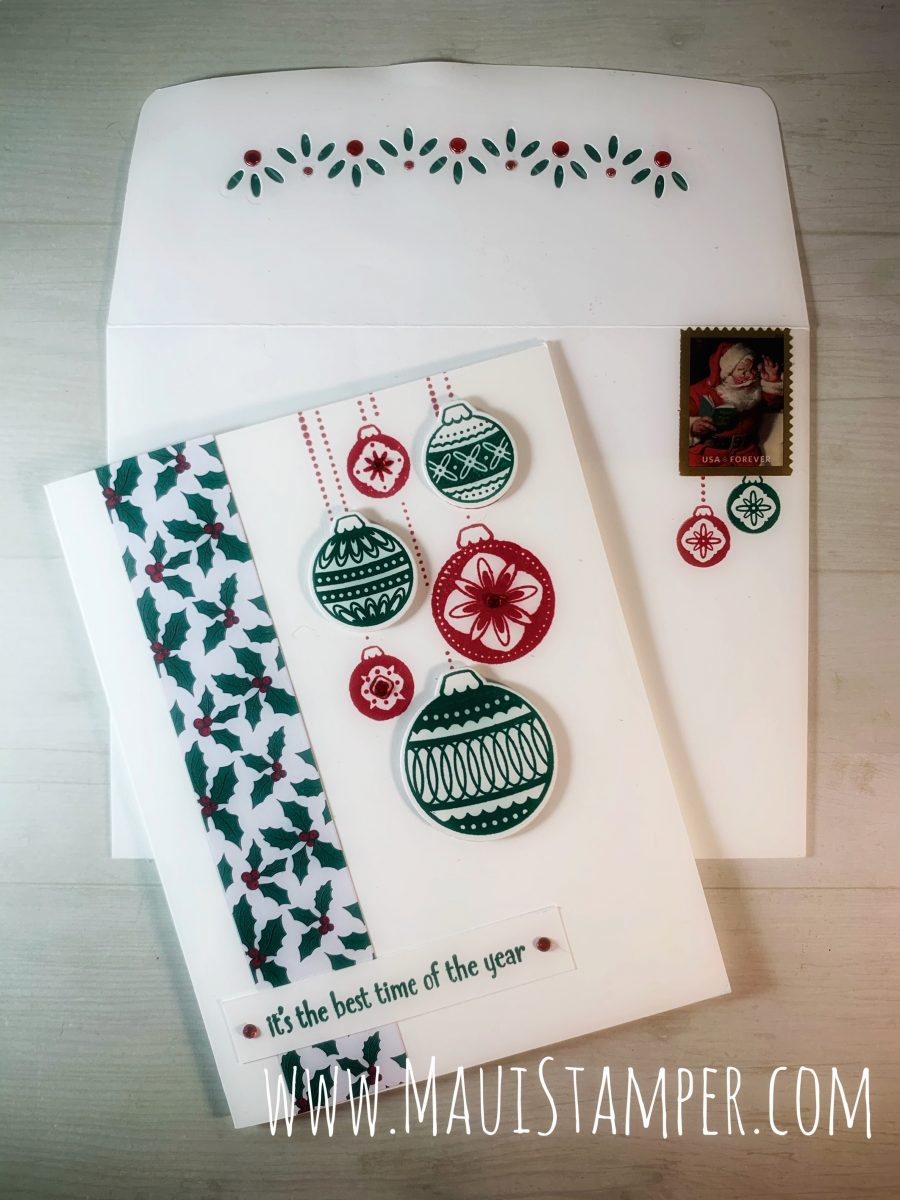
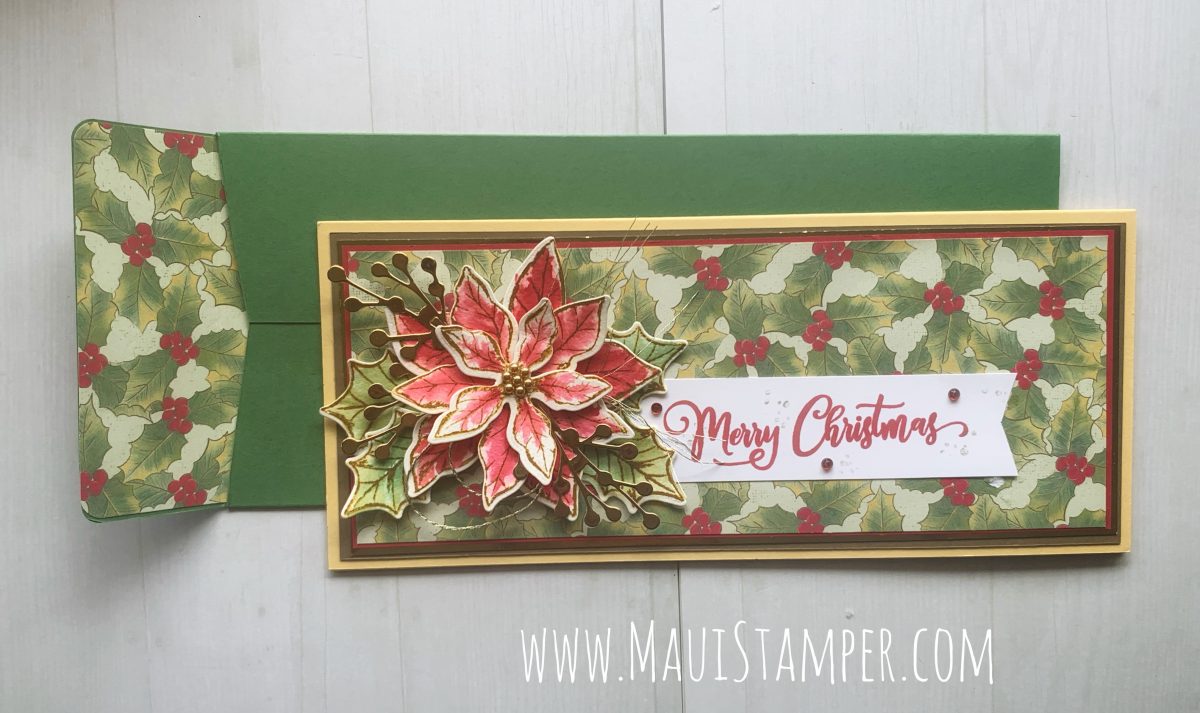
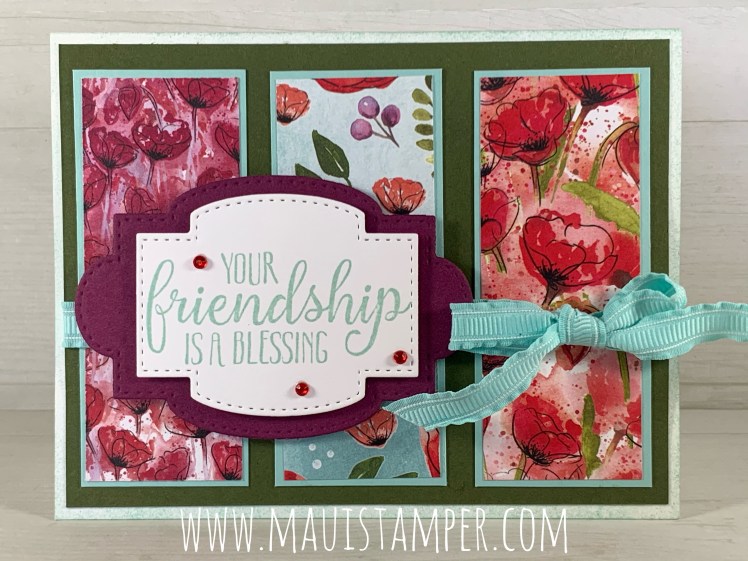
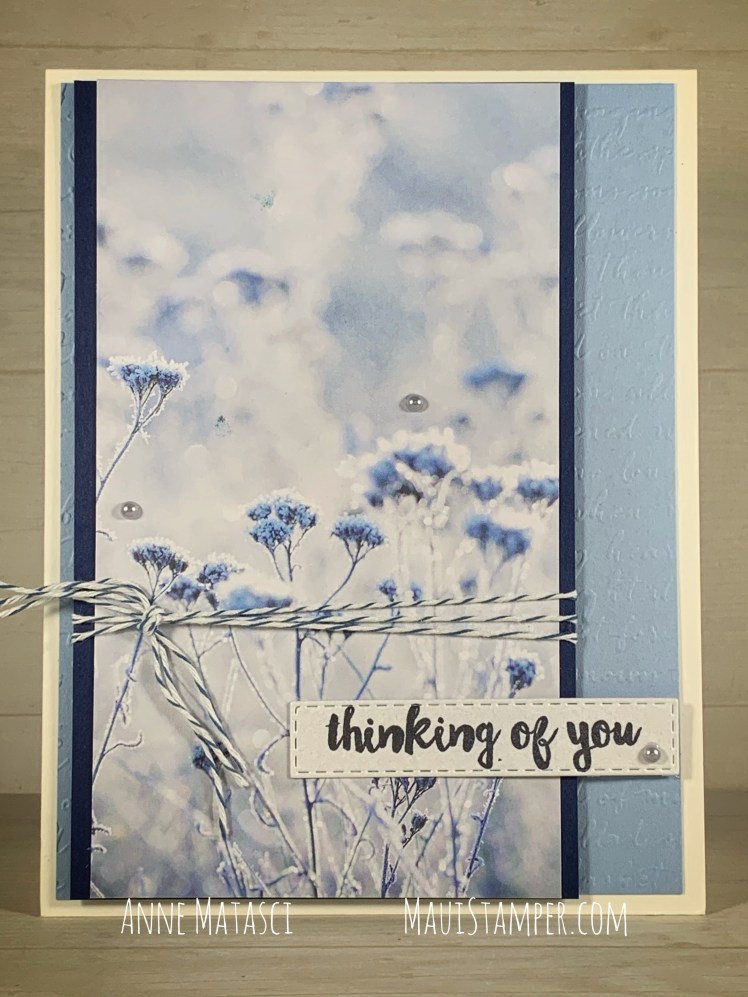
You knew this was coming, right? I could keep going, as there are so many fun patterns in the Tis the Season paper stack – did I mention it’s 6×6? So much easier to store, and mentally so much easier to chop up. I’m making a very intentional effort to actually USE all of my DSP. (I know, what a concept.) Shop for everything you need at my Online Store.

Are you a bear lover? Don’t miss out on this charming Paper Pumpkin kit to be shipped in December. Popular kits have sold out, and this one is a candidate – subscribe today to be sure this little red package shows up in your mailbox!

Ornamental Envelopes make great cards!

A stamp and die set named Ornamental Envelopes may not evoke cards, but think twice, my dear Crafty Friends! You’ll want this combo all year long for the details that make a handmade card stand out from the rest.

Maui Stamper Stampin Up Ornamental Envelope Handmade Christmas Card
  • Stamps: Ornamental Envelopes, A Merry Hello (host)
  • Color Palette: Whisper White, Shaded Spruce, Real Red
  • Accessories: Envelopes dies, Stampin Cut & Emboss, Stamparatus, Tis the Season Designer Series paper, Stampin Dimensionals, Red Rhinestone Jewels
Maui Stamper Stampin Up Ornamental Envelope Handmade Christmas Card

I’ve CASEd this project from the classic style of Mary Fish. I’ve made very few changes, although I chose to simplify the DSP strip and layer it on top of the card front rather than recess it. I’m stamping this with a group, so simple made sense! The Stamparatus really helps when you want to be sure that group of ornaments is hanging perfectly straight off the top of your card.

Maui Stamper Stampin Up Ornamental Envelope Handmade Christmas Card

The talented Ms. Fish embellished her envelope (how could we not?) but I had another idea. It was a little over-the-top, and I wouldn’t do it for a huge stack of envelopes, but I love how it turned out:

Maui Stamper Stampin Up Ornamental Envelope Handmade Christmas Card

I am quite pleased with myself to have found a Santa postage stamp – this is last year’s edition (or who knows, it could be 2013.) The front of the envelope is stamped, but it’s the flap that is the pièce de résistance:

Maui Stamper Stampin Up Ornamental Envelope Handmade Christmas Card

I created an envelope liner with the envelope die using a piece of the Tis the Season DSP and then I cut the envelope with this embellishing die. I ran that die through the Stamp Cut & Emboss again using Red Foil and picked out the little red circles and adhered them in the pukas (Hawaiian word for holes) using Tombo Multi Purpose Glue.

You NEED the Envelope dies, and if you’re going to order them, you really ought to take advantage of the savings you’ll get when you purchase the whole bundle. The bundle is only available until January 4, 2021, so get it while it’s hot!! Visit the Online Store and check that little to-do off your list.

You’re welcome! 💕

Poinsettia Place: The Slimline Card

I’m a little late to the party on Slimline cards, but I’m happy with my first effort. Poinsettia Place was the first thing on my list for the August-December mini catalog, even though back in July my heart just wasn’t into Christmas crafting! News flash: it’s November and it’s time to get cracking.

Maui Stamper Stampin Up Poinsettia Place Slimline card handmade with custom envelope
  • Stamps: Poinsettia Place
  • Color Palette: Garden Green, Old Olive, Real Red, So Saffron, Soft Suede, Whisper White, Gold foil
  • Accessories: Poinsettia dies, Stamp Cut & Emboss, Poinsettia Place DSP, Gold Foil, Forever Greenery Trim Combo pack (Gold thread), Metallic Pearls, Stampin’ Dimensionals, Fluid 100 watercolor paper, Water Painters, Detailed Trio Punch, Red Rhinestone gems, Wink of Stella. (Phew! Did I miss anything?)
Maui Stamper Stampin Up Poinsettia Place Slimline card handmade with custom envelope

When I first started using the Gold trim, I struggled to keep it from unraveling. (TIP: put a little glue from the Fine Tip Glue pen on the cut end to stop it from fraying.) My OCD self has experienced enlightenment now, and I encourage it to unravel – I love all those little threads!

Maui Stamper Stampin Up Poinsettia Place Slimline card handmade with custom envelope

This card measures 3 3/4″ x 8 3/4″ folded, or 7 1/2″ x 8 3/4″ unfolded. The envelope is very simple to create with the Simply Scored tool. I began with a piece of 8 1/2″ x 11″ card stock and with the long end across the top of my Simply Scored I marked 1 1/2″ and 10 1/2″. I turned the card stock a quarter turn so that the short end was across the top of the Simply Scored and marked 2″ and 6″. Cut away the rectangles at the four corners, fold along the score lines, and assemble the envelope with Stampin’ Seal+. I trimmed the top edges of the envelope before I adhered it so there would be a small reveal, and I cut a piece of Designer Series paper 3 3/8″ wide and 3″ long to line the top of the envelope. The Detailed Trio punch rounds the corners perfectly!

Maui Stamper Stampin Up Poinsettia Place Slimline card handmade with custom envelope

I used a few drops of ink refill in Real Red, Garden Green and Old Olive to watercolor the poinsettia and the leaves with our fabulous new Water Pens. These images are really forgiving, which made the watercoloring really enjoyable. I don’t have any formal art training, so it’s always an adventure to see how things turn out.

Maui Stamper Stampin Up Poinsettia Place Suite

Ready to add this gorgeous suite to your collection? These are timeless, classic images that you’ll reach for again and again. Shop HERE.

Hope Changes Everything: Love of Leaves

This past week I’ve had a number of friends and family members experience changes in their relationship with the Big C: Cancer. It’s such an insidious disease, and when you add in the uncertainty of life caused by the pandemic, things can get a little uncomfortable. I’ve been leaning pretty heavily on HOPE, and made this card yesterday to send to someone dear to me:

Maui Stamper Stampin Up HOPE CHANGES EVERYTHING Love of Leaves
  • Stamps: Love of Leaves
  • Color Palette: Very Vanilla, Cinnamon Cider, Cajun Craze, Calypso Coral, So Saffron
  • Accessories: Stampin’ Cut & Emboss (available September 1, 2020), Stitched Leaves Dies, Stitched Shapes dies, Old World Paper Embossing Folder, Metallic Pearls, Cinnamon Cider ribbon, Gold trim (Forever Greenery Combo Pack), Stampin’ Sponges, Stampin’ Dimensionals

I’ve had the Love of Leaves bundle on my desk a lot recently. We don’t really have autumn leaves here in Hawaii, but some trees do experience an autumn change of color. I love these beautiful shapes and the way they work so well together (it’s what Stampin’ Up! does best!).

Maui Stamper Stampin Up HOPE CHANGES EVERYTHING Love of Leaves

I made a huge mess of my ink pads creating this project. I kept pressing stamps with dark ink into the light ink pads without cleaning them – I was really into the process! I’ve found if you use a paper towel to blot the place in an ink pad where the “stain” has appeared, you can generally pull out most of the offending ink. A quick re-ink and the pad is *almost* as good as new.

Maui Stamper Stampin Up HOPE CHANGES EVERYTHING Love of Leaves

I was inspired by a card shared on Instagram by the Stampin’ Up! concept artists @stampinup. This color palette is similar to theirs, but not the same. I’d love to see it in shades of pale greens for spring, or even reds and burgundies for December. I guess it’s back to the drawing board!

Maui Stamper Stampin Up Love of Leaves bundle
# 155195 $47.50 usd

If you’ve got fall leaves – or a heart filled with hope – on your mind, shop HERE.

Inspired by Designer Series Paper

I love our DSP. The colors are rich, the designs are versatile, the finish of the paper is smooth, and the weight is Goldilocks perfect – not too heavy, not too light, but juuuuuust right. I’ve been challenging myself to dig into my stash (it’s a little embarrassing) and create with all of the beautiful paper I’ve found there.

Maui Stamper Stampin Up Peaceful Poppies

I used a Stampin’ Sponge to lightly shade the front edge of my Whisper White card. I didn’t want the bold color of Pool Party card stock, but the WW seemed too stark. Sponging was the perfect solution as it provided a hint of color and a very simple technique.

Maui Stamper Stampin Up Peaceful Poppies

That Peaceful Poppies DSP is gorgeous and completely IN YOUR FACE. The colors and images are really bold, but they’re really easy to use. I reached for this combination first when I decided to dig into my DSP stash.

The So Sentimental bundle is a versatile bundle with unique and very useful stitched shapes that layer in a multitude of ways. This one is a keeper, and it’s carrying forward into the new Annual Catalog.

Maui Stamper Stampin Up Magnolia Lane

This same layout has a simpler construction. The DSP panels stand on their own without a complimentary mat behind them, and the Whisper White card base is left in its natural state. I struggle with simple stamping (ink, stamps, paper) but this is pretty close for me.

Are you a DSP hoarder? I confess that I am, but I have been sending a lot of cards lately, and my stash is getting a little thin. Cutting into this gorgeous paper is hard – you know, the first cut is the deepest – but the results are worth it!

A lot of our beautiful DSP is on sale in the Online Store. Hurry, supplies are limited!

Triangle Fun Fold Swaps

I made a big stack of cards to swap at an event…that has been deferred. This was to have taken place a couple of weeks ago, and I was so discouraged that I set the entire project aside for a while, but they’re done now – and I’m quite happy with them, if I do say so myself:

Maui Stamper Stampin Up Triangle Fun Fold

This is an exceptionally easy fun fold to do, especially with our paper trimmer. Score a sheet of 8 1/2″ x 11″ card stock both horizontally and vertically. Place it diagonally along the cutting edge of your trimmer, making certain that you’ve centered the top and bottom corners. (The “X” in the center of the scored lines should be along the cutting line of the trimmer as well.) Cut your card stock diagonally – the trimmer cutting edge isn’t quite long enough to make it to the ends, but if you slide the cut piece of card stock out of the trimmer, you can finish it up with your snips – it’s less than 1″ on either side.

Cut your DSP into 4″ x 5 1/4″ rectangles, and cut them diagonally as well. One design goes on one triangular panel, the other design goes on the other. A focal point/shaped image attached to one panel finishes the card and helps to keep it closed at the same time.

Maui Stamper Stampin Up Triangle Fun Fold

Here’s what it looks like with one panel open. And here it is with the other panel open:

Maui Stamper Stampin Up Triangle Fun Fold

I used the Stamparatus to mass-produce those white die cut sentiment panels. It’s MUCH easier to cut them without the sentiment – you don’t have to position the die so precisely, and if it wiggles a little before it goes through the die cutting machine it’s NBD (No Big Deal). If you use the lighter weight Whisper White card stock, you can even cut two at a time!

Maui Stamper Stampin Up Triangle Fun Fold

Now you have a stack of die cut panels ready to be stamped.

Maui Stamper Stampin Up Triangle Fun Fold

Create a template by cutting your die cut out of the center of a good sized piece of card stock. Place your mass-produced die cut blank in the center of that template.

Maui Stamper Stampin Up Triangle Fun Fold

Align the clean sentiment stamp you have chosen on top of the positioned die cut and close your plate, picking up the stamp.

Maui Stamper Stampin Up Triangle Fun Fold

Add ink to your stamp, press the plate, and lift. Perfect placement every time – and you can do a stack of these in a hurry!

Maui Stamper Stampin Up Triangle Fun Fold

Since this design was being mass produced for a swap, I used two different DSP combinations to finish them. I didn’t realize it at the time, but I oriented the card stock on the opposite diagonal between the batches, so they open differently. Here’s the second version:

Maui Stamper Stampin Up Triangle Fun Fold

You can see the difference in the way the card opens:

Maui Stamper Stampin Up Triangle Fun Fold

This opens up instead of down compared with the card above, but the side still opens to the left – the shape is just inverted.

Maui Stamper Stampin Up Triangle Fun Fold

This card uses the gorgeous Peaceful Poppies DSP, and the sentiment is from Love What You Do. The two cards are the same layout, with the same embellishments. The difference is the DSP and color palette, and the sentiment on the focal point.

There are just a few more days until Sale-a-bration 2020 is in the rear view. We have one final release of SAB Rewards that include current catalog product, so be sure and take a look at the choices available as a free reward for your $50 purchase. You can start shopping HERE!

Quick and tiny notes

Sometimes you just need a little something to write a quick note. You don’t have a lot to say (I KNOW, but it happens!!). The card doesn’t need to go in the mail – it’s going on a package or in a lunchbox. Short and sweet!

Maui Stamper Stampin Up Timeless Tropical

The Sponge Daubers are the easiest way to apply ink directly and precisely onto a rubber stamp. When you want more than one color, “a little daub’ll do ya!”

Maui Stamper Stampin Up Timeless Tropical

These are the same colors and stamps, but by using the plumeria image I’ve changed the feeling of the entire card. The only embellishment is a pearl jewel, and there is absolutely no measuring or placement involved in this card. Change the sentiment, or do as I do and make a few with no sentiment at all. When you need a note, add the appropriate sentiment and you’re set! These note cards fit perfectly in our 3″ x 3″ Whisper White envelopes.

Keep it easy and keep a stash! Need supplies? Shop HERE.

A Japanese New Years Wish

I’ve learned a lot about different cultures living on Maui. Our community is diverse for many reasons, but primarily because the sugar plantations brought in workers from many countries beginning in the mid-1800’s. While sugar is no longer grown commercially here, the many families who arrived to work in the fields have taken root and enriched our communities with their traditions.

The first Japanese workers arrived in the mid-1880’s. Their legacy is found in everyday life on Maui, including food, language, art, celebrations, and so much more. When Stampin’ Up! offered the New Years Celebration set to the U.S. market, I was excited to have the opportunity to craft with these images.

Maui Stamper Stampin Up New Year Celebration

The characters for Happy New Year are embossed in gold and are written in Kanji, one of three writing systems. The colors are also very symbolic, as red and white are used to represent happiness and joy, and gold represents wealth and prestige. Bamboo represents wealth and prestige, and the chrysanthemum flower signifies longevity and rejuvenation. There’s a big message in this simple card!

Maui Stamper Stampin Up New Year Celebration

This set is not in any catalog, and it will only be available to the U.S. market through January 31, 2020. You can see samples and an interpretation of the images HERE, and of course, you can shop at the Online Store. These images are so Kawaii!

Feels Like Frost is Thinking of You

Do you remember when I told you I’d challenged myself to make as many cards with the Feels Like Frost DSP as I could in an afternoon? I’m not finished yet!

Maui Stamper Stampin Up Feels Like Frost Thinking of You

I really like the Scripty 3D Embossing folder. It’s very subtle and elegant. I also love that the silver Metallic Pearls take on a blue cast when they’re on blue paper! It works for me.

Maui Stamper Stampin Up Feels Like Frost Thinking of You

This is another tone-on-tone version from the endlessly versatile Feels Like Frost DSP stack. These cards almost put themselves together! If you need a stash of cards, I highly recommend you make a batch with these gorgeous photo-realism images and leave the sentiments off until you’re ready to send them. You’ll thank yourself later, I promise.

Are you ready to buy Feels Like Frost YET??? You know where to SHOP.

Flourishing Phrases and Colour Inkspiration 58

When I saw the colour palette for CI58 I thought OH YEAH. I love Crumb Cake with anything, and Blushing Bride and Metallic Gold seemed like the perfect match.

Tell my brain that!

I don’t know why I struggled, except for the sad reality that I’ve been away from my craft desk a lot recently and my mojo is rusty. (I think that would be a great title for a Country and Western song. Just sayin’).

Here’s what finally came together:

The gold Faceted Gem would have been better, but I didn’t have one in my stash (gasp). The dot on the i in friend is a metallic pearl because I lost both the white and the gold die cut dots. Like I said, I think my mojo is rusty. And I’ll quote from Alexander and the Terrible Horrible No Good Very Bad Day : “Some days are like that. Even in Australia.”

(OH EM GEE. I just read the Wikipedia entry for this book and apparently Judith Viorst altered the text for Australia and New Zealand. In all of the other editions, Alexander wants to move to Australia because it just has to be better there. But in the Aussie and Kiwi versions he wants to move to Timbuktu. My sense of the world has been turned upside down. We have always said “Some days are like that. Even in Australia.” and I have always wondered if that didn’t have something to do with my eldest actually moving there! This is going to take some adjustment.)

Fortunately, there’s some news in the Stampin’ Up! world that will straighten out the globe and shine your mojo. For every $50 US you spend in July, you’ll get a $5 voucher towards any purchase in August. If you’re a US shopper, visit my Online Store to get started.