SEASON OF CHIC: WATERCOLOR

I’m a late arrival to Season of Chic, but I’m now a true believer. It’s a versatile two-step stamping collection, and that makes it perfect for this simple watercolor technique:
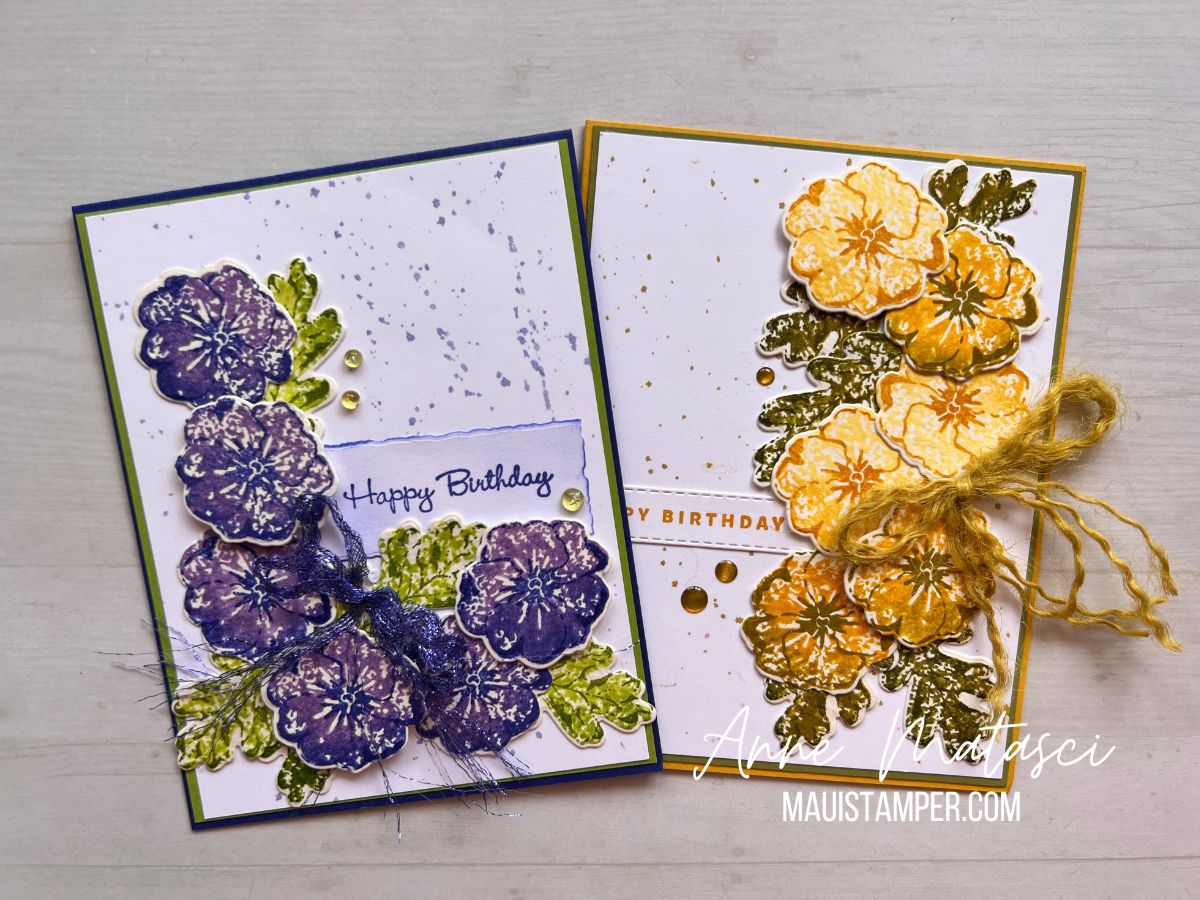
Two white handmade cards with the sentiment "Happy Birthday", one with yellow flowers and one with purple flowers
  • Stamps: Season of Chic, Go To Greetings/Something Fancy
  • Color Palette: Basic White with Orchid Oasis, Highland Heather, Granny Apple Green and Parakeet Party/Basic White with Daffodil Delight, Crushed Curry, Winter Wheat, and Old Olive
  • Accessories: Watercolor Paper, Stampin’ Spritzer, Dauber, Big Boss, Chic dies, Deckle Rectangle dies/Stitched Rectangle dies (retired), Metallic Ribbon/In Color Jute, Tinsel Gems/In Color dots

Do you have a favorite demonstrator (or two) whose work you never grow tired of? For me, Tami Hewlett is one of those people. She recently shared a stunning card showcasing a simple watercolor technique, and I really wanted to give it a try. Ink is applied to the stamp and the stamp is misted with water. Once it’s been stamped on watercolor paper, details are added using the two-step stamping technique.

Detail of a white handmade card with the sentiment "Happy Birthday” and yellow flowers

I don’t have the Tropical Leaf Bundle that she used, but these flowers made me happy. I tried a number of color combinations, and the range of yellows and purples were very satisfying. For this technique, it makes a big difference to have that two-step outline. It adds shape and definition to the soft, flowing watercolor.

Detail of a white handmade card with the sentiment "Happy Birthday” and purple flowers

I originally intended to use Orchid Oasis with Starry Sky, but the combination was too dark and didn’t have enough contrast. Highland Heather provided the balance I needed.

Each flower is unique, depending on where I placed the ink and how much water it got from the Spritzer. Tami applied the darker ink direct to the stamp, but I found it gave me more control to use a dauber.

A white handmade card with the sentiment "Happy Birthday” and yellow flowers

The watercolor paper makes a big difference. It absorbs the water, distributing the color evenly without distortion of the paper.

What color combination would you choose? I’m looking for more ideas! If you’d like to try this technique, shop for Season of Chic stamps and dies, or Tami’s choice, the Tropical Leaf bundle. Either way, I’m confident you’ll have a lot of fun!
Just a few more days to earn Bonus Days coupons! Through July 31st, with every $50 merchandise order you’ll earn a $5 coupon to spend in August. NO LIMITS!!
Online Exclusives are HERE. These Limited Edition products are fresh, seasonal, and sure to sell quickly – don’t wait to SHOP!

Be sure to subscribe by August 10th for your Craft Escape in a box! This kit includes 8 cards, 4 each of 2 designs, and 8 coordinating envelopes. The kit is special because of the way it uses the meaning of flowers. On each card, you’ll find a small inscription of what the flowers represent.

"Paper Pumpkin" on red banner, "Meaningful Flowers" in blue on a pale blue background with images of stamped flowers

And don’t wait, because anyone who subscribes to this month’s kit will get a FREE stamp set! This Distinktive stamp set is perfect for a variety of occasions! 

Paper Pumpkin subscriptions deliver ready-to-go projects to your doorstep every month, but you have ultimate control to skip or cancel 😱 if you decide it’s not for you. Stampin’ Up! also features an exclusive collection of kits that don’t require a subscription. Visit the Online Store to see what’s available.
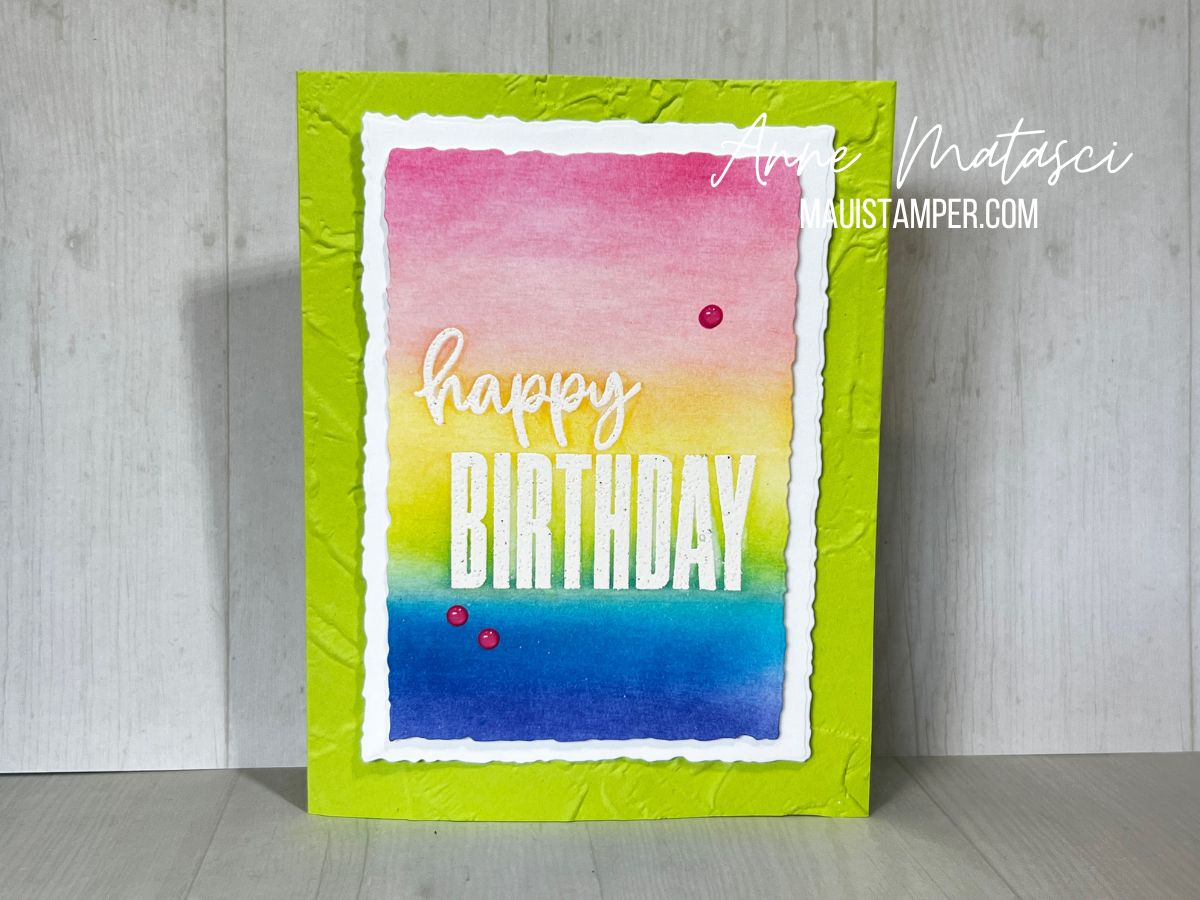
EMBOSS RESIST with BIGGEST WISH

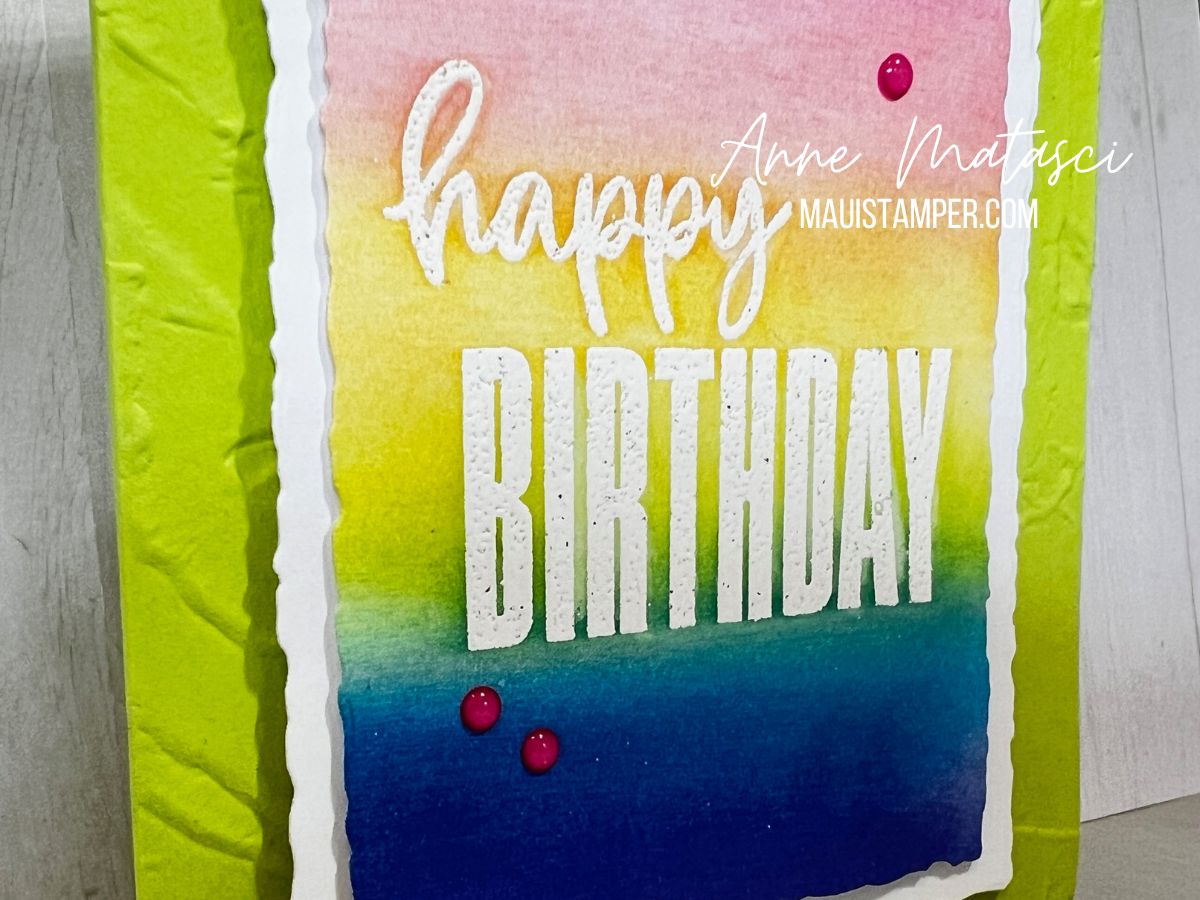
I get pretty excited when something turns out on paper the way I see it in my head. This rainbow emboss resist technique birthday card REALLY made me dance! I wanted bright colors, and friends, I GOT bright colors!!!

  • Stamps: Biggest Wish
  • Color Palette: Basic White, Orchid Oasis, Tahitian Tide, Parakeet Party, Daffodil Delight, Flirty Flamingo, Polished Pink
  • Accessories: Big Boss, Deckle Rectangle dies, Painted Texture 3D Embossing Folder, White Embossing Powder, Embossing Buddy, Embossing Tray, Heat Tool, Blending Brushes, Glossy Dots, Stampin’ Dimensionals

I embossed a stack of Happy Birthday messages and started playing. Not all of them were Ready For Prime Time results, if you know what I mean. But that’s part of the process, and it’s just paper. This one surely made the cut!

It’s time to open a fresh jar of White Embossing powder. The humidity here in the tropics is brutal. My take on this is that it’s intentional, as it adds more texture. {wink} One little tip: Use a blender pen on top of those broad embossed lines to wipe off any excess ink from the ombré Blending Brush technique. Your white will pop!

I used a larger piece of paper to create the ombré effect with the blends. There are a lot of advantages to doing that: it helps hide any dark spots you might get from working over an edge, and it allows you to choose the best balance of colors when you die cut it. The Deckle Rectangles are my new go-to shape, and stacking them in layers really sets off your focal point.

Another bonus of working on a larger piece of paper is that I had a nice strip left over when I cut the rectangle, which gave me a perfect embellishment for the interior of the card. I love how it brings the rainbow theme inside.

Shop for all the supplies at my Online Store.

Have you been Sale-a-brating? There’s nothing quite as sweet as FREE – and it’s so easy to place a qualifying order. See the choices HERE. If you haven’t purchased our Embossing Tool Kit, add it to your order. You’ll thank yourself over and over again. (If you’ve held off because you have our old tray, wait no longer! This tray has a threaded cap instead of a cork-style cap. Your fingernails will thank you.)

Be sure to subscribe by February 10th for your Craft Escape in a box! The February kit has a sunny theme and includes everything you need to make 9 cards and envelopes. These cards are sure to brighten the day and for the first time ever, there are coordinating dies available as an add-on!

Paper Pumpkin subscriptions deliver ready-to-go projects to your doorstep every month, but you have ultimate control to skip or cancel 😱 if you decide it’s not for you. Don’t miss this kit!

New products in the January-April Mini Catalog are flying off the shelves! Even better, when you place a qualifying order you will choose FREE Sale-a-bration products. Sale-a-bration ends February 28th and as always, those products are while supplies last.

Wattle: The Brightest Beauty

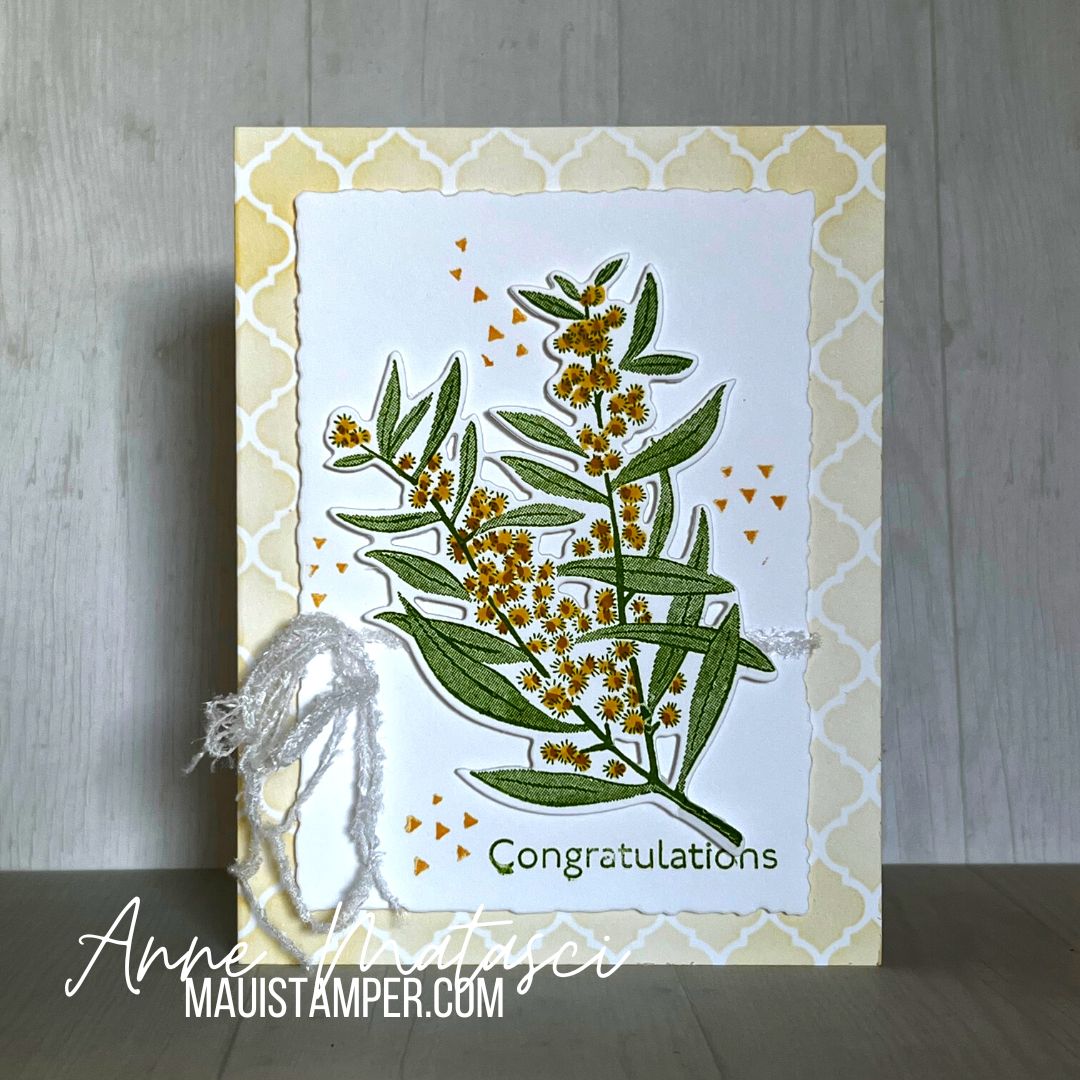
Have you seen a wattle shrub? It’s a member of the Acacia family, and if you’re an Aussie, you likely know it well. It’s the National flower, growing across the entire country – and it’s a beautiful stamp set in the mini catalog as well.

  • Stamps: Brightest Beauty, Art Gallery
  • Color Palette: Basic White, Granny Apple Green, So Saffron, Daffodil Delight, Crushed Curry
  • Accessories: Big Boss, Golden Beauty dies, Artistic Mix Decorative Masks, Blending Brushes, Stampin’ Write Markers, White Frayed Ribbon, Stampin’ Dimensionals

The wattle is beloved by Aussies, and I’ve got my very own beloved Aussie, so you can see why I might be fond of this glorious explosion of color. For my card, I colored the tiny blooms with Stampin’ Write markers, using a combination of Crushed Curry and Daffodil Delight. I used So Saffron for the mask on the card base to avoid overwhelming the flowers – a lot of yellow is, well, a LOT of yellow!

Did you see my custom trim? I’ve been feeling pretty out-of-the-box lately with trim. This particular bit is what you get when you pull apart the White Frayed Ribbon. I’ve cut it in half and tried playing (unsuccessfully) with the warp, but this card uses what would be considered the weft:

It initially comes apart quickly and easily, but as it gets longer, you have to tease it out with the pointy end of your Take Your Pick tool. It has a thin, wooly look – but be careful not to tangle it, or you’ll just need to pick out another length. Ask me how I know.

How do you challenge yourself to think outside the box? Honestly, for me it’s often boredom – I’ve used this, I’ve used that, I want something NEW. (oh dear, I think you know why I’m a Stampin’ Up! demonstrator now…)

Take a look at Brightest Beauty. It’s on page 60 of the mini catalog, or you can see it HERE. It’s a bit of a sleeper, so you might be the first on your block to craft with it! I hope you love it.

If elegance and romance are your style, you’ll love the Fitting Florets Collection, available now as a sneak peek to the new mini catalog coming in January 2023. The Framed Florets and coordinating dies will be available in January, but the Framed and Festive Stamps, Designer Series Paper, and Gold Swirls are available only while supplies last. Get them HERE!

Be sure to subscribe by November 10th for your Craft Escape in a box! The November kit coordinates with last month’s card kit, and makes 12 sparkly tags so you’ll be ready to wrap your packages.

Paper Pumpkin subscriptions deliver ready-to-go projects to your doorstep every month, but you have ultimate control to skip or cancel 😱 if you decide it’s not for you. Don’t miss this kit!

Our Mini Catalog is packed with new designs and products to inspire and delight. There’s something for everyone, and one of my favorite Do-Not-Miss-This products is our Embossing Additions Tool Kit with all the tools you’ll need for perfect results.

The 2023 DIY Template is now available! It’s just $5 and you may use it to make as many calendars as you like. It includes a page of covers, 12 monthly calendar blocks (4 to a page), and a set of cutting instructions. The blocks are designed to be cut to 3 1/2″ square.

Maui Stamper 2023 DIY Easel Calendar template $5

Contact me to make your payment – I use Square to invoice, and you don’t need an account to use it.

Hello Harvest with a Charming Sentiment

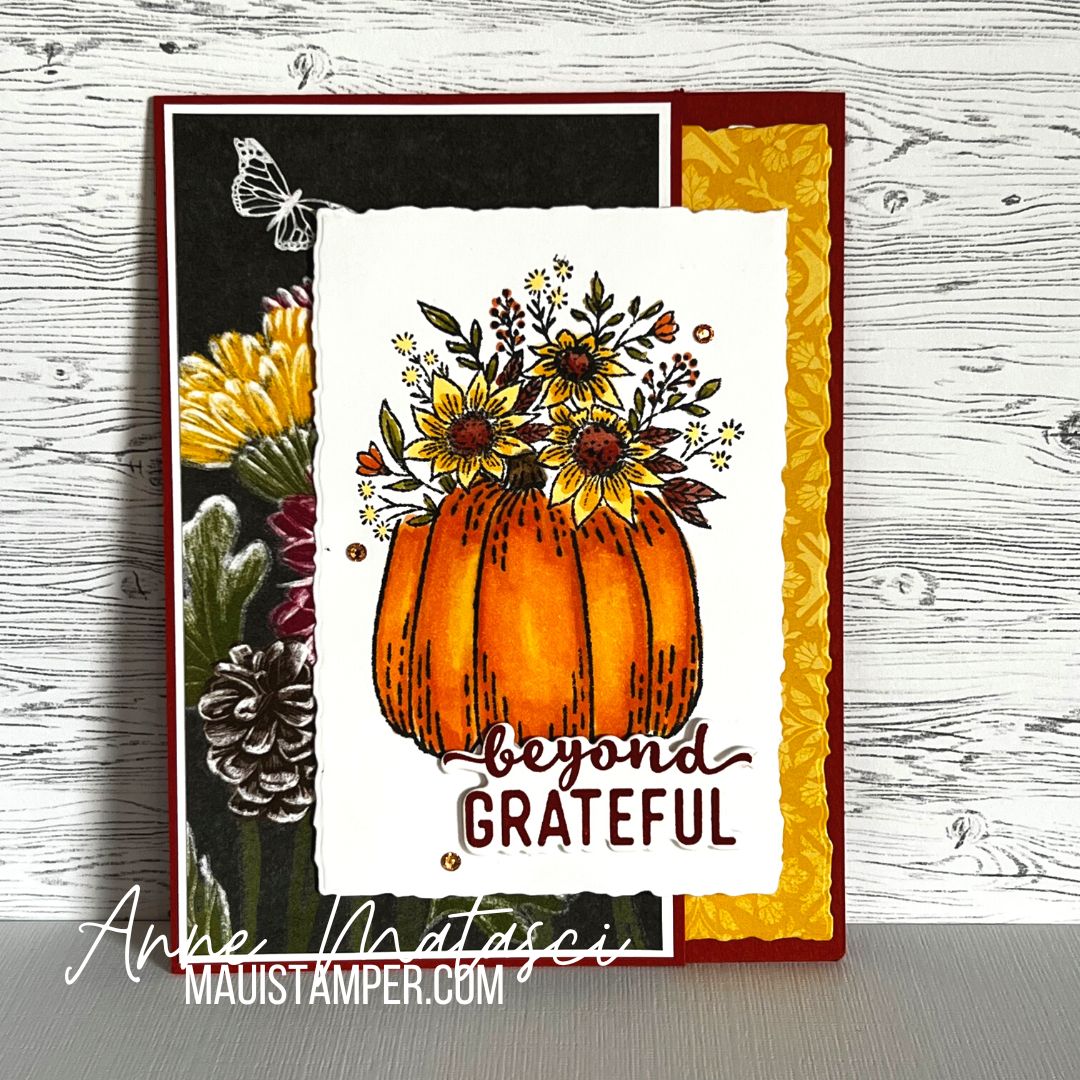
Hello Harvest stamps lend themselves to the masking technique, and today I’ve placed the floral image on top of that big juicy pumpkin with the help of our masking paper. It’s a great card to reproduce, as once you’ve cut the mask it’s good for many repetitions.

  • Stamps: Hello Harvest, Charming Sentiments
  • Color Palette: Basic White, Memento Black, Cajun Craze, Pumpkin Pie, Crushed Curry, Old Olive
  • Accessories: Big Boss, Sentiment Silhouettes dies, Deckle Rectangle dies, Masking Paper, Rustic Harvest DSP, Leaf Labels and Amber Gems, Stampin’ Blends, Dimensionals

I created a mask with the floral image by stamping it on our new masking paper and cutting it out with my snips. (The die would have been much faster, but my brain wasn’t working very well that morning.) You could use a sticky note instead of masking paper, but the beauty of masking paper is that the entire page is sticky, so you don’t have lifted edges. It’s also quite thin, so your layered image doesn’t have gaps.

I stamped the flowers first, then covered them with the mask and stamped the pumpkin. The next step was coloring, and oh, I do love to color, especially with Stampin’ Blends! I chose a sentiment from the Charming Sentiments bundle, inked it in Cajun Craze, and cut it out with the matching die. Both the sentiment and the focal point panel are mounted on Stampin’ Dimensionals.

On the inside, I came up with a little trick to expand the interior panel. I cut a strip of DSP about 1 1/4″ wide and placed it on the long edge of the Basic White panel. I ran both pieces through the Big Boss together using the Deckle Rectangle dies. I’ve actually skooched (highly technical stamping term) the DSP to the right a bit so I could get a wider interior panel.

This card could be a birthday card, thinking of you, or any number of other sentiments. I like to keep a few of these in my card stash without the sentiment – it just takes a moment to stamp and cut what you need and attach it to the front with dimensionals.

The leaves and amber gems are not available but are expected the week of November 7th. In the meantime, you can put together this entire card and add the gems later or substitute something you already have. Don’t wait on the Rustic Harvest DSP – it’s on the Low Inventory list! Shop today!

If your wish list is over $99, you may want to become a discount shopper and purchase the customizable starter kit. Through October 31st, you’ll save even more – you’ll get $155 in product + business supplies + free shipping. Click JOIN MY TEAM. Need more information? Message me.

Be sure to subscribe by November 10th for your Craft Escape in a box! The November kit coordinates with last month’s card kit, and makes 12 sparkly tags so you’ll be ready to wrap your packages.

Paper Pumpkin subscriptions deliver ready-to-go projects to your doorstep every month, but you have ultimate control to skip or cancel 😱 if you decide it’s not for you. Don’t miss this kit!

Our Mini Catalog is packed with new designs and products to inspire and delight. There’s something for everyone, and one of my favorite Do-Not-Miss-This products is our Embossing Additions Tool Kit with all the tools you’ll need for perfect results.

The 2023 DIY Template is now available! It’s just $5 and you may use it to make as many calendars as you like. It includes a page of covers, 12 monthly calendar blocks (4 to a page), and a set of cutting instructions. The blocks are designed to be cut to 3 1/2″ square.

Maui Stamper 2023 DIY Easel Calendar template $5

Contact me to make your payment – I use Square to invoice, and you don’t need an account to use it.

Floating Sunset

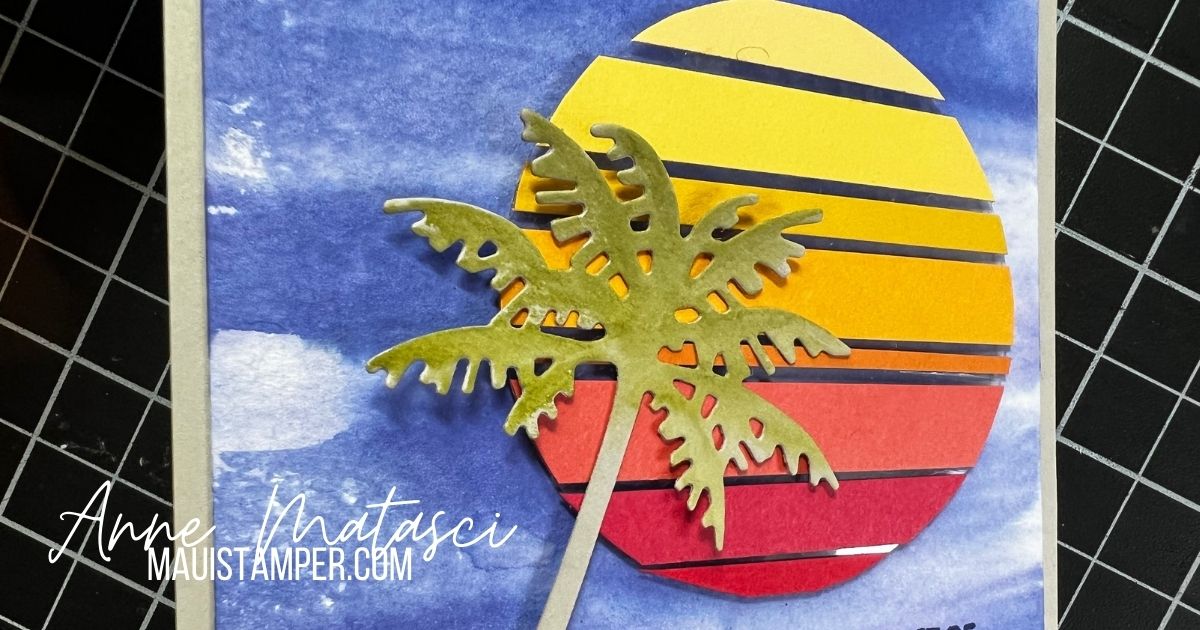
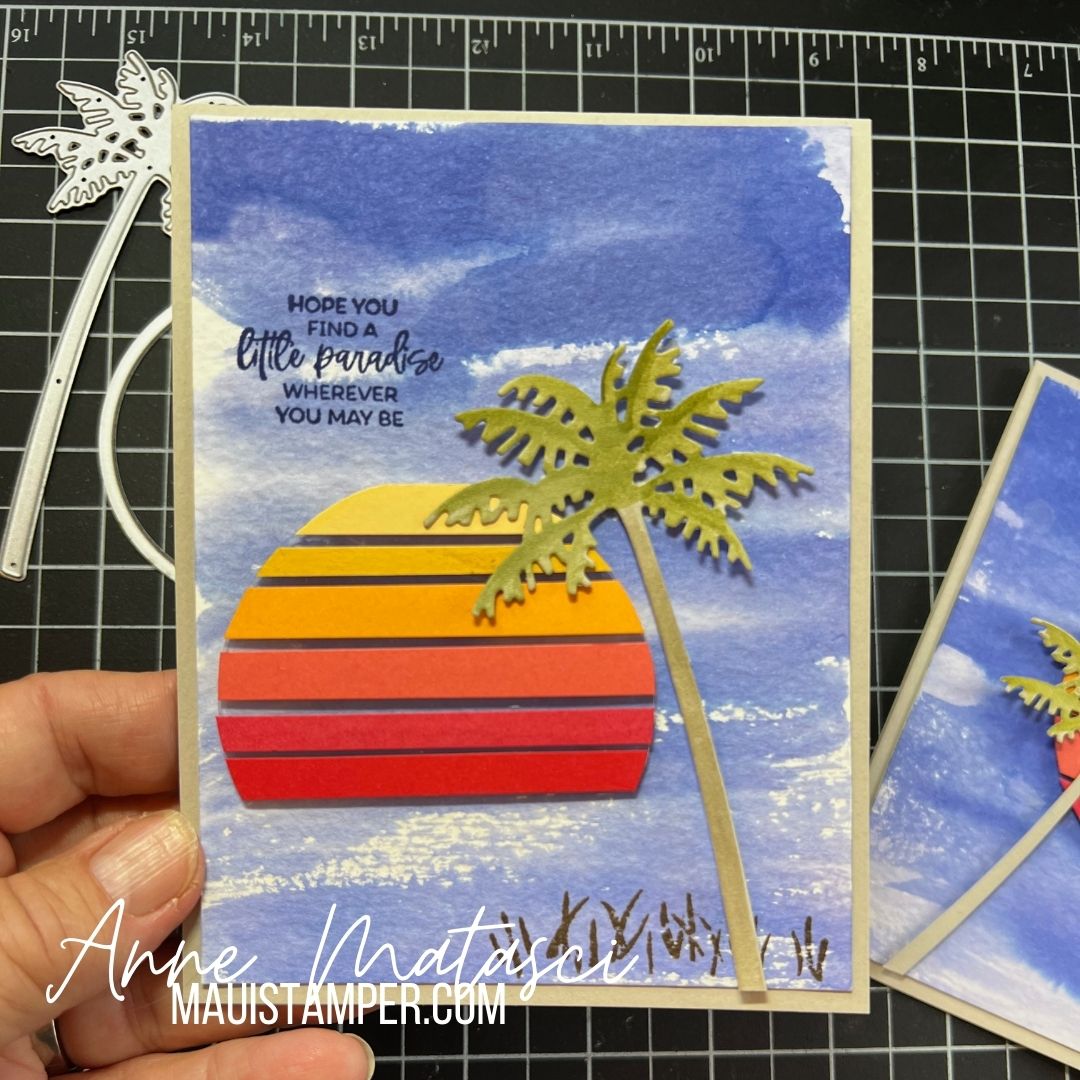
When I saw Laura’s Floating Sunset Palm card I did a little happy dance. I knew this was a card I would love making again and again, and the Paradise Palms bundle absolutely makes this project!

Handmade card with a blue watercolor background and a multi color circle with a palm tree
  • Stamps: Paradise Palms, Here Together
  • Color Palette: Sahara Sand, So Saffron, Daffodil Delight, Crushed Curry, Mango Melody, Pumpkin Pie, Calypso Coral, Sweet Sorbet, Poppy Parade, Starry Sky, Very Vanilla, Old Olive
  • Accessories: Big Boss, Palms dies, Layering Circles dies, Watercolor Paper, Ink Refill, Water Painters, Window Sheets, Stampin’ Dimensionals
Handmade card close up with multicolored circle and die cut palm on a blue watercolor background

The technique is really simple: cut a circle from our window sheets and adhere strips of colored card stock. I chose to vary their width, which also allowed me to include more colors. 😁 I added a little color to the palm, and used Starry Sky to wash the watercolor paper with color for the background.

handmade card with a multicolored semi circle on a blue watercolor wash background with a palm tree and the words Hope you find a little paradise wherever you may be

I made a second version with the sun sinking into the water. I considered changing the color of the background for this, but honestly, this is how it looks when I watch the sun go down, so I kept it.

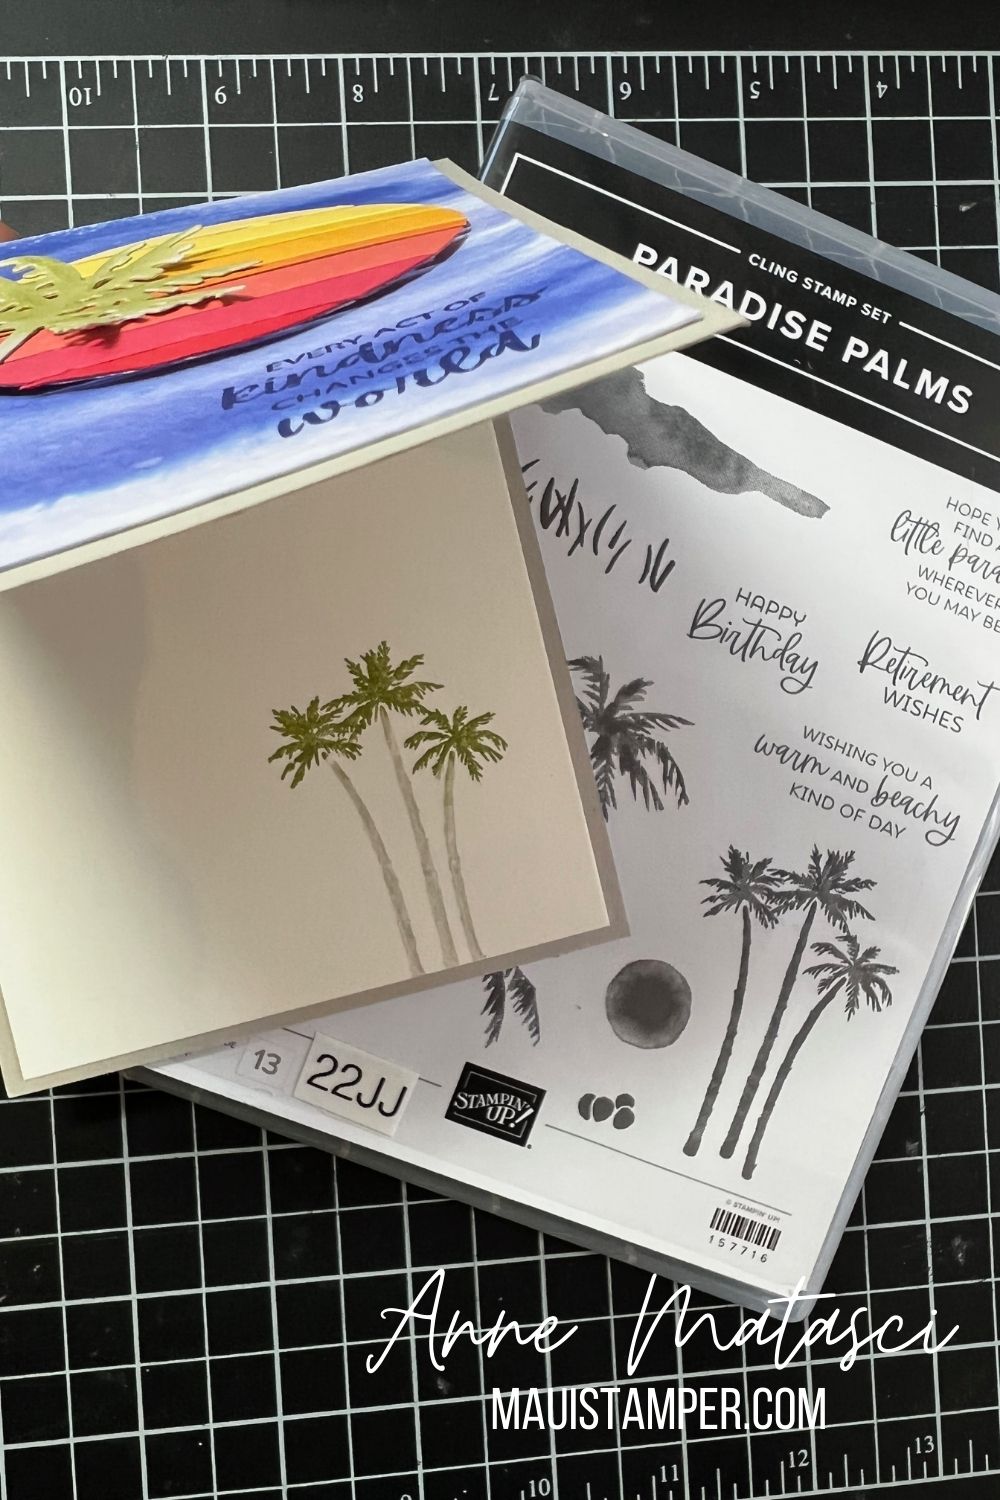
A card held open to show 3 small palm trees on the inside. Behind the card is a stamp case with palm images

The inside of this card was begging for these 3 palms, which I colored with Stampin’ Write markers.

Do you see that label on my stamp case? 22JJ? I embraced my inner nerd and made labels for each case to indicate the catalog where they first appeared. I can’t tell you how many times I’ve tried to dig back for that information, so now when my order comes I get out my label maker and put labels on EVERYTHING.

22JJ means this bundle is made its debut in the January-June 2022 Mini Catalog. It has carried over to the 22-23 Annual Catalog, but it is NOT available as a bundle in the Annual Catalog. That means you have until June 30 to save 10% on this indispensable bundle, so SHOP NOW.

Is your wishlist $99 or more? Perhaps you’d like to become a discount shopper and purchase the customizable starter kit. For just $99 you’ll choose $125 in Stampin’ Up! product and receive a bonus of 22 – 24 In Color Grid Paper, ink pad assortment, cardstock assortment, and Designer Series paper – an added value of $66.50. Contact me with your questions, or click HERE to join the Maui Stamper team.

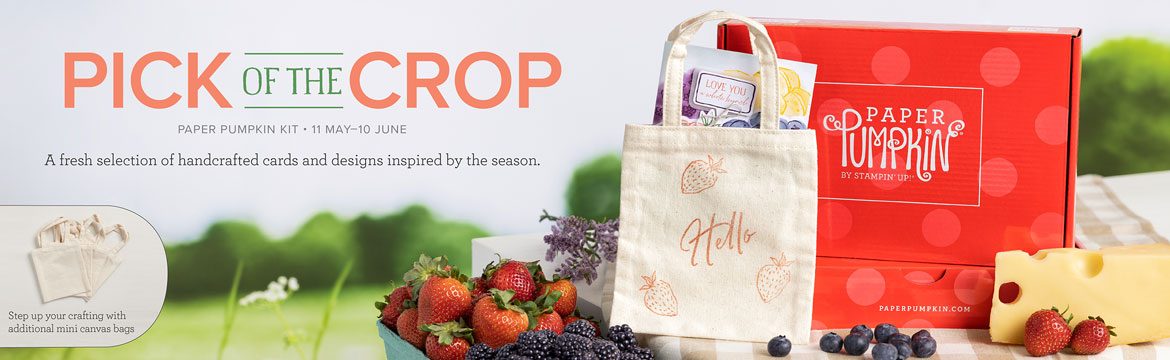
The June Paper Pumpkin features fresh summer designs and sentiments to make 9 cards with matching envelopes. Your kit includes a customizable canvas bag – and you can order more mini bags to deliver your cards with style!

Stampin Up Paper Pumpkin Box with stamped bag and berries and title Pick of the Crop

Be sure to subscribe by June 10th for your Craft Escape in a box! Paper Pumpkin subscriptions deliver ready-to-go projects to your doorstep every month, but you have ultimate control to skip or cancel 😱 if you decide it’s not for you.

One of a Kind Brushed Rainbow

The Brilliant Rainbow dies keep inspiring me with new ideas! I had a big stack of leftover “negatives” and realized they made perfect templates for brushing beautiful, soft rainbows. This is a very quick card!

Maui Stamper Stampin' Up! Brilliant Rainbow Slim Sayings #DIY #handmadecard #stampinupdemo #makeacardsendacard
  • Stamps: Slim Sayings
  • Color Palette: Fresh Freesia, Blushing Bride, Coastal Cabana, Daffodil Delight, Gorgeous Grape, Basic White
  • Accessories: Big Boss, Brilliant Rainbow Dies, Blending Brushes, 2021-2023 In Color 6×6 DSP, Multipurpose Glue, Note cards and envelopes

I used washi tape to hold my note card in place, then layered the die cut negative over the note card and secured it with a little more washi. Brushing the arcs is easy – choosing the colors is harder! I could do this over and over again with different results each time. The template is good for a number of uses, especially since the Blending Brush doesn’t make it soggy.

I love this sentiment from the new Slim Sayings stamp set! It’s perfect for any occasion, and in my opinion, it’s right up there with Mr. Rogers’ “I like you just the way you are.” And can’t we all use a little more of that right now?

Need supplies to tell someone they’re one of a kind? You can shop HERE.

Have you seen the latest release at Stampin’ Up!?

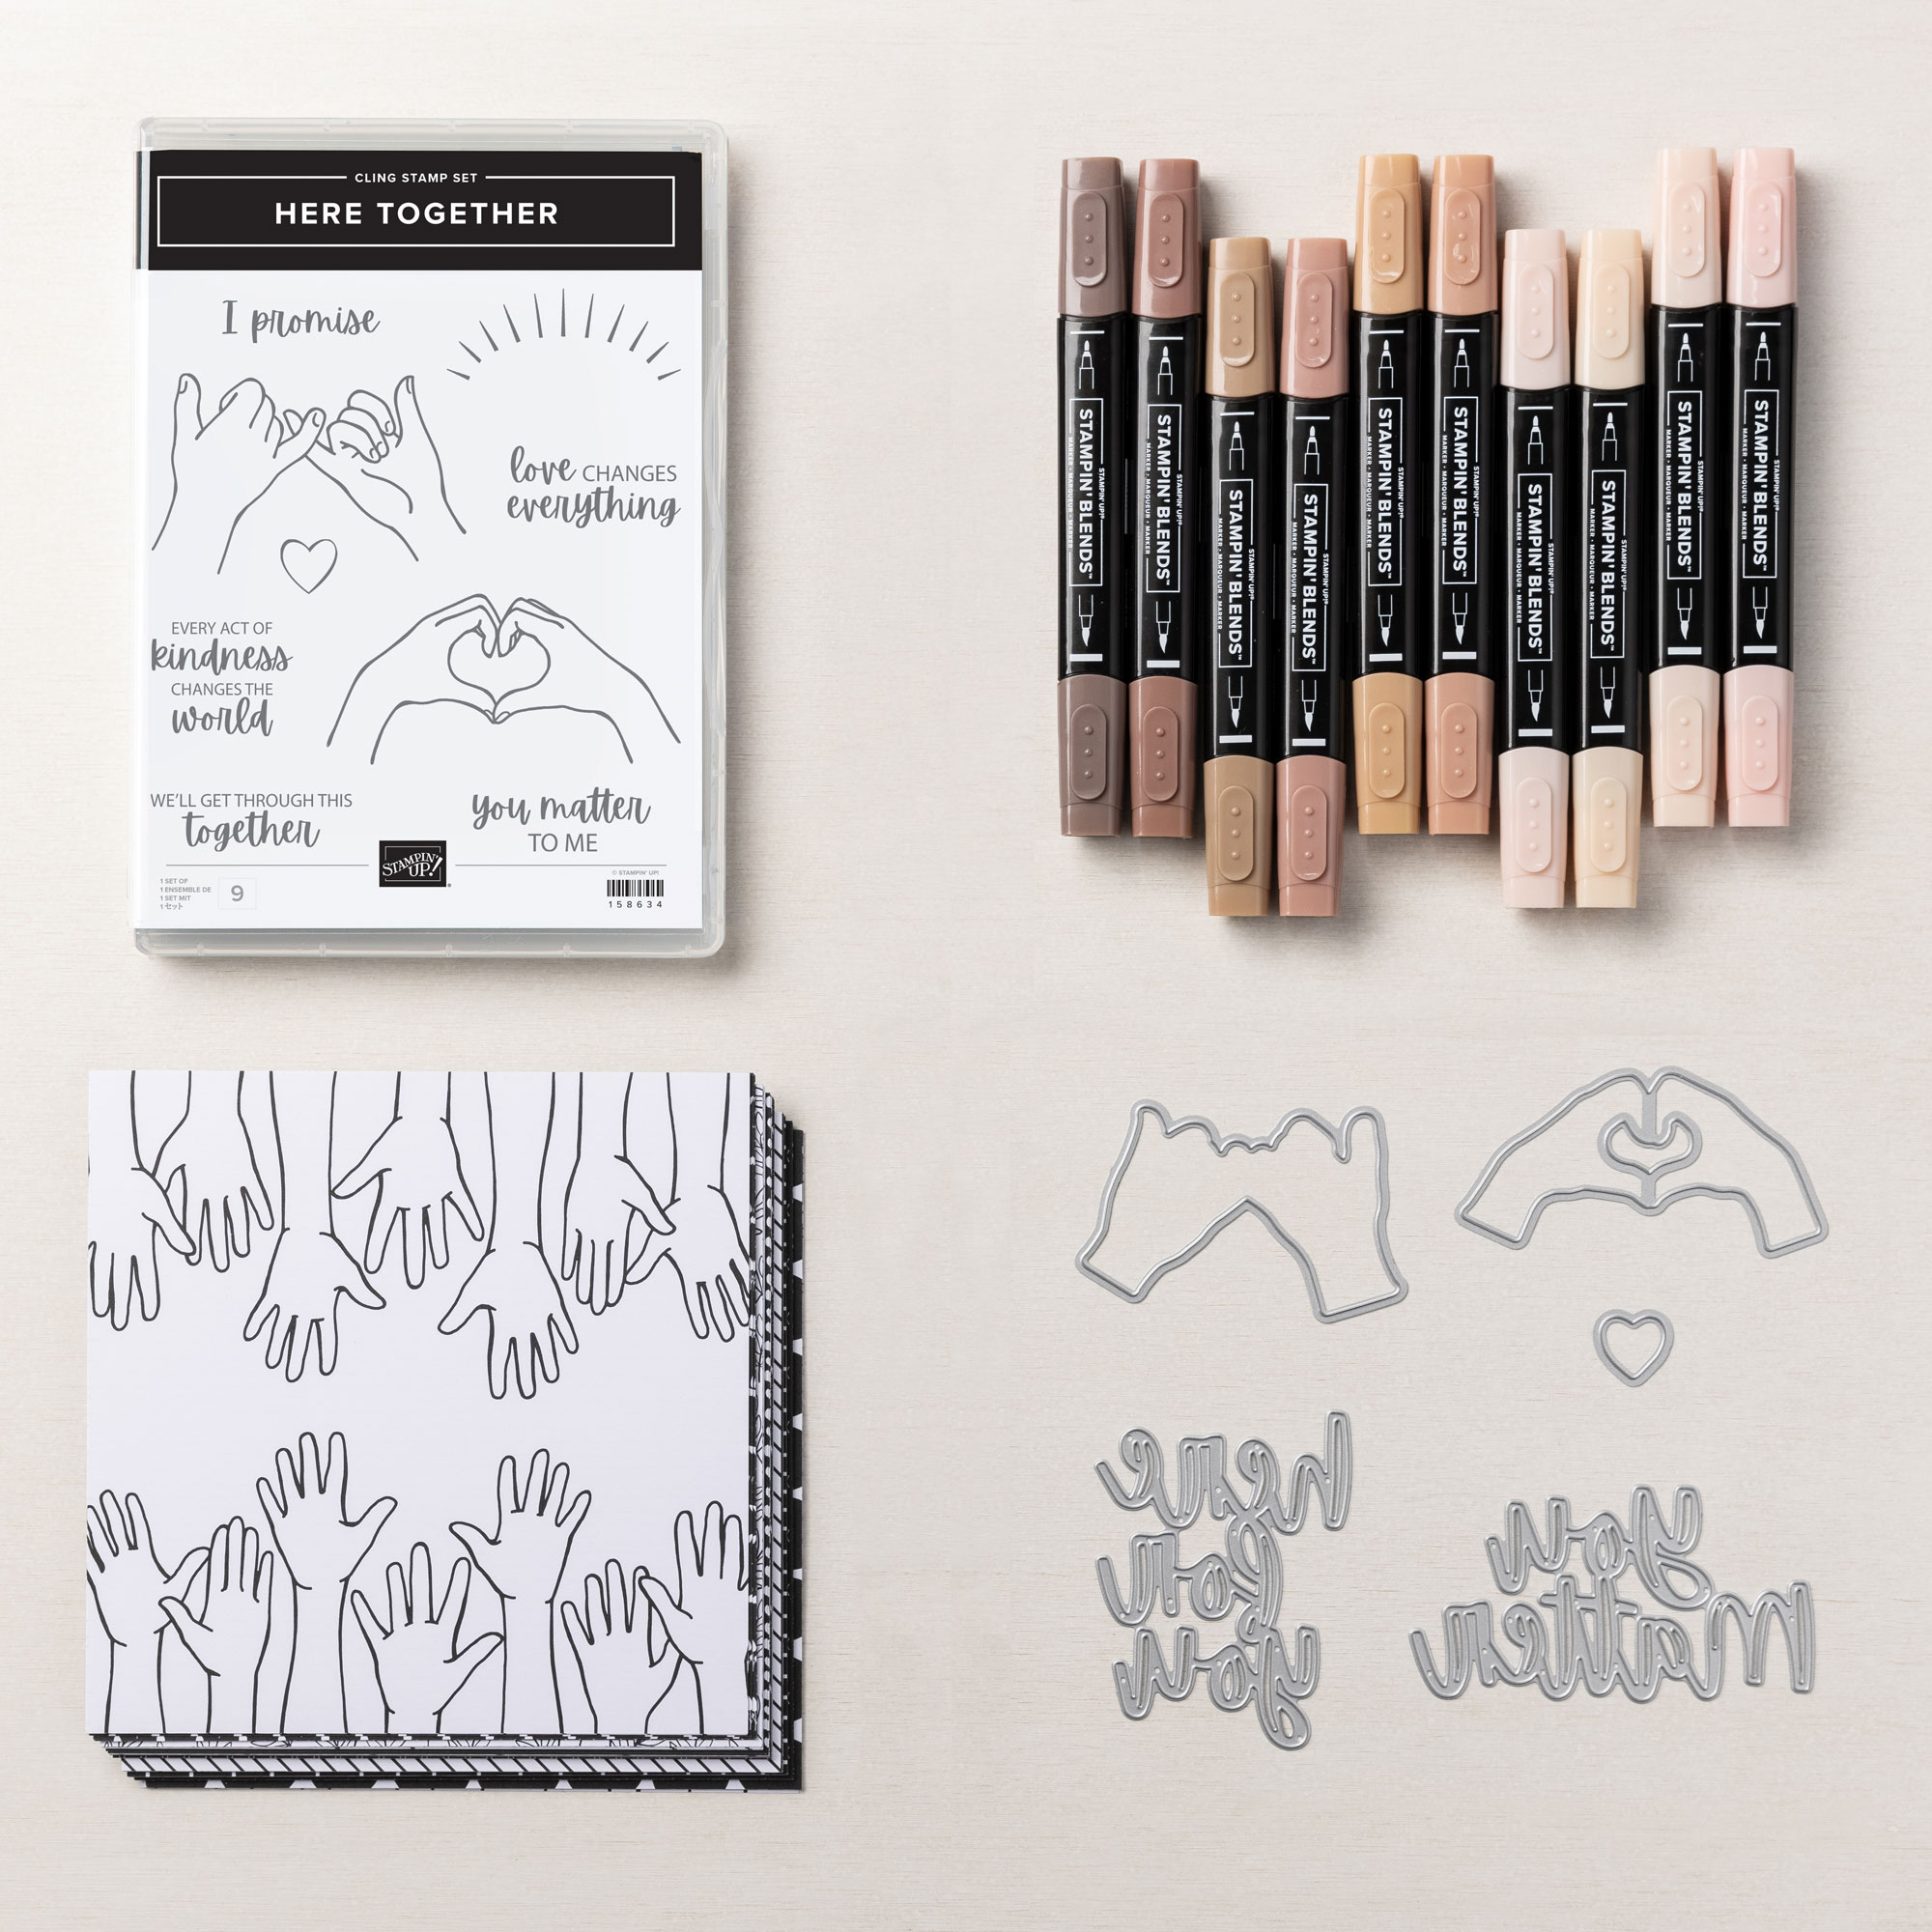
The All Together Suite includes Here Together stamps, Here for You dies, All Together Designer Series Paper, and our brand new Natural Tones Stampin’ Blends combos! They’re available as a suite, bundle or individually – but only the Blends will be available after May 2, 2022.

Sale-a-bration is still going strong. Everybody loves FREE!! Choose FREE goodies from January 4 to February 28, 2022!! Shop HERE.

Maui Stamper Stampin Up Sale-a-bration Join FREE STAMPS

Before you place that order, consider the Very Best Deal – joining Stampin’ Up! as a demonstrator! If you join by February 28, 2022, there’s a super opportunity. Choose 2 FREE stamp sets PLUS:

  • $125 additional product of your choice for $99
  • Free shipping on your kit
  • 20% savings on your own purchases
  • 6 months to try us out without risk – continue with just a $300 quarterly minimum
  • Earn Sale-a-bration and host rewards on RETAIL price not your discounted price
  • An incredible community of crafters
  • Early access AND sneak peeks (you know you want to know!)

Join by February 28th for those two free stamp sets! Message me if you have questions or want to chat.

Maui Stamper Stampin' Up! Beyond the Horizon Paper Pumpkin #bonusstamps #DIY #papercrafting #paperkit

Be sure to subscribe by March 10th for your Craft Escape in a box! Paper Pumpkin subscriptions deliver ready-to-go projects to your doorstep every month, but you have ultimate control to skip or cancel 😱if you decide it’s not for you. The March kit will make 9 coordinating cards and envelopes that you can tailor to your card-sending needs. These nature-inspired images will take your breath away. There’s a bonus stamp set (yup – TWO SETS) in March to say thanks for choosing Paper Pumpkin. Don’t wait!

Stampin’ Blends and the Alcohol Technique

I spent a marvelous afternoon a couple of weeks ago playing with Stampin’ Blends and the alcohol technique in Crystal’s Stampin’ Garage. It took a few tries to get the hang of it, but once we got over that bump we couldn’t stop. All you really need are Stampin’ Blends, vellum, a small paintbrush, and 91% rubbing alcohol.

(Who knew 91% Rubbing Alcohol was so hard to find? Thanks, Covid.)

Maui Stamper Stampin Up Stampin Blends Alcohol Technique Happy Birthday card
  • Stamps: Art Gallery
  • Color Palette: Basic White, Misty Moonlight, Garden Green, Balmy Blue
  • Accessories: Big Boss, Stitched Rectangle dies, Forever Flourishing dies, Poinsettia dies, vellum card stock, 91% rubbing alcohol, small paint brush, small dropper, Stampin’ Spritzer, Stampin’ Dimensionals

You need a non-porous paper like vellum for this technique to work. It’s pretty simple: add color with Stampin’ Blends in any pattern you like. Use 91% rubbing alcohol to reactivate the ink and gently move it around, color by color. Finally, add interest by dripping the alcohol with a small dropper, the Stampin’ Spritzer, or the flick of your paintbrush.

I chose to add these leafy elements, but some of my results needed nothing more than a sentiment. I learned that I like more monochromatic combinations, especially blues and greens. (HUGE surprise there, eh?)

Maui Stamper Stampin Up SALE-a-bration 2021 8-3 to 9-30

Shop early, shop often – your supplies for this project or your holiday crafting can earn free stamps, paper and accessories! SALE-a-bration runs through 30 September 2021, but supplies are limited! Shop HERE.

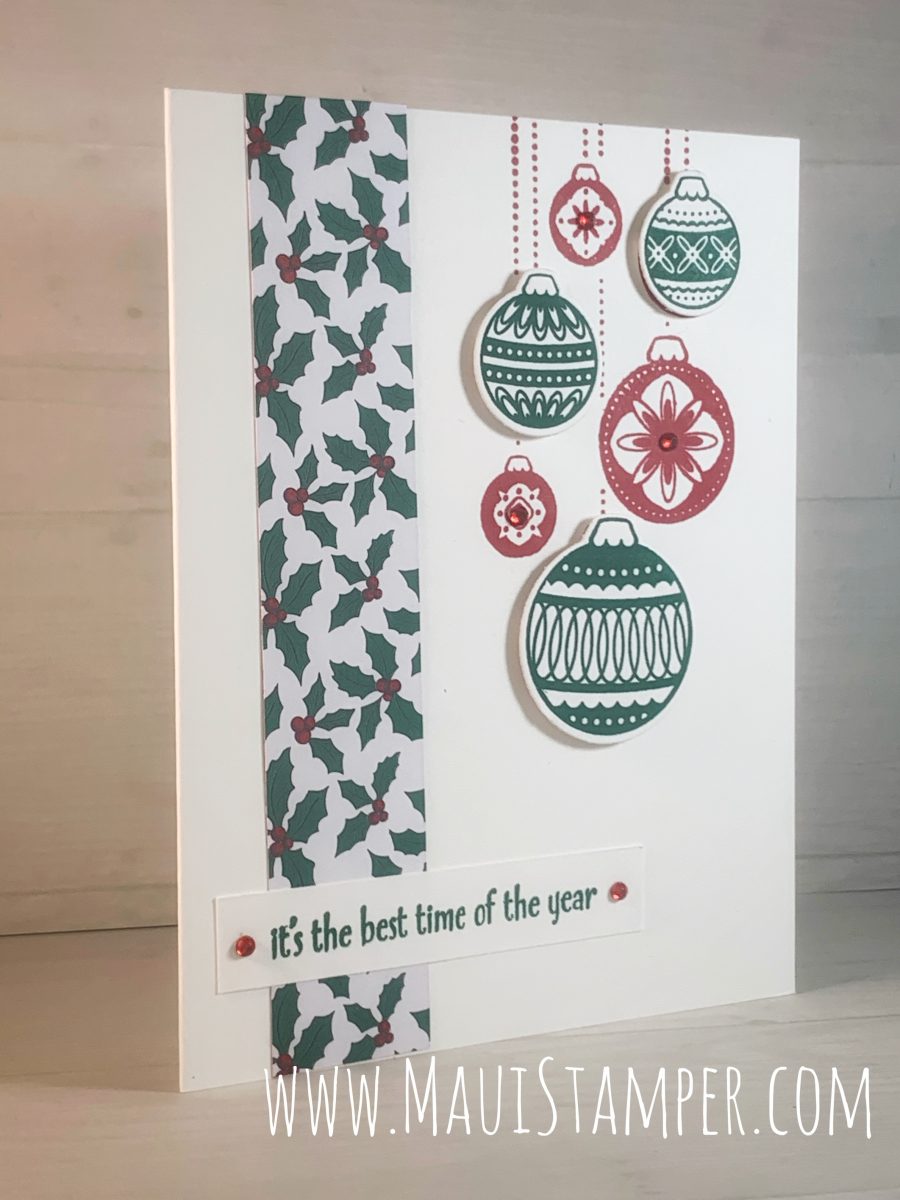
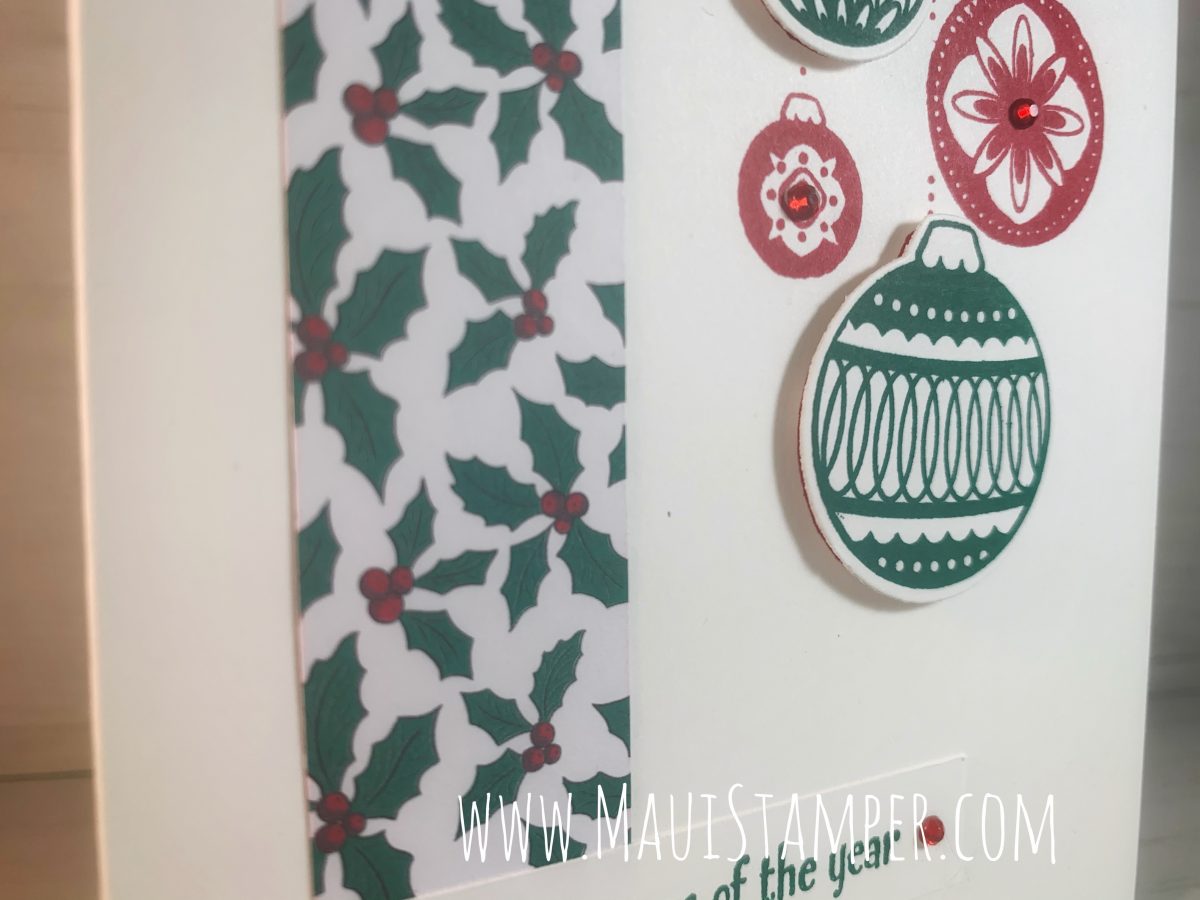
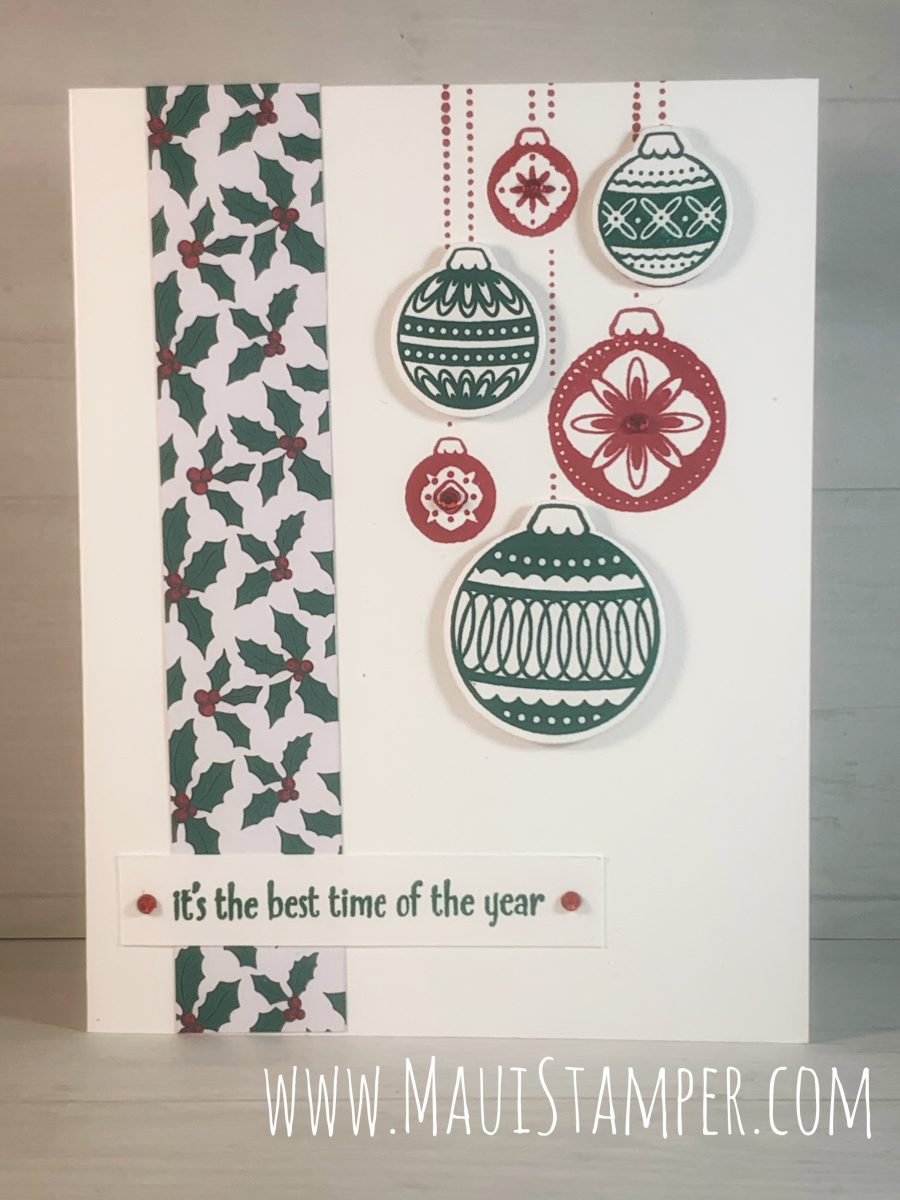
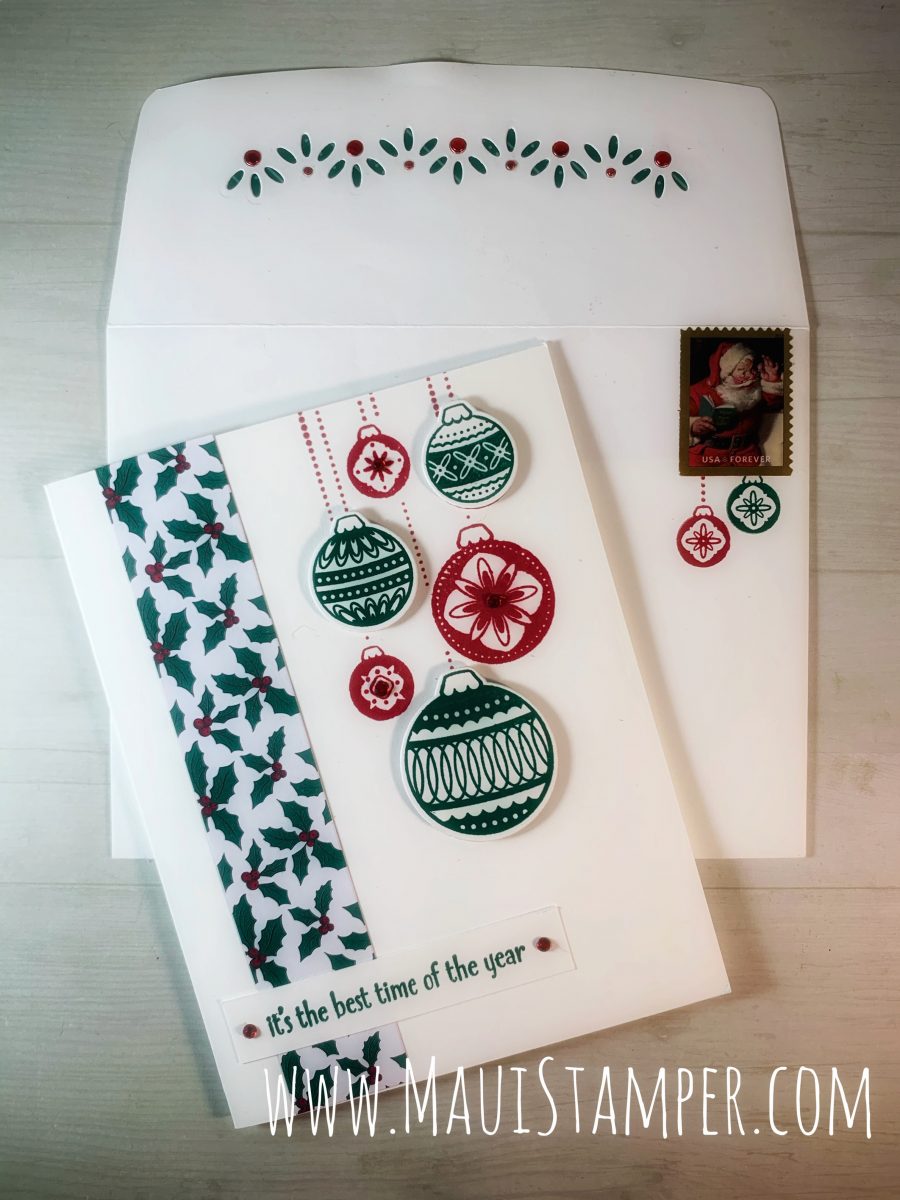
Ornamental Envelopes make great cards!

A stamp and die set named Ornamental Envelopes may not evoke cards, but think twice, my dear Crafty Friends! You’ll want this combo all year long for the details that make a handmade card stand out from the rest.

Maui Stamper Stampin Up Ornamental Envelope Handmade Christmas Card
  • Stamps: Ornamental Envelopes, A Merry Hello (host)
  • Color Palette: Whisper White, Shaded Spruce, Real Red
  • Accessories: Envelopes dies, Stampin Cut & Emboss, Stamparatus, Tis the Season Designer Series paper, Stampin Dimensionals, Red Rhinestone Jewels
Maui Stamper Stampin Up Ornamental Envelope Handmade Christmas Card

I’ve CASEd this project from the classic style of Mary Fish. I’ve made very few changes, although I chose to simplify the DSP strip and layer it on top of the card front rather than recess it. I’m stamping this with a group, so simple made sense! The Stamparatus really helps when you want to be sure that group of ornaments is hanging perfectly straight off the top of your card.

Maui Stamper Stampin Up Ornamental Envelope Handmade Christmas Card

The talented Ms. Fish embellished her envelope (how could we not?) but I had another idea. It was a little over-the-top, and I wouldn’t do it for a huge stack of envelopes, but I love how it turned out:

Maui Stamper Stampin Up Ornamental Envelope Handmade Christmas Card

I am quite pleased with myself to have found a Santa postage stamp – this is last year’s edition (or who knows, it could be 2013.) The front of the envelope is stamped, but it’s the flap that is the pièce de résistance:

Maui Stamper Stampin Up Ornamental Envelope Handmade Christmas Card

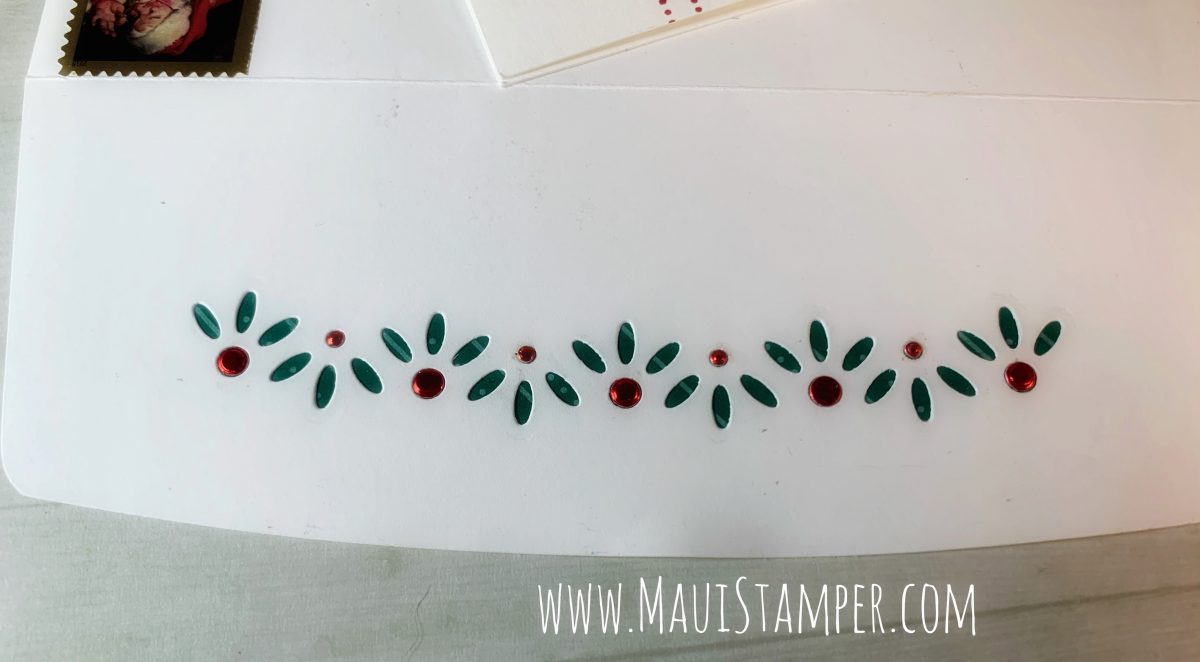
I created an envelope liner with the envelope die using a piece of the Tis the Season DSP and then I cut the envelope with this embellishing die. I ran that die through the Stamp Cut & Emboss again using Red Foil and picked out the little red circles and adhered them in the pukas (Hawaiian word for holes) using Tombo Multi Purpose Glue.

You NEED the Envelope dies, and if you’re going to order them, you really ought to take advantage of the savings you’ll get when you purchase the whole bundle. The bundle is only available until January 4, 2021, so get it while it’s hot!! Visit the Online Store and check that little to-do off your list.
You’re welcome! 💕

Split Circles

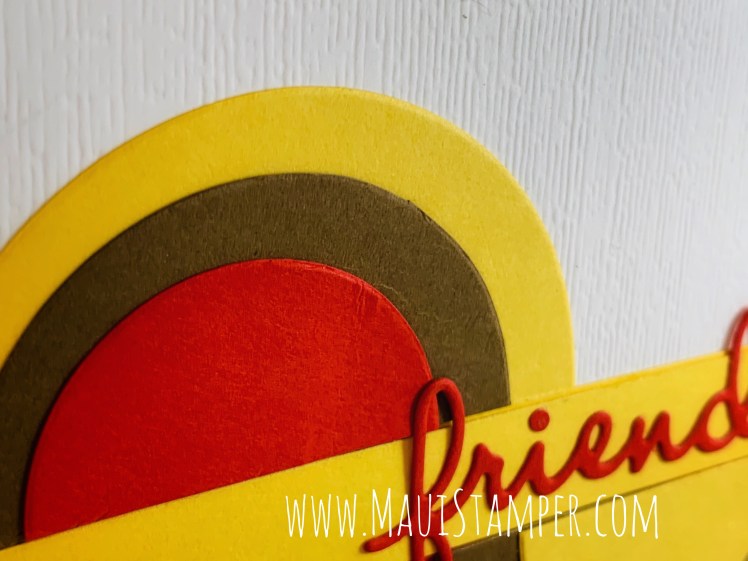
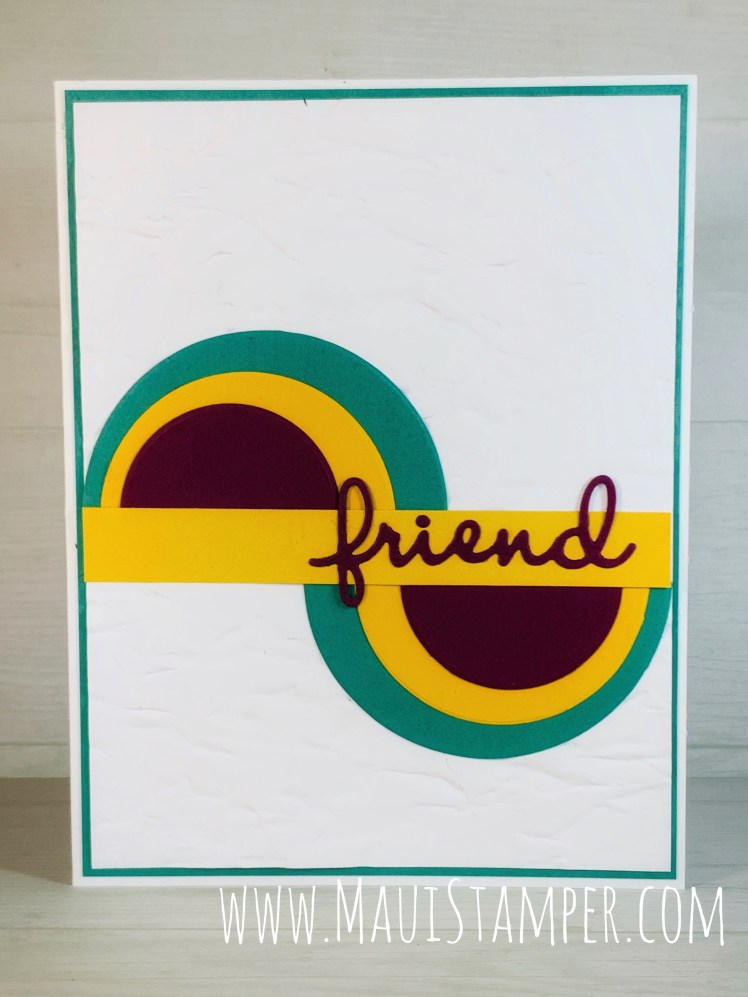
Playing with shapes – circles, squares, triangles – yields great graphic images. Well, maybe not every single time, but when it happens, it pops! I’ve seen this Split Circle Technique and spent a couple of afternoons with a desk full of circles.

Maui Stamper Stampin Up Split Circle Technique
  • Stamps: None!
  • Color Palette: Whisper White, Poppy Parade, Daffodil Delight, Soft Suede
  • Accessories: Stamp Cut & Emboss, Layering Circles Dies, Well Written Dies, Subtle Embossing Folder, Tombo Multipurpose Glue
Maui Stamper Stampin Up Split Circle Technique

Now you can see the texture – there’s a reason it’s called Subtle! Note that the Daffodil Delight strip that runs across the width of the card is actually two layers glued together. Because there are 3 layers of circles, it looks odd if that strip is only one layer thick.

Maui Stamper Stampin Up Split Circle Technique

Same concept, different colors and embossing folder. This is the Old World Paper Embossing Folder with Just Jade, Daffodil Delight, and Rich Razzleberry.

Maui Stamper Stampin Up Split Circle Technique

If you look closely, you’ll see a subtle difference in these two cards. The Poppy/Daffodil/Suede circles are reversed to create a color flow. Notice that the top largest circle is Daffodil, and its edge aligns with the smallest circle on the bottom. The reverse happens with the smallest circle on the top and the largest on the bottom.

In the second card, all circle pairs are the same color, so the only place where you see a “flow” from top to bottom is in the center set of circles.

Maui Stamper Stampin Up Split Circle Technique

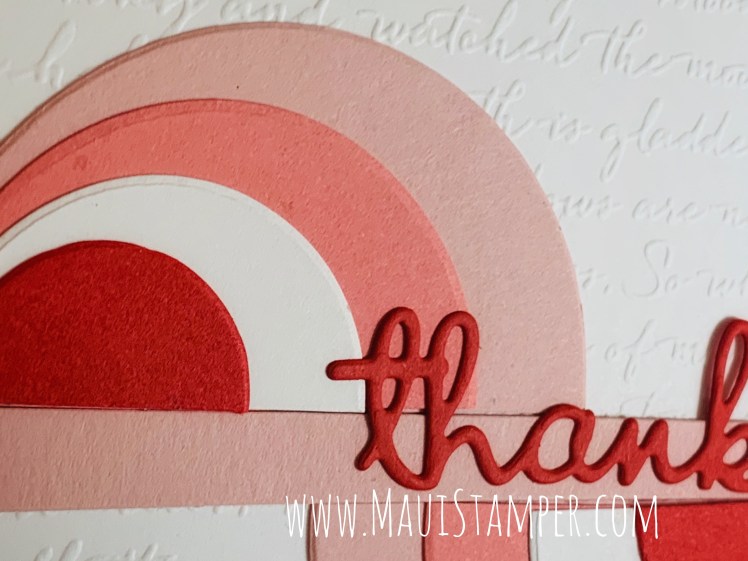
Here’s one more alternative! This is the Scripty Embossing folder with Blushing Bride, Flirty Flamingo, Whisper White, and Poppy Parade circles, and the word Thanks. I’ve used 4 circles here and worked small to large from the outside in.

Maui Stamper Stampin Up Split Circle Technique

You can see how I ended up with heaps and heaps of circles on my craft desk – it was hard to stop once I got going! If you’re one of those people who keeps odd die cut bits, pull out the circles and get to work. These cards go together really quickly.

Get your Layering Circles and Well Written dies HERE.

Rooted in Nature with the Acrylic Block Technique

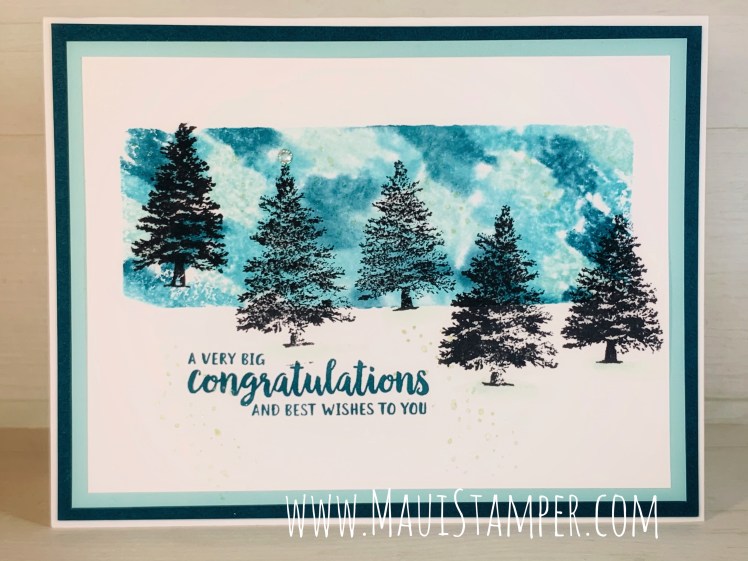
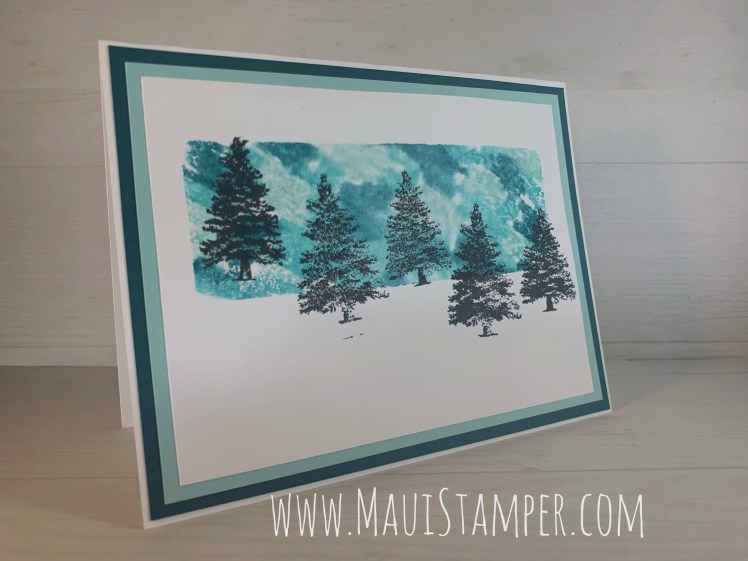
I’m at it again with the Acrylic Block Technique, and I’m very pleased with this version. This is a single layer card with very limited embellishment, but the background technique catches your eye:

Maui Stamper Stampin Up Rooted in Nature Acrylic Block Technique
  • Stamps: Rooted in Nature, Beautiful Friendship, Forever Fern
  • Color Palette: Whisper White, Basic Black, Bermuda Bay, Coastal Cabana, Pool Party
  • Accessories: Rhinestone jewel, Water brush, Acrylic Block H, Wink of Stella, Stampin’ Write Markers, Stampin’ Spritzer

The technique is simple. Scribble on an acrylic block with Stampin’ Write markers. If you place the block on a piece of white paper, you can see your color distribution and coverage. Mist the inky block with as little or as much water as you’d like – the amount you choose will impact the look you get – and press the block firmly into a Whisper White card stock panel. Lift and admire!
Maui Stamper Stampin Up Rooted in Nature Acrylic Block Technique

You need very sharp eyes to see the sparkle, but I painted the little splooshes stamp from Forever Fern with Wink of Stella and stamped it directly onto the card. It’s quite lovely in person, but challenging to photograph.

I also used our Water Painter and a bit of Pool Party ink to make very soft shadows underneath the trees.

Maui Stamper Stampin Up Rooted in Nature Acrylic Block Technique

This could just as easily have been a Christmas card, or a birthday card, or any other type of card. I originally intended to post it without the sentiment, as I often leave that step for the moment I need a card. Having a variety of cards without sentiments allows me more flexibility when I need something at the very last minute. But this one looked forlorn, and I’m very glad I added the linear element of this wish.

Maui Stamper Stampin Up Rooted in Nature Acrylic Block Technique

Don’t you agree? It’s more versatile to keep it this way but it’s much better with the sentiment (and my sentiment hides that little black bit that doesn’t belong!)

These is my favorite set of tonal colors: Bermuda Bay, Coastal Cabana, and Pool Party. Add them to your stash and see how happy they can make you! Shop HERE.