Following your heart

There’s a big transition looming on my horizon.  My oldest daughter is moving.  To Australia.  In about one week.

We’ve known about this for a long time.  She spent a semester abroad in Perth her junior year at Notre Dame, and met someone.   These two have maintained a long distance relationship for two years, seeing each other a couple of times a year and making do with Skype, instant messaging, email and the occasional card.  Our daughter graduated in May and came home to work for a few months.  Her goal was to earn enough money to convince the Australian government to grant her a visa, and a couple of months ago, she got the good word that she could enter the country.  Her Someone has just finished law school and needs to get work experience in his field before he can apply to work in the U.S.  They assure me that living in the U.S., specifically in Hawaii, is their long term goal.

As her departure grows closer, the distance seems to grow greater.  It’s not all that much farther than she was when she was at Notre Dame, but it’s another country.  Not so easy (or so cheap!) to pick up the cell phone and push her speed-dial.  And it’s West of us instead of East, which makes the time zone coordination a little more complicated.

Her dad and I support her decision, but it’s still hard.  When I saw this sentiment in the Sale-a-bration catalog, I knew it was meant for her.
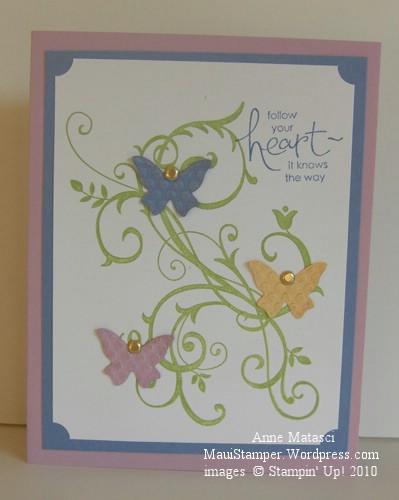
Follow Your Heart Beautiful Wings

  • Whimsical Words SAB Clear Mount stamps and Baroque Motifs stamp set
  • Whisper White, Bordering Blue, So Saffron, and Pale Plum card stock
  • Certainly Celery and Bordering Blue Classic ink pads
  • Big Shot and Beautiful Wings Embosslit
  • Ticket corner punch, Gold brads, and Champagne Mist Shimmer Paint

The butterflies seem appropriate too, though butterflies aren’t really her favorites.  They represent change and taking flight and letting go.  I’m working on accepting all three.

Layers are a girl’s best friend

Well, maybe layers aren’t my BFF, but I know they’re a big part of my style.  The more the merrier, and I really have to hold myself back sometimes.  I could have easily added two or three more layers to this card, but I held the urge in check.  I’m very proud that I could be so self-disciplined.

A Bouquet of Happy Moments

  • Happy Moments (Sale-a-bration) stamp set
  • Whisper White, Almost Amethyst, Certainly Celery and Barely Banana card stock
  • Almost Amethyst, Certainly Celery, Old Olive, Melon Mambo and Barely Banana Classic ink pads
  • Scallop trim border punch, piercing tool and template, and Stampin’ Dimensionals
  • Elementary Ribbon originals, hand-held rectangle punch (retired) and Aquapainter
  • Big Shot with Perfect Details texture plate and Perfect Polka Dots impressions folder

I stamped the little focal image for this card the same time I stamped the image for yesterday’s card.  I wanted to use that open Scallop Trim punch to complement the feminine aspect of the flowers, so a straight color block wouldn’t work.  These mats are larger and more of a design element than an accent.

Take a closer look at the long white accent panel.  I stamped the same little floral image in Barely Banana since I wanted some subtle color and texture, but the Banana color didn’t stand out enough.  I stamped right over the Banana images with Certainly Celery ink – and it was easy with the Clear Mount stamps on their beautiful crystal-clear blocks – and then used the Aquapainter to smudge a little more Barely Banana color around the images.   It looks tied together without being too same-same, if you know what I mean.  Sometimes you get the best results when you don’t have the “perfect” solution for a problem and are forced to improvise and innovate.

Sharing Happy Moments

When I first saw the Sale-a-bration mini catalog, I looked at the Happy Moments set and thought “Cute, but not me”.   After getting my hands on it, I’ve changed my mind.

Color Block Happy Moments

  • Happy Moments and Itty Bitty Backgrounds stamp sets
  • Very Vanilla, Old Olive, Not Quite Navy and Barely Banana card stock
  • Old Olive, Not Quite Navy and Summer Sun Classic ink pads
  • Very Vanilla Craft ink pad
  • Aquapainter and Old Olive Wide Striped grosgrain ribbon

I’ve seen a lot of cards lately using color block sketches.  Color block is a perfect layout for a smaller image – it gives plenty of pop without distracting your eye from the image.  The line art in these images is perfect for watercoloring with the aquapainter.  The rough edges mean you don’t have to color perfectly inside the lines, either!

Malama `aina: to care for the land

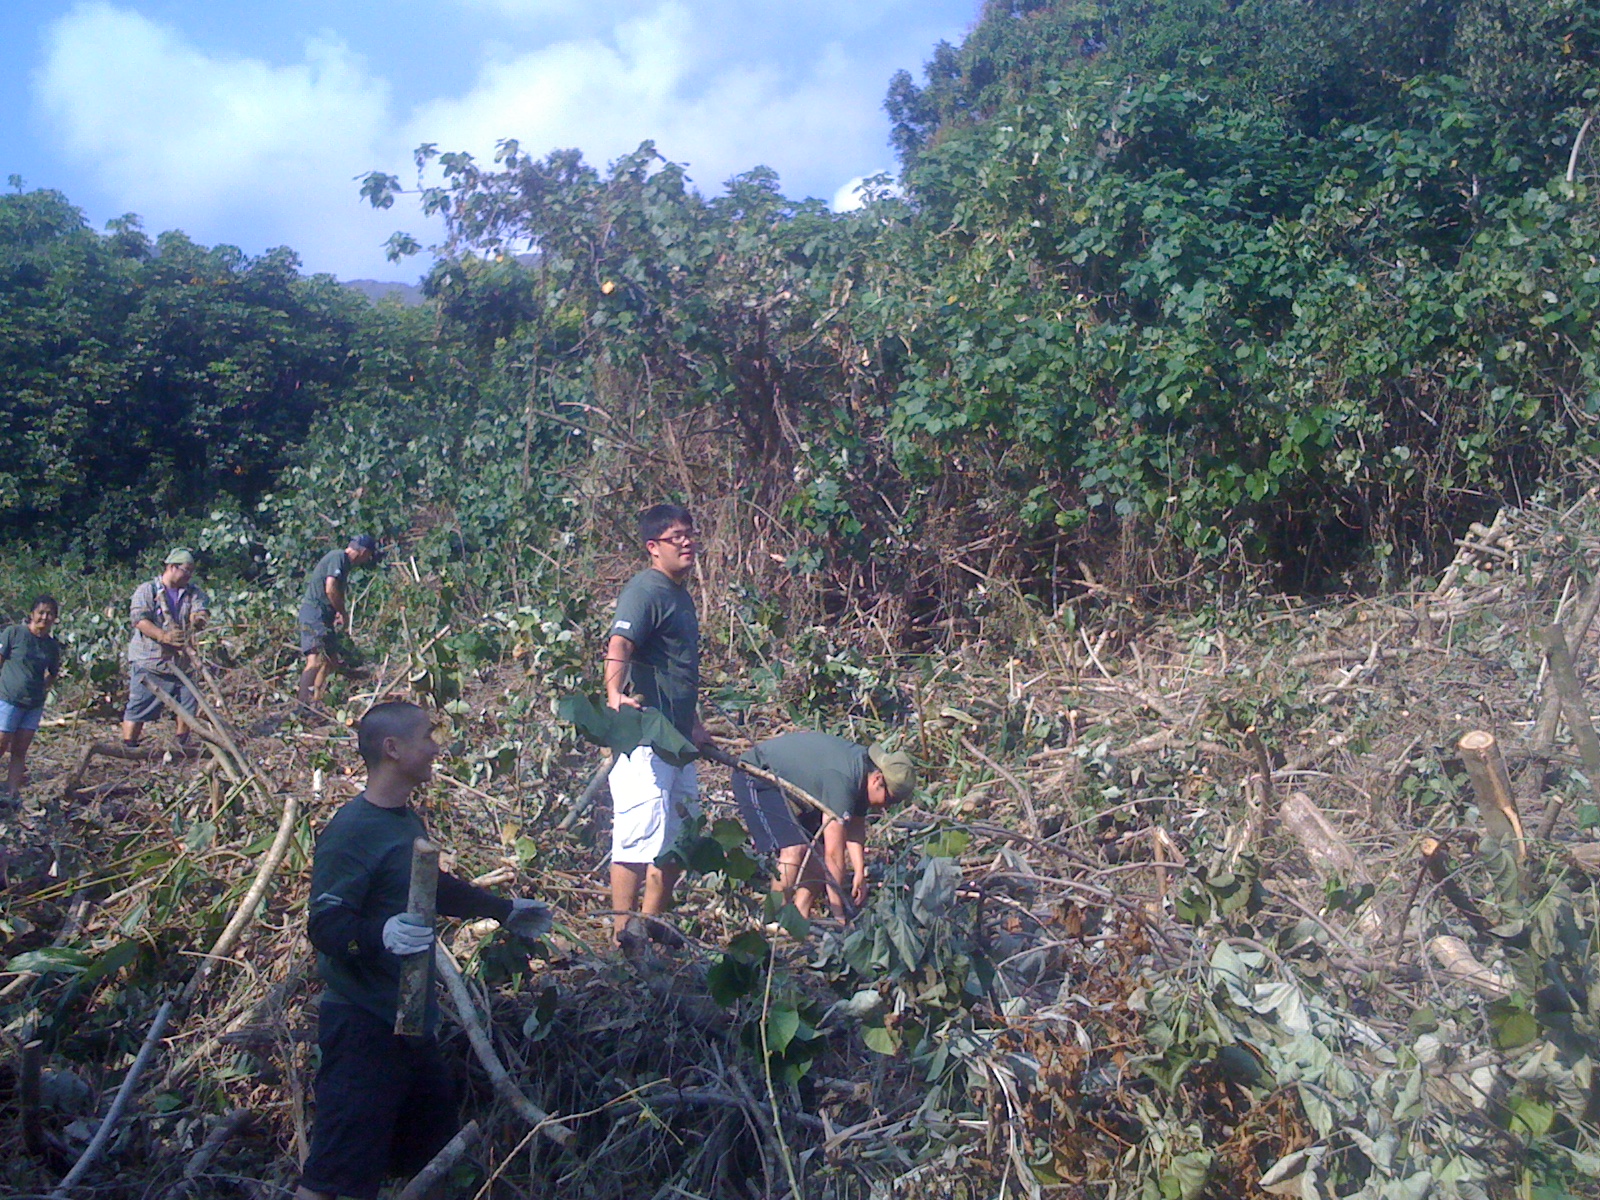
One of the fundamental concepts of Hawaiian culture is to care for the land.   On Saturday, a diverse group of people joined forces to malama `aina,  care for the land.

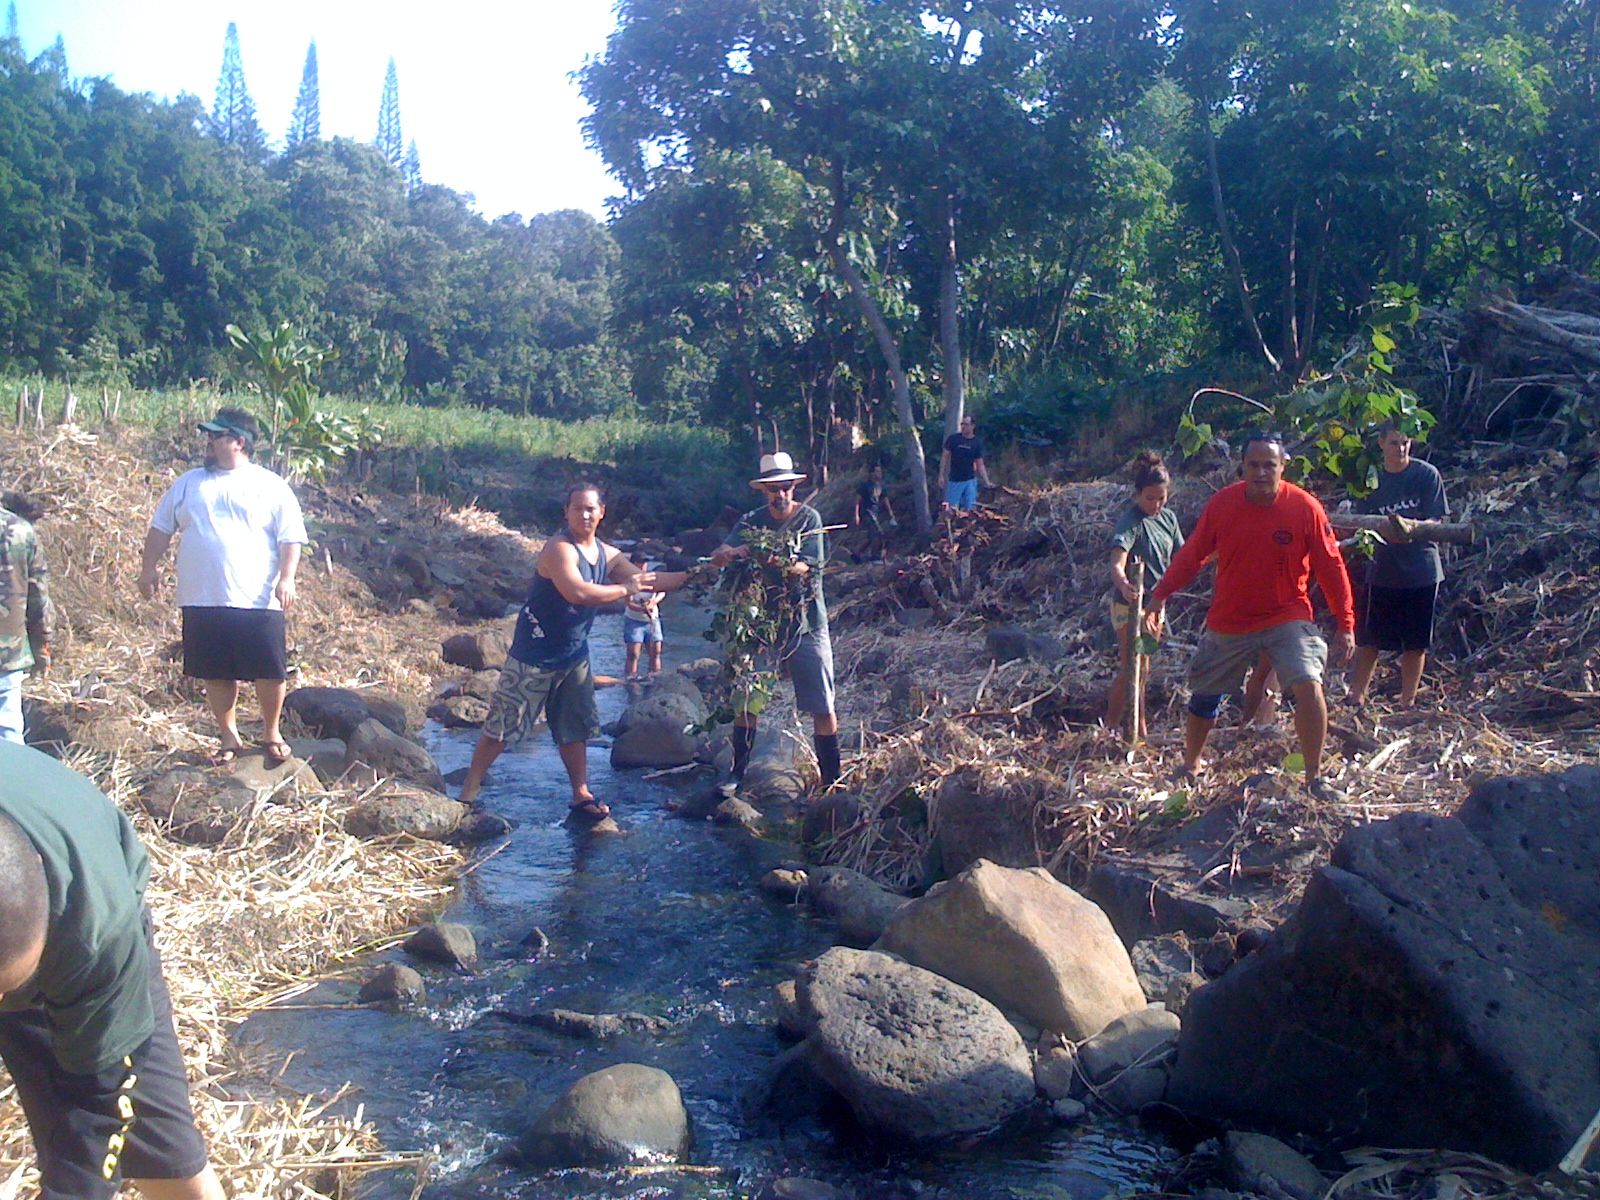
We met early in the morning at Papahana Kuaola in Waipao, O`ahu.   This area was once rich farmland growing crops like taro and sweet potato, but invasive species have crowded the stream and made the area impassible.  Previous work crews had cut down the thick growth,   so our task for the day was simple.  We would  create a human chain that would move the debris from one side of the Ha`iku river to the other.

Surveying our task

We began with a pule, or prayer, and then moved to form three lines across the river.  We stood side by side, and piece by piece, the wood was passed from hand to hand down the bank, over the stream, and up the other side to form a pile that could be accessed by a truck with a wood chipper.  It was easy to imagine this same task taking place hundreds of years ago.

Line across the stream

It wasn’t long before the jokes and stories started up, and the time passed quickly.  After our mid-morning break, the large group split into two.  Some continued to pass the debris across the stream, while others moved to the lo`i, or traditional planting beds for taro.  They had been shaped and the soil turned, but there was still much to do before they could be planted.

working in the lo`i

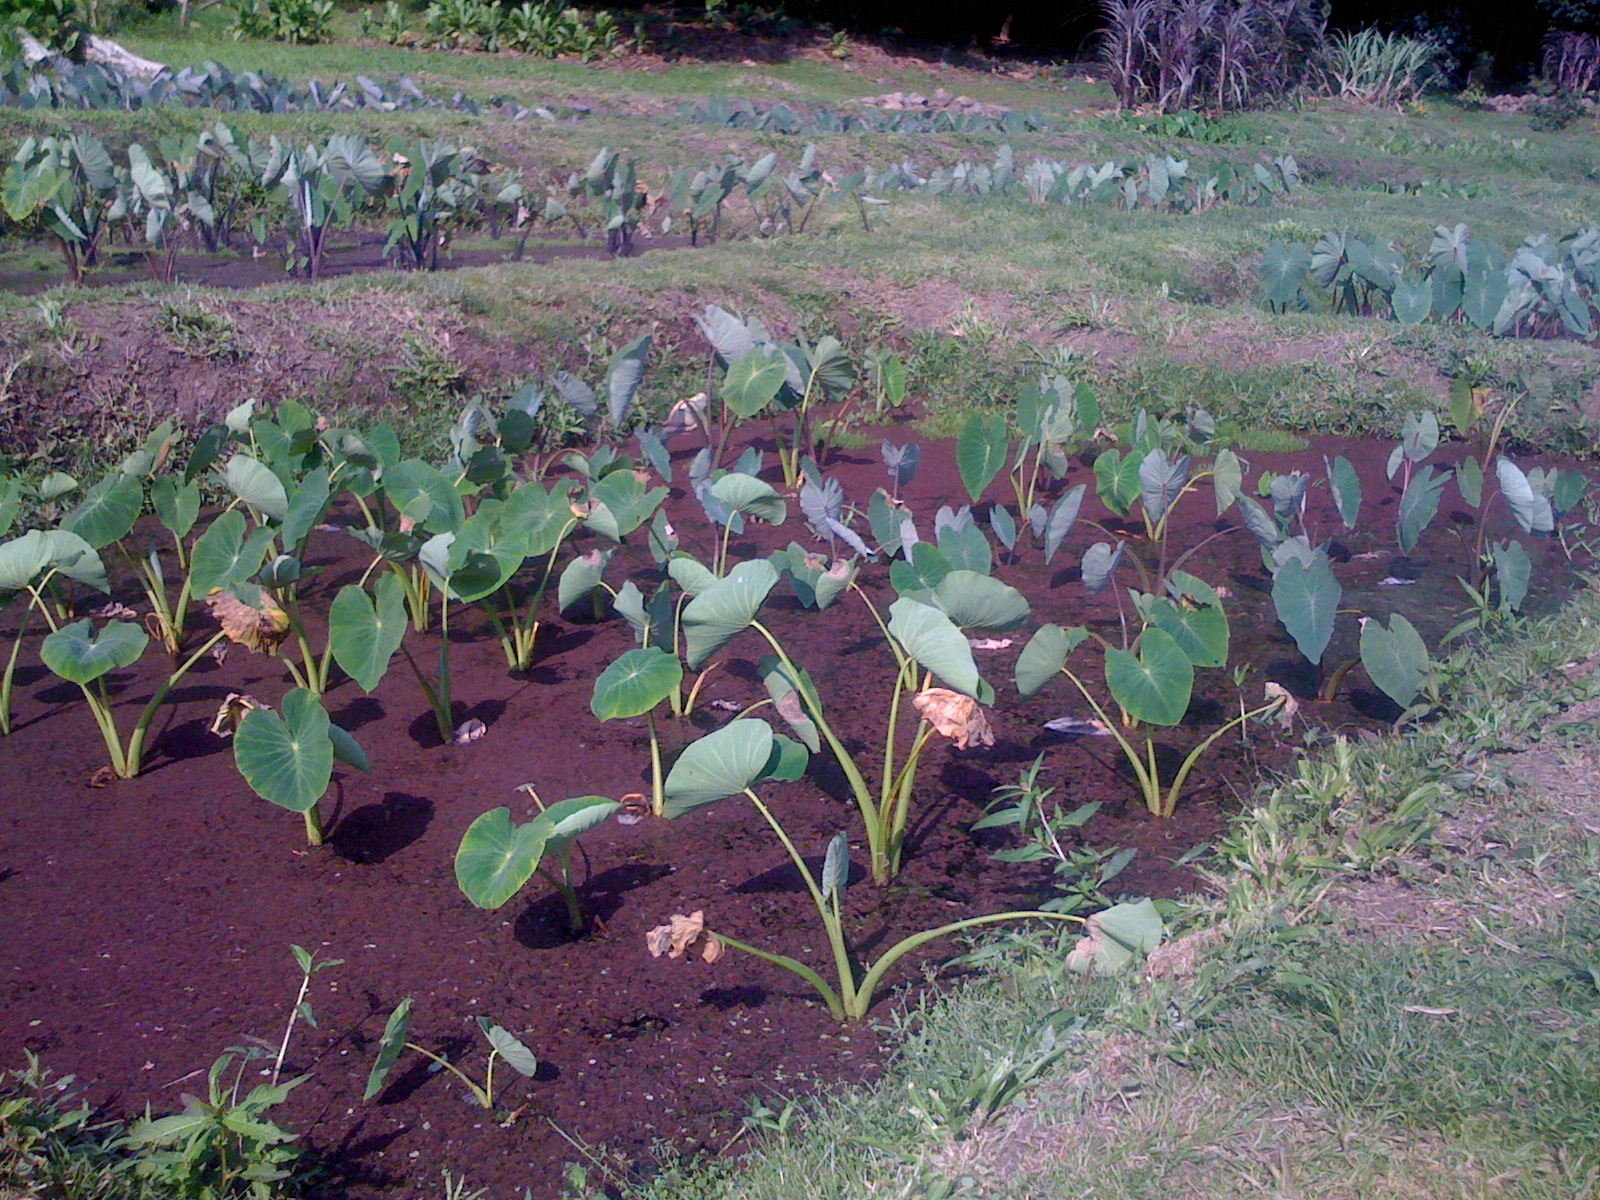
We were inspired by the sight of the lo`i already planted:

Taro flourishing in the lo`i

Our diligence in clearing the stream bed created a very gratifying pile of debris on the hill above the stream bank.

No wheel barrows, no heavy machinery, just human hands

Our entertainment for the day was Lili.  She leaped up and down the stream, more nimble than a mountain goat.  Her priority was rocks, and her preference was for enormous rocks.  She would paw and push under the water to loosen a huge rock, then stick her whole snout into the water to attempt to pick it up.  If you were standing nearby, you were guaranteed a shower!

Lili

We finished the morning with a sense of accomplishment and community.  Working side by side with a diverse group of people, some from around the world, we made a small contribution to the land and enriched our own lives immeasurably.

Haitian Disaster Relief, Stampin’ Up! Style

Stampin’ Up! customers and demonstrators are coming together to make a difference in Haiti.  From now until February 28, Stampin’ Up! will donate $2.00 from the sale of every I {Heart} Hearts stamp set to the American Red Cross’ Haiti Relief and Development Fund. The Red Cross is already well-established in Haiti, and this money will be used to provide immediate relief and long-term support through supplies, technical assistance and other support to help those in need.

I {Heart} Hearts – clear-mount, Item #118571, $18.95

I {Heart} Hearts – wood-mount, Item # 117010, $26.95
Many small efforts joined together make a big difference.  However you choose to support the relief efforts in Haiti, do it today.

The things we do for love

My dear friend and partner-in-crime has made an offer on a wonderful home almost 50 minutes away.  Here on Maui, that’s the kind of trip that requires an overnight bag.  She lives less than 5 minutes away right now, so this move is something of a shock to us both.  I went out to see the “estate” with her last week – it’s 2 acres – and we were both inspired with all sorts of fabulous decorating ideas.  There could never be enough money to satisfy our imaginations, but we did agree on a color concept.

  • Vintage Vogue Clear Mount Stamp set
  • Soft Suede, Bermuda Bay and Naturals Ivory Card stock
  • Soft Suede and  Bermuda Bay Classic ink pads; Pretty in Pink Stampin’ Write marker
  • Big Shot and Perfect Polka Dots textured impressions folder
  • Pretty in Pink 1/2″ Epoxy Sending Love brads
  • Crop-a-dile

I’m trying REALLY hard to be supportive, so I designed this card based on her colors.  She’ll have to select a carpet before she makes a final decision between a Soft Suede kind of accent or a Close to Cocoa kind of accent.  (You know you’re a serious Stampin’ Up! stamper when you use those alliterative color names to describe colors you see out in the Real World.)

There’s lots of wall space in this new house and Decor Elements will help fill it up without the cost of artwork, framing, and holes pounded in freshly painted walls.   I’ll have to pack my bags and leave a freezer full of meals so I can take my trusty Decor Elements Applicator out to Haiku.  Change is good.  Right??

Just a little something

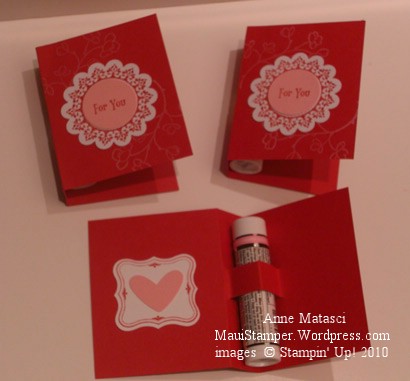
I made these for “just because” to give to some friends.  They were quick and easy.

  • Real Red, Whisper White and Pretty in Pink card stock
  • Vintage Labels SAB set and Embrace Life stamp set
  • Scallop Circle, 1″ circle, Curley Label and Heart to Heart punches
  • Real Red Classic Ink Pad, Craft White ink pad
  • Tombo adhesive, Paper Snips, and a chapstick

You could whip out a classroom’s worth of these in no time.  They do make Spiderman chapstick, don’t they?

A little birdie told me…

I should have ordered this punch!  I know, I know, I have a LOT of Stampin’ Up! goodies.  And I am very happy with what I have.  I run into problems when I go over to a friend’s house to play and she has toys that I don’t have.   (No, I am not 7 years old.)  I start to play, I get ideas, I go online and find more ideas, and before I know it, guess what’s at the top of my Wish List!

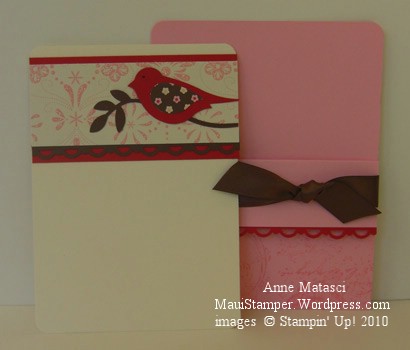
Bird Punch Pocket Notes

  • Extra Large Two-Step Bird, Scallop Trim and corner rounder punches
  • Real Red, Very Vanilla, Chocolate Chip and Pretty in Pink card stock
  • Sending Love Specialty Designer Series Paper
  • Chocolate Chip 5/8″ Satin ribbon
  • Tombo Adhesive and Chocolate Chip Stampin’ Write marker
  • Very Vintage Jumbo Wheel and Pretty in Pink Jumbo Ink Cartridge

My inspiration for this pocket note is  Becky Robert’s little note .  I really liked her placement and proportions, and you can see I was very faithful to them.  I added the simple pocket to dress up the presentation.  You can make a pocket like this with just a few steps:

  1. Cut a piece of cardstock 4 1/4″ x 11″ (here I used Pretty in Pink)
  2. Score at 5 1/2″ and 8 1/2″
  3. Cut off 1 1/4″ from the last score, making your last section 1 1/4″ wide
  4. Zig Zag fold to create a pocket
  5. Tie ribbon around the pocket to hold it in place – no adhesive is needed

Here’s the note outside of the pocket:

Pocket note and pocket

This little bird is just the right size for a card or page embellishment.  There are so many different ways of mixing and matching patterns to create different birds, real or imagined!   I’ve seen some beautiful birds that are very faithful to their feathered counterparts – this Chickadee is a great example.   I wonder if I could make a sassy Mynah bird?

Valentine Bouquet

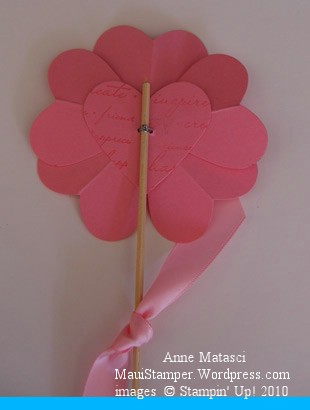
I’m not a huge fan of punch art, but I do like 3-D projects.  These little flowers seem to be a cross-over project between the two:

Flowers from the Full Heart punch

Do you ever struggle with a concept that is perfectly shaped in your head but won’t take that shape underneath your hands?  No comments about the condition of my head, please!!   These flowers are cuter on their own than as a group.  I think I broke the Rule of Odds – odd numbers in an arrangement – and that may be why it doesn’t look quite right to me.  I don’t have any artistic training, so my problem-solving techniques amount to trial and error.

These were simple to make.

  1. Punch 6 hearts with the Full Heart punch.
  2. Use a sponge dauber to define the edges  of 5 hearts; stamp, emboss or texture each.  Score down the center and crease.
  3. Use the 6th heart as a base.  Attach 5 hearts in flower shape with Tombo Adhesive.
  4. Punch a 3/4″ circle of cardstock.  Layer the flower, the cardstock circle and a button and pierce through button holes with piercing tool.
  5. Set aside the button.  Use a needle and threat to tie the circle and button together with linen thread.
  6. Place the button on top of the flower and circle.  Use fine craft wire to attach the flower, circle and button to a bamboo skewer, twisting securely on the back.  Trim ends and bend in towards skewer to avoid sharp edges.

Back view of Heart Flower

It took me about 40 minutes to make 8 of these.  I’ll bet you could do them faster!

Sweet Baby Laundry Bags

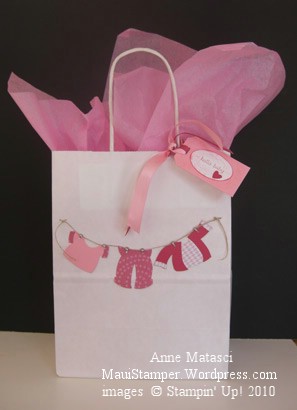
My dear friend Crystal is getting closer to her due date.  At her shower last month, she received a gift in the cutest little gift bag.  I looked at it and thought “I could MAKE that!”  Last week, I finally sat down to do just that:

Sweet Baby Girl Laundry Bag

Can you stand it? It’s so cute it makes your face hurt when you look at it, doesn’t it?   I’m still grinning.

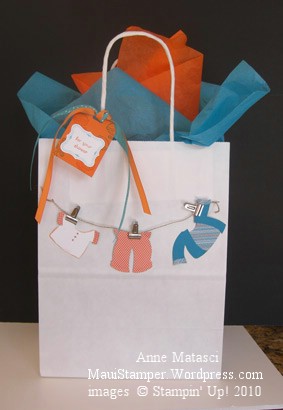
Of course the baby boys need their own version:

Sweet Baby Boy Laundry Bag

  • Sweet Pea Designer Series Paper Pad
  • Vintage Labels SAB , Teeny Tiny Wishes, and Sock Monkey Accessories stamp sets
  • Pretty in Pink, Rose Red, Whisper White, Pumpkin Pie, and Taken with Teal card stock
  • Big Shot and Build A Bear Beary Essentials die
  • Linen Twine, Rose Red and Pumpkin Pie 1/4″ grosgrain ribbon, Bermuda Bay Polka Dot ribbon, and Pretty in Pink 5/8″ Satin ribbon
  • Wide oval , Curly label , Heart to Heart, Horizontal Slot and Tag Corner punches; 1/16″ hand held punch
  • Tombo Adhesive, Mini Glue dots, 1/2″ Library Clips, Vintage Brads, and sponge daubers

I wanted to make these with colored bags, but I couldn’t find anything that wouldn’t compete with the outfits.  Remember, I live on a small island in the middle of the Pacific Ocean!  It’s kinda country here.

A few things to note:

  1. The linen twine is attached to the bag by piercing holes with a large needle and threading the twine through.
  2. The brads looked sort of like clothes pins to me, but I had to trim the sharp points off with my Craft and Rubber scissors.  Be really careful with those sharp little bits of metal.
  3. The little garments are held in place with glue dots – the brads and clips are more decorative than functional

I’d love to see what you do with this idea, and would appreciate a link back to this post if you publish your work.  Have fun!