Hello Neighbor! SASC37

What a cheery neighborhood this must be!  This new set from Sale-a-bration lends itself to so many concepts.  I’ve seen row houses and suburban neighborhoods, as well as  country estates surrounded by orchards.  I wanted to play with the Stampin’ Addicts sketch challenge, so I kept the image small.

Good Neighbors stamps with Welcome Neighbors paper

  • Good Neighbors (SAB) and Teeny Tiny Wishes stamp sets
  • Whisper White, Pumpkin Pie, Bermuda Bay, Old Olive and Crushed Curry card stock
  • Welcome Neighbor Designer Series Paper Pad (SAB)
  • Pumpkin Pie, Bermuda Bay and Old Olive Classic stamp pads
  • Aquapainter, Old Olive and Soft Suede Stampin’ Write Markers and a blender pen
  • Stamp-a-ma-jig, Linen Twine, paper Snips and Stampin’ Dimensionals

The colors in the Welcome Neighbor stamp pad are bright and cheerful but they coordinate well.  I love the 6″ square size for use in cardmaking – it keeps the proportions right.  And the Stampin’ Addicts challenge was a great one, though it took a while to get the dimensions just right!  If I have time I’ll post them later.  I’m off to the beach with my son and my middle daughter – she leaves tonight to go back to Boston where they are reporting a “severe weather watch”.   She loves the excitement of the city, the stimulation of university life, and the companionship of her friends.  The weather, well, she’s not so thrilled with that, but it’s part of the deal.

I’m missing her already.
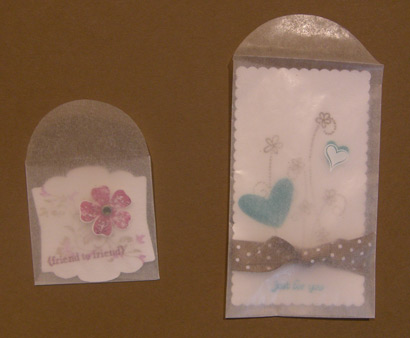
Very Cool Envelopes

So have you been through the Occasions Mini?  Marked it up and made your wish list?

Hijack:  You know you have Wish List Issues when your Wish List is on an Excel spreadsheet.  You have BIG Issues if your Wish List is an Excel workbook with multiple sheets.

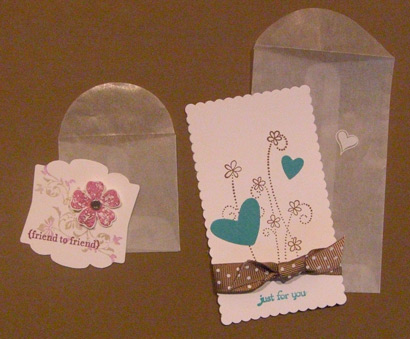
Back to our regularly scheduled topic.  One (well, two) of the things I spotted in the new Mini was (OK, it should be were, I’m into subject/verb agreement)….ANYWAY….I’m talking about the glassine envelopes.  I liked the little die cut Hugs and Kisses Love Notes that were pictured right below the envelopes, but it was really the envelopes that got my attention.  They’re just so cool!

Hugs and Kisses in Glassine Envelopes

I mean, you can see through them!  And they’re so smooth, and they’re kind of crackle-y, and yes, I admit it, I’m a bit of a dork about paper.  Can you see the tiny little heart Rub-on I put onto the rectangular envelope?  It’s retired, and I should have resisted it, but I couldn’t.

Hugs and Kisses Sending Love Notes

  • Hugs and Kisses Sending Love Notes; Rectangle and Square Glassine Envelopes
  • Vintage Vogue, Simply Said, and Teeny Tiny Wishes Stamp Sets
  • Whisper White and Bermuda Bay card stock
  • Soft Suede, Bermuda Bay, Sahara Sand and Rich Razzleberry Classic Ink pads
  • Orchid Opulence Stampin’ Write marker and a Blender Pen
  • Heart to Heart Punch; Soft Suede Polka-Dot grosgrain ribbon; Circle Ice Rhinestone brads
  • Stampin’ Dimensionals

Stampin’ Up! has commited that the Vintage Vogue stamp set will be in the 2010 -2011 Idea Book and Catalog and I’ve gotta tell you, that’s good news.  The more I stamp with this set the more ideas I come up with.  If it’s not on your spreadsheet, workbook, or back-of-the-envelope wish list,  maybe you should think about it again.

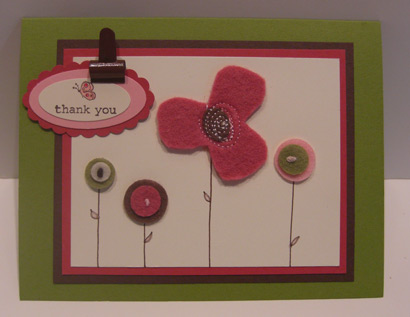
Sweet Pea Garden

There are a LOT of little pieces in the Sweet Pea Stitched Felt assortment!  I started this card and the card you saw yesterday at the same time, but this one – the simpler one – was more difficult to finish, mostly because I couldn’t leave it alone.  Duh.  Maybe I should take a memo on this.  Simple = OK.  Sweet Pea Garden

  • Oval All stamp set
  • Old Olive, Chocolate Chip, Rose Red, Pretty in Pink and Very Vanilla card stock
  • Chocolate Chip Classic ink pad; Chocolate Chip, Pretty in Pink and Rose Red Stampin’ Write markers
  • Sweet Pea Stitched Felt and Mini glue dots; Aquapainter
  • Scallop Oval, Oval and Small Oval punches; Stampin’ Dimensionals; 1/2″ Library Clips

Doesn’t quite qualify as simple, does it?  Ah well, I still like it.

Did you notice the stems on the flowers?  I drew them.  (Ta da!!) I’m rather proud of that, because I’m not confident about drawing.  Somehow a straight line with a little tiny leaf didn’t seem so scary.  Within that little confession lies the seed of my love of stamping.  I’ve always enjoyed crafts, but drawing has always been intimidating.  Stamping provides the images and allows me the creative freedom to manipulate them as I choose.  It does the drawing for me!

Sweet Pea Mojo – Mojo121

I’ve been looking at these Sweet Pea Stitched Felt embellishments (117266, $7.95) on my craft table for weeks.  What should have been simple became really complicated in my head.  About a week ago, I saw a VERY simple card that really appealed to me, and that provided the Mojo to make this card come together.  Of course, my card isn’t simple, and we’ve already discussed my challenges with the Clean and Simple Style, so we don’t need to go back there again.

Sweet Pea Stitched Felt Mojo121

  • Simply Said and Well Scripted stamp sets
  • Naturals Ivory, Chocolate Chip, Pretty in Pink and Rose Red card stock
  • Sweet Pea Designer Series Paper Stack
  • Old Olive, Pretty in Pink and Chocolate Chip Classic ink pads; Very Vanilla Craft ink pad
  • Sweet Pea Stitched Felt, Chocolate Chip taffeta ribbon, piercing tool, sponge dauber
  • Oval Scallop punch, Oval punch, Corner rounder punch
  • Stampin’ Dimensionals, Mini Glue dots and Aquapainter

Check out that pink houndstooth paper.  It’s printed in Pretty in Pink on white, and when I realized I’d stamped my image on Naturals Ivory I thought I was going to have to start over.  I’d seen someone try this trick, though, and it works:  use a sponge dauber to rub Very Vanilla craft ink across the printed paper.  The combination of the smooth paper and the creamy consistency of the craft ink allows you to get nice even coverage that makes the papers blend well together.

There are a lot of layers on this card, but to my eye they’re subtle.  The Mojo Monday team did a great job with this week’s sketch, creating something out of the ordinary but not unreasonable.  I really enjoy playing along with this sketch challenge, and though I can’t fit it in every week, it’s a pleasure when I do.

Clean and Simple

I’m not sure that I have an identifiable style, but whatever it is I do, it is generally NOT clean and simple.  Clean and simple (CAS) cards have few if any layers.  They use limited embellishment and generally have a lot of white space.

When Kellie came over last week, she brought a few photos she’d printed from various websites as inspiration.  Kellie really likes clean and simple cards, and  she showed me was THIS beautiful design from Ronda Camire.  It was such a pretty card that I had to give CAS a try.

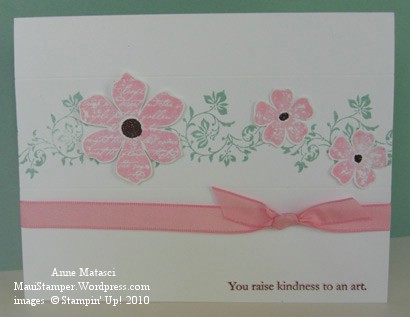
Vintage Vogue Clean and Simple

  • Vintage Vogue Clear Mount Stamp set
  • Whisper White card stock
  • Pretty in Pink, Sage Shadow, and Chocolate Chip Classic Ink pads
  • Pretty in Pink taffeta ribbon, Stampin’ Dimensionals, and the Stamp-a-ma-jig
  • Fine Supernova Stampin’ Glitter in Chocolate Chip and Tombo Multipurpose Adhesive
  • Champagne Mist Shimmer Paint and rubbing alcohol – Shimmer Spray
  • Scoring tool

I know, I know, it’s kind of a long supply list for a CAS card – but there’s only ONE color of card stock!!  And yes, I know they are Clear Mount stamps and I shouldn’t need the Stamp-a-ma-jig, but I stamped the sentiment in Pretty in Pink and we agreed it was kind of wimpy, so I had to line up the sentiment in Chocolate Chip.

Do you know that the Shimmer Paints are still available from Stampin’ Up! ??  I was planning on buying a case of Champagne Mist Shimmer Paint (#116806, $5.95) and keeping it in my fridge so it wouldn’t dry out.  I’m really pleased it’s been extended beyond the Holiday Mini catalog.  I was going to have to label it “Champagne” to get away with keeping it in the fridge.

If you somehow missed making Shimmer Spray, it’s as easy as can be.  Put a few drops – literally – of Shimmer Paint into a fine mist spray bottle and add ordinary household rubbing alcohol – my bottle holds 3 oz.  Shake and spray onto your projects for a subtle shimmery sparkle that doesn’t come off on your clothes, furniture, pets, or other items that shouldn’t shimmer.  You can add more Shimmer Paint if you prefer, but you get plenty of sparkle from just a few drops.  Not that we have to hoard it anymore!

So very Charming

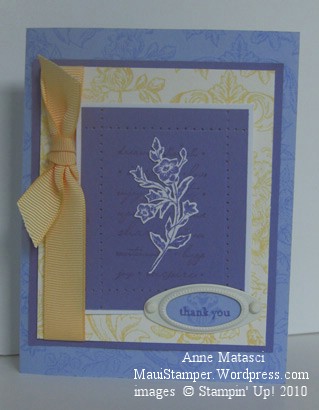
The February Stampin’ Success magazine had an article about combining purple and yellow.  It’s a bold combination that I’ve always loved, though I tend to mute one hue or the other.   I also tend towards monochromatic color schemes, so it was easy to start with Lovely Lilac and Almost Amethyst.

Charming in purples and yellows

  • Charming, Bella Toile and Teeny Tiny Wishes stamp sets
  • Very Vanilla, Almost Amethyst and Lovely Lilac card stock
  • Lovely Lilac, Almost Amethyst and So Saffron Classic Ink pads
  • Styled Vanilla Hodge Podge Hardware, Piercing tool and template, small oval punch
  • Paper snips, So Saffron 5/8″ Grosgrain (last year’s SAB) and Stampin’ Dimensionals

I started defining the Lovely Lilac panel with scoring, but it was just too subtle.  If you know me at all, you know I’m not subtle.  Nope.  I wanted to line up my piercing template with the scored lines, and by using my Grid Paper, I was able to do a pretty successful job of it.  And yes, I did go a little over-the-top on the trimming of the floral spray.  It was just one of those things that had to be done.  Good thing I had a nice sharp pair of snips!

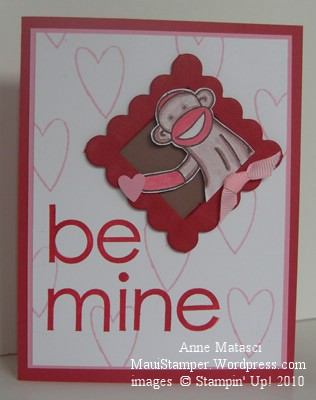
Monkey Be Mine

The Late Night Stampers issue a challenge every Monday, and yesterday’s challenge was to create a Valentine.  How easy is that?  If we wanted an extra challenge, we could make it a masculine Valentine.  And what could be more masculine than Sock Monkey?  (oooh, I’m gonna pay for that!  I’m talking BOY masculine, not MAN masculine, OK??)

Monkey Be Mine

  • Sock Monkey and Contempo Alphabet stamp sets
  • Whisper White, Ruby Red, Regal Rose, Pretty in Pink and Close to Cocoa card stock
  • Ruby Red, Chocolate Chip, Regal Rose, and Pretty in Pink Class Ink pads
  • Aquapainter, Champagne Mist Shimmer Paint, Paper Snips and the Heart to Heart punch
  • On Board Essentials chipboard, Sponge Daubers, and the Stamp-a-ma-jig
  • Pretty in Pink 1/4″ grosgrain, Mini Glue Dots, Stampin’ Dimensionals, and Tombo adhesive

This was Round 2 for the Monkey in the Frame.  Round 1 was so busy it gave me a headache to look at, so I pulled it apart and started over.  I really hate it when I sit and stare at a project and can’t decide what to do with it.  Sometimes that happens early in the project, sometimes it happens late in the project, and sometimes the whole project, well, it shoulda stayed on the back burner a while longer.

By the way…do you have a pair of Stampin’ Up! Paper Snips (#103579, $9.95)?  If you don’t, you really should consider investing in a pair.  Yes, it’s an investment, not a glamorous sparkly kind of purchase, but every time you pick them up you’ll say “Wow!  Why did I wait so long to buy these things?? They’re AMAZING!!”  Tools make the project.  If you don’t have a good pair of Snips, you won’t want to cut out the Monkey (or the flower spray, or the heart, or whatever.)  And you’ll miss out on that satisfied feeling you get when you look at something and realize it’s Just Right because you trimmed it out so well.

Sweet little cards and CASE-ing the mini

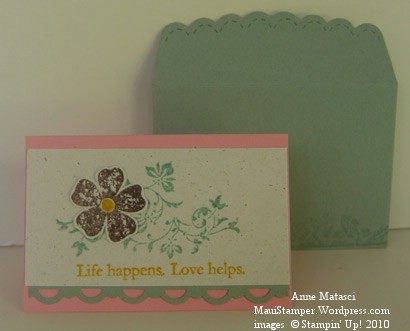
Did I mention  that Kellie and I spent the morning CASE-ing the other day?  We had to put our own spin on things, of course, but these two little cards are clearly first cousins to the note card on page 27 of the Occasions Mini.  We started with a 3×3 card

Vintage Vogue 3 x 3

but quickly realized the proportions weren’t right.  Kellie figured out the card in the Mini wasn’t a square but a rectangle, and I didn’t want to make a card that I couldn’t find an envelope for, so we adjusted the card size to fit in the Scallop Envelope Bigz Die.

Vintage Vogue with Scallop Envelope

  • Vintage Vogue Clear Mount Stamp set
  • Pretty In Pink, Crushed Curry, and Sage Shadow card stock
  • Whisper White (1st card) and Naturals White (2nd card) card stock
  • Chocolate Chip, Crushed Curry and Sage Shadow Classic Ink pads
  • Crushed Curry and Pretty in Pink Stampin’ Write markers
  • Big Shot and Scallop Envelope Bigz die
  • Scallop Trim border punch, paper snips, and Tombo Adhesive

It was so much fun to CASE these samples.  It’s relaxing to copy something, making changes to suit your personality and/or your supplies.  It’s almost like attending a class, except of course you have to cut all of your own paper.  I love designing my own projects, but sometimes I need to just make something instead of THINK about making something.

Have you stamped today?

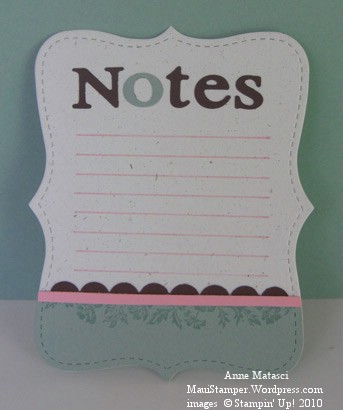
Top Notes

If these look at all familiar, then you’ve been browsing your Occasions Mini catalog!  These were fun and easy, although I’m not sure I would make enough to keep in a tablet by the phone.  I could be persuaded to use them for a To-Do list though.  Don’t you think checking things off that list would be more fun with notes like this?

  • Vintage Vogue Clear Mount Stamp set
  • Big Shot, Top Note Bigz die, and Naturally Serif Decorative Strip Sizzlet
  • Naturals White, Chocolate Chip, Sage Shadow and Pretty in Pink card stock
  • Sage Shadow Classic Ink pad and Pretty in Pink Stampin’ Write marker
  • Scallop Border punch and a ruler

The more I think about it, the more I like the idea of using these notes for a To Do list.  Did you notice that there are only 8 lines on this note card?  I could live with a list like that.  I would have to be very concise with a list that short.

  1. Stamp stuff
  2. Stamp more stuff
  3. Take pictures of stuff
  4. Upload pictures
  5. Post
  6. Hide mess
  7. Fix great dinner for family so they won’t notice mess
  8. Call stamping friends to figure out what to stamp tomorrow.

Off to work on my To Do list!

Kellie’s Journal

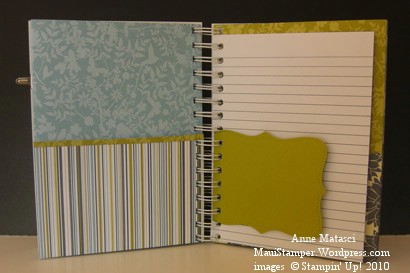
My friend Kellie came over yesterday morning to stamp, and one of the things she brought with her was a journal she’d made.  She told me she was tired of hoarding Designer Series Paper (who isn’t??) and decided to use her Urban Garden paper from last year’s catalog.  She put it together with the Bind-it-All and it is gorgeous!

Kellie's Urban Garden Journal

  • Urban Garden Designer Series Paper (retired)
  • Pretties Kit, Basic Gray Corduroy Buttons, and the Clips Assortment
  • Big Shot and the Little Leaves Sizzlet
  • Retired buttons and rub-ons
  • Non-SU ribbon and the Bind-it-all

You’re really going to love the inside:

Inside Kellie's Urban Garden journal

She used the Top Note Bigz die to create little pages for notes and photos, and turned each Designer Series Paper page up to create a pocket page when she bound it.  Genius!  This set of papers was so beautiful (and it’s not just my bias for Baja Breeze and Kiwi Kiss, either!) and the entire project is really stunning.  Couldn’t you see this in Cottage Wall? And I have a brand new package of Bella Bleu just waiting to be opened!