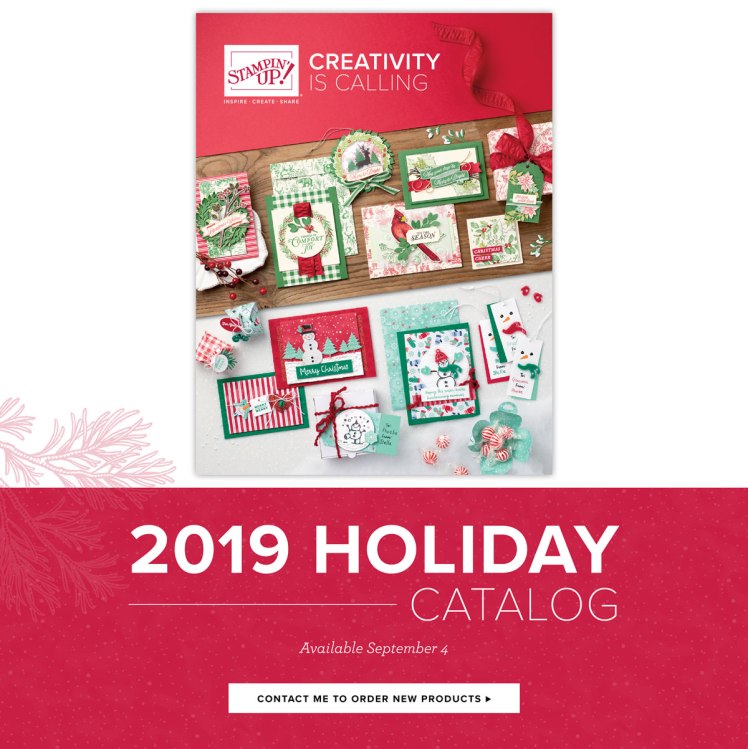
It’s always exciting when a new catalog goes live, but this Holiday catalog is really something special! There are great new products, fantastic kits, and truly something for every crafter.
I love that this video features all of the markets Stampin’ Up! is in, although truthfully, I’m just not quite ready for Christmas music! Planning, yes – the music, well, check with me in another 6 weeks. But let me show you some of my favorites – you can click on your favorites for the details:


Oh, I could go on and on!! Click each image to go straight to the details! And make a note of the Joy of Giving Tag Kit, because I’ll be offering events locally to get together and assemble these gorgeous tags!

Do you have room for a little more excitement? Buy 3, Get 1 Free is back! A select group of Designer Series Papers are part of this great deal – and they’re gorgeous, easy-to-use designs you’ll reach for over and over again:
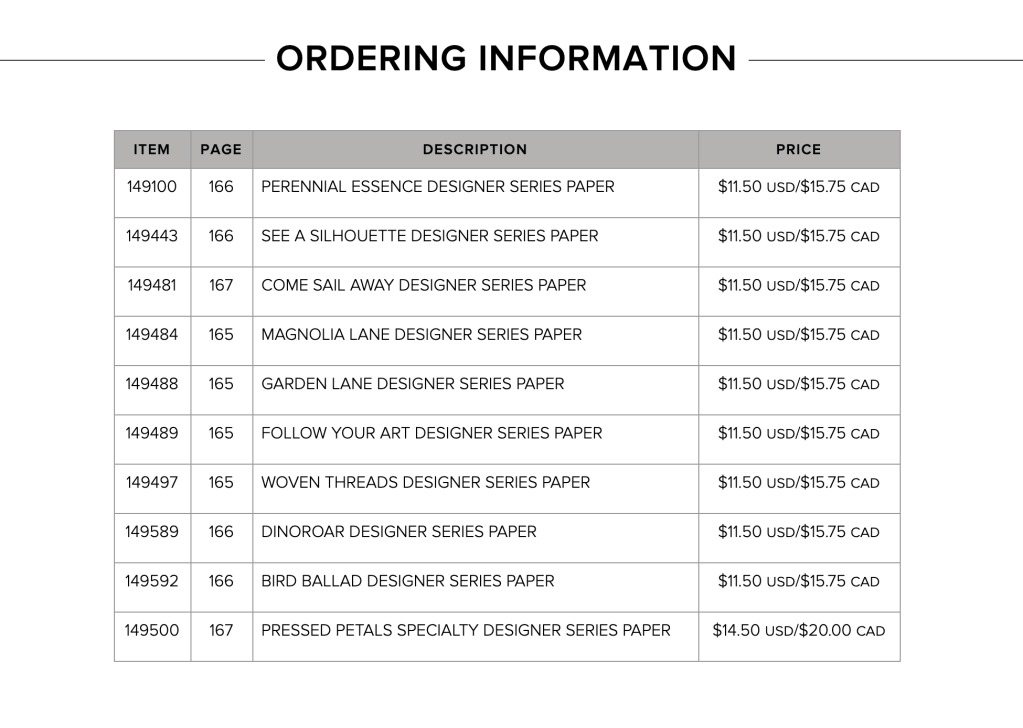
Shop HERE to get started with your papers – and make note that the Pressed Petals Specialty DSP is included in this offer!
Happy shopping – and happy crafting!